23 Cute Baking Recipe Ideas for Sweet Homemade Magic
Some of the sweetest memories begin with a little flour, a mixing bowl, and something delicious baking in the oven. The best part? Your homemade treats can look just as adorable as they taste!
These Cute Baking Recipe Ideas bring together charming mini desserts, playful cookies, delicate pastries, and bite-sized cakes that make ordinary baking feel special. Whether you’re preparing treats for a birthday party, planning a cozy weekend baking session, or making thoughtful edible gifts, you’ll find plenty of inspiration to try at home. I’ve noticed that small details, like pastel decorations, tiny shapes, and simple chocolate toppings, can make homemade desserts feel extra special without requiring professional baking skills. Each idea offers a fun way to explore new flavors, add personality to your dessert table, and create treats worth sharing. Get ready to find your next favorite bake!
Mini Bear Paw Cookies

These mini bear paw cookies turn ordinary sugar cookie dough into adorable little treats. Their rounded shapes and chocolate details make them stand out on birthday dessert tables, children’s party platters, and homemade gift boxes. The recipe uses simple pantry ingredients, so even beginner bakers can create a batch without special decorating equipment.
The secret is keeping the dough chilled before shaping. Cold dough holds its shape better in the oven, helping the paws look neat rather than spreading into flat circles. Press the chocolate pieces gently into the dough before baking, and leave enough space between cookies for even browning. Serve them once completely cooled.
Ingredients
- 1/2 cup unsalted butter, softened
- 1/2 cup granulated sugar
- 1 large egg
- 1 teaspoon vanilla extract
- 1 1/2 cups all-purpose flour
- 1/2 teaspoon baking powder
- 1/4 teaspoon salt
- 1/3 cup semisweet chocolate chips
- 24 small chocolate buttons or chocolate chips for decoration
How to Make It
- Beat the softened butter and sugar together until light and creamy.
- Add the egg and vanilla extract, mixing until combined.
- In a separate bowl, whisk together the flour, baking powder, and salt. Gradually stir the dry ingredients into the butter mixture to form a soft dough.
- Cover and refrigerate the dough for 30 minutes.
- Preheat the oven to 350°F (175°C) and line a baking sheet with parchment paper.
- Roll the dough into small balls, then flatten each one slightly into a rounded paw shape.
- Press one larger chocolate piece into the center and three smaller pieces along the top to create the paw pads.
- Bake for 10 to 12 minutes, until the edges are lightly golden.
- Cool on the baking sheet for five minutes, then transfer to a wire rack.
ALSO READ : Low Carb High Protein Recipes Under 400 Calories
Confetti Cake Donuts
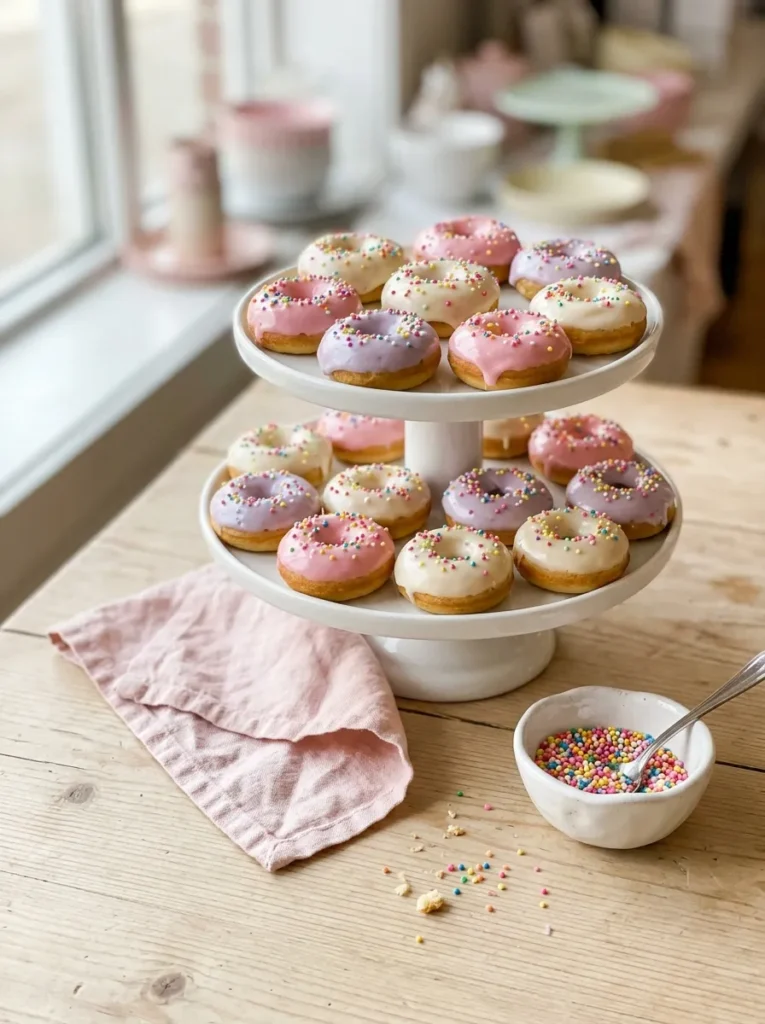
- Prepare the donut pan: Lightly grease a mini donut pan to help the baked donuts release cleanly.
- Measure the dry ingredients: Combine all-purpose flour, baking powder, sugar, and a pinch of salt.
- Mix the wet ingredients: Whisk milk, egg, melted butter, and vanilla extract until smooth.
- Fill the cavities: Transfer the batter into a piping bag and fill each donut cavity about two-thirds full.
- Decorate after cooling: Dip the cooled donuts into pastel icing and finish with rainbow sprinkles before the glaze sets.
Confetti cake donuts bring the fun of birthday cake into a small, easy-to-serve treat. Baking instead of deep-frying keeps the preparation straightforward, while the colorful icing makes every donut look party-ready. For the neatest results, pipe the batter into the pan rather than spooning it, and avoid overfilling the cavities.
Ingredients
For the donuts:
- 1 cup all-purpose flour
- 1/3 cup granulated sugar
- 1 teaspoon baking powder
- 1/4 teaspoon salt
- 1/2 cup milk
- 1 large egg
- 2 tablespoons unsalted butter, melted
- 1 teaspoon vanilla extract
- 2 tablespoons rainbow sprinkles
For the icing:
- 1 cup powdered sugar
- 2 to 3 tablespoons milk
- 1/2 teaspoon vanilla extract
- Pink and lavender gel food coloring
- Extra rainbow sprinkles
How to Make It
- Preheat the oven to 350°F (175°C) and lightly grease a mini donut pan.
- Whisk the flour, sugar, baking powder, and salt in a mixing bowl.
- In another bowl, combine the milk, egg, melted butter, and vanilla.
- Pour the wet mixture into the dry ingredients and stir just until combined. Fold in the rainbow sprinkles.
- Transfer the batter to a piping bag and fill each cavity about two-thirds full.
- Bake for 8 to 10 minutes, or until the donuts spring back when lightly touched.
- Cool in the pan for five minutes before transferring to a wire rack.
- Mix the powdered sugar, milk, and vanilla to make a smooth glaze. Divide it into bowls and tint with pastel food coloring.
- Dip the cooled donuts into the icing, add extra sprinkles, and allow the glaze to set before serving.
Pinterest Account : FreshRecipeIdeas1
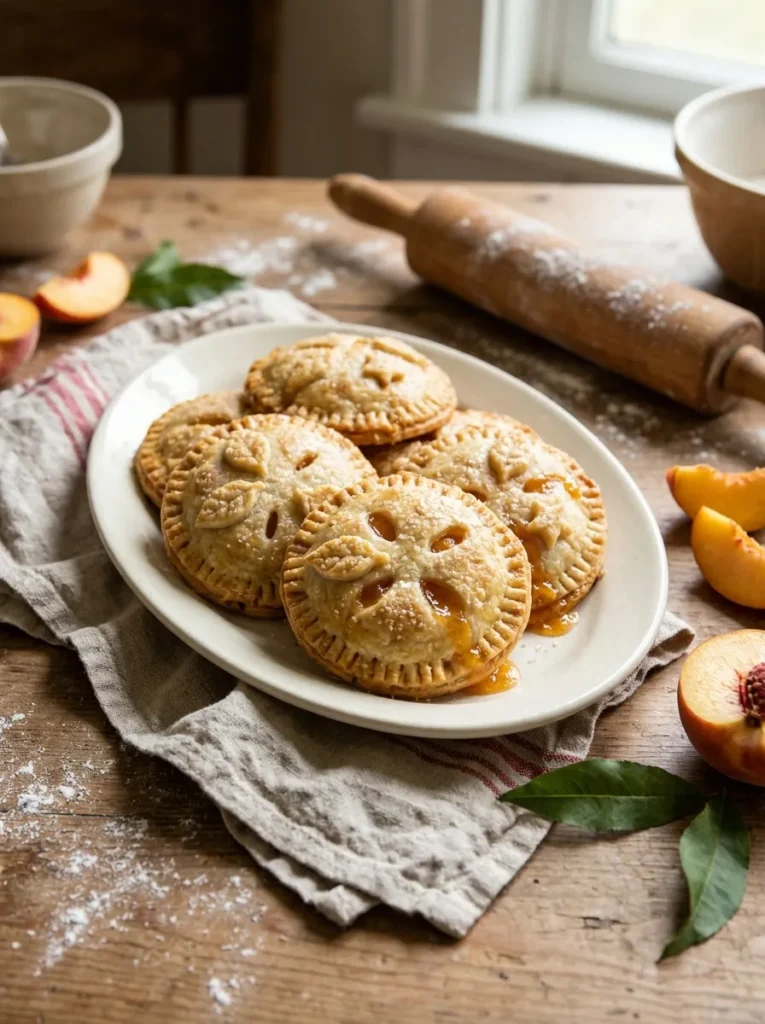
Mini Peach Hand Pies
Quick Tip:
Dice the peaches into small, even pieces and cook the filling briefly before assembling the pies. This helps soften the fruit and remove excess liquid, reducing the chance of soggy pastry. Let the filling cool completely before spooning it onto the dough.
Mini peach hand pies combine flaky pastry with sweet, juicy fruit in a cute handheld shape. Their crimped edges and golden tops make them look special without elaborate decoration. Store-bought pie crust can save preparation time, while homemade pastry gives you more control over the flavor and texture. A small heart-shaped vent adds an extra decorative touch.
Ingredients
For the filling:
- 1 1/2 cups peeled and diced fresh peaches
- 2 tablespoons granulated sugar
- 1 teaspoon cornstarch
- 1/2 teaspoon ground cinnamon
- 1 teaspoon lemon juice
For the pastry:
- 2 refrigerated pie crusts
- 1 egg, beaten
- 1 tablespoon milk
- 1 tablespoon coarse sugar, optional
How to Make It
- Place the diced peaches, sugar, cornstarch, cinnamon, and lemon juice in a small saucepan.
- Cook over medium heat for 4 to 6 minutes, stirring gently until the peaches soften and the filling thickens. Cool completely.
- Preheat the oven to 375°F (190°C) and line a baking sheet with parchment paper.
- Unroll the pie crusts and cut out equal-sized circles using a round cookie cutter.
- Place a small spoonful of peach filling in the center of half the circles, leaving a clear border around the edges.
- Brush the borders lightly with water, cover with the remaining pastry circles, and press the edges together with a fork.
- Cut two small vents in each pie or use a tiny heart-shaped cutter to create a decorative opening.
- Brush the tops with beaten egg mixed with milk, then sprinkle with coarse sugar if desired.
- Bake for 18 to 22 minutes, until golden brown. Let the pies cool for at least 10 minutes before serving because the filling will be very hot.
Mini Rainbow Swirl Meringues
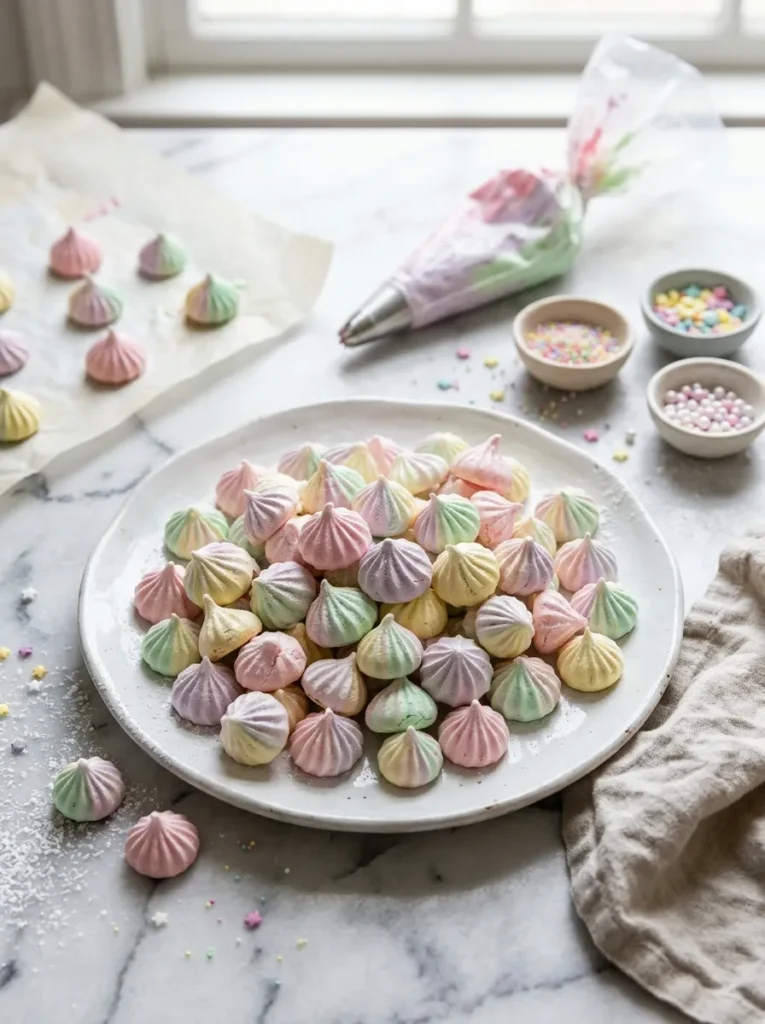
These crisp little meringues bring a colorful bakery finish to dessert tables without requiring flour or complicated cake decorating. Their delicate shells look especially pretty in clear treat bags, on birthday dessert stands, or beside a cup of tea. The secret is whipping the egg whites until glossy, firm peaks form before adding color.
Recipe Details: Prep Time: 20 minutes | Baking Time: 1 hour 15 minutes | Yield: 30 to 35 meringues
Ingredients
- 3 large egg whites, at room temperature
- 3/4 cup granulated sugar
- 1/4 teaspoon cream of tartar
- 1/2 teaspoon vanilla extract
- Pink, lavender, mint green, and yellow gel food coloring
How to Make It
- Preheat the oven to 200°F (95°C) and line a baking sheet with parchment paper.
- Beat the egg whites with cream of tartar until foamy, then gradually add sugar while whisking.
- Continue beating until the mixture forms stiff, glossy peaks. Mix in the vanilla extract.
- Divide the meringue into small portions and tint each portion with a different gel color.
- Spoon the colors into a piping bag fitted with a star tip, keeping the shades separate enough to create swirls.
- Pipe small rosettes onto the prepared tray and bake for 75 minutes.
- Turn off the oven and leave the meringues inside for another hour, or until dry and crisp.
Bunny Ear Brownie Bites

Fudgy brownies become adorable party treats with just a few simple decorations. These bunny bites work well for spring celebrations, children’s birthdays, or a weekend baking activity when you want something more playful than ordinary brownies. Cutting the brownies into small, even squares gives each bunny a neat shape and makes the finished treats easy to serve.
Recipe Details: Prep Time: 20 minutes | Baking Time: 25 minutes | Yield: 16 brownie bites
Ingredients
- 1/2 cup unsalted butter
- 3/4 cup granulated sugar
- 2 large eggs
- 1 teaspoon vanilla extract
- 1/3 cup unsweetened cocoa powder
- 1/2 cup all-purpose flour
- 1/4 teaspoon salt
- 1/2 cup white chocolate chips
- 2 tablespoons pink candy melts
- 32 mini candy eyes
How to Make It
- Preheat the oven to 350°F (175°C). Grease an 8-inch square baking pan and line it with parchment paper.
- Melt the butter, then whisk it with the sugar until combined.
- Add the eggs and vanilla extract, mixing until smooth.
- Stir in the cocoa powder, flour, and salt until no dry streaks remain.
- Spread the batter evenly in the pan and bake for 20 to 25 minutes, until a toothpick inserted near the center comes out with a few moist crumbs.
- Let the brownies cool completely before cutting them into 16 squares.
- Melt the white chocolate and pipe two small bunny ears onto each brownie. Add pink candy details to the ears, then attach two candy eyes with a little melted chocolate.
- Allow the decorations to set before arranging the brownie bites on a serving tray.
Pastel Macaron Sandwiches
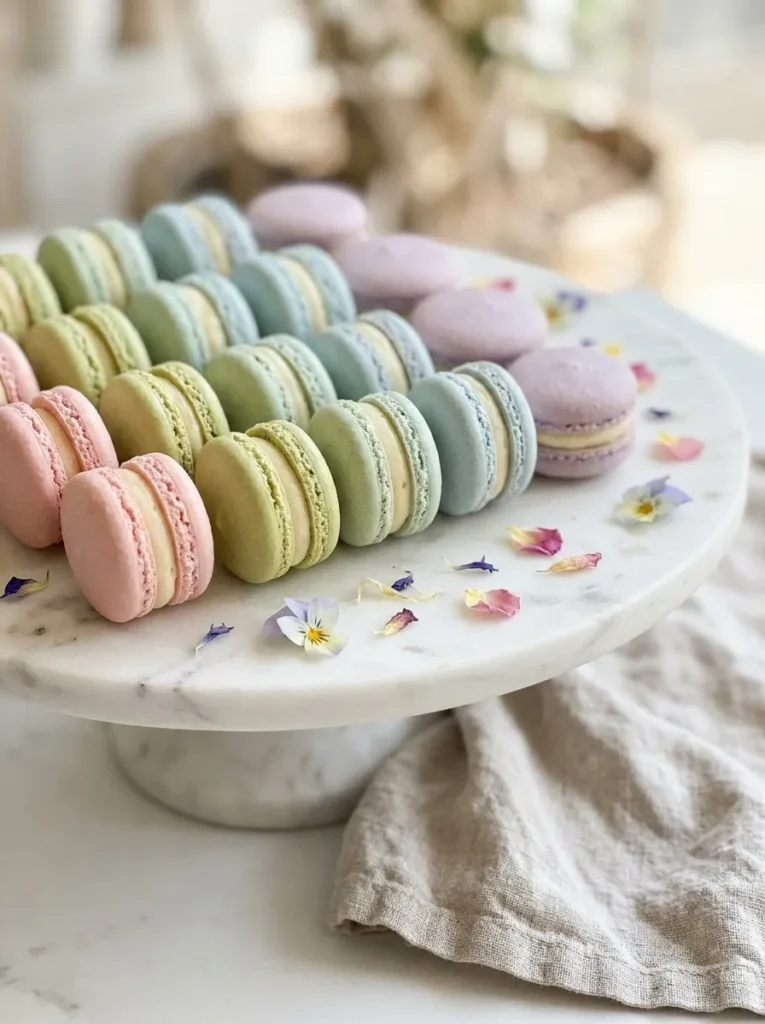
Pastel macarons look like tiny jewels on a dessert table, with crisp shells and soft, creamy centers. They take more precision than basic cookies, but careful measuring and patient mixing help beginners achieve a better result. For this version, a simple vanilla buttercream filling balances the sweet almond shells without overpowering their delicate flavor.
Recipe Details: Prep Time: 35 minutes | Resting Time: 30 minutes | Baking Time: 14 to 16 minutes | Yield: 12 sandwich macarons
Ingredients
For the shells:
- 1 cup (100 g) finely ground almond flour
- 3/4 cup (90 g) powdered sugar
- 2 large egg whites, at room temperature
- 1/4 cup (50 g) granulated sugar
- Gel food coloring in pastel shades
For the buttercream filling:
- 1/4 cup unsalted butter, softened
- 3/4 cup powdered sugar
- 1/2 teaspoon vanilla extract
- 1 to 2 teaspoons milk, as needed
How to Make It
- Preheat the oven to 300°F (150°C). Line a baking sheet with a silicone mat or parchment paper.
- Sift the almond flour and powdered sugar together to remove lumps.
- Beat the egg whites until foamy, then gradually add the granulated sugar. Continue whisking until stiff, glossy peaks form.
- Fold the dry ingredients into the meringue in batches. Stop when the batter flows slowly from the spatula in a thick ribbon.
- Divide the batter and tint each portion with a small amount of gel coloring.
- Pipe evenly sized circles onto the prepared tray. Tap the tray gently against the counter to release air bubbles, then let the shells rest for about 30 minutes, until their surfaces feel dry.
- Bake for 14 to 16 minutes. Cool completely before removing the shells from the mat.
- Beat the softened butter with powdered sugar and vanilla, adding milk a little at a time until the filling is smooth.
- Pipe buttercream onto half the shells and sandwich them with the remaining shells. Refrigerate for 24 hours for the best texture, then bring to room temperature before serving.
Tiny Strawberry Shortcake Cups
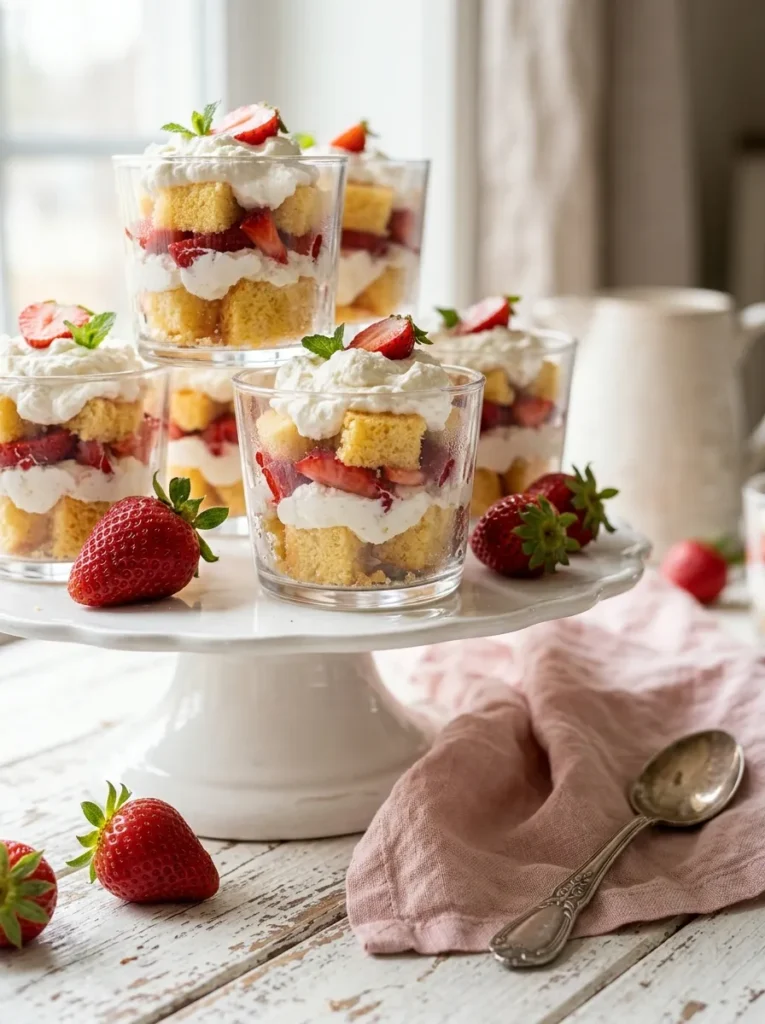
These tiny strawberry shortcake cups turn a classic dessert into individual servings that look adorable on a party table. The layers of soft cake, juicy strawberries, and whipped cream create a lovely contrast of colors and textures. They are especially useful for birthdays, bridal showers, and afternoon gatherings where guests can grab a dessert without cutting a whole cake.
Do:
- Cut the sponge cake into small, even cubes for tidy layers.
- Pat the sliced strawberries dry to prevent excess juice from soaking the cake.
- Whip the cream until it holds soft peaks.
- Layer the ingredients in clear cups so the pink and white colors remain visible.
Don’t:
- Assemble the cups too far ahead, as the cake can become soggy.
- Overfill the cups with cream, which can hide the fruit layers.
- Use underripe strawberries that lack sweetness.
- Leave whipped cream desserts at room temperature for extended periods.
For the prettiest finish, pipe the final layer of cream with a star-shaped nozzle and place one small strawberry slice on top. Chill the cups for about 30 minutes before serving. If you’re preparing them for a gathering, keep them refrigerated until dessert time so the cream stays fresh and the cake retains its delicate texture.
Ingredients
- 2 cups prepared vanilla sponge cake, cut into small cubes
- 1 1/2 cups fresh strawberries, sliced
- 1 tablespoon granulated sugar
- 1 cup cold heavy whipping cream
- 2 tablespoons powdered sugar
- 1/2 teaspoon vanilla extract
- Small strawberry slices for garnish
How to Make It
- Toss the sliced strawberries with granulated sugar and let them rest for 10 minutes.
- Pour the cold whipping cream into a chilled bowl. Add powdered sugar and vanilla extract.
- Beat until the cream forms soft to medium peaks that hold their shape.
- Place a layer of sponge cake cubes in the bottom of each small dessert cup.
- Add a spoonful of strawberries, followed by a layer of whipped cream.
- Repeat the layers until the cups are nearly full, finishing with whipped cream.
- Garnish each cup with a strawberry slice.
- Refrigerate for 30 minutes before serving, keeping the cups chilled until needed.
Cinnamon Sugar Mini Churro Muffins
Cost: Budget-friendly pantry ingredients.
Prep Time: 15 minutes.
Baking Time: 12 to 15 minutes.
Skill Level: Beginner-friendly.
Yield: Approximately 24 mini muffins.
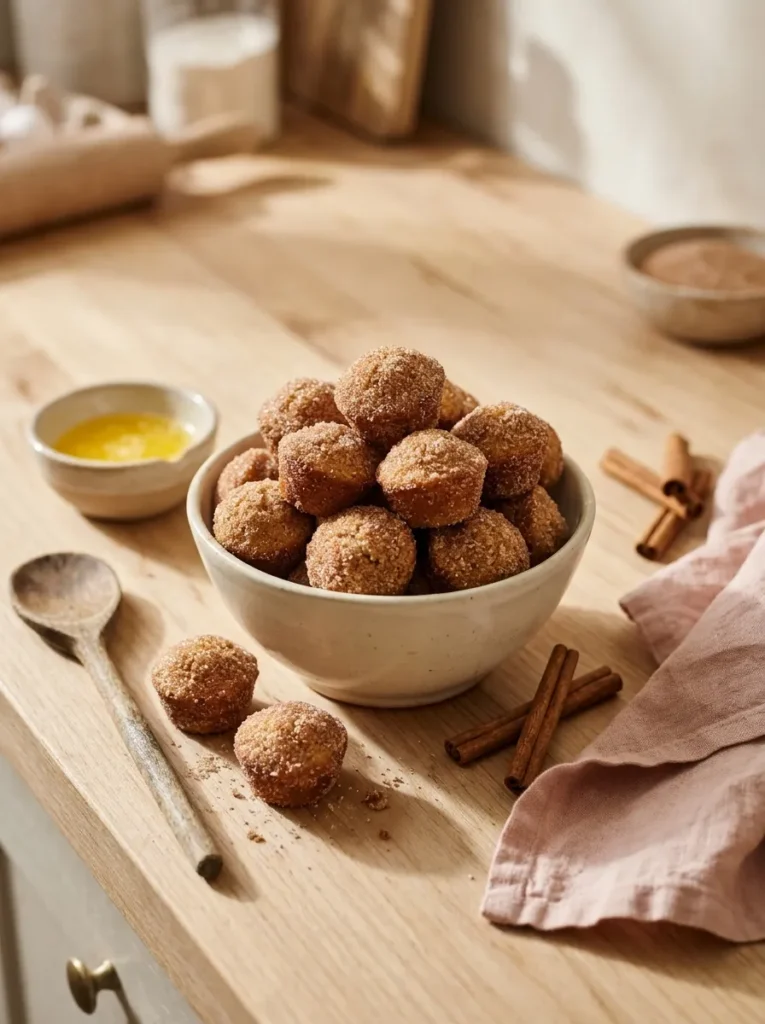
Cinnamon sugar mini churro muffins deliver the warm, sweet flavor of churros in a soft, bite-sized baked treat. Their sparkling coating makes them look special without frosting, piping bags, or complicated decorations. They’re a practical choice for bake sales, lunchbox treats, and casual get-togethers when you need something easy to share.
The key is coating the muffins while they are still slightly warm. A light brush of melted butter helps the cinnamon sugar cling evenly, creating a delicate, crunchy exterior around the tender crumb. Use a mini muffin pan for uniform portions, and avoid overbaking so the centers remain soft. Serve them fresh for the best texture.
Ingredients
For the muffins:
- 1 cup all-purpose flour
- 1/3 cup granulated sugar
- 1 teaspoon baking powder
- 1/4 teaspoon salt
- 1/2 teaspoon ground cinnamon
- 1 large egg
- 1/2 cup milk
- 1/4 cup unsalted butter, melted
- 1 teaspoon vanilla extract
For the coating:
- 3 tablespoons unsalted butter, melted
- 1/3 cup granulated sugar
- 1 teaspoon ground cinnamon
How to Make It
- Preheat the oven to 350°F (175°C) and grease a 24-cavity mini muffin pan.
- In a large bowl, whisk together the flour, sugar, baking powder, salt, and cinnamon.
- In a separate bowl, combine the egg, milk, melted butter, and vanilla extract.
- Pour the wet ingredients into the dry ingredients and stir just until combined. Avoid overmixing.
- Divide the batter evenly among the muffin cavities, filling each about two-thirds full.
- Bake for 12 to 15 minutes, until the tops spring back when lightly touched and a toothpick comes out clean.
- Let the muffins cool in the pan for five minutes.
- Mix the coating sugar and cinnamon in a shallow bowl.
- Brush each warm muffin lightly with melted butter, then roll it in the cinnamon sugar until evenly coated.
- Place on a wire rack and serve warm or at room temperature.
Little Lemon Butterfly Cakes
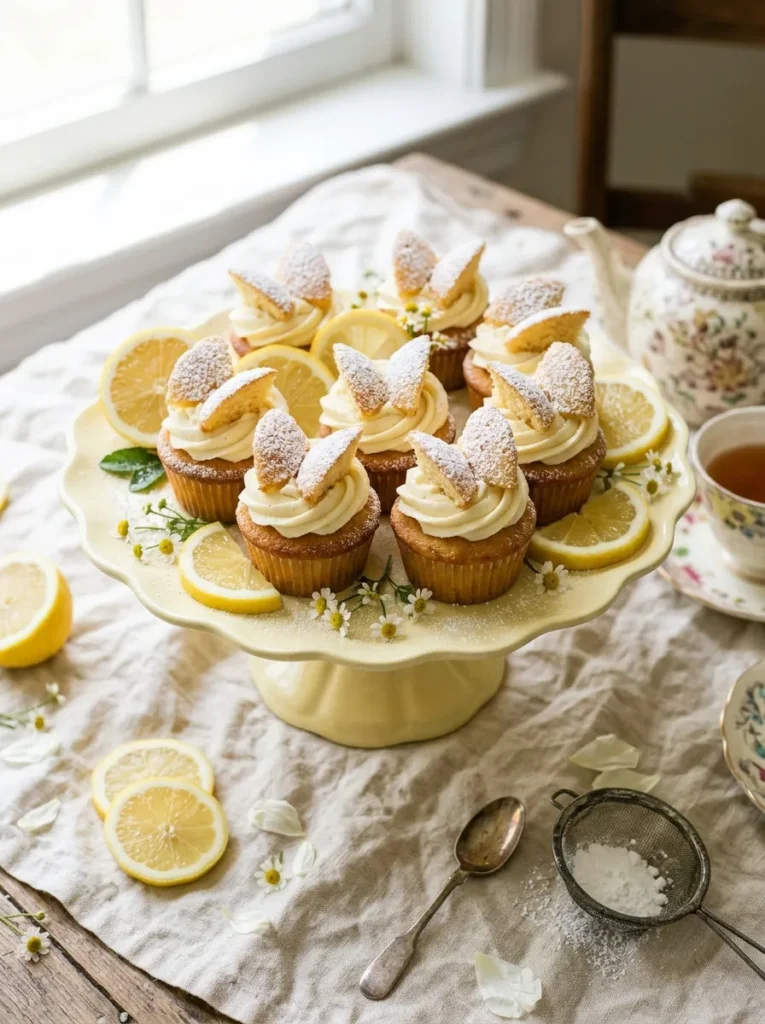
Little lemon butterfly cakes bring a playful touch to afternoon tea with their delicate wings and bright citrus flavor. Each cake is topped with a small cutout of sponge, creating the appearance of a butterfly resting on a swirl of cream. The result looks decorative without requiring advanced cake-decorating skills.
Start with a light lemon sponge and let the cupcakes cool completely before cutting their tops. A small amount of lemon zest adds fragrance without making the batter too wet. For an attractive finish, pipe the buttercream into the center, then place the two sponge pieces at a slight angle to resemble wings. These cheerful treats suit spring picnics, tea parties, and homemade birthday spreads.
Ingredients
For the cupcakes:
- 1 cup all-purpose flour
- 1/2 cup granulated sugar
- 1 teaspoon baking powder
- 1/4 teaspoon salt
- 1/2 cup unsalted butter, softened
- 2 large eggs
- 2 tablespoons milk
- 1 teaspoon finely grated lemon zest
- 1 tablespoon lemon juice
- 1/2 teaspoon vanilla extract
For the buttercream:
- 1/2 cup unsalted butter, softened
- 1 1/2 cups powdered sugar
- 1 teaspoon lemon juice
- 1 to 2 teaspoons milk, as needed
- Powdered sugar for dusting, optional
How to Make It
- Preheat the oven to 350°F (175°C) and line a 12-cup muffin pan with paper liners.
- Whisk the flour, baking powder, and salt in a medium bowl.
- In another bowl, beat the butter and sugar until pale and fluffy.
- Add the eggs one at a time, beating after each addition. Mix in the lemon zest, lemon juice, and vanilla.
- Fold in the dry ingredients alternately with the milk, mixing only until the batter is smooth.
- Divide the batter evenly among the liners.
- Bake for 16 to 20 minutes, until the cupcakes are lightly golden and a toothpick inserted into the center comes out clean.
- Cool completely on a wire rack.
- Beat the butter for the frosting until creamy. Gradually add the powdered sugar, then mix in the lemon juice and enough milk to achieve a pipeable consistency.
- Carefully slice a small circle from the top of each cupcake and cut each removed piece in half to create two wings.
- Pipe a swirl of buttercream into the hollow center of each cupcake. Position the two sponge pieces at an angle to resemble butterfly wings.
- Dust lightly with powdered sugar just before serving, if desired.
Mini Lemon Poppy Seed Loaves
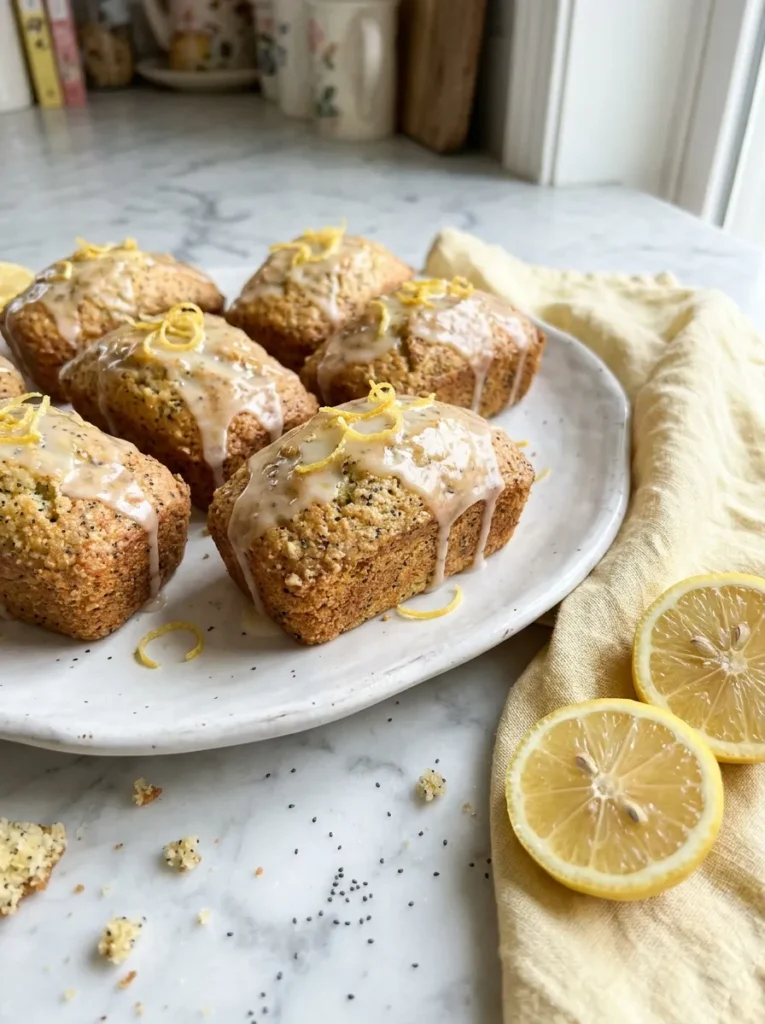
These little lemon loaves offer a bright citrus flavor, a tender crumb, and a pretty glazed finish. Their miniature size makes them lovely additions to brunch spreads, afternoon tea, bake sales, and homemade gift baskets. Unlike full-sized cakes, individual loaves are easy to portion and decorate, even when you’re baking for a small gathering.
- Use fresh lemon zest: It adds a fragrant citrus aroma without introducing extra liquid into the batter.
- Measure the flour carefully: Too much flour can make these small cakes dry and dense.
- Mix gently: Stir only until the ingredients are combined to keep the crumb tender.
- Glaze after cooling: Warm loaves can absorb the glaze instead of keeping a neat, glossy coating.
- Choose mini loaf pans: Similar pan sizes help the cakes bake evenly.
For a delicate bakery-style finish, drizzle the glaze in thin lines and sprinkle a little fresh lemon zest over each loaf. A small amount of poppy seed gives the crumb attractive speckles without overpowering the citrus flavor. Store cooled loaves in an airtight container and add the glaze shortly before serving for the prettiest presentation.
Ingredients
For the mini loaves:
- 1 1/2 cups all-purpose flour
- 3/4 cup granulated sugar
- 1 tablespoon poppy seeds
- 1 teaspoon baking powder
- 1/4 teaspoon baking soda
- 1/4 teaspoon salt
- 1/2 cup unsalted butter, softened
- 2 large eggs
- 1/3 cup milk
- 2 tablespoons fresh lemon juice
- 1 tablespoon finely grated lemon zest
- 1 teaspoon vanilla extract
For the lemon glaze:
- 3/4 cup powdered sugar
- 1 to 2 tablespoons fresh lemon juice
- A little extra lemon zest for garnish
How to Make It
- Preheat the oven to 350°F (175°C). Grease a mini loaf pan or line the cavities with baking paper.
- Whisk together the flour, sugar, poppy seeds, baking powder, baking soda, and salt.
- In another bowl, beat the softened butter until creamy. Add the eggs one at a time, then mix in the milk, lemon juice, lemon zest, and vanilla.
- Fold the dry ingredients into the wet mixture until just combined. Avoid overmixing the batter.
- Divide the batter evenly among the mini loaf cavities, filling each about two-thirds full.
- Bake for 18 to 24 minutes, depending on the size of the pans. Check that a toothpick inserted into the center comes out clean.
- Let the loaves cool in the pan for 10 minutes, then transfer them to a wire rack to cool completely.
- Mix the powdered sugar with enough lemon juice to create a thick but pourable glaze.
- Drizzle the glaze over the cooled loaves and finish with a little lemon zest. Allow the glaze to set before serving.
Jam Thumbprint Flower Cookies
Quick Tip:
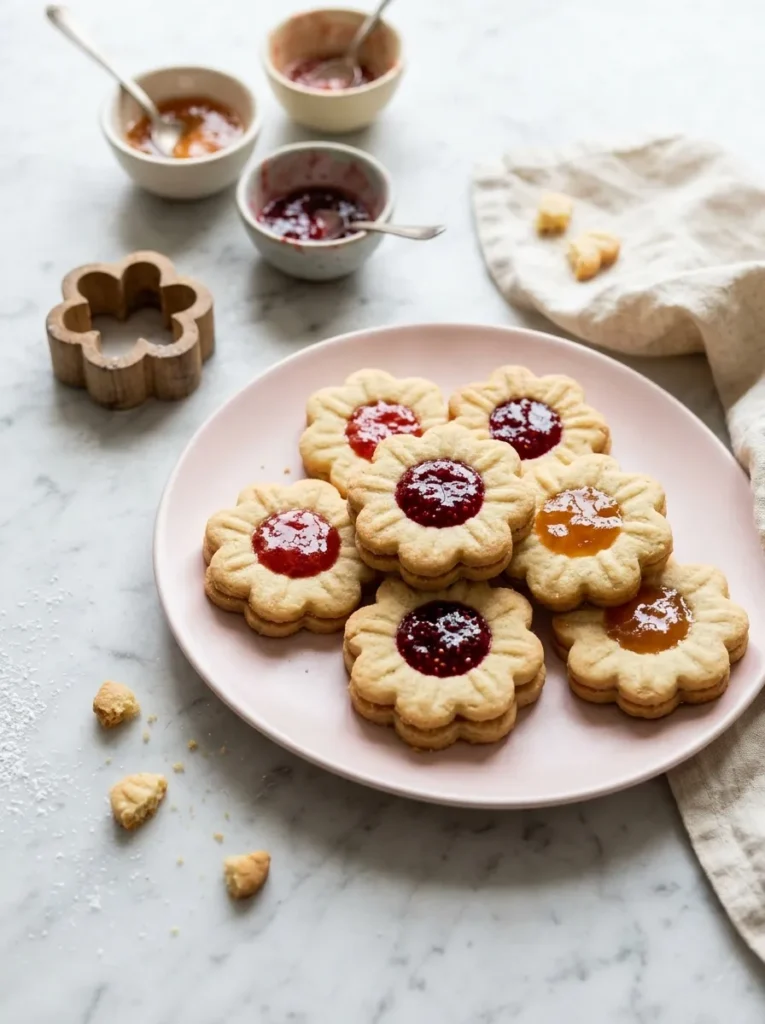
Chill the shaped cookie dough for 15 to 20 minutes before baking to help the flower petals hold their shape. Use a small measuring spoon or the back of a rounded teaspoon to create shallow centers, then fill them with just enough jam to avoid overflowing.
These floral cookies combine buttery, crumbly edges with sweet fruit centers for a treat that looks lovely on tea trays and party dessert tables. Strawberry jam creates a soft pink finish, while apricot preserves add a sunny golden color. For the clearest flower shapes, choose a cutter with distinct petals and keep the dough evenly thick.
Ingredients
- 1 cup unsalted butter, softened
- 2/3 cup granulated sugar
- 1 large egg yolk
- 1 teaspoon vanilla extract
- 2 cups all-purpose flour
- 1/4 teaspoon salt
- 1/3 cup strawberry jam
- 1/3 cup apricot or raspberry jam
How to Make It
- Beat the softened butter and sugar together until creamy and pale.
- Add the egg yolk and vanilla extract, mixing until combined.
- In a separate bowl, whisk together the flour and salt. Gradually mix them into the butter mixture until a soft dough forms.
- Divide the dough into two portions, flatten each into a disc, wrap, and refrigerate for 20 to 30 minutes.
- Preheat the oven to 350°F (175°C) and line two baking sheets with parchment paper.
- Roll the dough to approximately 1/4 inch thick on a lightly floured surface.
- Cut out flower shapes and place them on the prepared baking sheets. Gently press a shallow indentation into the center of each flower.
- Spoon a small amount of jam into each indentation, keeping it below the rim.
- Bake for 10 to 13 minutes, until the cookie edges are lightly golden.
- Cool on the baking sheet for five minutes before transferring to a wire rack. Let the jam cool completely before serving.
Chocolate Swirl Brioche Buns

BEFORE
Plain homemade bread rolls can look simple on a breakfast table, even when their flavor is delicious. A basic sweet dough may also feel less exciting for a special brunch or homemade bakery gift.
AFTER
Chocolate-swirl brioche buns reveal beautiful spirals when sliced, creating an attractive pattern without complicated icing or decorations. Their buttery crumb and rich chocolate filling make them feel like a special bakery purchase.
The key is rolling the dough into an even rectangle before spreading the filling. Leave a small border around the edges so the chocolate mixture stays inside when you roll it up. These buns take longer than quick muffins because the dough needs time to rise, but the soft texture and swirled centers make the extra effort worthwhile.
Ingredients
For the brioche dough:
- 3 cups all-purpose flour
- 1/4 cup granulated sugar
- 2 1/4 teaspoons instant yeast
- 1/2 teaspoon salt
- 2 large eggs, at room temperature
- 1/2 cup warm milk
- 1/3 cup unsalted butter, softened
For the chocolate filling:
- 1/3 cup unsalted butter, softened
- 1/3 cup brown sugar
- 1/4 cup unsweetened cocoa powder
- 1/2 cup finely chopped semisweet chocolate
For finishing:
- 1 egg
- 1 tablespoon milk
How to Make It
- Combine the flour, sugar, instant yeast, and salt in a large mixing bowl.
- Add the eggs and warm milk. Mix until a rough dough forms.
- Knead for five minutes, then gradually work in the softened butter. Continue kneading for another 8 to 10 minutes, until the dough becomes smooth and elastic.
- Place the dough in a lightly greased bowl, cover, and let it rise in a warm place for about 60 to 90 minutes, or until doubled in size.
- Mix the softened butter, brown sugar, and cocoa powder into a spreadable filling. Stir in the chopped chocolate.
- Gently deflate the risen dough and roll it into a rectangle approximately 12 by 16 inches.
- Spread the chocolate filling evenly over the dough, leaving a small border along one long edge.
- Roll the dough tightly from the opposite long edge into a log. Pinch the seam closed and cut the log into 10 to 12 equal pieces.
- Arrange the pieces cut-side up in a greased baking pan, leaving a little space between them. Cover and let rise for another 30 to 45 minutes.
- Preheat the oven to 350°F (175°C). Beat the egg with the tablespoon of milk and brush lightly over the buns.
- Bake for 20 to 25 minutes, until golden brown and cooked through. If the tops brown too quickly, loosely cover them with foil.
- Let the buns cool in the pan for 10 minutes before transferring them to a rack. Serve slightly warm for soft dough and melty chocolate swirls.
Mini Blueberry Crumble Bars
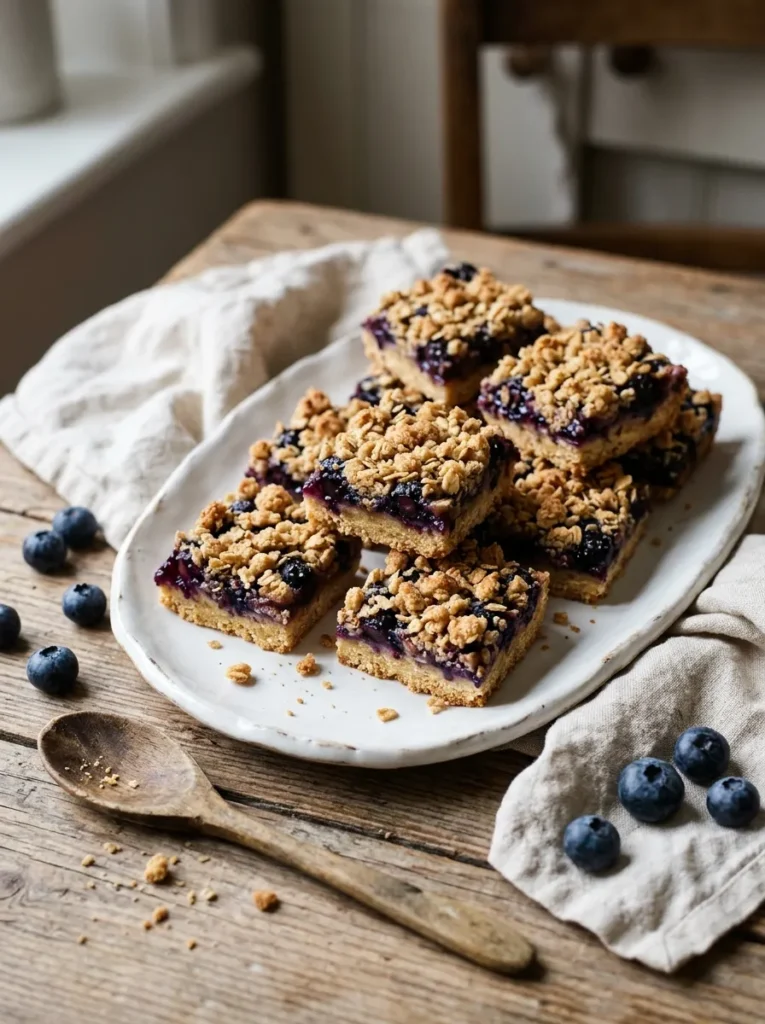
Mini blueberry crumble bars combine a buttery base, sweet-tart fruit, and a crisp topping in one adorable handheld dessert. Their purple-blue filling creates a beautiful contrast against the golden crumble, making them especially attractive for Pinterest baking boards, picnic baskets, and homemade dessert boxes.
For neat squares, let the bars cool completely before slicing. Fresh or frozen blueberries both work, but frozen berries should go straight into the filling without thawing to reduce excess moisture. A little lemon zest brightens the fruit flavor, while rolled oats add texture to the topping. These bars are easier to transport than delicate frosted cakes and can be prepared ahead for gatherings.
Ingredients
For the base:
- 1 cup all-purpose flour
- 1/3 cup granulated sugar
- 1/2 cup unsalted butter, melted
- 1/4 teaspoon salt
- 1/2 teaspoon vanilla extract
For the blueberry filling:
- 1 1/2 cups fresh or frozen blueberries
- 3 tablespoons granulated sugar
- 1 tablespoon cornstarch
- 1 tablespoon lemon juice
- 1 teaspoon finely grated lemon zest
For the crumble topping:
- 1/2 cup all-purpose flour
- 1/3 cup rolled oats
- 1/4 cup brown sugar
- 1/4 teaspoon ground cinnamon
- 3 tablespoons cold unsalted butter, cubed
How to Make It
- Preheat the oven to 350°F (175°C). Line an 8-inch square baking pan with parchment paper, leaving some overhang for easy removal.
- Mix the flour, sugar, salt, melted butter, and vanilla until the mixture resembles damp crumbs.
- Press the mixture firmly into the bottom of the prepared pan to form an even base.
- In a bowl, combine the blueberries, sugar, cornstarch, lemon juice, and lemon zest.
- Spread the blueberry mixture evenly over the crust.
- For the topping, mix the flour, oats, brown sugar, and cinnamon. Rub in the cold butter with your fingertips until coarse crumbs form.
- Scatter the crumble mixture over the blueberries without pressing it down.
- Bake for 35 to 40 minutes, until the topping is golden and the fruit filling bubbles around the edges.
- Cool completely in the pan, then refrigerate briefly if needed for cleaner cuts.
- Lift out using the parchment paper and slice into small squares or rectangles.
Chocolate-Dipped Madeleines
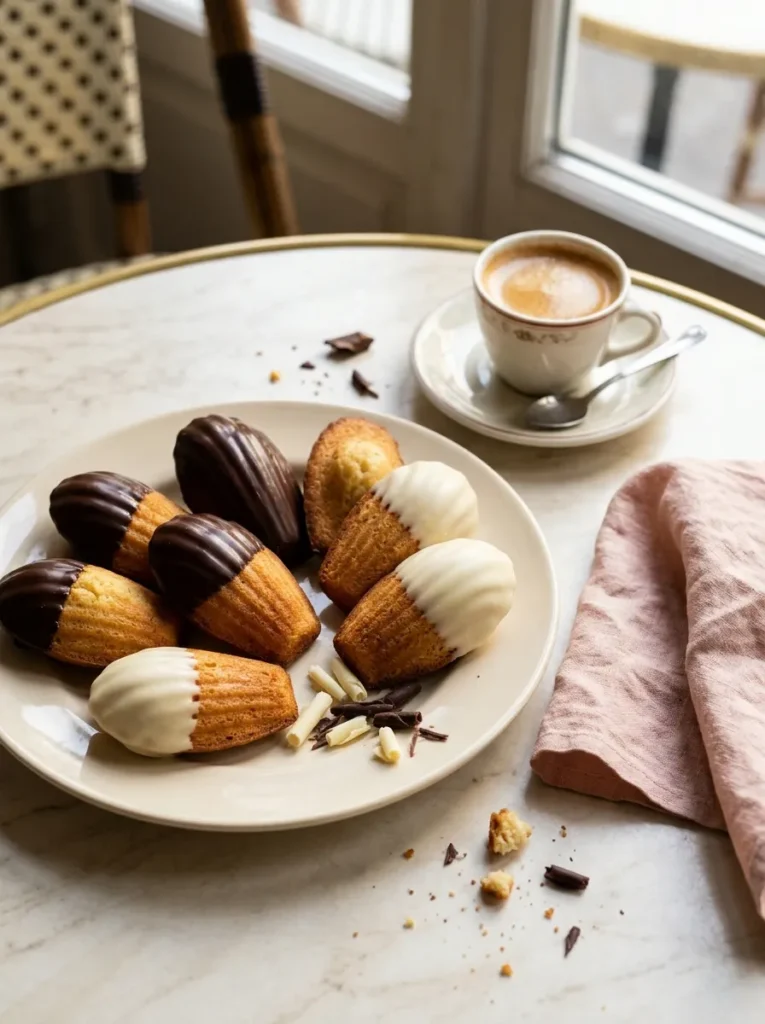
- Prepare the pan: Generously butter and lightly flour a madeleine pan so the delicate shell shapes release cleanly.
- Whip the eggs and sugar: Beat until pale and slightly thick to help create a light texture.
- Fold gently: Add the flour and melted butter without knocking out too much air.
- Chill the batter: Rest it in the refrigerator for at least 30 minutes to improve the texture and help the cakes rise.
- Dip after cooling: Coat only half of each madeleine in melted chocolate for a polished two-tone finish.
Chocolate-dipped madeleines look elegant but require only a handful of familiar baking ingredients. Their scalloped shells provide natural decoration, so even a simple chocolate coating looks special. Serve them with tea or coffee, or arrange them in small paper cups for party favors. For the neatest chocolate finish, allow excess coating to drip off before placing each cake on parchment paper to set.
Ingredients
For the madeleines:
- 2 large eggs, at room temperature
- 1/2 cup granulated sugar
- 3/4 cup all-purpose flour
- 1/2 teaspoon baking powder
- 1/4 teaspoon salt
- 1 teaspoon vanilla extract
- 1/2 cup unsalted butter, melted and cooled slightly
- 1 teaspoon finely grated lemon zest, optional
For the chocolate coating:
- 4 ounces semisweet or dark chocolate
- 2 ounces white chocolate, optional
How to Make It
- Beat the eggs and sugar in a bowl for about 3 to 4 minutes, until pale and slightly thick.
- Sift the flour, baking powder, and salt together. Gently fold them into the egg mixture.
- Stir in the vanilla, optional lemon zest, and melted butter until the batter is evenly combined.
- Cover the bowl and refrigerate the batter for at least 30 minutes.
- Preheat the oven to 375°F (190°C). Grease and lightly flour the madeleine pan.
- Spoon the batter into the cavities, filling each about three-quarters full.
- Bake for 9 to 12 minutes, until the edges are golden and the centers spring back lightly when touched.
- Remove the madeleines from the pan and cool completely on a wire rack.
- Melt the dark chocolate in short microwave intervals, stirring between each interval until smooth. Melt the white chocolate separately if using.
- Dip half of each madeleine into the chocolate, allowing the excess to drip off.
- Place on parchment paper and let the coating set at room temperature or refrigerate briefly.
Mini Apple Pie Roses
Do:
- Slice the apples very thinly so they bend without breaking.
- Warm the slices briefly to make them flexible before rolling.
- Cut the puff pastry into even strips for consistent rose shapes.
- Brush the finished pastries with a little apricot jam for a glossy finish.
Don’t:
- Use thick apple slices that resist curling around the pastry.
- Overfill the pastry strips, which can make the roses difficult to roll.
- Leave the puff pastry at room temperature until it becomes sticky.
- Remove the pastries from the muffin pan before they have rested for a few minutes.
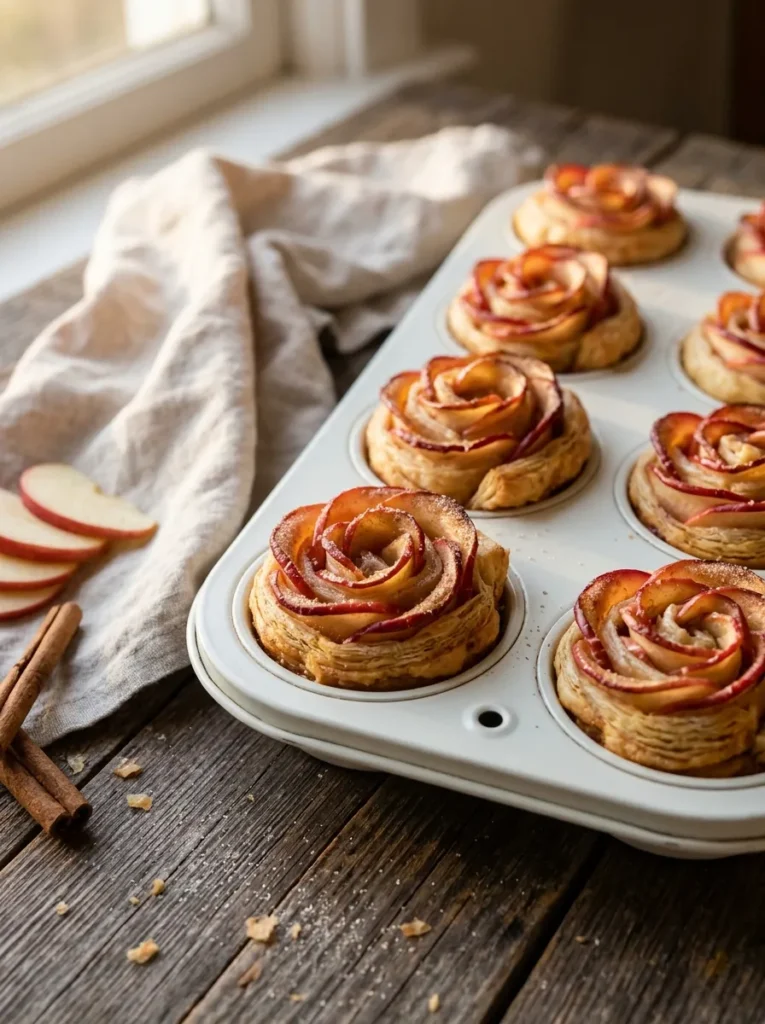
These little apple roses combine the flavor of classic apple pie with a decorative flower shape. Red-skinned apples create attractive pink edges, while cinnamon adds familiar warmth. Store-bought puff pastry keeps preparation manageable, making this dessert a lovely choice for brunch, autumn gatherings, or a homemade treat that looks more elaborate than it really is.
Ingredients
- 1 sheet frozen puff pastry, thawed according to package instructions
- 2 medium red apples
- 2 tablespoons lemon juice
- 3 tablespoons granulated sugar
- 1 teaspoon ground cinnamon
- 2 tablespoons apricot jam
- 1 tablespoon water
- 1 tablespoon all-purpose flour, for dusting
- Powdered sugar for serving, optional
How to Make It
- Preheat the oven to 375°F (190°C). Lightly grease a standard muffin pan.
- Halve the apples, remove the cores, and slice them into very thin half-moons.
- Place the apple slices in a microwave-safe bowl with the lemon juice and enough water to cover them partially. Microwave for 1 to 2 minutes, checking until the slices bend easily without falling apart. Drain and pat dry.
- Mix the granulated sugar and cinnamon in a small bowl.
- Lightly flour the work surface and roll the puff pastry into a slightly thinner rectangle. Cut it into six long strips.
- Spread a thin layer of apricot jam along each pastry strip.
- Arrange the apple slices along one long edge, overlapping them slightly so their curved red edges extend beyond the pastry.
- Sprinkle lightly with cinnamon sugar, then fold the lower half of the pastry over the bottom of the apple slices.
- Starting at one end, roll each strip gently into a rose shape and place it upright in a muffin cavity.
- Bake for 35 to 40 minutes, until the pastry is golden and cooked through. If the apple edges brown too quickly, loosely cover the pan with foil.
- Let the roses rest in the pan for five minutes before transferring them to a wire rack.
- Warm the remaining apricot jam with the tablespoon of water and lightly brush it over the roses. Dust with powdered sugar just before serving, if desired.
Mini Watermelon Sugar Cookies
Prep Time: 25 minutes | Chilling Time: 30 minutes | Baking Time: 10 to 12 minutes | Yield: 20 to 24 cookies
Skill Level: Beginner-friendly
Best For: Summer parties, picnic desserts, and colorful baking gifts.
Decorating Tip: Use gel food coloring for vivid pink and green icing without making it too runny.
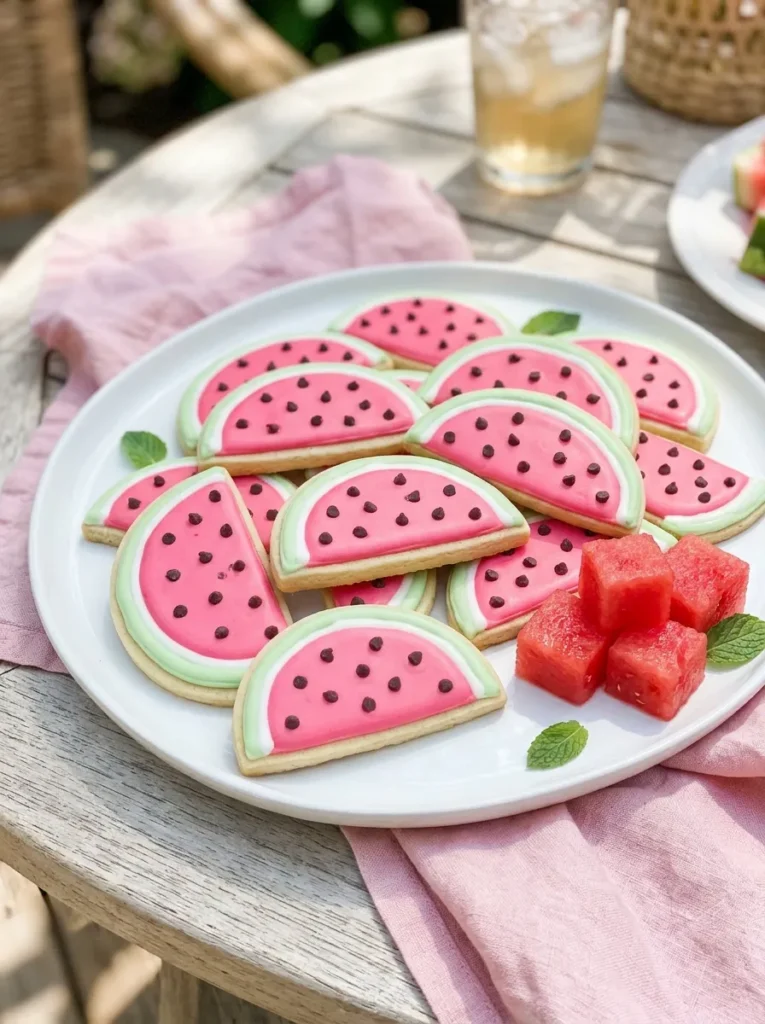
These cheerful watermelon cookies bring a playful summer theme to an ordinary sugar cookie recipe. Their curved shape and tiny chocolate chip seeds make them instantly recognizable, while the buttery base keeps them delicious beneath the colorful decoration. A simple round cookie cutter is enough to create the basic shapes, so you won’t need specialized baking equipment.
Ingredients
For the cookies:
- 1/2 cup unsalted butter, softened
- 2/3 cup granulated sugar
- 1 large egg
- 1 teaspoon vanilla extract
- 1 3/4 cups all-purpose flour
- 1/2 teaspoon baking powder
- 1/4 teaspoon salt
For the decoration:
- 1 cup powdered sugar
- 1 to 2 tablespoons milk
- 1/2 teaspoon vanilla extract
- Pink gel food coloring
- Green gel food coloring
- 1 tablespoon mini chocolate chips
- White icing for the inner rind
How to Make It
- Beat the softened butter and sugar until creamy. Add the egg and vanilla, mixing until combined.
- In another bowl, whisk together the flour, baking powder, and salt.
- Gradually mix the dry ingredients into the butter mixture until a soft dough forms.
- Wrap the dough and refrigerate for 30 minutes.
- Preheat the oven to 350°F (175°C) and line a baking sheet with parchment paper.
- Roll the dough to about 1/4 inch thick. Cut out circles, then slice each circle in half to create semicircles.
- Arrange the cookies on the baking sheet and bake for 10 to 12 minutes, until the edges are just beginning to turn golden.
- Cool completely on a wire rack.
- Mix the powdered sugar, milk, and vanilla into a thick icing. Divide it into portions and color them pink and green.
- Spread pink icing over the main cookie area, leaving room along the curved edge for a thin white stripe and green outer rind.
- Add the white and green icing details, then press mini chocolate chips into the pink section to resemble watermelon seeds.
- Let the icing dry completely before stacking or packaging the cookies.
Pastel Pinwheel Cookies
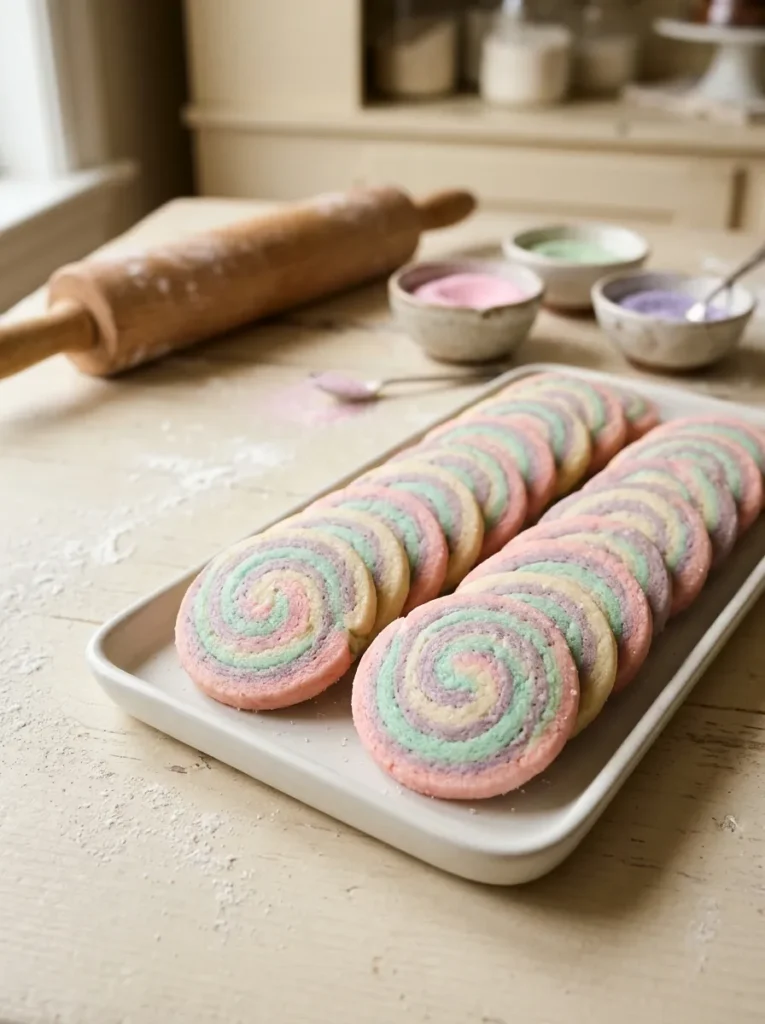
Sometimes the prettiest baked treats are made by combining simple ingredients in a clever way. Pastel pinwheel cookies feature colorful spirals that appear when you slice the rolled dough, creating a charming pattern without frosting or elaborate decorations. They work beautifully for birthday parties, baby showers, afternoon tea, and homemade cookie gift boxes.
The trick is rolling each dough layer evenly and chilling the finished log before slicing. This helps the spirals stay round instead of flattening under the knife. Use gel food coloring for gentle pastel shades, and keep the colors separate until you’re ready to layer them. For a tidy finish, rotate the dough log slightly between cuts and use a sharp knife.
Ingredients
- 1 cup unsalted butter, softened
- 1 cup granulated sugar
- 1 large egg
- 1 teaspoon vanilla extract
- 2 3/4 cups all-purpose flour
- 1/2 teaspoon baking powder
- 1/4 teaspoon salt
- Pink gel food coloring
- Mint green gel food coloring
- Lavender gel food coloring
- 1 tablespoon milk, only if needed to bring the dough together
How to Make It
- Beat the butter and sugar until light and fluffy. Add the egg and vanilla extract, mixing well.
- In a separate bowl, whisk together the flour, baking powder, and salt.
- Gradually add the dry ingredients to the butter mixture until a soft dough forms. Add a little milk only if the dough seems too dry to hold together.
- Divide the dough into three equal portions. Tint each portion a different pastel shade, leaving one portion plain if you prefer a vanilla stripe.
- Roll each portion between sheets of parchment paper into similarly sized rectangles, approximately 1/4 inch thick.
- Stack the colored layers carefully, pressing gently so they adhere without squeezing the dough out of shape.
- Starting at one long edge, roll the stacked dough into a tight log. Wrap it in parchment paper and refrigerate for at least two hours.
- Preheat the oven to 350°F (175°C) and line baking sheets with parchment paper.
- Slice the chilled log into rounds about 1/4 inch thick and arrange them on the trays with space between each cookie.
- Bake for 10 to 12 minutes, until the bottoms are lightly golden while the tops retain their pastel colors.
- Cool on the baking sheet for five minutes before transferring the cookies to a wire rack.
- Allow them to cool completely before serving or storing in an airtight container.
Mini Lemon Meringue Tartlets
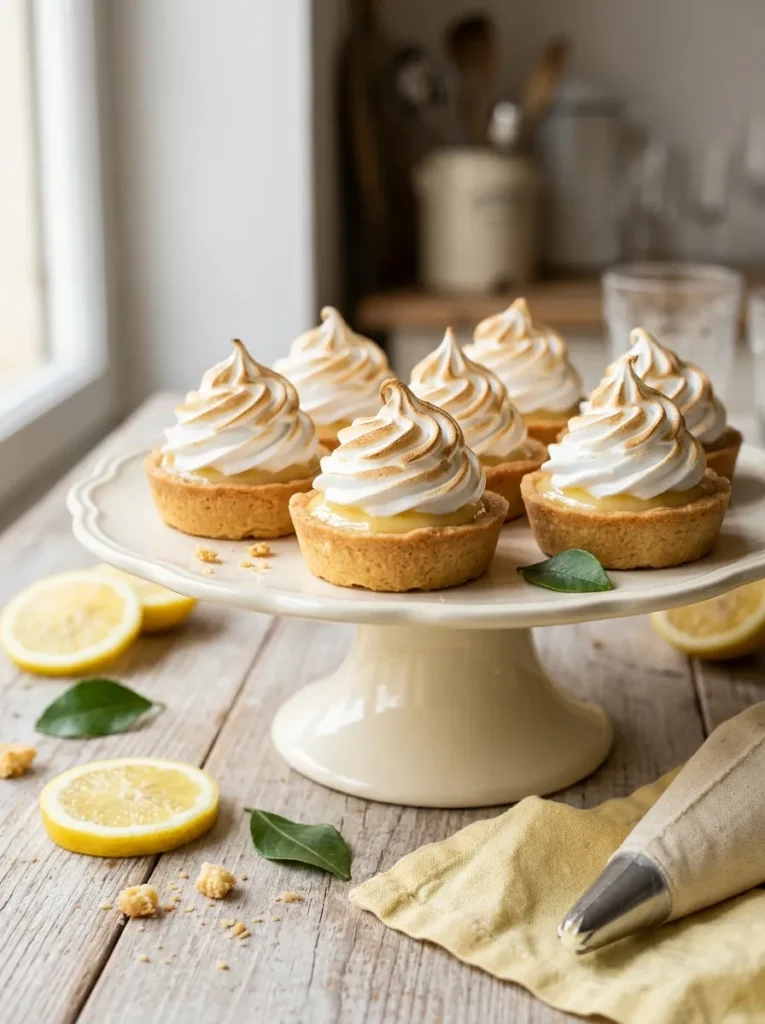
- Make the pastry shells: Bake small pastry cases in a mini muffin pan until crisp and lightly golden.
- Prepare the lemon curd: Whisk egg yolks, sugar, lemon juice, and butter over gentle heat until thickened.
- Fill the cooled shells: Spoon the chilled or cooled curd into each pastry case, leaving room for the meringue.
- Whip the topping: Beat egg whites with sugar until the mixture forms stiff, glossy peaks.
- Pipe and toast: Pipe decorative swirls onto the tartlets and carefully toast the meringue with a kitchen torch or under a broiler.
Mini lemon meringue tartlets combine three lovely textures: crisp pastry, smooth citrus filling, and airy toasted meringue. Their small size makes them easy to arrange on dessert platters, while the piped peaks give every tartlet a bakery-style finish. Prepare the shells and curd ahead of time, then add the meringue closer to serving for the freshest appearance.
Ingredients
For the pastry shells:
- 1 1/4 cups all-purpose flour
- 1/4 cup powdered sugar
- 1/4 teaspoon salt
- 1/2 cup cold unsalted butter, cubed
- 1 large egg yolk
- 1 to 2 tablespoons cold water, as needed
For the lemon filling:
- 3 large egg yolks
- 1/2 cup granulated sugar
- 1/3 cup fresh lemon juice
- 1 tablespoon finely grated lemon zest
- 4 tablespoons unsalted butter, cubed
For the meringue:
- 3 large egg whites
- 3/4 cup granulated sugar
- 1/4 teaspoon cream of tartar
How to Make It
- Combine the flour, powdered sugar, and salt in a bowl. Rub in the cold butter until the mixture resembles coarse crumbs.
- Add the egg yolk and enough cold water to bring the dough together. Shape into a disc, wrap, and refrigerate for 30 minutes.
- Preheat the oven to 350°F (175°C). Roll out the chilled dough and cut circles large enough to line the cavities of a mini muffin pan.
- Press the pastry gently into the pan, prick the bases with a fork, and bake for 12 to 15 minutes, until lightly golden. Cool completely.
- To make the filling, whisk the egg yolks, sugar, lemon juice, and lemon zest in a heatproof saucepan.
- Cook over low heat, stirring constantly, until the mixture thickens enough to coat the back of a spoon. Do not let it boil vigorously.
- Remove from the heat and stir in the butter until smooth. Transfer to a bowl and let the curd cool.
- Spoon the lemon curd into the cooled pastry shells and refrigerate until set.
- For the meringue, combine the egg whites, sugar, and cream of tartar in a heatproof bowl. Set it over gently simmering water, ensuring the bowl does not touch the water. Whisk until the sugar dissolves and the mixture reaches 160°F (71°C).
- Remove from the heat and beat with an electric mixer until stiff, glossy peaks form and the mixture cools.
- Transfer the meringue to a piping bag fitted with a star tip. Pipe small swirls over each filled tartlet.
- Lightly toast the meringue with a kitchen torch. Alternatively, use a broiler briefly, watching continuously to prevent burning.
- Chill the tartlets until serving. Keep refrigerated and serve the same day for the best texture.
Mini Cloud Shortbread
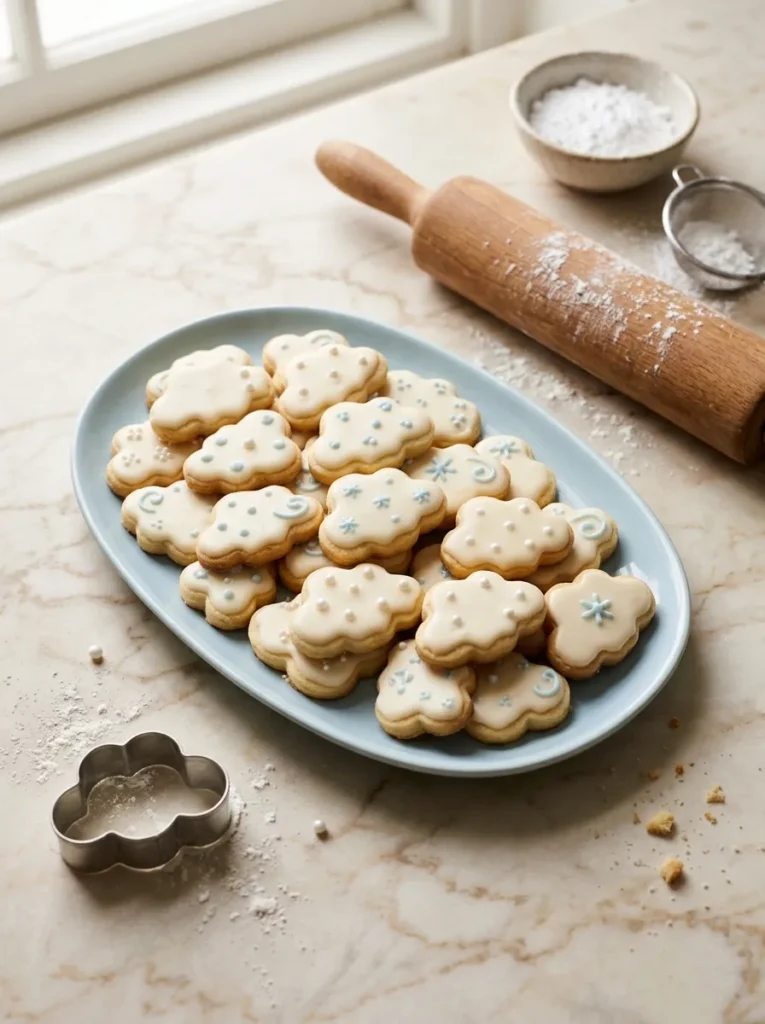
Prep Time: 20 minutes | Chilling Time: 30 minutes | Baking Time: 10 to 12 minutes
Yield: Approximately 20 cookies
Skill Level: Beginner-friendly
Best For: Baby showers, birthday favors, tea parties, and whimsical dessert tables.
Storage: Keep undecorated cookies in an airtight container for up to one week.
These dreamy cloud cookies bring a soft, whimsical look to homemade baking without complicated decorating techniques. Their buttery texture pairs beautifully with a simple vanilla icing, while the cloud shape makes them stand out among ordinary round cookies. A basic cookie cutter and a few pastel decorations are enough to create a charming batch.
For the cleanest shapes, chill the dough before cutting and transfer the cookies carefully to the baking tray. Avoid rolling the dough too thin, since thicker cookies are less likely to break during decorating. Keep the icing pale and simple, using tiny sugar pearls or a few blue accents rather than covering every cookie with decorations.
Ingredients
For the shortbread:
- 1 cup unsalted butter, softened
- 1/2 cup powdered sugar
- 1 teaspoon vanilla extract
- 2 cups all-purpose flour
- 1/4 teaspoon salt
- 1 tablespoon milk, if needed
For the icing:
- 1 cup powdered sugar
- 1 to 2 tablespoons milk
- 1/2 teaspoon vanilla extract
- Pale blue gel food coloring, optional
- White sugar pearls, optional
How to Make It
- Beat the softened butter and powdered sugar until smooth and creamy.
- Mix in the vanilla extract. Add the flour and salt gradually, stirring until a soft dough forms. Add the milk only if the dough seems too crumbly.
- Shape the dough into a disc, wrap it, and refrigerate for 30 minutes.
- Preheat the oven to 325°F (165°C) and line a baking sheet with parchment paper.
- Roll the chilled dough to approximately 1/4 inch thick on a lightly floured surface.
- Cut out cloud shapes and transfer them carefully to the prepared baking sheet.
- Bake for 10 to 12 minutes, until the edges are just beginning to turn golden. Let the cookies cool on the tray for five minutes before moving them to a wire rack.
- Mix the powdered sugar, milk, and vanilla into a smooth icing. Divide it into portions and add a tiny amount of blue coloring to one portion if desired.
- Spread or pipe a thin layer of icing over the completely cooled cookies.
- Add sugar pearls while the icing is still wet, then leave the cookies undisturbed until the decoration sets.
Raspberry Cream Cheese Pastries
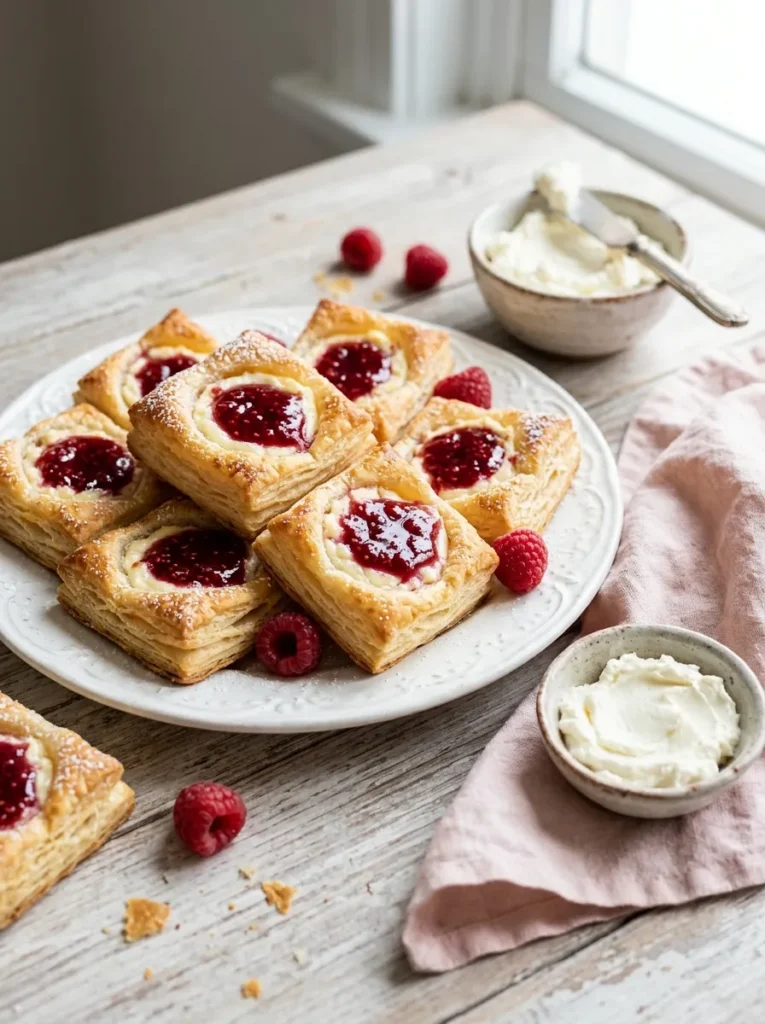
Raspberry cream cheese pastries bring together buttery, flaky layers and a tangy, creamy center with a bright pop of fruit. Their folded corners create a pretty flower-like shape, making each pastry look decorative straight from the oven. They’re a lovely choice for weekend brunch, afternoon coffee, or a homemade treat when you want bakery-style results without preparing pastry from scratch.
Store-bought puff pastry keeps the process manageable, while a small spoonful of raspberry jam provides plenty of flavor. I’ve found that keeping the pastry cold until assembly helps the layers puff up more beautifully in the oven. Use thick cream cheese filling and avoid overfilling each square, so the centers stay neat instead of spilling onto the baking tray.
Ingredients
- 1 sheet frozen puff pastry, thawed according to package instructions
- 4 ounces cream cheese, softened
- 2 tablespoons granulated sugar
- 1/2 teaspoon vanilla extract
- 1 teaspoon lemon zest
- 1/3 cup raspberry jam
- 1 large egg
- 1 tablespoon milk
- 1 tablespoon powdered sugar, optional
- Fresh raspberries for garnish, optional
How to Make It
- Preheat the oven to 400°F (200°C) and line a baking sheet with parchment paper.
- Beat the cream cheese, granulated sugar, vanilla extract, and lemon zest until smooth.
- Unfold the puff pastry on a lightly floured surface and cut it into nine equal squares.
- Make a small diagonal cut from each corner toward the center, stopping before reaching the middle. Fold alternating corners inward to create a flower-like shape, pressing gently to secure them.
- Spoon approximately one teaspoon of cream cheese filling into the center of each pastry.
- Add about half a teaspoon of raspberry jam over the cream cheese. Keep the filling in the middle to prevent leakage.
- Whisk the egg with the milk and brush it lightly over the exposed pastry edges.
- Bake for 15 to 20 minutes, until the pastry is puffed and deeply golden.
- Transfer the pastries to a wire rack and allow them to cool for at least 10 minutes.
- Dust lightly with powdered sugar and garnish with fresh raspberries if desired. Serve warm or at room temperature.
Mini S’mores Cookie Cups
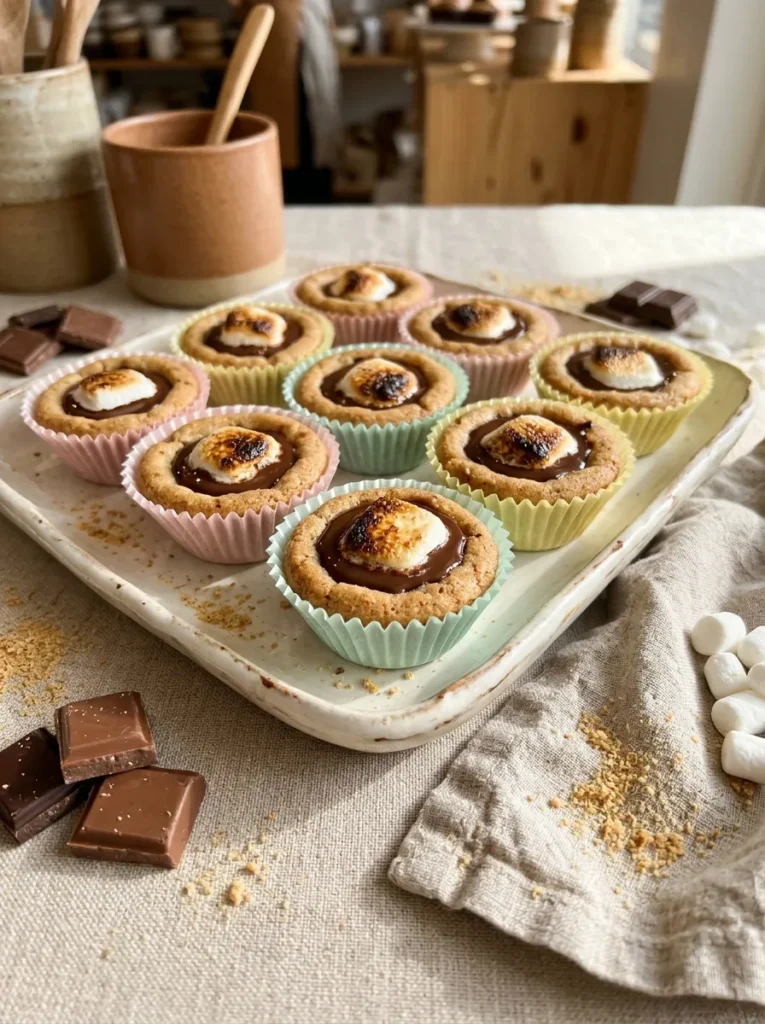
- Choose the cookie base: Use a buttery graham cracker cookie dough to capture the familiar flavor of classic s’mores.
- Shape the cups: Press small dough balls into a mini muffin pan to create shallow wells for the filling.
- Add chocolate carefully: Place a small chocolate piece inside each baked cookie cup while the centers are still warm.
- Finish with marshmallows: Add miniature marshmallows and briefly toast them under a broiler, watching closely.
- Decorate for serving: Sprinkle graham cracker crumbs over the tops for a crunchy finish.
These bite-sized treats combine a crisp cookie shell, rich chocolate, and soft toasted marshmallow in one adorable dessert. They’re especially fun for birthday parties, movie nights, and casual gatherings where guests can grab a sweet without needing plates or utensils. Let the cups cool slightly before removing them from the pan to help prevent broken edges.
Ingredients
- 1 cup graham cracker crumbs
- 3/4 cup all-purpose flour
- 1/2 teaspoon baking soda
- 1/4 teaspoon salt
- 1/2 cup unsalted butter, softened
- 1/3 cup brown sugar
- 1 large egg
- 1 teaspoon vanilla extract
- 12 small milk chocolate squares, halved if needed
- 1 cup mini marshmallows
- 2 tablespoons extra graham cracker crumbs for garnish
How to Make It
- Preheat the oven to 350°F (175°C) and lightly grease a 24-cavity mini muffin pan.
- Combine the graham cracker crumbs, flour, baking soda, and salt in a bowl.
- In another bowl, beat the softened butter and brown sugar until creamy. Add the egg and vanilla extract, mixing until smooth.
- Gradually stir the dry ingredients into the butter mixture to create a soft dough.
- Roll the dough into small balls and place one in each mini muffin cavity.
- Bake for 9 to 11 minutes, until the edges are lightly golden.
- While the cookies are still warm, gently press the center of each one with the rounded end of a small spoon to create a cup.
- Place a chocolate piece inside each cup and add two or three mini marshmallows on top.
- Return the pan to the oven for 2 to 3 minutes, until the marshmallows puff and the chocolate softens.
- For toasted tops, place the pan under the broiler for a few seconds, watching continuously to prevent burning.
- Sprinkle with graham cracker crumbs and let the cookie cups cool in the pan for 10 minutes before carefully removing them.
Mini Vanilla Bean Madeleines
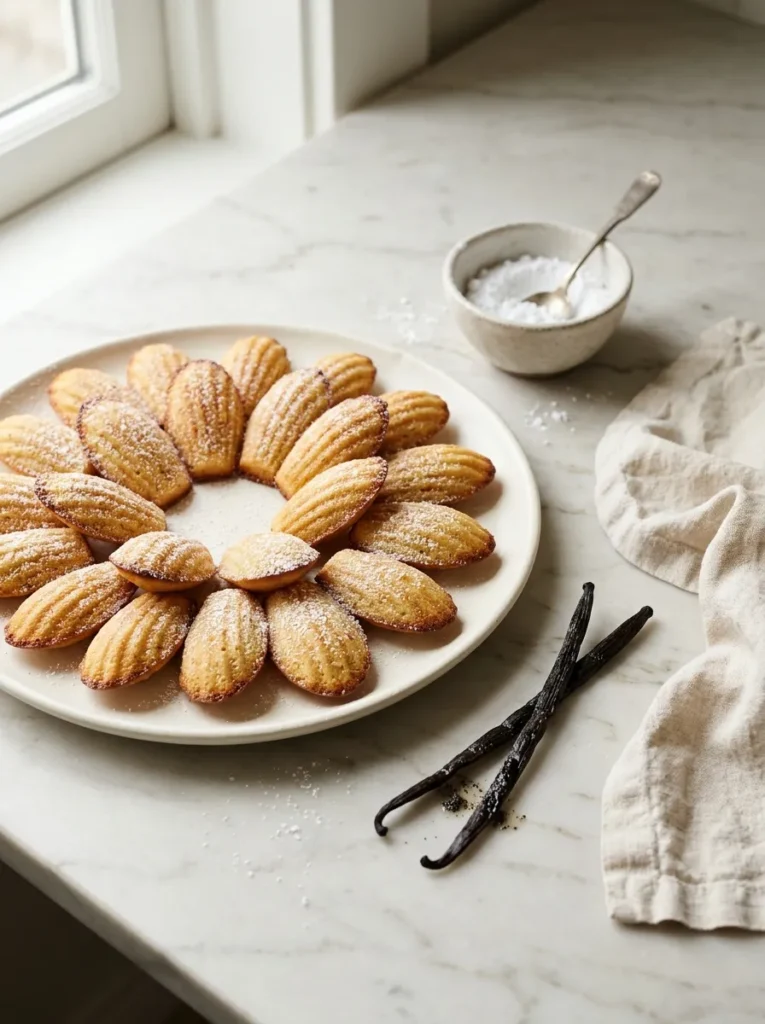
Prep Time: 15 minutes | Chilling Time: 30 minutes | Baking Time: 9 to 12 minutes
Yield: Approximately 18 to 20 mini madeleines
Skill Level: Beginner to intermediate
Best For: Afternoon tea, bridal showers, elegant dessert platters, and homemade gift boxes.
These petite French cakes have a delicate shell shape, buttery flavor, and soft golden edges that make them look lovely with very little decoration. Vanilla bean adds tiny black specks throughout the crumb, giving the cakes an elegant bakery finish. Their small size also makes them easy to serve alongside coffee, tea, or fresh berries.
The secret to good madeleines is gently folding the batter and allowing it to rest before baking. Chilling helps the batter firm up, while a properly greased shell-shaped pan makes releasing the cakes much easier. Avoid overbaking, since their small size means they can dry out quickly. A light dusting of powdered sugar is enough to finish these charming treats.
Ingredients
- 2 large eggs, at room temperature
- 1/2 cup granulated sugar
- 3/4 cup all-purpose flour
- 1/2 teaspoon baking powder
- 1/8 teaspoon salt
- 1/2 cup unsalted butter, melted and cooled
- 1 teaspoon vanilla bean paste
- 1 teaspoon finely grated lemon zest, optional
- Powdered sugar for dusting
- Extra softened butter and flour for preparing the pan
How to Make It
- Brush a mini madeleine pan with softened butter and dust lightly with flour. Tap out any excess.
- Beat the eggs and granulated sugar for about 3 to 4 minutes, until pale and slightly thick.
- In a separate bowl, whisk together the flour, baking powder, and salt.
- Gently fold the dry ingredients into the egg mixture, working carefully to preserve as much air as possible.
- Add the melted butter, vanilla bean paste, and optional lemon zest. Fold until the batter is smooth and evenly combined.
- Cover the bowl and refrigerate for 30 minutes.
- Preheat the oven to 375°F (190°C).
- Spoon the chilled batter into the prepared cavities, filling each about three-quarters full.
- Bake for 9 to 12 minutes, until the edges turn golden and the centers spring back when lightly touched.
- Let the madeleines rest in the pan for two minutes, then gently remove them and transfer to a wire rack.
- Once cooled slightly, dust with powdered sugar and serve fresh for the best texture.
Mini Peanut Butter Chocolate Blossoms

Few homemade treats look as inviting as tiny peanut butter cookies crowned with chocolate. These miniature blossoms combine a soft, slightly chewy center with a rich chocolate topping, creating a cute bite-sized dessert for birthday parties, bake sales, and homemade snack boxes. Their familiar flavor makes them appealing to both children and adults.
Start by rolling the dough into evenly sized balls so the cookies bake at the same rate. A light coating of granulated sugar creates a delicate sparkle around the edges, while pressing the chocolate pieces into the warm cookies gives them their signature blossom shape. Let the cookies cool before packing them, as the chocolate needs time to firm up and stay neatly in place.
Ingredients
- 1/2 cup creamy peanut butter
- 1/4 cup unsalted butter, softened
- 1/3 cup granulated sugar
- 1/3 cup packed brown sugar
- 1 large egg
- 1 teaspoon vanilla extract
- 1 1/4 cups all-purpose flour
- 1/2 teaspoon baking soda
- 1/4 teaspoon salt
- 2 tablespoons milk, if needed
- 3 tablespoons granulated sugar for rolling
- 24 to 30 small chocolate kiss candies, unwrapped
How to Make It
- Preheat the oven to 350°F (175°C) and line two baking sheets with parchment paper.
- Beat the peanut butter, softened butter, granulated sugar, and brown sugar until creamy.
- Add the egg and vanilla extract, mixing until fully incorporated.
- In a separate bowl, combine the flour, baking soda, and salt.
- Gradually stir the dry ingredients into the peanut butter mixture. If the dough feels too crumbly to roll, add the milk a teaspoon at a time.
- Shape the dough into small balls, approximately one inch wide, and roll each ball in the extra granulated sugar.
- Arrange the balls on the prepared baking sheets, leaving about two inches between them.
- Bake for 8 to 10 minutes, until the edges are set and the tops begin to crack slightly.
- Remove the cookies from the oven and immediately press one chocolate kiss gently into the center of each cookie.
- Leave the cookies on the baking sheet for five minutes before transferring them to a wire rack.
- Allow the chocolate to set before storing the cookies in an airtight container.
CONCLUSION
Cute homemade desserts don’t need complicated techniques or fancy equipment to feel memorable. From tiny cakes and delicate pastries to playful cookies and chocolate-topped treats, these ideas offer something for different occasions, skill levels, and sweet cravings. Start with the recipe that catches your eye, gather your ingredients, and enjoy the simple pleasure of making something delicious with your own hands. In my experience, a little creativity can turn an everyday baking session into a lovely memory. Save this collection of Cute Baking Recipe Ideas on Pinterest for your next baking day, try your favorites, and share this article with someone who loves sweet homemade treats.