22 Aesthetic Brownie Recipe Ideas Teens Will Adore
Want brownies that taste amazing and look adorable in every photo? These Aesthetic Brownie Recipe Ideas turn simple chocolate treats into eye-catching desserts worth sharing with friends.
Whether you’re planning a birthday party, hosting a sleepover, preparing a cute dessert box, or simply craving something sweet, the right toppings and creative combinations can make homemade brownies feel extra special. Think pastel swirls, creamy layers, colorful sprinkles, fruity finishes, and rich chocolate centers that look just as good as they taste.
The best part is that you don’t need professional baking skills or expensive equipment to create beautiful results. I’ve found that small details, like adding a contrasting drizzle or arranging toppings neatly, can make ordinary brownies feel bakery-worthy. These 22 ideas offer inspiration for different moods, flavors, and occasions, with practical ingredients and easy steps to help you get started. Pick your favorite, gather your baking essentials, and create a batch that’s delicious, creative, and ready to share.
Biscoff Cookie Butter Brownies

The combination of deep chocolate and caramelized cookie butter gives these brownies a rich flavor and a beautiful golden-brown finish. For teens who enjoy café-style desserts, the contrast between glossy chocolate and delicate biscuit swirls makes every square look special. These are a fun addition to weekend baking, birthday treats, or a homemade dessert box.
For the prettiest pattern, spoon slightly warmed cookie butter over the brownie batter and swirl it gently with a toothpick. Press a few biscuit pieces on top before baking. Keep the swirls broad rather than mixing them completely into the chocolate. The result is a striking marbled surface with crunchy cookie pieces and a soft, fudgy center.
Ingredients
- 1/2 cup (113 g) unsalted butter
- 3/4 cup (150 g) granulated sugar
- 2 large eggs
- 1 teaspoon vanilla extract
- 1/3 cup (30 g) unsweetened cocoa powder
- 1/2 cup (65 g) all-purpose flour
- 1/4 teaspoon salt
- 1/3 cup (90 g) Biscoff cookie butter
- 4 Biscoff biscuits, roughly broken
How to Make It
- Preheat the oven to 350°F (175°C). Line an 8-inch square baking pan with parchment paper.
- Melt the butter and let it cool slightly. Whisk in the sugar, eggs, and vanilla until smooth.
- Stir in the cocoa powder, flour, and salt until no dry patches remain.
- Spread the batter evenly in the prepared pan. Warm the cookie butter briefly until spoonable, then drop small spoonfuls over the batter.
- Swirl gently with a toothpick and scatter the broken biscuits on top.
- Bake for 22 to 28 minutes, checking for moist crumbs on a toothpick. Cool completely before slicing into squares.
ALSO READ : Healthy Crockpot Recipes
Matcha White Chocolate Brownies
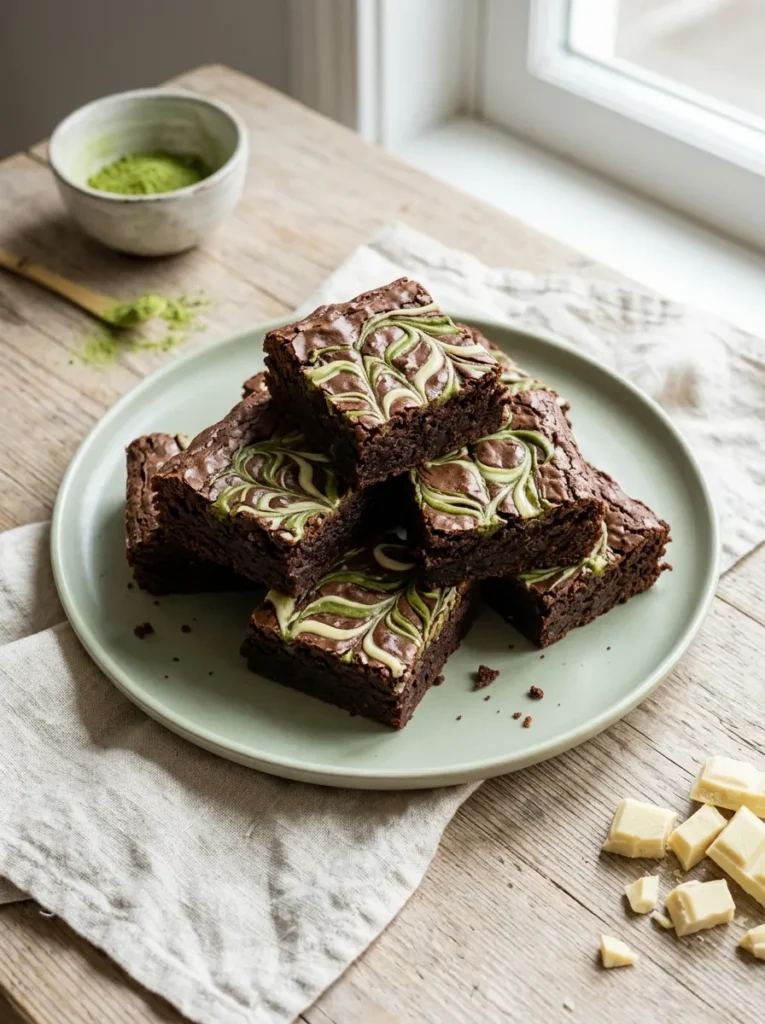
The earthy taste of matcha paired with sweet white chocolate creates a striking green-and-brown dessert. These brownies are ideal for teens who love minimalist café aesthetics and want something a little different from traditional chocolate toppings. The contrasting colors make each slice look distinctive without requiring complicated decorating skills.
- Choose good matcha: Culinary-grade matcha works well for baking and provides a recognizable green color.
- Melt carefully: Use short microwave intervals to melt white chocolate without scorching it.
- Create contrast: Reserve a little melted white chocolate for a thin finishing drizzle.
- Keep the pattern visible: Add the matcha mixture in small dollops and swirl lightly.
- Cool before slicing: This helps the chocolate set and keeps the edges neat.
The secret to an attractive finish is keeping the green accents bright rather than mixing everything into one uniform color. Serve the squares on a white or sage plate to highlight the contrast. For a more pronounced matcha flavor, sift the powder before mixing it into the white chocolate to prevent clumps.
Ingredients
- 1/2 cup (113 g) unsalted butter
- 3/4 cup (150 g) granulated sugar
- 2 large eggs
- 1 teaspoon vanilla extract
- 1/3 cup (30 g) unsweetened cocoa powder
- 1/2 cup (65 g) all-purpose flour
- 1/4 teaspoon salt
- 1/2 cup (85 g) white chocolate chips
- 1 teaspoon culinary-grade matcha powder
- 1 tablespoon heavy cream, if needed
How to Make It
- Preheat the oven to 350°F (175°C). Line an 8-inch square pan with parchment paper.
- Melt the butter and whisk it with the sugar. Add the eggs and vanilla, mixing until smooth.
- Fold in the cocoa powder, flour, and salt until just combined. Spread the brownie batter into the pan.
- Melt the white chocolate in short microwave intervals, stirring between each interval. Mix the matcha powder with the cream if needed, then stir it into the melted chocolate.
- Spoon the matcha mixture over the brownie batter and gently swirl with a toothpick.
- Bake for 22 to 28 minutes, until the edges are set and a toothpick comes out with a few moist crumbs. Cool completely before cutting.
Pinterest Account : FreshRecipeIdeas1
Galaxy Sprinkle Brownies
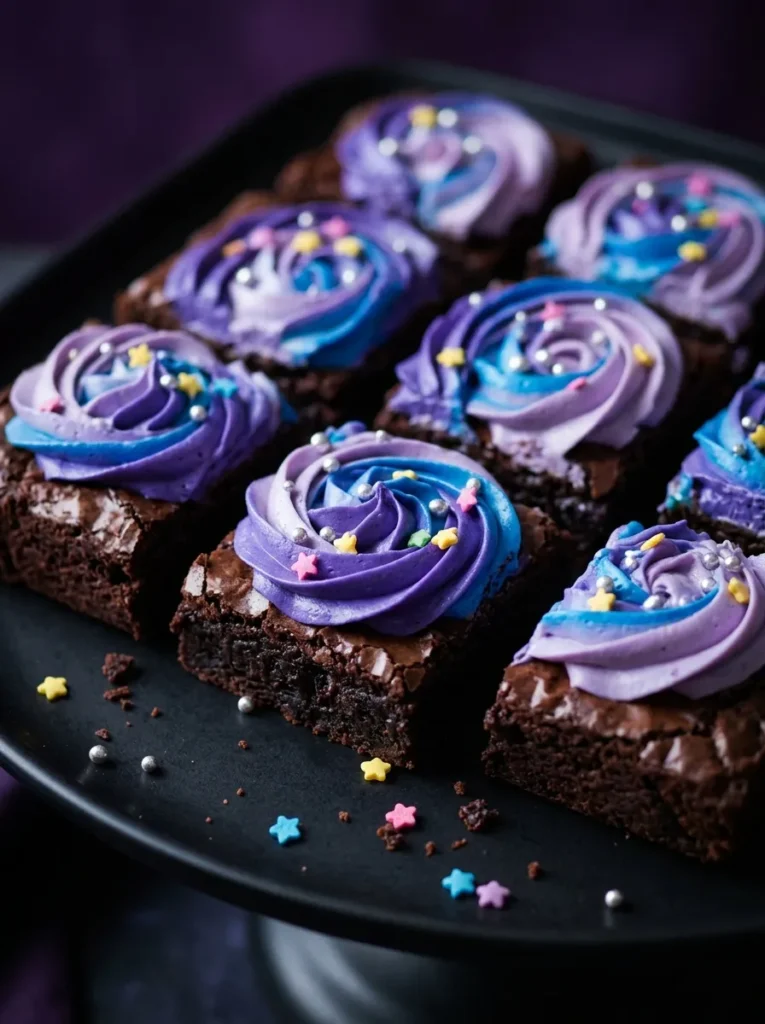
Galaxy-inspired brownies turn an ordinary chocolate tray into a colorful dessert with a cosmic finish. The dark brownie base makes purple and blue frosting stand out, while tiny star sprinkles add texture and playful detail. These treats suit birthday parties, sleepovers, themed celebrations, and baking afternoons with friends.
Quick Tip:
Use gel food coloring to achieve vivid purple and blue shades without adding too much liquid to the frosting. Keep the colors separate until you spoon them onto the brownies, then swirl gently for a galaxy effect.
For a polished finish, spread a thin layer of chocolate frosting over the cooled brownies before adding the colored swirls. Sprinkle the edible decorations on while the frosting is still soft so they stay in place. I’ve found that using just two or three complementary colors creates a clearer pattern than mixing every shade together.
Ingredients
For the brownies:
- 1/2 cup (113 g) unsalted butter
- 3/4 cup (150 g) granulated sugar
- 2 large eggs
- 1 teaspoon vanilla extract
- 1/3 cup (30 g) unsweetened cocoa powder
- 1/2 cup (65 g) all-purpose flour
- 1/4 teaspoon salt
For the decoration:
- 1/2 cup (60 g) softened unsalted butter
- 1 1/2 cups (180 g) powdered sugar
- 1 tablespoon milk, plus more if needed
- 1/2 teaspoon vanilla extract
- Purple gel food coloring
- Blue gel food coloring
- Star-shaped sprinkles and silver sugar pearls
How to Make It
- Preheat the oven to 350°F (175°C). Line an 8-inch square baking pan with parchment paper.
- Melt the butter, then whisk in the sugar, eggs, and vanilla until combined.
- Stir in the cocoa powder, flour, and salt. Spread the batter evenly in the pan.
- Bake for 22 to 28 minutes, until the edges are set and the center remains slightly fudgy. Cool completely.
- Beat the softened butter until creamy. Gradually add the powdered sugar, vanilla, and milk to make a smooth frosting.
- Divide the frosting between two bowls. Tint one purple and the other blue with gel coloring.
- Spread a thin layer of frosting over the brownies, add small dollops of both colors, and swirl lightly with a toothpick.
- Finish with star sprinkles and silver sugar pearls. Let the frosting set before slicing into neat squares.
Chocolate Chip Cookie Dough Brownies
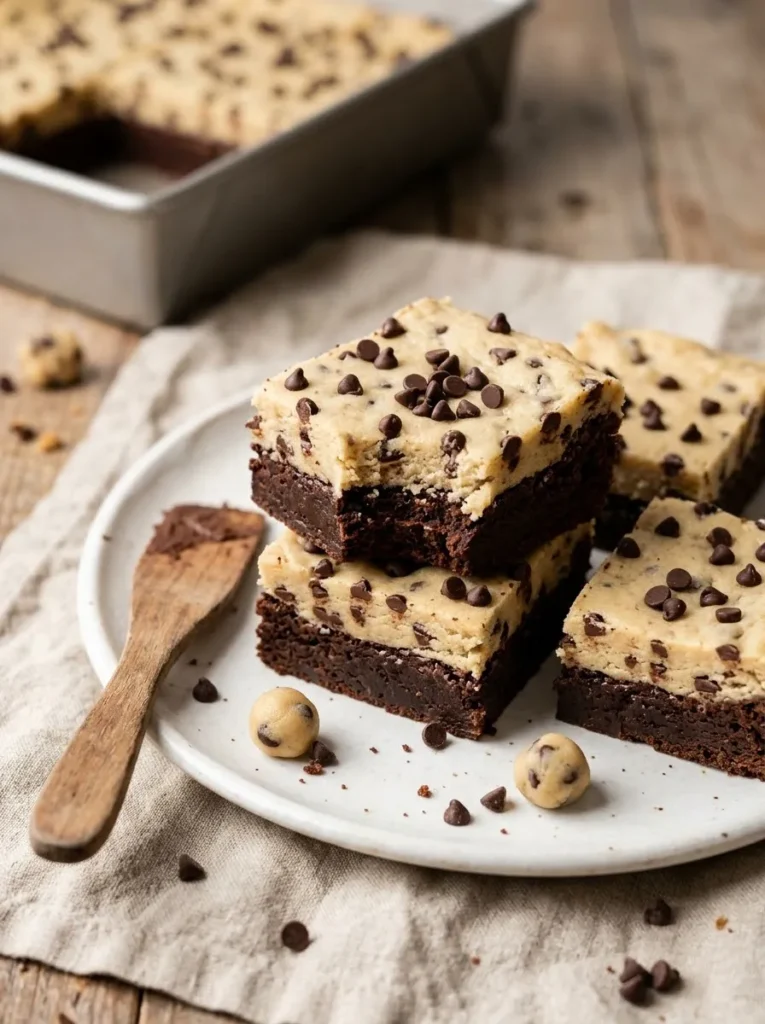
These brownies combine two classic desserts in one indulgent square. A dense chocolate base supports a soft cookie dough topping dotted with mini chocolate chips, creating a layered look that stands out on Pinterest. They are especially fun for teen baking days when everyone wants a dessert that feels like a bakery treat.
BEFORE
Plain brownies can look simple on a dessert table, even when they taste delicious. Adding lots of random toppings may also make the surface messy and difficult to slice.
AFTER
A smooth cookie dough layer creates a clean, defined finish. Mini chocolate chips add texture, while the visible brownie base gives each square a tempting two-layer appearance.
For food safety, make the topping with heat-treated flour and no raw eggs. Spread it over completely cooled brownies, then chill until firm before cutting. A warm knife helps create tidy edges without dragging the cookie dough across the chocolate layer.
Ingredients
For the brownies:
- 1/2 cup (113 g) unsalted butter
- 3/4 cup (150 g) granulated sugar
- 2 large eggs
- 1 teaspoon vanilla extract
- 1/3 cup (30 g) unsweetened cocoa powder
- 1/2 cup (65 g) all-purpose flour
- 1/4 teaspoon salt
For the cookie dough topping:
- 1/4 cup (57 g) softened unsalted butter
- 1/4 cup (50 g) brown sugar
- 2 tablespoons granulated sugar
- 2 tablespoons milk
- 1/2 teaspoon vanilla extract
- 1/2 cup (60 g) heat-treated all-purpose flour
- 1/3 cup (55 g) mini chocolate chips
How to Make It
- Preheat the oven to 350°F (175°C). Line an 8-inch square baking pan with parchment paper.
- Melt the brownie butter and whisk with the granulated sugar. Add the eggs and vanilla, then mix in the cocoa powder, flour, and salt.
- Spread the batter in the pan and bake for 22 to 28 minutes. Cool completely.
- To heat-treat the topping flour, spread it on a baking sheet and bake at 350°F (175°C) for about 5 to 7 minutes, checking that it reaches 165°F (74°C). Cool completely before using.
- Beat the softened butter with both sugars until creamy. Mix in the milk and vanilla, then add the cooled flour.
- Fold in the mini chocolate chips and spread the cookie dough over the cooled brownie base.
- Refrigerate for 30 to 60 minutes, then slice into squares with a warm, clean knife.
Red Velvet Cheesecake Brownies
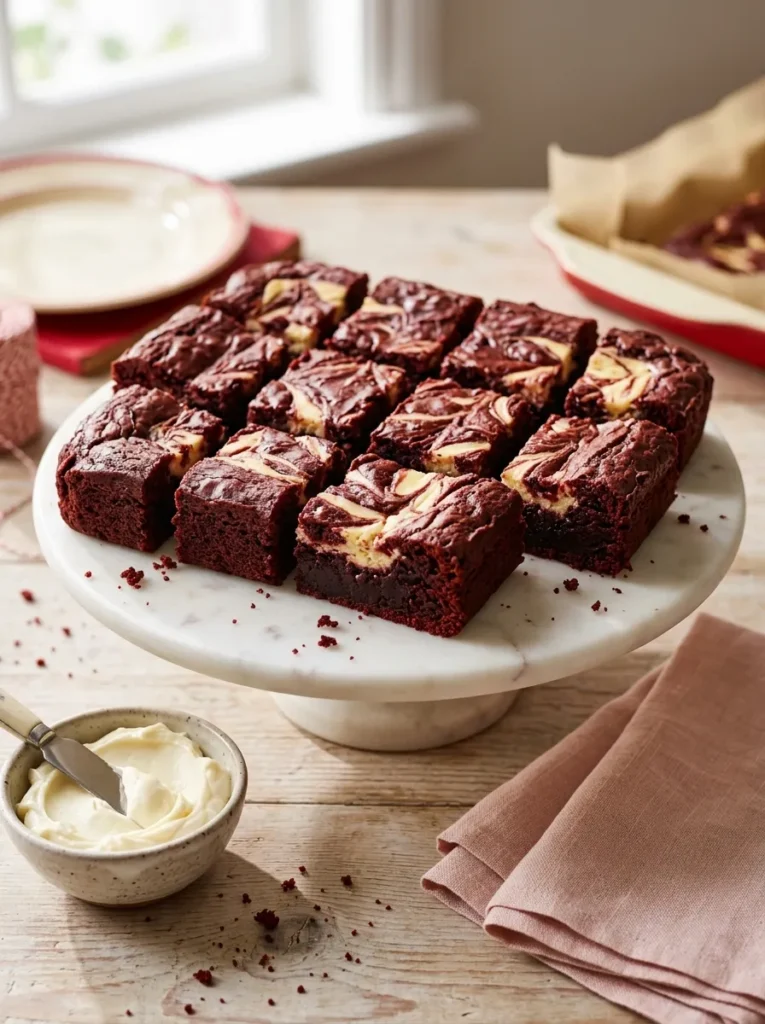
Red velvet and cheesecake make a striking pair, bringing a vibrant red color and creamy white contrast to a familiar chocolate dessert. The marbled top looks detailed and elegant, yet the technique is simple enough for beginner bakers. These squares work beautifully for birthday parties, Valentine’s celebrations, or a pretty dessert platter.
- Prepare the pan: Line it with parchment paper so the brownies lift out cleanly.
- Make the red velvet batter: Blend the cocoa, flour, sugar, eggs, butter, and red food coloring until evenly combined.
- Mix the cheesecake layer: Beat softened cream cheese with sugar, an egg yolk, and vanilla until smooth.
- Create the marble: Spoon the cheesecake mixture over the red batter and drag a toothpick through both layers.
- Check doneness: Remove the pan when the center is just set rather than waiting for a completely dry toothpick.
The best marbling comes from using small spoonfuls of cheesecake filling and making only a few deliberate swirls. Too much mixing can blur the colors and leave the surface looking uniform. Chill the baked brownies before cutting so the cheesecake layer holds its shape and each slice shows off the red-and-white pattern.
Ingredients
For the red velvet brownie layer:
- 1/2 cup (113 g) unsalted butter, melted
- 3/4 cup (150 g) granulated sugar
- 2 large eggs
- 1 teaspoon vanilla extract
- 1 tablespoon unsweetened cocoa powder
- 3/4 cup (95 g) all-purpose flour
- 1/4 teaspoon salt
- Red gel food coloring, as needed
For the cheesecake layer:
- 6 oz (170 g) cream cheese, softened
- 1/4 cup (50 g) granulated sugar
- 1 egg yolk
- 1/2 teaspoon vanilla extract
How to Make It
- Preheat the oven to 350°F (175°C). Line an 8-inch square pan with parchment paper.
- Whisk the melted butter and sugar together. Add the eggs, vanilla, and a small amount of red gel coloring.
- Stir in the cocoa powder, flour, and salt until the batter is smooth and evenly colored.
- In another bowl, beat the cream cheese and sugar until creamy. Mix in the egg yolk and vanilla.
- Spread most of the red velvet batter into the pan. Add spoonfuls of cheesecake filling and dot with the remaining red batter.
- Swirl gently with a toothpick to create a marbled pattern.
- Bake for approximately 25 to 32 minutes, until the edges are set and the cheesecake portions no longer look liquid.
- Cool completely, refrigerate until firm, and slice with a clean knife.
S’mores Marshmallow Brownies

S’mores brownies bring the familiar combination of chocolate, toasted marshmallow, and crunchy graham crackers into a rich, easy-to-serve dessert. The toasted topping adds golden color and texture, making these brownies especially appealing for cozy movie nights, sleepovers, and casual parties with friends.
The trick is to add the marshmallows near the end of baking rather than leaving them in the oven for the full cooking time. This helps them toast without completely melting away. Break the graham crackers into uneven pieces for a relaxed campfire-inspired look, and add a few chocolate chunks while the topping is still warm.
Ingredients
For the brownies:
- 1/2 cup (113 g) unsalted butter
- 3/4 cup (150 g) granulated sugar
- 2 large eggs
- 1 teaspoon vanilla extract
- 1/3 cup (30 g) unsweetened cocoa powder
- 1/2 cup (65 g) all-purpose flour
- 1/4 teaspoon salt
For the topping:
- 1 cup mini marshmallows
- 3 graham cracker sheets, broken into pieces
- 1/4 cup (45 g) milk chocolate chunks
How to Make It
- Preheat the oven to 350°F (175°C). Line an 8-inch square pan with parchment paper.
- Melt the butter and whisk it with the sugar. Add the eggs and vanilla, then stir in the cocoa powder, flour, and salt.
- Spread the batter evenly in the pan and bake for about 20 to 24 minutes.
- Remove the pan carefully and scatter the marshmallows, graham cracker pieces, and chocolate chunks over the top.
- Return the pan to the oven for another 3 to 5 minutes, until the marshmallows puff and begin to turn golden.
- For extra color, briefly use the oven’s broiler while watching constantly. Keep the pan away from direct contact with the heating element.
- Let the brownies cool until the topping is set enough to handle. Use a lightly greased knife to cut through the marshmallow layer.
Salted Caramel Pretzel Brownies
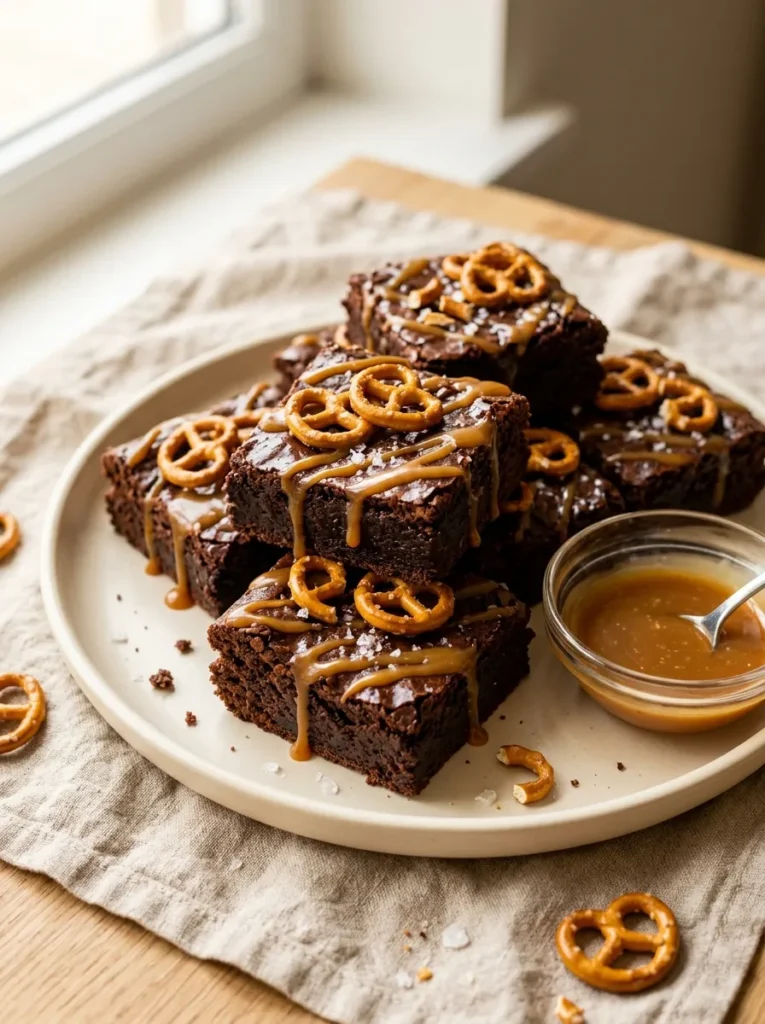
Sweet caramel, rich chocolate, and salty pretzels create a delicious contrast in every bite. These brownies have a bakery-style finish without requiring complicated decorating techniques. The golden caramel against the dark chocolate also makes them especially eye-catching for Pinterest dessert boards and teen party tables.
DO
- Use thick caramel sauce that holds its shape on cooled brownies.
- Break a few pretzels into small pieces for extra crunch.
- Add a light sprinkle of flaky sea salt just before serving.
- Press whole mini pretzels gently into the topping for decoration.
DON’T
- Pour watery caramel over warm brownies.
- Add too much salt, which can overpower the chocolate.
- Crush every pretzel into fine crumbs.
- Slice before the caramel has settled.
For the neatest finish, bake the brownies first and let them cool completely before decorating. Drizzle caramel in thin zigzags, then arrange the pretzels in a simple repeating pattern. A little restraint keeps the topping attractive and makes each piece easier to pick up without losing its crunchy decoration.
Ingredients
For the brownies:
- 1/2 cup (113 g) unsalted butter
- 3/4 cup (150 g) granulated sugar
- 2 large eggs
- 1 teaspoon vanilla extract
- 1/3 cup (30 g) unsweetened cocoa powder
- 1/2 cup (65 g) all-purpose flour
- 1/4 teaspoon salt
For the topping:
- 1/3 cup (80 g) thick caramel sauce
- 1 cup mini pretzels
- 1/4 teaspoon flaky sea salt, or to taste
How to Make It
- Preheat the oven to 350°F (175°C). Line an 8-inch square baking pan with parchment paper.
- Melt the butter and whisk it with the sugar. Add the eggs and vanilla, then stir in the cocoa powder, flour, and salt.
- Spread the batter evenly in the pan and bake for 22 to 28 minutes, until the edges are set and a toothpick comes out with a few moist crumbs.
- Let the brownies cool completely in the pan.
- Warm the caramel sauce briefly until it is easy to drizzle. Spoon it over the brownies in thin lines.
- Arrange mini pretzels on top and sprinkle lightly with flaky sea salt.
- Allow the caramel to settle before slicing into squares with a sharp knife.
Peanut Butter Cup Brownies
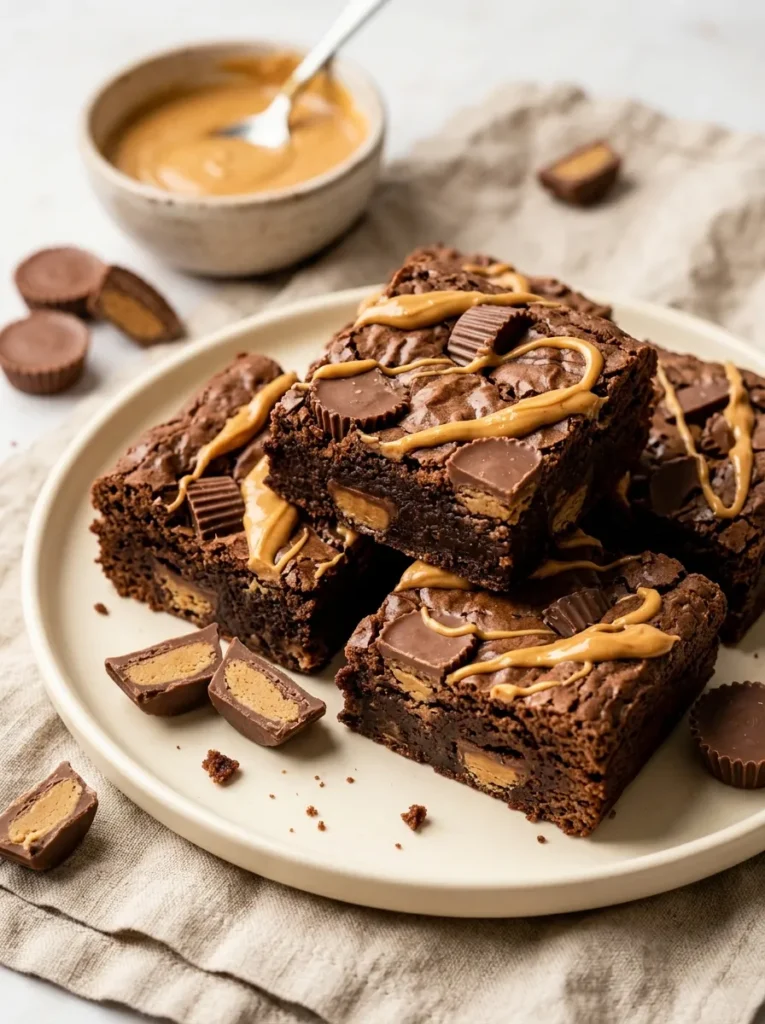
Peanut butter cup brownies are made for anyone who loves the combination of chocolate and creamy, nutty sweetness. Mini candy cups create little pockets of flavor throughout the brownies, while a peanut butter drizzle gives the surface a polished finish. Each slice has a slightly different pattern, making the tray feel playful and homemade.
Cost: Moderate, depending on the candy and chocolate brands.
Prep Time: 15 minutes.
Bake Time: 22 to 28 minutes, plus cooling.
Skill Level: Beginner-friendly.
Best For: Birthday treats, sleepovers, and chocolate-peanut butter fans.
For a balanced result, use mini peanut butter cups rather than filling the entire surface with candy. Fold some chopped pieces into the batter and reserve a few halves for the top. If the peanut butter is too thick to drizzle, warm it in short intervals and stir until smooth. Let the brownies cool before adding the finishing ribbons.
Ingredients
For the brownies:
- 1/2 cup (113 g) unsalted butter
- 3/4 cup (150 g) granulated sugar
- 2 large eggs
- 1 teaspoon vanilla extract
- 1/3 cup (30 g) unsweetened cocoa powder
- 1/2 cup (65 g) all-purpose flour
- 1/4 teaspoon salt
- 12 mini peanut butter cups, chopped
For the topping:
- 2 tablespoons creamy peanut butter
- 4 additional mini peanut butter cups, halved
How to Make It
- Preheat the oven to 350°F (175°C). Line an 8-inch square pan with parchment paper.
- Melt the butter and whisk with the sugar. Beat in the eggs and vanilla until combined.
- Stir in the cocoa powder, flour, and salt. Fold in the chopped peanut butter cups.
- Spread the batter in the prepared pan and bake for 22 to 28 minutes, until the center is just set.
- Cool the brownies completely. Warm the peanut butter briefly until pourable.
- Drizzle the peanut butter over the surface and arrange the halved candy cups on top.
- Allow the topping to settle, then cut into squares with a sharp knife.
Blueberry Cheesecake Brownies
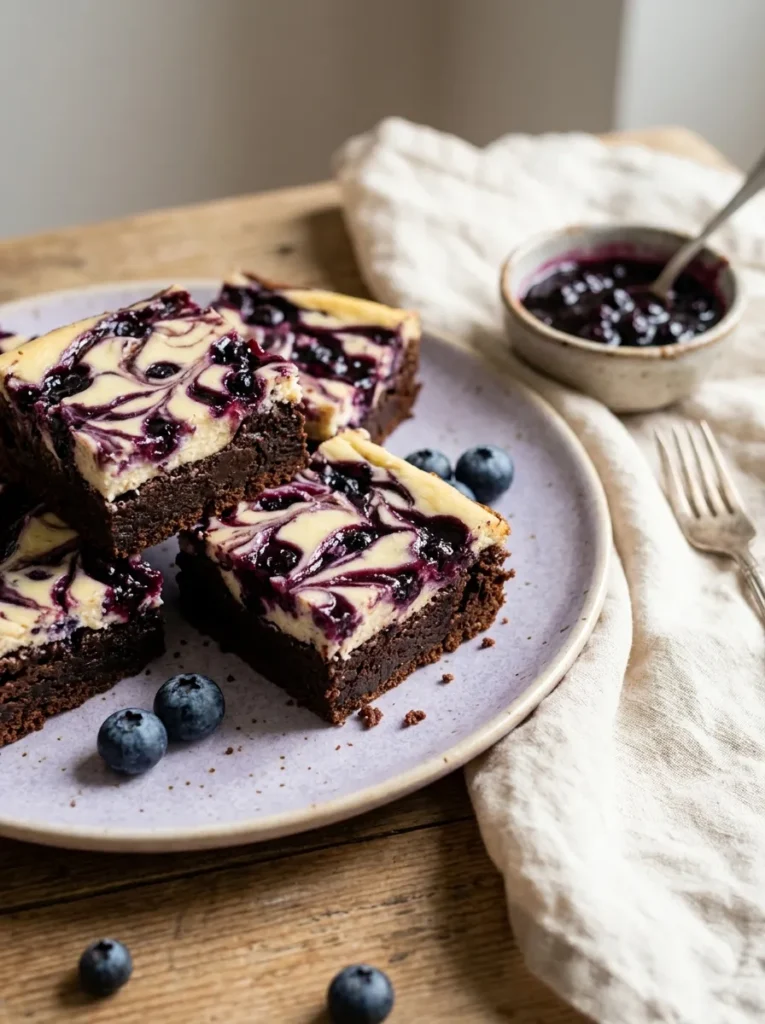
Blueberry cheesecake brownies combine rich cocoa flavor with tangy cream cheese and bright fruit. The purple swirls create a colorful finish that feels different from the usual chocolate toppings, while the cheesecake adds a smooth contrast to the dense brownie base.
For the best pattern, use thick blueberry compote rather than a watery sauce. Add small spoonfuls over the cheesecake layer and drag a toothpick through the mixture just a few times. Too much swirling can turn the surface muddy. Refrigerate the cooled brownies before cutting so the creamy layer holds together and the purple ribbons stay distinct.
Ingredients
For the brownies:
- 1/2 cup (113 g) unsalted butter
- 3/4 cup (150 g) granulated sugar
- 2 large eggs
- 1 teaspoon vanilla extract
- 1/3 cup (30 g) unsweetened cocoa powder
- 1/2 cup (65 g) all-purpose flour
- 1/4 teaspoon salt
For the cheesecake swirl:
- 6 oz (170 g) cream cheese, softened
- 1/4 cup (50 g) granulated sugar
- 1 egg yolk
- 1/2 teaspoon vanilla extract
- 1/4 cup (60 g) thick blueberry compote, cooled
How to Make It
- Preheat the oven to 350°F (175°C). Line an 8-inch square pan with parchment paper.
- Melt the butter and whisk it with the sugar. Add the eggs and vanilla, then stir in the cocoa powder, flour, and salt.
- Spread the brownie batter evenly in the prepared pan.
- Beat the cream cheese and sugar until smooth. Mix in the egg yolk and vanilla.
- Spoon the cheesecake mixture over the brownie batter, then add small dots of blueberry compote.
- Use a toothpick to swirl the cheesecake and blueberry mixture gently across the surface.
- Bake for 28 to 35 minutes, until the edges are set and the cheesecake layer is no longer liquid.
- Cool completely, refrigerate until firm, and slice into squares. Store leftovers covered in the refrigerator.
Birthday Cake Sprinkle Brownies
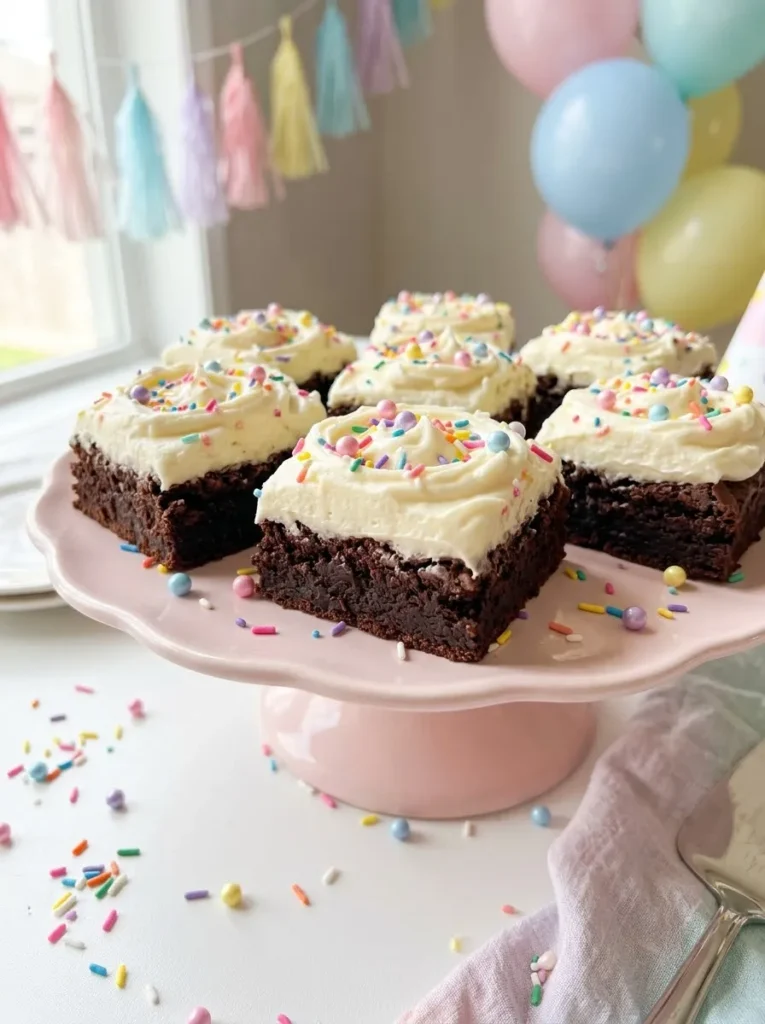
Birthday cake brownies bring together rich chocolate and cheerful rainbow decorations in one easy dessert. The colorful topping makes ordinary brownie squares feel party-ready, even without elaborate piping or special equipment. They are especially fun for teen birthdays, sleepovers, school celebrations, and homemade treat boxes.
- Choose a smooth vanilla frosting that spreads easily over cooled brownies.
- Use rainbow jimmies and confetti sprinkles for a classic birthday-cake look.
- Add pastel candy pearls for extra texture, but keep the topping light.
- Refrigerate briefly if the frosting feels too soft to slice neatly.
- Cut the brownies into equal squares for a polished party platter.
For a balanced finish, let the chocolate flavor remain the star and use the sprinkles as colorful accents. Apply the frosting in a thin, even layer, then scatter the decorations while it is still soft. A mix of pink, yellow, blue, and purple sprinkles creates a bright result that looks festive in photos.
Ingredients
For the brownies:
- 1/2 cup (113 g) unsalted butter
- 3/4 cup (150 g) granulated sugar
- 2 large eggs
- 1 teaspoon vanilla extract
- 1/3 cup (30 g) unsweetened cocoa powder
- 1/2 cup (65 g) all-purpose flour
- 1/4 teaspoon salt
For the topping:
- 1/2 cup (60 g) powdered sugar
- 2 tablespoons softened unsalted butter
- 1 tablespoon milk, plus more if needed
- 1/4 teaspoon vanilla extract
- 2 tablespoons rainbow sprinkles
- 1 tablespoon pastel candy pearls, optional
How to Make It
- Preheat the oven to 350°F (175°C). Line an 8-inch square pan with parchment paper.
- Melt the butter and whisk it with the sugar. Add the eggs and vanilla, then stir in the cocoa powder, flour, and salt.
- Spread the batter into the pan and bake for 22 to 28 minutes, until the edges are set and a toothpick comes out with a few moist crumbs.
- Cool the brownies completely before decorating.
- Beat the powdered sugar and softened butter together. Add the milk and vanilla gradually until the frosting is smooth and spreadable.
- Spread a thin layer of frosting over the brownies. Scatter the rainbow sprinkles and optional candy pearls over the top.
- Let the frosting set before slicing into neat squares.
Raspberry White Chocolate Brownies
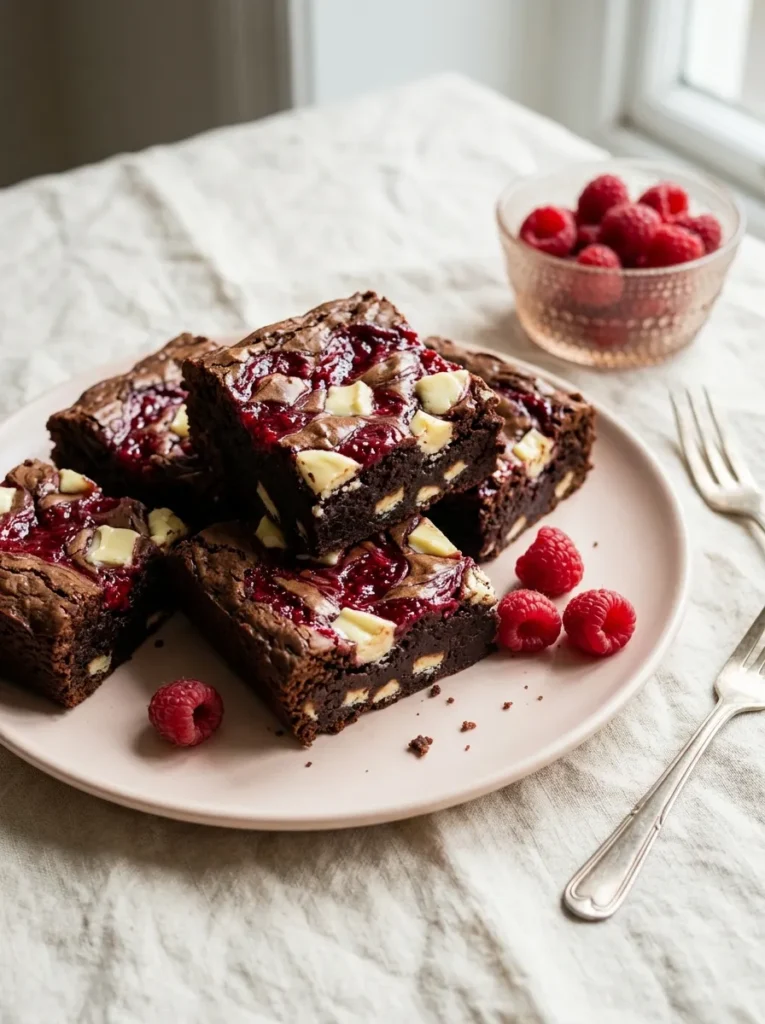
Raspberry and white chocolate bring a sweet-tart contrast to rich chocolate brownies. The bright berries add a natural pop of color, while creamy white chocolate creates little pockets of sweetness throughout the fudgy base. This combination feels elegant enough for a dessert board but remains simple enough for beginner bakers.
Quick Tip:
Use thick raspberry jam or a reduced raspberry sauce to keep the brownie batter from becoming watery. If using fresh raspberries, pat them dry and press them gently into the surface instead of stirring them aggressively into the batter.
For an attractive finish, reserve a few berries for the top and scatter white chocolate chunks across the batter before baking. The red fruit stands out against the dark chocolate, creating a naturally colorful dessert without needing artificial decorations. Allow the brownies to cool fully before slicing so the melted chocolate sets and the berry-studded squares hold their shape.
Ingredients
- 1/2 cup (113 g) unsalted butter
- 3/4 cup (150 g) granulated sugar
- 2 large eggs
- 1 teaspoon vanilla extract
- 1/3 cup (30 g) unsweetened cocoa powder
- 1/2 cup (65 g) all-purpose flour
- 1/4 teaspoon salt
- 1/2 cup (85 g) white chocolate chunks
- 1/4 cup (60 g) thick raspberry jam
- 1/3 cup (40 g) fresh raspberries, patted dry
How to Make It
- Preheat the oven to 350°F (175°C). Line an 8-inch square baking pan with parchment paper.
- Melt the butter and whisk it with the sugar. Add the eggs and vanilla, then mix in the cocoa powder, flour, and salt.
- Fold in half of the white chocolate chunks. Spread the batter evenly into the prepared pan.
- Drop small spoonfuls of raspberry jam over the surface and swirl gently with a toothpick.
- Scatter the remaining white chocolate chunks and fresh raspberries over the top, pressing them in lightly.
- Bake for 22 to 28 minutes, until the edges are set and the center is still slightly fudgy.
- Cool completely before cutting into squares. Refrigerate leftovers in a covered container because of the fresh fruit.
Mocha Espresso Brownies

Mocha brownies bring the deep flavor of chocolate together with the roasted notes of coffee. A small amount of espresso powder intensifies the chocolate taste without making the dessert taste like a cup of coffee. Their dark finish and simple cocoa dusting create a grown-up café look that teens can enjoy with a glass of milk or a favorite cold drink.
Coffee flavor can become overpowering if too much is added, so begin with a modest amount of instant espresso powder. Mix it into the melted butter while it is still warm to help it dissolve evenly. For a polished presentation, dust the cooled brownies lightly with cocoa powder and add chocolate-covered coffee beans only as an optional decoration for those who enjoy them.
Ingredients
- 1/2 cup (113 g) unsalted butter
- 3/4 cup (150 g) granulated sugar
- 2 large eggs
- 1 teaspoon vanilla extract
- 1/3 cup (30 g) unsweetened cocoa powder
- 1/2 cup (65 g) all-purpose flour
- 1/4 teaspoon salt
- 1 to 2 teaspoons instant espresso powder
- 1/3 cup (55 g) dark chocolate chunks
- 1 teaspoon cocoa powder, for dusting
- Chocolate-covered coffee beans, optional
How to Make It
- Preheat the oven to 350°F (175°C). Line an 8-inch square pan with parchment paper.
- Melt the butter and stir in the espresso powder until dissolved. Let the mixture cool slightly.
- Whisk in the sugar, eggs, and vanilla until combined.
- Fold in the cocoa powder, flour, and salt. Stir in the dark chocolate chunks.
- Spread the batter evenly in the prepared pan and bake for 22 to 28 minutes, until the edges are set and a toothpick comes out with a few moist crumbs.
- Cool completely, then dust lightly with cocoa powder.
- Add chocolate-covered coffee beans as a decorative topping if desired, and slice into squares.
Cinnamon Roll Swirl Brownies
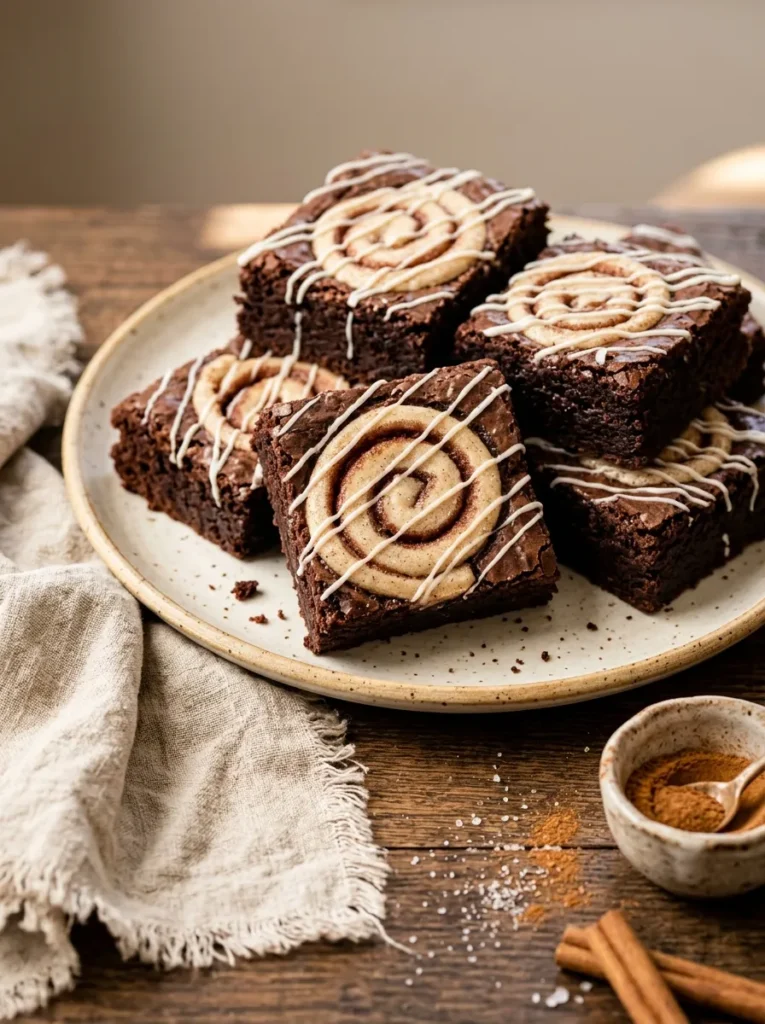
Cinnamon roll brownies combine rich cocoa with the sweet, warmly spiced flavor of a classic cinnamon roll. The swirling pattern gives each square a decorative finish, while a thin vanilla glaze adds a bakery-style touch. They are a fun choice for autumn baking, weekend treats, or sharing with friends over hot chocolate.
1. Prepare the brownie base. Melt the butter and mix it with the sugar, eggs, and vanilla. Fold in the cocoa powder, flour, and salt until just combined.
2. Make the cinnamon filling. Stir brown sugar, cinnamon, and softened butter into a thick paste that is easy to spoon over the batter.
3. Create the swirl. Spread the brownie batter in a lined pan, add small ribbons of cinnamon filling, and drag a toothpick through them in loose spirals.
4. Bake and cool. Bake until the edges are set and the center remains slightly fudgy. Cool completely before adding the glaze.
5. Finish with icing. Drizzle a simple powdered sugar and milk glaze over the cooled brownies for a sweet, bakery-inspired finish.
The secret is to keep the cinnamon filling in thin ribbons rather than thick layers. Too much filling can make the center overly soft. A few well-defined swirls look attractive when the brownies are sliced, especially against the dark chocolate base.
Ingredients
For the brownies:
- 1/2 cup (113 g) unsalted butter
- 3/4 cup (150 g) granulated sugar
- 2 large eggs
- 1 teaspoon vanilla extract
- 1/3 cup (30 g) unsweetened cocoa powder
- 1/2 cup (65 g) all-purpose flour
- 1/4 teaspoon salt
For the cinnamon swirl:
- 2 tablespoons softened butter
- 1/4 cup (50 g) brown sugar
- 1 teaspoon ground cinnamon
For the glaze:
- 1/3 cup (40 g) powdered sugar
- 1 to 2 teaspoons milk
- A few drops of vanilla extract
How to Make It
- Preheat the oven to 350°F (175°C). Line an 8-inch square baking pan with parchment paper.
- Melt the brownie butter and whisk in the sugar, eggs, and vanilla.
- Stir in the cocoa powder, flour, and salt until just combined. Spread the batter into the prepared pan.
- Mix the softened butter, brown sugar, and cinnamon in a small bowl.
- Drop small spoonfuls of the cinnamon mixture over the batter. Use a toothpick to create gentle swirls.
- Bake for 22 to 28 minutes, until the edges are set and a toothpick inserted near the center comes out with a few moist crumbs.
- Cool completely. Mix the powdered sugar with milk and vanilla, then drizzle the glaze over the brownies.
- Let the glaze set before cutting into squares.
Cookies and Cream Brownies

Cookies and cream brownies deliver the familiar flavor of chocolate sandwich cookies in a rich, fudgy dessert. A pale topping and dark cookie pieces create a striking contrast that looks polished without elaborate decoration. These squares are especially appealing for teen parties, bake sales, and dessert boxes where visual variety matters.
| Option A: Cookie-Studded | Option B: Creamy Topping |
| Fold chopped sandwich cookies into the batter. | Add a thin white chocolate layer after baking. |
| Creates crunchy pieces throughout each square. | Creates a clear black-and-white surface contrast. |
| Best for a simple, one-pan bake. | Best for a more decorative finish. |
For a balanced texture, combine both methods by folding some cookie pieces into the batter and saving the rest for the top. Use a thin coating of melted white chocolate rather than a thick layer, which can overpower the brownie. Let the topping set before slicing to keep the cookie pieces in place.
Ingredients
For the brownies:
- 1/2 cup (113 g) unsalted butter
- 3/4 cup (150 g) granulated sugar
- 2 large eggs
- 1 teaspoon vanilla extract
- 1/3 cup (30 g) unsweetened cocoa powder
- 1/2 cup (65 g) all-purpose flour
- 1/4 teaspoon salt
- 6 chocolate sandwich cookies, roughly chopped
For the topping:
- 1/2 cup (85 g) white chocolate chips
- 4 chocolate sandwich cookies, roughly crushed
How to Make It
- Preheat the oven to 350°F (175°C). Line an 8-inch square pan with parchment paper.
- Melt the butter and whisk it with the sugar. Add the eggs and vanilla, then mix in the cocoa powder, flour, and salt.
- Fold in the chopped sandwich cookies and spread the batter evenly in the pan.
- Bake for 22 to 28 minutes, until the edges are set and the center remains slightly fudgy.
- Cool the brownies completely. Melt the white chocolate in short microwave intervals, stirring until smooth.
- Spread or drizzle the white chocolate over the brownies and scatter the crushed cookies on top.
- Let the topping set before slicing into neat squares.
Lemon Meringue Brownies
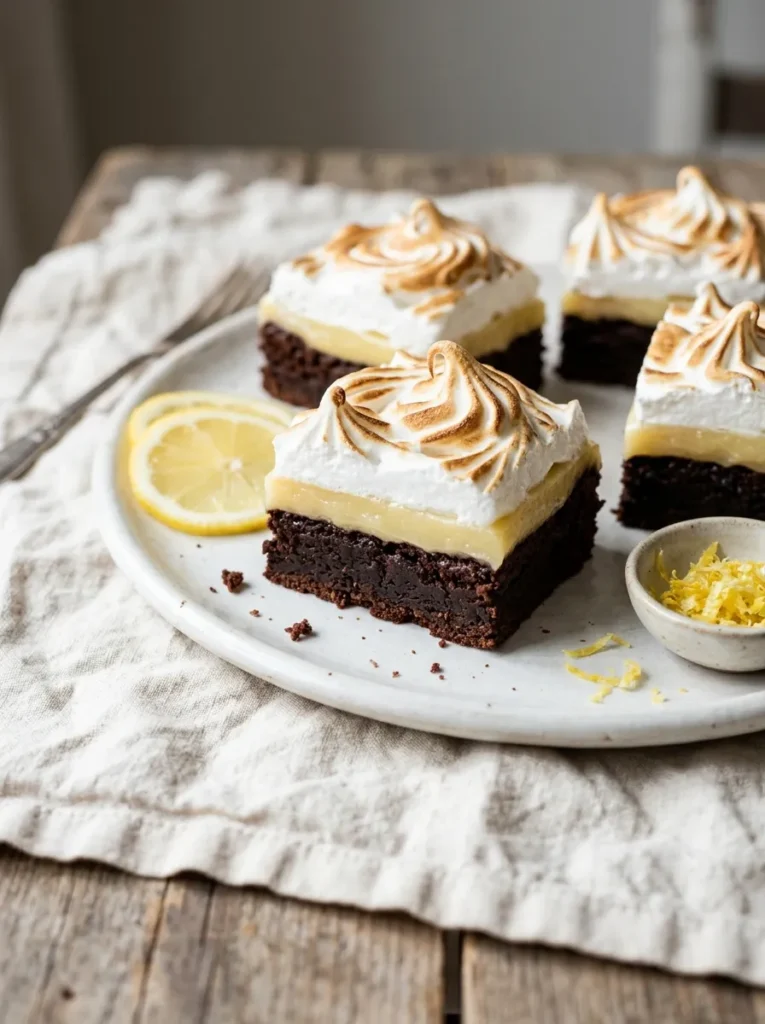
Lemon meringue brownies offer a surprising mix of rich chocolate, bright citrus, and sweet, fluffy meringue. The sunny yellow layer makes them visually distinctive, while the toasted peaks add height and texture. This combination is best for adventurous dessert lovers who enjoy sweet treats with a tangy finish.
DO
- Let the brownies cool completely before adding lemon curd.
- Use thick lemon curd so the topping stays in place.
- Beat the egg whites in a clean, grease-free bowl.
- Toast the meringue carefully for a lightly golden finish.
DON’T
- Spread lemon curd over hot brownies.
- Add liquid lemon juice directly to the meringue.
- Leave the meringue under a broiler unattended.
- Slice immediately while the topping is still soft.
The cleanest presentation comes from keeping each layer distinct. Spread a thin layer of lemon curd over the cooled brownie base, then pipe or spoon small meringue peaks on top. Toast the meringue briefly and allow it to settle before serving. Because this topping is delicate, these brownies are best enjoyed fresh rather than stored for several days.
Ingredients
For the brownies:
- 1/2 cup (113 g) unsalted butter
- 3/4 cup (150 g) granulated sugar
- 2 large eggs
- 1 teaspoon vanilla extract
- 1/3 cup (30 g) unsweetened cocoa powder
- 1/2 cup (65 g) all-purpose flour
- 1/4 teaspoon salt
For the topping:
- 1/3 cup (80 g) prepared lemon curd
- 2 large egg whites
- 1/2 cup (100 g) granulated sugar
- 1/4 teaspoon cream of tartar
- 1/2 teaspoon vanilla extract
- 1 teaspoon finely grated lemon zest, optional
How to Make It
- Preheat the oven to 350°F (175°C). Line an 8-inch square pan with parchment paper.
- Melt the butter and whisk it with the sugar. Add the eggs and vanilla, then stir in the cocoa powder, flour, and salt.
- Spread the batter into the pan and bake for 22 to 28 minutes. Cool completely.
- Spread the lemon curd in a thin, even layer over the cooled brownies.
- Place the egg whites, sugar, and cream of tartar in a heatproof bowl over gently simmering water. Whisk until the sugar dissolves and the mixture reaches 160°F (71°C).
- Beat the warm mixture with an electric mixer until glossy, stiff peaks form. Add the vanilla and optional lemon zest.
- Spoon or pipe the meringue over the lemon curd.
- Briefly toast the meringue with a kitchen torch, or use a broiler for a few seconds while watching constantly.
- Serve once the topping has settled. Refrigerate leftovers promptly in a covered container.
Marble Cheesecake Brownies
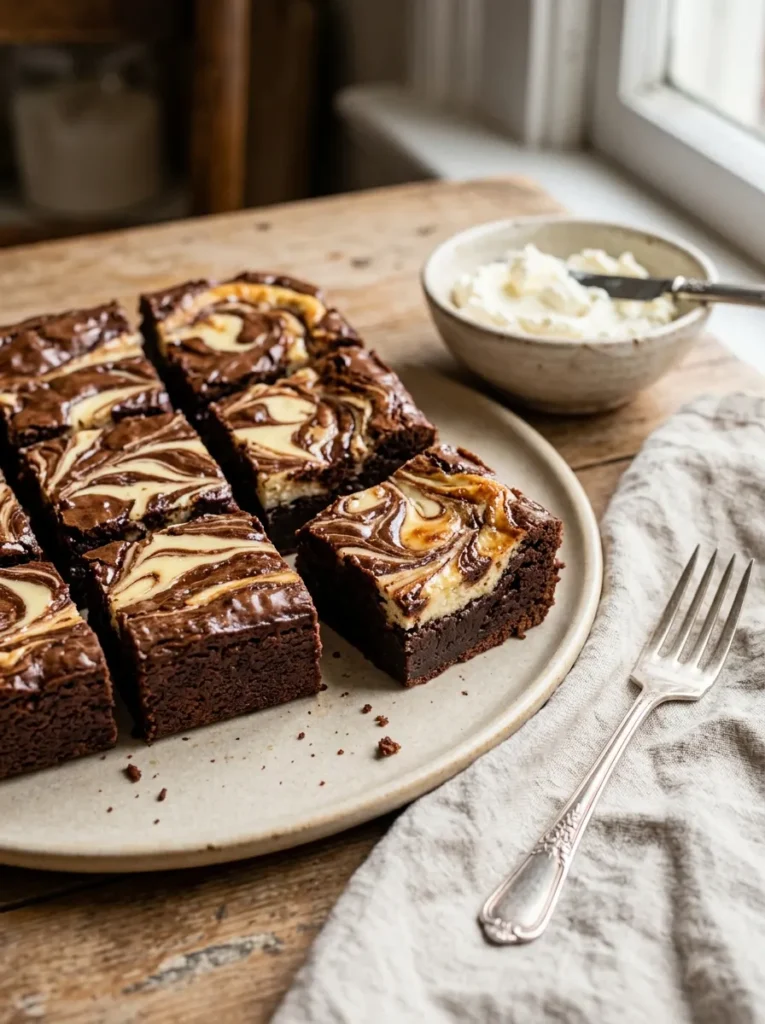
Marble cheesecake brownies bring two dessert favorites together in a single, eye-catching bake. The creamy cheesecake mixture creates pale ribbons against the dark chocolate base, giving every square a slightly different pattern. This style looks impressive on a dessert table but requires only a few extra minutes of preparation.
Cost: Moderate, depending on the cream cheese brand.
Prep Time: 15 to 20 minutes.
Bake Time: 28 to 35 minutes.
Skill Level: Beginner-friendly.
Best For: Birthday platters, weekend baking, and homemade dessert gifts.
For a defined marble effect, place small spoonfuls of cheesecake mixture across the brownie batter rather than spreading it into a complete layer. Make only a few gentle passes with a toothpick. Too much swirling blends the colors together, while a light hand creates the attractive contrast that makes these brownies so photogenic.
Ingredients
For the brownie layer:
- 1/2 cup (113 g) unsalted butter
- 3/4 cup (150 g) granulated sugar
- 2 large eggs
- 1 teaspoon vanilla extract
- 1/3 cup (30 g) unsweetened cocoa powder
- 1/2 cup (65 g) all-purpose flour
- 1/4 teaspoon salt
For the cheesecake swirl:
- 6 oz (170 g) cream cheese, softened
- 1/4 cup (50 g) granulated sugar
- 1 egg yolk
- 1/2 teaspoon vanilla extract
How to Make It
- Preheat the oven to 350°F (175°C). Line an 8-inch square baking pan with parchment paper.
- Melt the butter and whisk it with the sugar. Add the eggs and vanilla, then stir in the cocoa powder, flour, and salt.
- Spread the brownie batter evenly into the prepared pan.
- Beat the softened cream cheese with the sugar until smooth. Mix in the egg yolk and vanilla.
- Spoon the cheesecake mixture over the brownie batter in small dollops.
- Drag a toothpick through the dollops in gentle curves to create a marble pattern.
- Bake for 28 to 35 minutes, until the edges are set and the cheesecake layer no longer looks liquid.
- Cool completely, refrigerate until firm, and cut into neat squares with a clean knife.
Churro Sugar Brownies
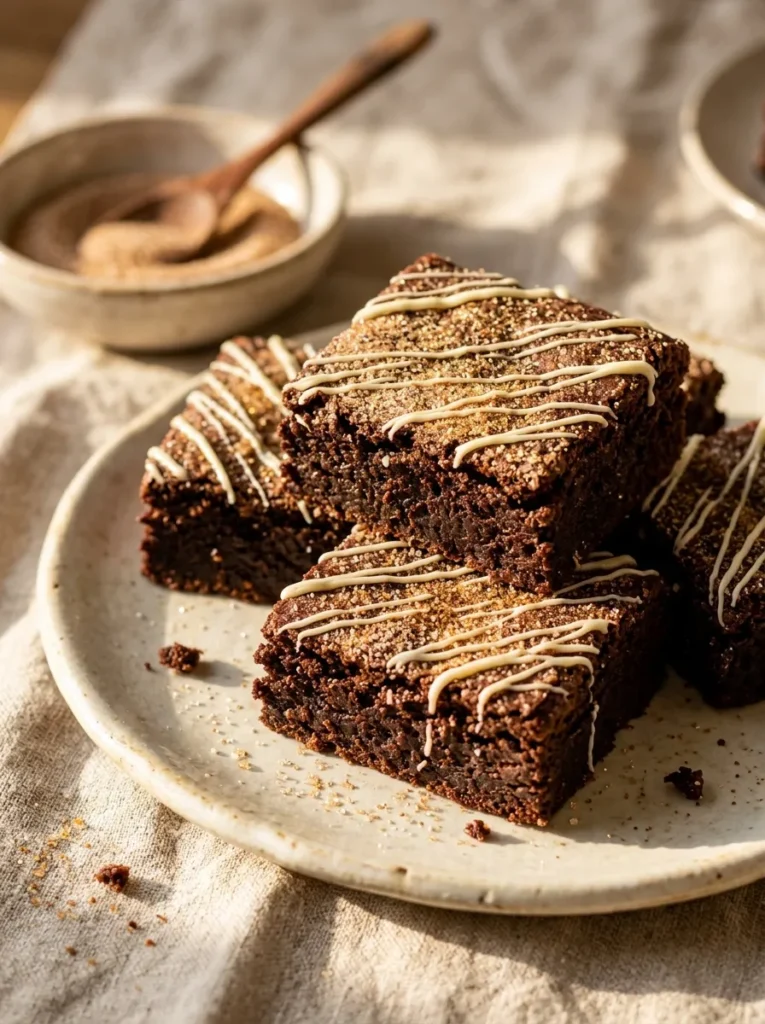
Churro-inspired brownies pair rich chocolate with the familiar warmth of cinnamon sugar. The light coating creates a slightly crisp, sweet finish, while a thin white chocolate drizzle adds contrast without overwhelming the flavor. These brownies are easy to decorate and work well for cozy movie nights or casual gatherings with friends.
DO
- Mix the cinnamon and sugar thoroughly for an even coating.
- Sprinkle the mixture while the brownie surface is still slightly warm if you want it to adhere.
- Add a little white chocolate drizzle after the brownies have cooled.
- Cut the brownies into equal squares before arranging them on a platter.
DON’T
- Use too much cinnamon, which can overpower the chocolate.
- Apply a heavy coating that hides the brownie surface.
- Pour melted white chocolate over hot brownies.
- Slice with a blunt knife that compresses the fudgy center.
A fine cinnamon-sugar layer gives these brownies their churro-inspired finish without requiring deep frying or extra equipment. For a stronger crunch, sprinkle a little of the mixture over the batter during the last few minutes of baking. Finish with a delicate drizzle and serve once the chocolate has set.
Ingredients
For the brownies:
- 1/2 cup (113 g) unsalted butter
- 3/4 cup (150 g) granulated sugar
- 2 large eggs
- 1 teaspoon vanilla extract
- 1/3 cup (30 g) unsweetened cocoa powder
- 1/2 cup (65 g) all-purpose flour
- 1/4 teaspoon salt
For the topping:
- 2 tablespoons granulated sugar
- 1 teaspoon ground cinnamon
- 1/4 cup (45 g) white chocolate chips
How to Make It
- Preheat the oven to 350°F (175°C). Line an 8-inch square pan with parchment paper.
- Melt the butter and whisk in the sugar, eggs, and vanilla.
- Stir in the cocoa powder, flour, and salt until just combined.
- Spread the batter into the pan and bake for 22 to 28 minutes, until the edges are set and the center remains slightly fudgy.
- Mix the cinnamon and sugar in a small bowl.
- While the brownies are still slightly warm, sprinkle the cinnamon-sugar mixture lightly over the top.
- Cool completely. Melt the white chocolate in short microwave intervals and drizzle it over the brownies.
- Allow the chocolate to set before slicing into squares.
Nutella Hazelnut Brownies
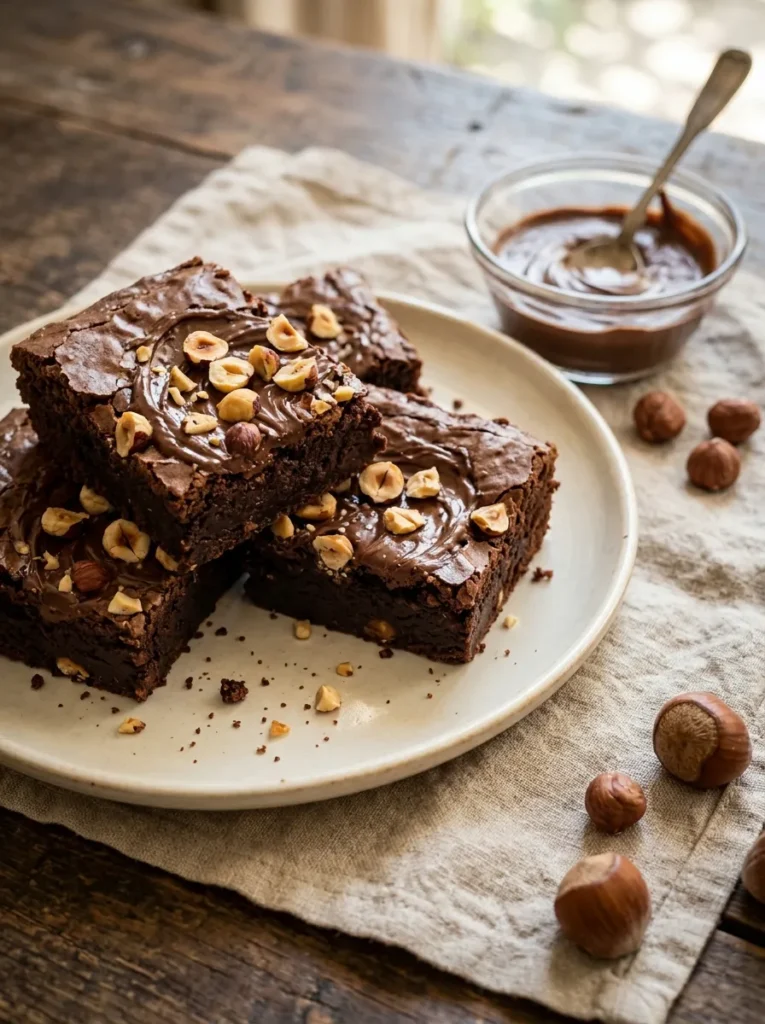
Chocolate hazelnut brownies offer a rich, nutty flavor and a glossy finish with very little decorating effort. A few spoonfuls of chocolate hazelnut spread create attractive swirls, while toasted hazelnuts provide a crunchy contrast to the soft brownie center. This combination suits chocolate lovers who prefer a simple recipe with a bakery-style appearance.
Cost: Moderate, depending on the chocolate hazelnut spread.
Prep Time: 15 minutes.
Bake Time: 22 to 28 minutes.
Skill Level: Easy.
Best For: Chocolate lovers, dessert boxes, and casual parties.
For the most noticeable hazelnut flavor, toast the chopped nuts briefly in a dry skillet, then let them cool before adding them to the brownies. Warm the spread just enough to make it easy to spoon, but avoid making it runny. A few deliberate swirls will give the top a polished look without hiding the chocolate base.
Ingredients
- 1/2 cup (113 g) unsalted butter
- 3/4 cup (150 g) granulated sugar
- 2 large eggs
- 1 teaspoon vanilla extract
- 1/3 cup (30 g) unsweetened cocoa powder
- 1/2 cup (65 g) all-purpose flour
- 1/4 teaspoon salt
- 1/3 cup (100 g) chocolate hazelnut spread
- 1/3 cup (40 g) chopped hazelnuts, toasted and cooled
How to Make It
- Preheat the oven to 350°F (175°C). Line an 8-inch square baking pan with parchment paper.
- Melt the butter and whisk it with the sugar. Add the eggs and vanilla, then stir in the cocoa powder, flour, and salt.
- Fold half of the chopped hazelnuts into the batter and spread it evenly in the pan.
- Warm the chocolate hazelnut spread briefly until spoonable. Drop small spoonfuls over the brownie batter.
- Swirl gently with a toothpick and scatter the remaining hazelnuts over the surface.
- Bake for 22 to 28 minutes, until the edges are set and a toothpick comes out with a few moist crumbs.
- Cool completely before cutting into squares.
Black Forest Brownies
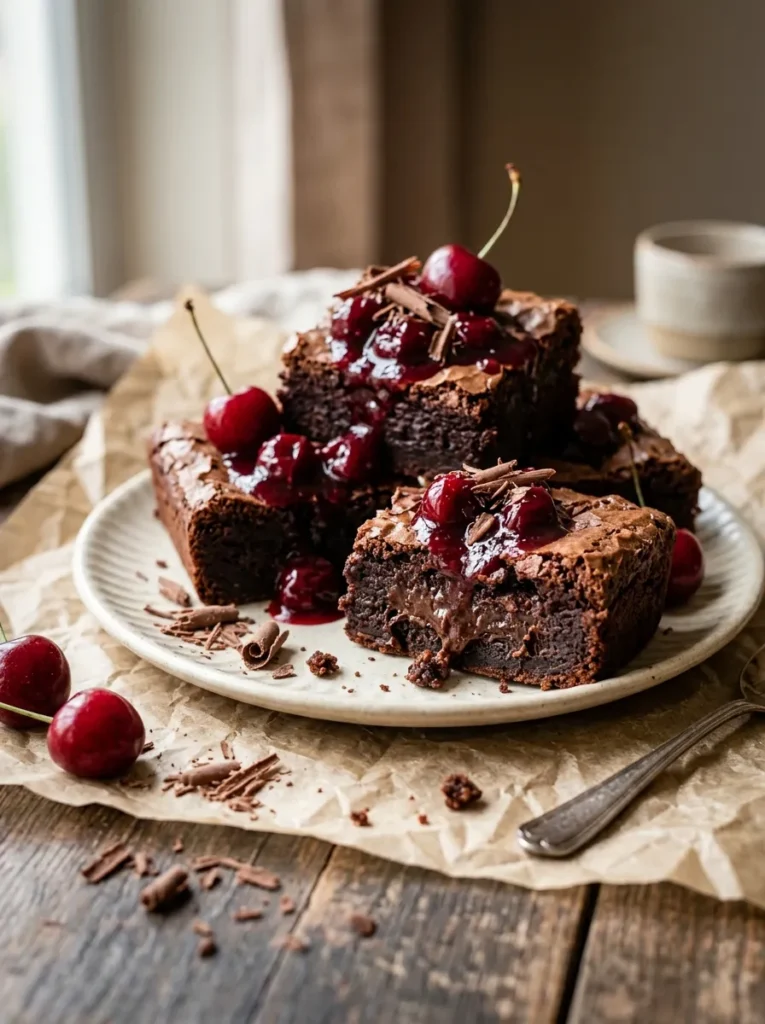
These brownies bring the charm of a classic Black Forest cake into a rich, chocolatey treat that looks gorgeous on any dessert table. Sweet cherries add a fruity contrast to the deep cocoa flavor, while chocolate shavings make every square look bakery-worthy.
For the prettiest finish, spoon a little cherry topping over each cooled brownie and scatter chocolate curls across the top. Serve them at teen sleepovers, birthday parties, or movie nights when you want a dessert that feels special without requiring complicated decorating skills.
Ingredients
- ½ cup unsalted butter
- 1 cup granulated sugar
- 2 large eggs
- 1 teaspoon vanilla extract
- ⅓ cup unsweetened cocoa powder
- ½ cup all-purpose flour
- ¼ teaspoon salt
- ½ cup dark chocolate chips
- ¾ cup cherry pie filling or thick cherry compote
- 2 tablespoons chocolate shavings
How to Make It
- Preheat the oven to 350°F (175°C). Line an 8-inch square baking pan with parchment paper.
- Melt the butter and let it cool slightly. Whisk in the sugar, eggs, and vanilla until smooth.
- Stir in the cocoa powder, flour, and salt until just combined. Fold in the chocolate chips.
- Spread the batter evenly in the prepared pan and bake for 20 to 25 minutes, until the edges are set and a toothpick comes out with moist crumbs.
- Cool completely, then spoon cherry filling over the brownies and sprinkle with chocolate shavings. Slice into squares and serve.
Cotton Candy Swirl Brownies
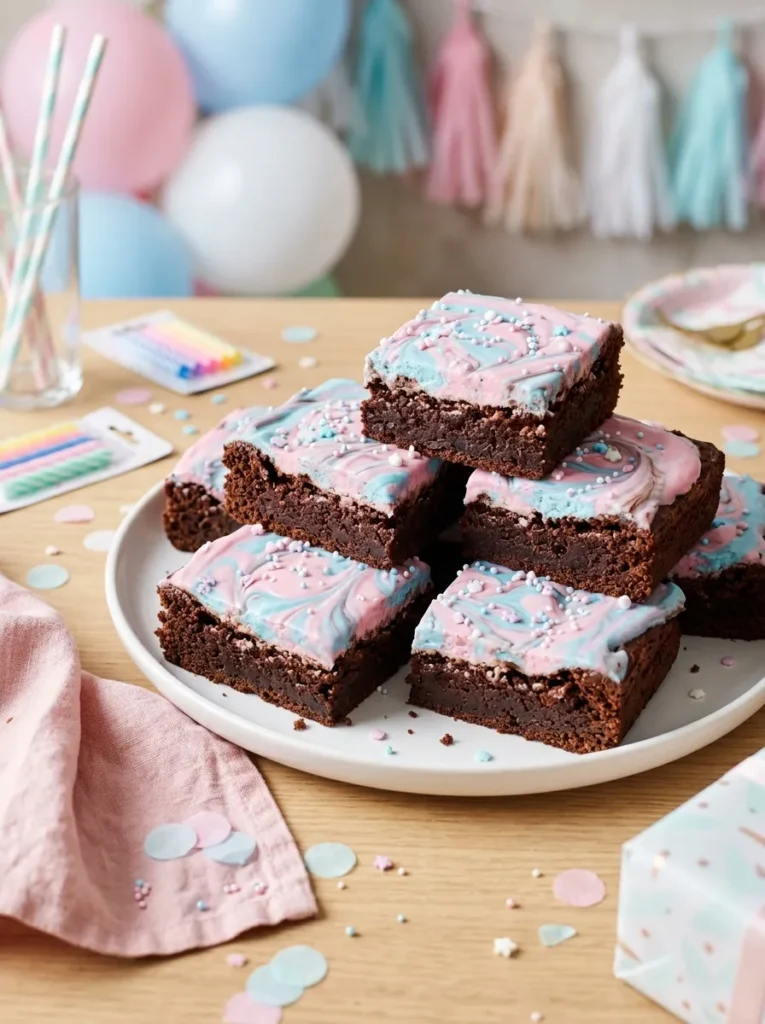
Pastel colors make these brownies feel like a sweet little celebration, even before the first bite. A creamy pink and blue topping creates a dreamy cotton candy look against the dark chocolate base, making each square stand out in photos.
- Use gel food coloring for brighter pastel shades without thinning the topping.
- Keep the chocolate brownie layer fully cooled before adding the swirl.
- Drag a toothpick gently through the two colors for a marbled finish.
- Add sprinkles while the topping is still soft so they stick.
These treats work beautifully for birthday parties, sleepovers, or a pastel-themed dessert board. Cut them into small squares and arrange them in alternating directions for a playful presentation that looks especially cute in Pinterest photos.
Ingredients
- ½ cup unsalted butter
- ¾ cup granulated sugar
- 2 large eggs
- 1 teaspoon vanilla extract
- ⅓ cup unsweetened cocoa powder
- ½ cup all-purpose flour
- ¼ teaspoon salt
- ½ cup white chocolate chips
- 3 tablespoons heavy cream
- Pink and blue gel food coloring
- 1 tablespoon pastel sprinkles
How to Make It
- Preheat the oven to 350°F (175°C). Line an 8-inch square pan with parchment paper.
- Melt the butter, then whisk in the sugar, eggs, and vanilla.
- Add the cocoa powder, flour, and salt. Stir until combined, then spread the batter in the pan.
- Bake for 20 to 25 minutes. Let the brownies cool completely.
- Melt the white chocolate chips with the heavy cream in short microwave intervals, stirring until smooth.
- Divide the mixture between two bowls and tint one pink and the other blue.
- Spoon both colors over the cooled brownies. Swirl gently with a toothpick, add sprinkles, and chill until the topping sets before slicing.
Pistachio Cream Brownies

A layer of nutty pistachio cream gives these brownies a sophisticated look with very little decorating effort. The vibrant green topping contrasts beautifully with the dark chocolate base, while chopped pistachios add a delicate crunch to each bite.
DO
- Choose a thick pistachio spread that holds its shape when chilled.
- Let the brownies cool completely before spreading the topping.
- Sprinkle chopped pistachios over the cream for texture.
- Chill the finished brownies before cutting clean squares.
DON’T
- Spread the cream over warm brownies, as it may become runny.
- Add too much topping if you want neat, easy-to-hold slices.
- Cut the brownies before the pistachio layer firms up.
These brownies are a lovely option for dessert boxes, weekend baking, or sharing with friends who enjoy nutty flavors. For an extra polished finish, drizzle a little melted dark chocolate over the green layer and wipe the knife between cuts.
Ingredients
- ½ cup unsalted butter
- 1 cup granulated sugar
- 2 large eggs
- 1 teaspoon vanilla extract
- ⅓ cup unsweetened cocoa powder
- ½ cup all-purpose flour
- ¼ teaspoon salt
- ½ cup pistachio cream or pistachio spread
- 2 tablespoons chopped pistachios
- 2 tablespoons melted dark chocolate, optional
How to Make It
- Preheat the oven to 350°F (175°C). Line an 8-inch square pan with parchment paper.
- Melt the butter, then whisk it with the sugar, eggs, and vanilla.
- Mix in the cocoa powder, flour, and salt until no dry streaks remain.
- Spread the batter evenly in the pan and bake for 20 to 25 minutes. Cool completely.
- Stir the pistachio cream until spreadable, then gently spread it over the brownies.
- Sprinkle with chopped pistachios and drizzle with melted dark chocolate, if desired.
- Refrigerate for 30 to 45 minutes to help the topping set, then slice into squares.
Tiramisu Brownies
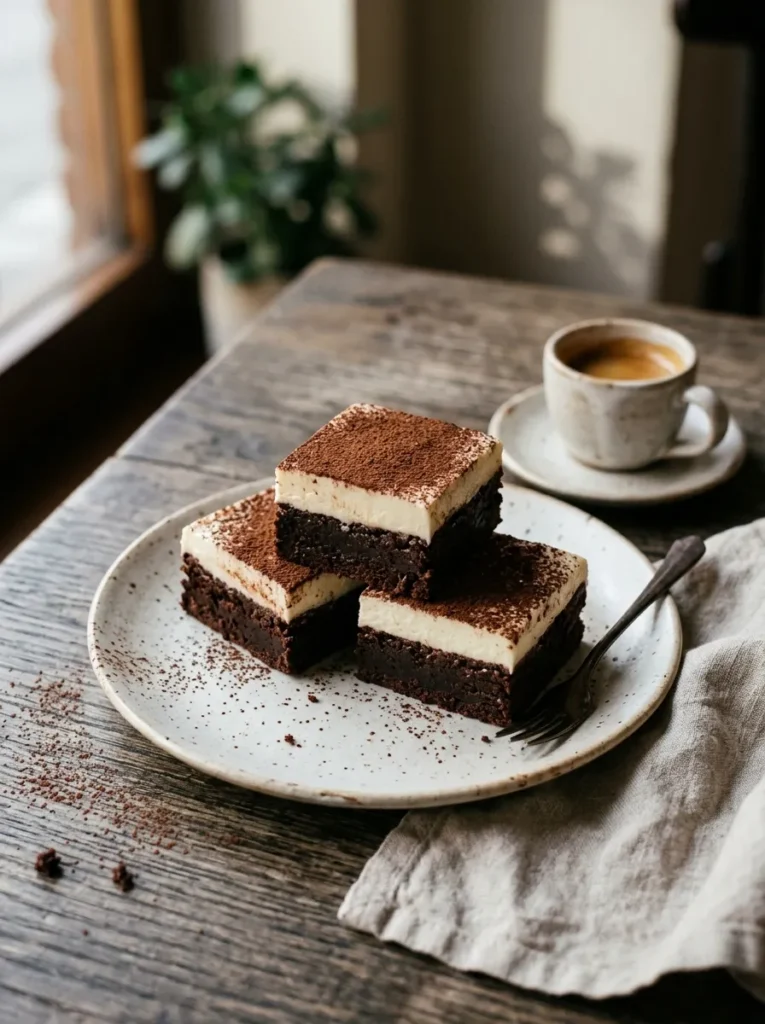
Coffee lovers will adore the dessert-inspired twist in these tiramisu brownies. A deep chocolate base pairs beautifully with a creamy topping and a gentle cocoa finish, creating a treat that looks elegant without requiring fancy baking decorations.
For the best presentation, spread the cream in an even layer and dust the top with cocoa just before serving. The contrast between the dark base and pale topping makes each square look polished in dessert boxes, at birthday gatherings, or on a cozy weekend treat board.
Ingredients
- ½ cup unsalted butter
- ¾ cup granulated sugar
- 2 large eggs
- 1 teaspoon vanilla extract
- ⅓ cup unsweetened cocoa powder
- ½ cup all-purpose flour
- ¼ teaspoon salt
- 1 teaspoon instant espresso powder
- 4 ounces cream cheese, softened
- ¼ cup mascarpone cheese
- 3 tablespoons powdered sugar
- ¼ teaspoon vanilla extract
- 1 teaspoon unsweetened cocoa powder, for dusting
How to Make It
- Preheat the oven to 350°F (175°C). Line an 8-inch square baking pan with parchment paper.
- Melt the butter and let it cool slightly. Whisk in the granulated sugar, eggs, and vanilla.
- Stir in the cocoa powder, flour, salt, and espresso powder until just combined.
- Spread the batter in the pan and bake for 20 to 25 minutes, until the edges are set and the center is just cooked. Cool completely.
- Beat the cream cheese, mascarpone, powdered sugar, and vanilla until smooth and creamy.
- Spread the topping over the cooled brownies and refrigerate for at least 30 minutes.
- Dust lightly with cocoa powder, slice into squares, and keep refrigerated until serving.
CONCLUSION
Beautiful brownies don’t have to be complicated. With these 22 ideas, you can explore playful colors, creamy toppings, fruity flavors, and chocolatey combinations to make treats that feel personal and fun. Whether you’re baking for friends or enjoying a cozy afternoon in the kitchen, there’s an idea here to match your mood and skill level.
Start with the recipe that catches your eye, then experiment with your favorite toppings to make it your own. Save these Aesthetic Brownie Recipe Ideas on Pinterest for your next baking day, and share this collection with friends who love sweet treats. Happy baking, and enjoy every delicious bite!