23 Aesthetic Cake Ideas Recipe Fans Will Treasure Today
A beautiful cake can turn an ordinary afternoon into a sweet memory. From delicate pastel frosting to glossy chocolate finishes, the right design makes every slice feel special.
These Aesthetic Cake Ideas Recipe inspirations bring together eye-catching decorations, delicious flavor combinations, and practical baking ideas for your next celebration. Whether you’re planning a birthday, hosting afternoon tea, or simply craving a homemade treat, you’ll find plenty of styles to match your taste and skill level.
Sometimes, the smallest details make the biggest difference. A sprinkle of edible flowers, a smooth buttercream finish, or fresh fruit between the layers can make a homemade cake look bakery-worthy. I’ve noticed that simple decorations often create the most charming results without requiring professional equipment. Explore these 23 ideas, discover a new favorite, and find inspiration for a cake you’ll be excited to bake, share, and save for later.
Lemon Blueberry Layer Cake

Lemon and blueberry create a beautiful balance of bright citrus and juicy sweetness. The purple filling also gives each slice a striking contrast against the golden sponge, making this cake especially appealing for spring birthdays and afternoon celebrations.
For neat layers, cool the sponge completely before assembling and chill the blueberry filling until thick. A thin coat of buttercream helps seal in crumbs, while a few fresh berries on top provide a natural finish without complicated piping.
Ingredients
For the cake:
- 2 cups (250 g) all-purpose flour
- 1 cup (200 g) granulated sugar
- 1/2 cup (113 g) unsalted butter, softened
- 2 large eggs
- 3/4 cup (180 ml) milk
- 2 tablespoons lemon juice
- 1 tablespoon lemon zest
- 2 teaspoons baking powder
- 1 teaspoon vanilla extract
- 1/4 teaspoon salt
For the blueberry filling:
- 1 1/2 cups (225 g) blueberries
- 3 tablespoons sugar
- 1 tablespoon lemon juice
- 1 teaspoon cornstarch mixed with 1 tablespoon water
For the frosting:
- 1 cup (226 g) unsalted butter, softened
- 3 cups (360 g) powdered sugar
- 2 tablespoons milk
- 1 teaspoon vanilla extract
- Fresh blueberries and lemon slices for decoration
How to Make
- Preheat the oven to 350°F (175°C). Grease and line two 8-inch round cake pans.
- Cream the butter and sugar until fluffy. Beat in the eggs, vanilla, lemon zest, and lemon juice.
- Mix the flour, baking powder, and salt in a separate bowl. Add to the butter mixture alternately with the milk.
- Divide the batter between the pans and bake for 25 to 30 minutes, or until a toothpick comes out clean. Cool completely.
- Simmer the blueberries, sugar, and lemon juice in a saucepan. Stir in the cornstarch mixture and cook until thick. Cool fully.
- Beat the frosting ingredients until smooth and fluffy.
- Layer the cakes with blueberry filling and frosting. Cover the outside with pale yellow frosting and decorate with fresh berries and lemon slices.
ALSO READ : Crockpot Chicken Recipes
Matcha Strawberry Cream Cake
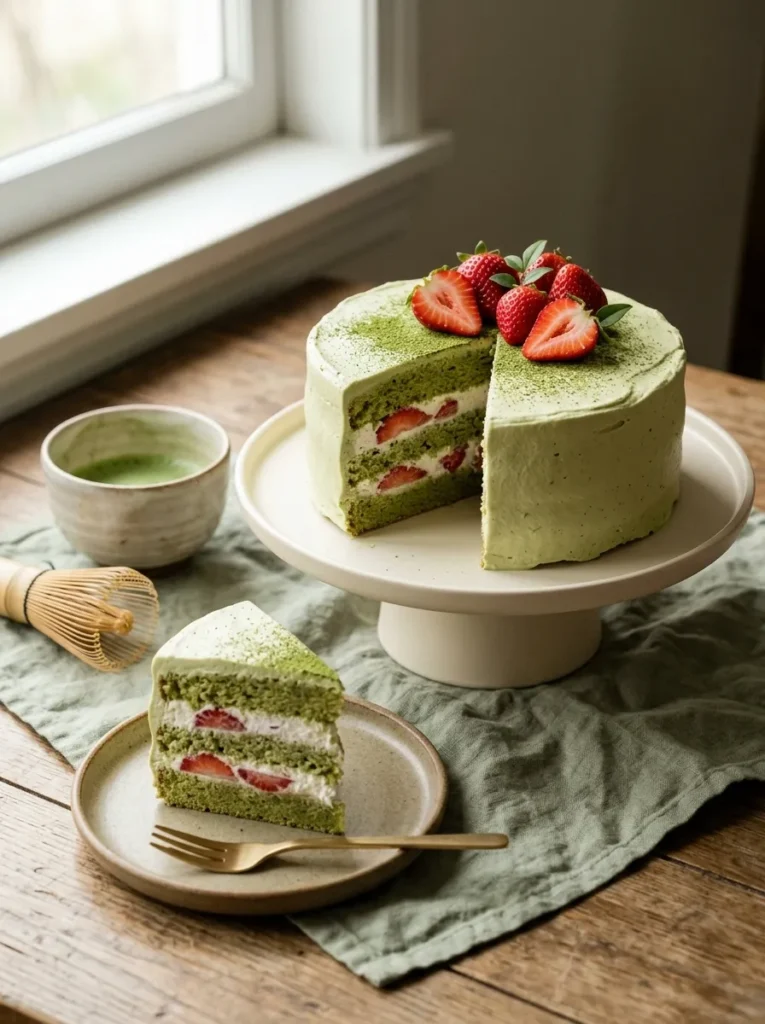
Earthy green tea and sweet strawberries give this cake a distinctive flavor and a fresh, modern appearance. The pale cream layers soften the matcha color, while the red berries create a striking accent that looks lovely in close-up food photography.
- Use culinary-grade matcha: Sift it with the flour to prevent green clumps.
- Choose ripe strawberries: Firm berries hold their shape better between layers.
- Keep the cream cold: Chilled cream whips more reliably and helps the filling stay stable.
- Build even layers: Level the cooled sponge before spreading the filling.
- Decorate sparingly: A few strawberry halves and a light dusting of matcha keep the finish clean.
Ingredients
For the cake:
- 1 1/2 cups (190 g) all-purpose flour
- 1 tablespoon culinary-grade matcha powder
- 3/4 cup (150 g) granulated sugar
- 1/2 cup (113 g) unsalted butter, softened
- 2 large eggs
- 1/2 cup (120 ml) milk
- 1 1/2 teaspoons baking powder
- 1 teaspoon vanilla extract
- 1/4 teaspoon salt
For the filling:
- 1 cup (240 ml) cold heavy whipping cream
- 3 tablespoons powdered sugar
- 1 teaspoon vanilla extract
- 1 cup (150 g) fresh strawberries, sliced
For decoration:
- 4 to 5 fresh strawberries
- A little sifted matcha powder
How to Make
- Preheat the oven to 350°F (175°C). Grease and line two 7-inch round cake pans.
- Sift the flour, matcha, baking powder, and salt together.
- Beat the butter and sugar until creamy. Add the eggs one at a time, followed by the vanilla.
- Mix in the dry ingredients alternately with the milk until just combined.
- Divide the batter between the pans and bake for 22 to 28 minutes. Cool completely before assembling.
- Whip the cold cream with powdered sugar and vanilla until medium-stiff peaks form.
- Spread whipped cream over the first cake layer, arrange the sliced strawberries, and place the second layer on top.
- Finish with a thin cream coating, fresh strawberries, and a light matcha dusting. Refrigerate until serving.
Pinterest Account : FreshRecipeIdeas1
Raspberry White Chocolate Cake
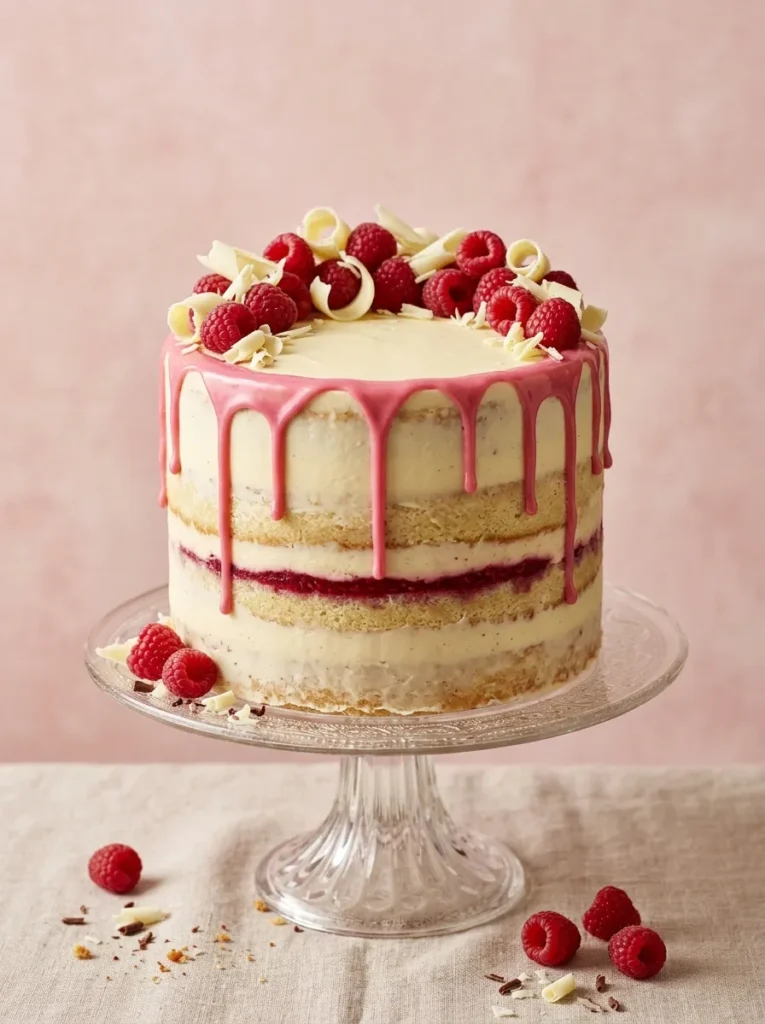
White chocolate frosting and tart raspberries create a lovely contrast in both flavor and color. The blush filling peeking between the layers gives this dessert a polished bakery look, while white chocolate curls add texture without requiring elaborate decorating tools.
Quick Tip:
Let the raspberry filling cool completely before spreading it onto the cake. Warm filling can soften the frosting and cause the layers to slide. For a tidy drip effect, test a little ganache on the chilled cake before decorating the entire edge.
Ingredients
For the cake:
- 2 cups (250 g) all-purpose flour
- 1 cup (200 g) granulated sugar
- 1/2 cup (113 g) unsalted butter, softened
- 2 large eggs
- 3/4 cup (180 ml) milk
- 2 teaspoons baking powder
- 1 teaspoon vanilla extract
- 1/4 teaspoon salt
For the raspberry filling:
- 1 1/2 cups (180 g) raspberries, fresh or frozen
- 1/4 cup (50 g) granulated sugar
- 1 tablespoon lemon juice
- 1 teaspoon cornstarch mixed with 1 tablespoon water
For the frosting:
- 1 cup (226 g) unsalted butter, softened
- 3 cups (360 g) powdered sugar
- 100 g white chocolate, melted and cooled
- 2 tablespoons milk, as needed
For the drip and decoration:
- 100 g white chocolate
- 60 ml heavy cream
- Fresh raspberries
- White chocolate curls
How to Make
- Preheat the oven to 350°F (175°C). Grease and line two 8-inch round cake pans.
- Beat the butter and sugar until fluffy. Add the eggs and vanilla, then mix in the flour, baking powder, salt, and milk until combined.
- Divide the batter between the pans and bake for 25 to 30 minutes. Cool completely.
- Simmer the raspberries, sugar, and lemon juice until the fruit breaks down. Stir in the cornstarch mixture and cook until thick. Cool fully.
- Beat the butter and powdered sugar until fluffy. Mix in the cooled melted white chocolate, adding a little milk if needed.
- Spread frosting and raspberry filling between the cake layers. Cover the outside with a smooth layer of frosting and chill.
- Heat the cream until steaming, pour it over the white chocolate, and stir until smooth. Cool until slightly thickened.
- Drizzle the ganache around the chilled cake’s top edge. Finish with raspberries and white chocolate curls.
Peach Melba Cake

Sweet peaches and tangy raspberries bring a fresh seasonal flavor to this delicate layer cake. The combination of golden fruit and pink filling creates beautiful colors in every slice, making it a lovely centerpiece for summer birthdays, garden parties, or afternoon tea.
BEFORE
A plain vanilla cake can look a little simple when served without filling or decoration. Thick frosting alone may also overpower the delicate flavor of fresh fruit.
AFTER
Peach slices and raspberry cream create colorful layers, while peach-tinted buttercream gives the outside a coordinated finish. Fresh fruit on top adds texture without requiring advanced piping skills.
For the best result, choose ripe peaches that still feel firm enough to slice neatly. Drain any excess juice before layering to prevent a soggy sponge. Chill the assembled cake for at least 30 minutes before cutting, and add fresh peach decorations shortly before serving to maintain their color and texture.
Ingredients
For the cake:
- 2 cups (250 g) all-purpose flour
- 1 cup (200 g) granulated sugar
- 1/2 cup (113 g) unsalted butter, softened
- 2 large eggs
- 3/4 cup (180 ml) milk
- 2 teaspoons baking powder
- 1 teaspoon vanilla extract
- 1/4 teaspoon salt
For the filling:
- 2 medium ripe peaches, thinly sliced
- 1 cup (240 ml) cold heavy whipping cream
- 3 tablespoons powdered sugar
- 1/2 cup (60 g) raspberries
For the frosting:
- 1 cup (226 g) unsalted butter, softened
- 3 cups (360 g) powdered sugar
- 2 tablespoons milk
- A small drop of peach-colored gel food coloring
How to Make
- Preheat the oven to 350°F (175°C). Grease and line two 8-inch round cake pans.
- Beat the butter and sugar until fluffy. Add the eggs and vanilla, then mix in the flour, baking powder, salt, and milk.
- Divide the batter between the pans and bake for 25 to 30 minutes. Cool completely.
- Whip the cream with powdered sugar until medium-stiff peaks form. Gently fold in the raspberries.
- Beat the frosting ingredients together until smooth, adding the peach coloring gradually.
- Spread raspberry cream and peach slices between the cake layers.
- Cover the cake with peach buttercream and decorate with fresh peach wedges and raspberries.
- Refrigerate until serving and keep leftovers chilled.
Chocolate Cherry Drip Cake
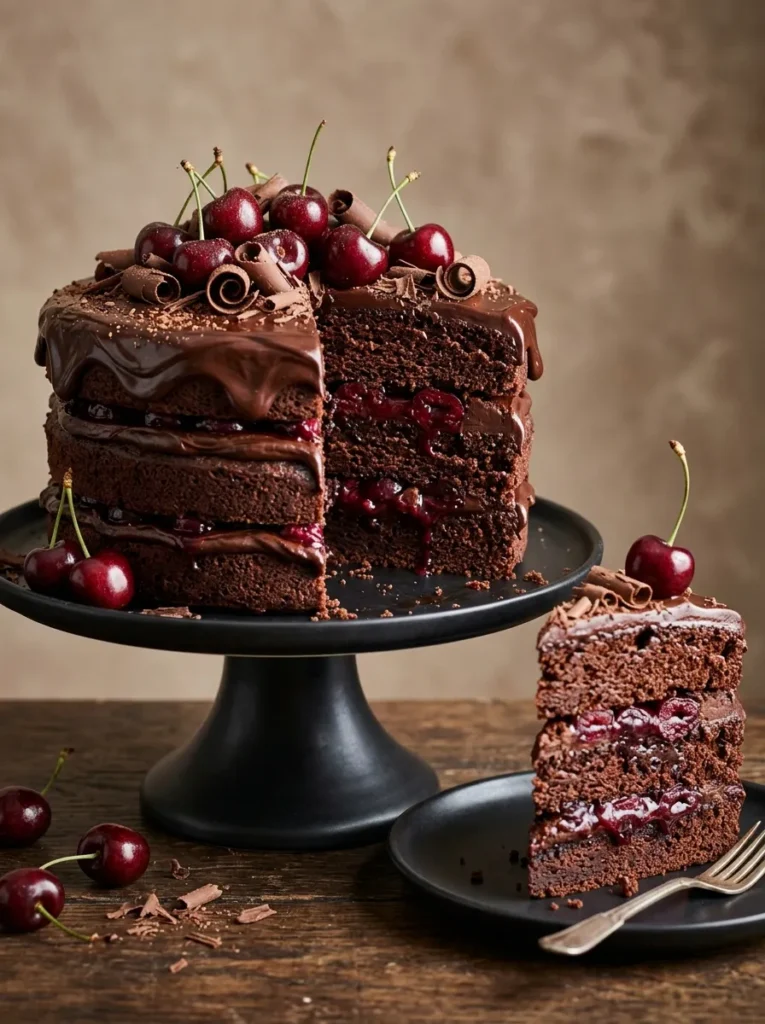
Dark chocolate and cherries create a classic combination that looks dramatic without complicated decorations. The deep brown frosting contrasts beautifully with the red fruit, making this cake suitable for birthdays, anniversary dinners, and celebrations where a rich dessert deserves attention.
- Bake the layers: Prepare chocolate sponge cakes and allow them to cool completely before assembly.
- Make the filling: Simmer pitted cherries with sugar and lemon juice until juicy, then thicken with a cornstarch slurry.
- Prepare the ganache: Pour hot heavy cream over chopped dark chocolate and stir until glossy.
- Assemble the cake: Spread cooled cherry filling between the sponge layers, keeping it away from the outer edges.
- Finish the decoration: Coat the cake with ganache, create gentle drips around the rim, and arrange cherries and chocolate curls on top.
For a clean finish, refrigerate the assembled cake before applying the final drip. The ganache should be fluid enough to move slowly but not so warm that it melts the frosting. A few carefully placed cherries create a stronger visual effect than covering the entire surface.
Ingredients
For the cake:
- 1 3/4 cups (220 g) all-purpose flour
- 3/4 cup (75 g) unsweetened cocoa powder
- 1 3/4 cups (350 g) granulated sugar
- 2 large eggs
- 1 cup (240 ml) milk
- 1/2 cup (120 ml) vegetable oil
- 1 cup (240 ml) hot water
- 2 teaspoons baking powder
- 1 teaspoon baking soda
- 1 teaspoon vanilla extract
- 1/2 teaspoon salt
For the cherry filling:
- 1 1/2 cups (225 g) pitted cherries
- 3 tablespoons sugar
- 1 tablespoon lemon juice
- 1 teaspoon cornstarch mixed with 1 tablespoon water
For the ganache:
- 200 g dark chocolate, chopped
- 180 ml heavy cream
- Fresh cherries and chocolate curls for decoration
How to Make
- Preheat the oven to 350°F (175°C). Grease and line two 8-inch round cake pans.
- Whisk the flour, cocoa powder, sugar, baking powder, baking soda, and salt together.
- Add the eggs, milk, oil, and vanilla. Mix until combined, then slowly stir in the hot water. The batter will be thin.
- Divide the batter between the pans and bake for 28 to 35 minutes, checking with a toothpick. Cool completely.
- Simmer the cherries, sugar, and lemon juice in a saucepan. Stir in the cornstarch mixture and cook until thick. Cool fully.
- Heat the cream until steaming and pour it over the chopped chocolate. Let stand for two minutes, then stir until smooth.
- Spread cherry filling between the cake layers. Coat the cake with ganache and chill until the surface is firm.
- Apply the remaining ganache around the top edge to create drips. Decorate with fresh cherries and chocolate curls.
Coconut Lime Cake

Coconut and lime give this cake a refreshing flavor that feels lighter than a traditional chocolate dessert. White frosting creates a clean, airy appearance, while green lime accents add a pop of color that stands out beautifully in Pinterest food photography.
| Detail | Coconut Lime Cake |
| Flavor | Sweet coconut with bright citrus |
| Preparation | About 35 minutes |
| Baking | 25 to 30 minutes |
| Skill level | Beginner to intermediate |
| Best for | Summer parties and tropical-themed celebrations |
Use finely shredded unsweetened coconut for an even coating, and add lime zest to the batter for a stronger citrus aroma. Coconut milk contributes extra flavor and moisture, while fresh lime juice balances the sweetness of the frosting. Keep the decoration simple with thin lime slices and a light sprinkle of coconut around the top edge.
Ingredients
For the cake:
- 2 cups (250 g) all-purpose flour
- 1 cup (200 g) granulated sugar
- 1/2 cup (113 g) unsalted butter, softened
- 2 large eggs
- 3/4 cup (180 ml) coconut milk
- 2 tablespoons fresh lime juice
- 1 tablespoon lime zest
- 2 teaspoons baking powder
- 1 teaspoon vanilla extract
- 1/4 teaspoon salt
For the frosting:
- 1 cup (226 g) unsalted butter, softened
- 3 cups (360 g) powdered sugar
- 2 tablespoons coconut milk, plus more as needed
- 1/2 cup (40 g) finely shredded coconut
- 1 teaspoon lime zest
For decoration:
- 1/2 cup (40 g) shredded coconut
- Thin lime slices
How to Make
- Preheat the oven to 350°F (175°C). Grease and line two 8-inch round cake pans.
- Whisk the flour, baking powder, and salt in a bowl.
- Beat the butter and sugar until creamy. Add the eggs, vanilla, lime zest, and lime juice.
- Mix in the dry ingredients alternately with the coconut milk until the batter is smooth.
- Divide the batter between the pans and bake for 25 to 30 minutes. Cool completely.
- Beat the butter and powdered sugar until fluffy. Add coconut milk gradually, then mix in the shredded coconut and lime zest.
- Spread frosting between the cake layers and cover the outside evenly.
- Press shredded coconut gently onto the sides and finish with thin lime slices. Refrigerate until serving.
Honey Lavender Cake

Honey and lavender create a delicate floral flavor that feels special without needing elaborate decorations. The pale purple frosting, golden honey accents, and tiny edible flowers give the cake a gentle, romantic appearance suited to bridal showers, spring birthdays, and afternoon tea.
DO
- Use culinary-grade dried lavender in small amounts for a subtle floral aroma.
- Infuse the milk with lavender, then strain it before adding it to the batter.
- Choose a mild honey so it complements rather than overwhelms the cake.
- Decorate with food-safe edible flowers for a natural finish.
DON’T
- Use decorative lavender that is not labeled food-safe.
- Add too much lavender, which can create a soapy flavor.
- Pour warm honey directly onto delicate buttercream.
- Frost the cake before the sponge has cooled completely.
For a balanced flavor, start with a small quantity of lavender and taste the infused milk before baking. A light honey buttercream pairs beautifully with vanilla sponge, while a few lavender buds provide visual detail. Keep the decoration restrained so the floral notes remain the star of the dessert.
Ingredients
For the cake:
- 2 cups (250 g) all-purpose flour
- 1 cup (200 g) granulated sugar
- 1/2 cup (113 g) unsalted butter, softened
- 2 large eggs
- 3/4 cup (180 ml) milk
- 1 teaspoon culinary-grade dried lavender
- 2 teaspoons baking powder
- 1 teaspoon vanilla extract
- 1/4 teaspoon salt
For the frosting:
- 1 cup (226 g) unsalted butter, softened
- 3 cups (360 g) powdered sugar
- 3 tablespoons honey
- 1 to 2 tablespoons milk, as needed
- A small amount of purple gel food coloring, optional
For decoration:
- Food-safe edible lavender flowers
- 1 teaspoon honey for drizzling
How to Make
- Warm the milk gently with the dried lavender. Remove from the heat, steep for 10 minutes, then strain and cool.
- Preheat the oven to 350°F (175°C). Grease and line two 8-inch round cake pans.
- Beat the butter and sugar until fluffy. Add the eggs and vanilla.
- Mix the flour, baking powder, and salt separately. Add to the batter alternately with the lavender-infused milk.
- Divide the batter between the pans and bake for 25 to 30 minutes. Cool completely.
- Beat the butter, powdered sugar, honey, and enough milk to make a smooth frosting. Add a tiny amount of purple coloring if desired.
- Fill and frost the cooled cake. Drizzle lightly with honey and decorate with edible lavender flowers.
Pistachio Rose Cake
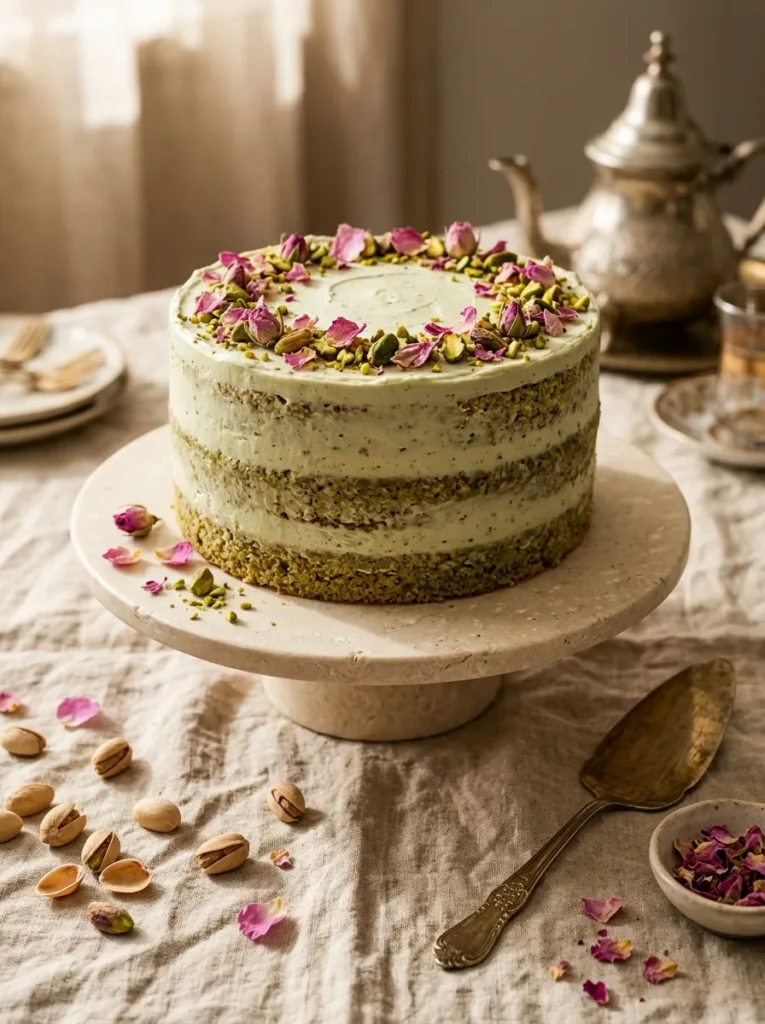
Pistachio and rose create a distinctive combination of nutty richness and delicate floral sweetness. The natural green sponge paired with soft pink decoration gives this cake a refined look, making it a memorable choice for celebrations, tea parties, and special family gatherings.
Cost: Moderate, depending on pistachio prices.
Preparation: About 35 minutes.
Baking: 25 to 30 minutes.
Skill Level: Intermediate.
Best For: Elegant birthdays, engagement parties, and afternoon tea.
Finely ground pistachios add flavor and texture to the sponge, while a little rose water brings a fragrant finish. Start with just a small amount of rose water because its aroma can quickly dominate the cake. For a naturally green appearance, use unsalted pistachios and avoid excessive food coloring. A scattering of chopped nuts and food-safe rose petals provides decoration without hiding the frosting.
Ingredients
For the cake:
- 1 1/2 cups (190 g) all-purpose flour
- 3/4 cup (90 g) finely ground unsalted pistachios
- 3/4 cup (150 g) granulated sugar
- 1/2 cup (113 g) unsalted butter, softened
- 3 large eggs
- 1/2 cup (120 ml) milk
- 2 teaspoons baking powder
- 1 teaspoon vanilla extract
- 1/4 teaspoon salt
For the frosting:
- 1 cup (226 g) unsalted butter, softened
- 3 cups (360 g) powdered sugar
- 2 tablespoons milk
- 1/4 teaspoon food-grade rose water, or to taste
- A small drop of green gel food coloring, optional
For decoration:
- 2 tablespoons chopped pistachios
- Food-safe dried rose petals
How to Make
- Preheat the oven to 350°F (175°C). Grease and line two 7-inch round cake pans.
- Combine the flour, ground pistachios, baking powder, and salt.
- Beat the butter and sugar until light. Add the eggs one at a time, followed by the vanilla.
- Mix in the dry ingredients alternately with the milk until just combined.
- Divide the batter between the pans and bake for 25 to 30 minutes. Cool completely.
- Beat the butter and powdered sugar until fluffy. Add the milk and rose water gradually, tasting as you go.
- Spread frosting between the cake layers and cover the outside with a smooth coating.
- Sprinkle chopped pistachios around the top edge and finish with food-safe rose petals.
Caramelized Banana Cake
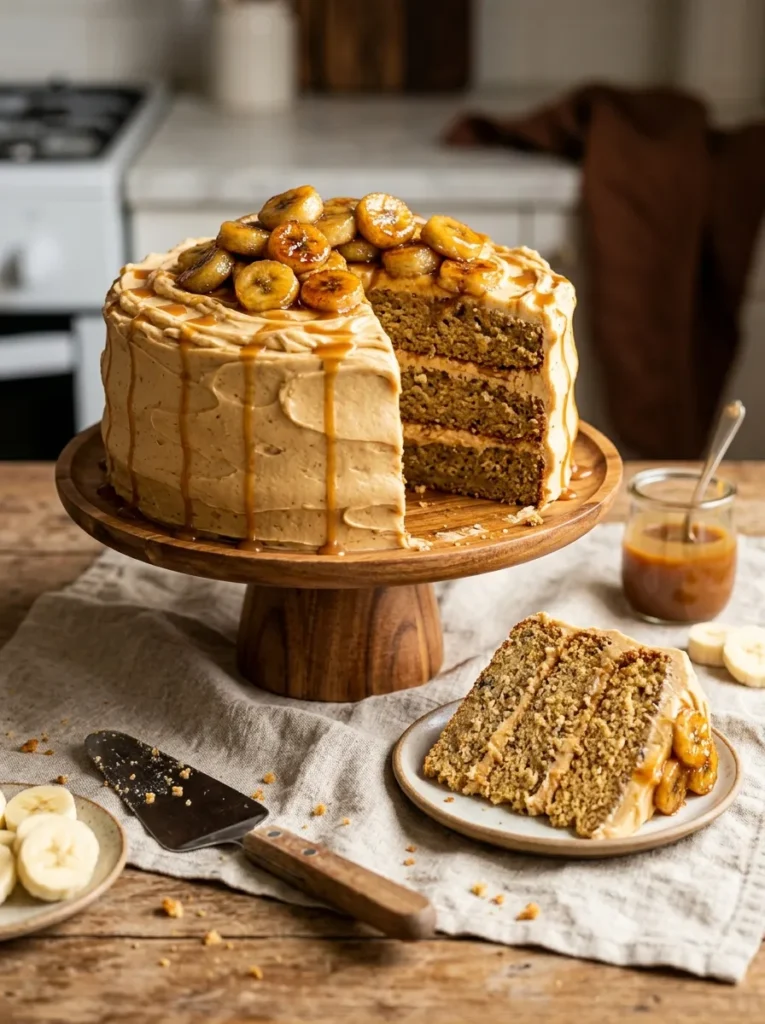
Ripe bananas bring natural sweetness and moisture to this comforting cake, while caramel adds a glossy finish and deeper flavor. The golden sponge and warm brown topping create an inviting look that suits autumn gatherings, weekend baking, and casual birthday celebrations.
Ingredients
For the cake:
- 2 cups (250 g) all-purpose flour
- 3/4 cup (150 g) granulated sugar
- 1/2 cup (113 g) unsalted butter, softened
- 2 medium ripe bananas, mashed
- 2 large eggs
- 1/2 cup (120 ml) milk
- 2 teaspoons baking powder
- 1 teaspoon vanilla extract
- 1/2 teaspoon ground cinnamon
- 1/4 teaspoon salt
For the frosting:
- 1 cup (226 g) unsalted butter, softened
- 3 cups (360 g) powdered sugar
- 3 tablespoons thick caramel sauce
- 1 to 2 tablespoons milk, as needed
For the topping:
- 1 banana, sliced
- 1 tablespoon butter
- 1 tablespoon brown sugar
- 2 tablespoons caramel sauce
How to Make
- Preheat the oven to 350°F (175°C). Grease and line two 8-inch round cake pans.
- Whisk together the flour, baking powder, cinnamon, and salt.
- Beat the butter and sugar until creamy. Add the eggs, mashed bananas, and vanilla.
- Mix in the dry ingredients alternately with the milk.
- Divide the batter between the pans and bake for 25 to 30 minutes. Cool completely.
- Beat the frosting ingredients until smooth and fluffy.
- Melt the topping butter in a skillet. Add the brown sugar and banana slices, cooking briefly on each side until golden. Let cool.
- Fill and frost the cake, drizzle with caramel sauce, and arrange the caramelized banana slices on top.
For the prettiest finish, arrange the banana slices just before serving so they retain their color and texture. Keep the caramel drizzle thin enough to show the frosting underneath, and allow the cake to cool fully before assembly. Store leftovers covered in the refrigerator because the fresh banana topping is perishable.
Blue Velvet Cake
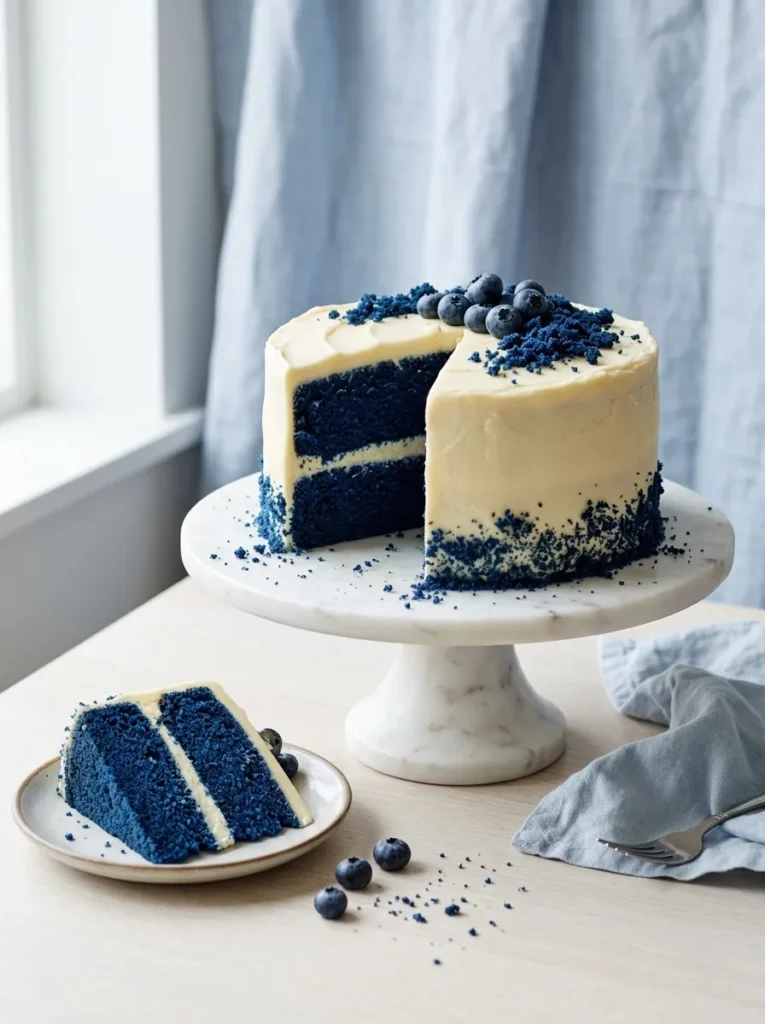
Blue velvet cake brings a bold splash of color to a dessert table while keeping the familiar softness of a classic velvet sponge. Its deep blue layers look especially striking against white frosting, creating a clean contrast that photographs beautifully for birthdays and themed celebrations.
- Choose the right color: Use gel food coloring for a rich blue shade without adding too much liquid to the batter.
- Measure cocoa carefully: A small amount adds depth without making the sponge taste like chocolate cake.
- Cool completely: Warm layers can soften cream cheese frosting and cause the cake to slide.
- Save cake crumbs: Trimmed blue sponge makes a simple decoration for the base and top.
- Chill before slicing: A short rest in the refrigerator helps produce clean, colorful layers.
For a polished finish, keep the outer frosting white and let the blue sponge provide the main visual impact. A few crumbs around the bottom edge add texture without requiring piping skills. Use a sharp knife wiped clean between slices to reveal neat blue and white layers on every plate.
Ingredients
For the cake:
- 2 1/2 cups (310 g) all-purpose flour
- 1 1/2 cups (300 g) granulated sugar
- 1 tablespoon unsweetened cocoa powder
- 1/2 cup (120 ml) vegetable oil
- 2 large eggs
- 1 cup (240 ml) buttermilk
- 1 teaspoon vanilla extract
- 1 tablespoon blue gel food coloring, or as needed
- 1 teaspoon baking soda
- 1 teaspoon white vinegar
- 1/2 teaspoon salt
For the frosting:
- 225 g cream cheese, softened
- 1/2 cup (113 g) unsalted butter, softened
- 3 cups (360 g) powdered sugar
- 1 teaspoon vanilla extract
How to Make
- Preheat the oven to 350°F (175°C). Grease and line two 8-inch round cake pans.
- Whisk the flour, cocoa powder, and salt in a bowl.
- Beat the sugar, oil, and eggs until smooth. Mix in the buttermilk, vanilla, and blue food coloring.
- Add the dry ingredients and stir until combined. Mix the baking soda with the vinegar, then fold it into the batter.
- Divide the batter between the pans and bake for 25 to 30 minutes, or until a toothpick comes out clean. Cool completely.
- Beat the cream cheese and butter until smooth. Gradually add powdered sugar and vanilla.
- Spread frosting between the cake layers and cover the outside. Decorate with reserved blue cake crumbs and refrigerate until serving.
Apple Cinnamon Crumb Cake

Warm cinnamon, tender apples, and buttery crumbs make this cake a comforting choice for cool-weather gatherings. Unlike a heavily frosted layer cake, its textured topping creates visual interest with very little decorating work.
Quick Tip:
Choose firm baking apples that hold their shape in the oven, such as Granny Smith or Honeycrisp. Cut them into small, even pieces so they soften at the same rate. Let the cake cool before slicing, allowing the crumb topping to set rather than fall apart.
For the best texture, toss the apples with cinnamon and a little sugar before folding them into the batter. Keep the crumb mixture cold until it goes into the oven, which helps create distinct, buttery clusters. Serve slices plain with tea or coffee, or add a small spoonful of whipped cream for a more dressed-up dessert.
Ingredients
For the cake:
- 2 cups (250 g) all-purpose flour
- 3/4 cup (150 g) granulated sugar
- 1/2 cup (113 g) unsalted butter, softened
- 2 large eggs
- 1/2 cup (120 ml) milk
- 2 medium apples, peeled and diced
- 2 teaspoons baking powder
- 1 teaspoon vanilla extract
- 1 teaspoon ground cinnamon
- 1/4 teaspoon salt
For the crumb topping:
- 3/4 cup (95 g) all-purpose flour
- 1/3 cup (65 g) brown sugar
- 1 teaspoon ground cinnamon
- 1/4 cup (57 g) cold unsalted butter, cubed
How to Make
- Preheat the oven to 350°F (175°C). Grease and line an 8-inch square cake pan.
- Combine the flour, baking powder, cinnamon, and salt in a bowl.
- Beat the softened butter and granulated sugar until fluffy. Add the eggs and vanilla.
- Mix in the dry ingredients alternately with the milk. Fold in the diced apples.
- For the topping, rub the cold butter into the flour, brown sugar, and cinnamon until coarse crumbs form.
- Spread the batter into the prepared pan and scatter the crumb mixture evenly over the top.
- Bake for 35 to 45 minutes, checking the center with a toothpick.
- Cool before slicing. Serve as is or with whipped cream.
Cookies And Cream Cake
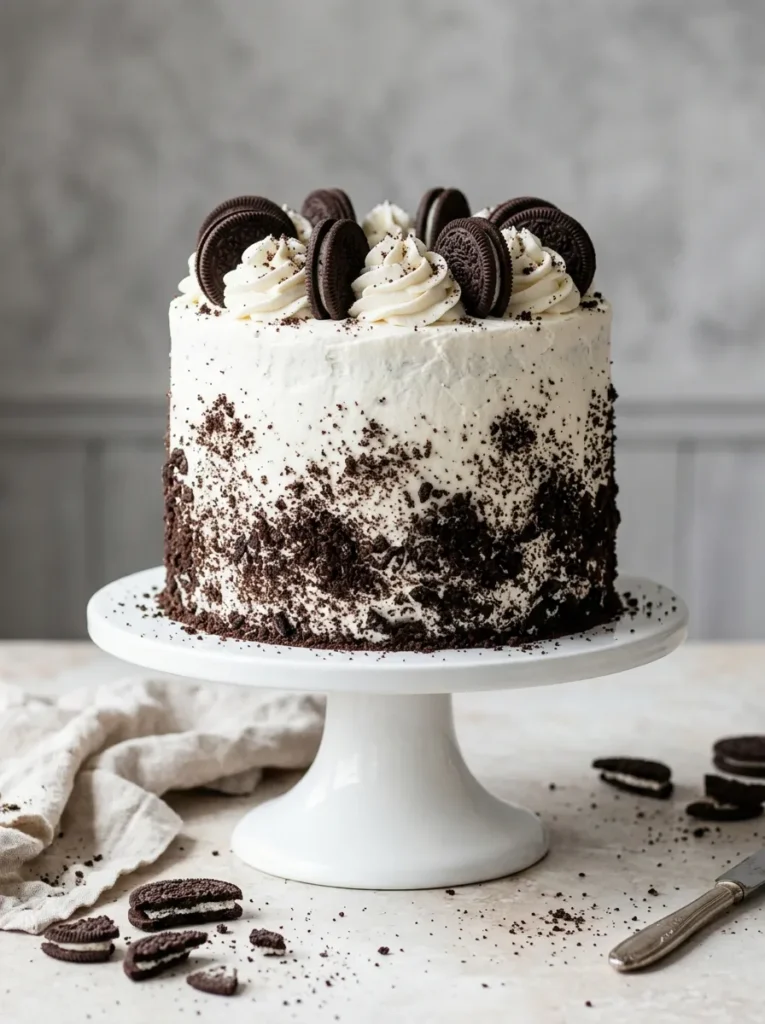
Chocolate cookie pieces and fluffy vanilla frosting give this cake a playful look that appeals to both children and adults. The black-and-white contrast makes every slice visually distinct, while the familiar flavor combination works well for birthdays, sleepovers, and casual celebrations.
BEFORE
A plain white frosted cake can look unfinished when there is no contrast between the layers and the decoration. Adding too many toppings, however, can make the surface messy and difficult to slice.
AFTER
Crushed chocolate cookies create a textured border, while whole cookies arranged in a simple pattern give the top a finished appearance. A few visible cookie pieces between the layers reveal the flavor before the first bite.
For an even crumb coating, crush the cookies into a mixture of fine crumbs and small pieces. Press them gently into freshly applied frosting before it sets. Keep the top decoration balanced, leaving some white frosting visible so the dark cookie details stand out clearly.
Ingredients
For the cake:
- 2 cups (250 g) all-purpose flour
- 1 cup (200 g) granulated sugar
- 1/2 cup (113 g) unsalted butter, softened
- 2 large eggs
- 3/4 cup (180 ml) milk
- 2 teaspoons baking powder
- 1 teaspoon vanilla extract
- 1/4 teaspoon salt
- 8 chocolate sandwich cookies, roughly crushed
For the frosting:
- 1 cup (226 g) unsalted butter, softened
- 3 cups (360 g) powdered sugar
- 2 to 3 tablespoons milk
- 1 teaspoon vanilla extract
- 6 chocolate sandwich cookies, finely crushed
For decoration:
– 6 to 8 whole chocolate sandwich cookies
How to Make
- Preheat the oven to 350°F (175°C). Grease and line two 8-inch round cake pans.
- Whisk the flour, baking powder, and salt together.
- Beat the butter and sugar until fluffy. Add the eggs and vanilla.
- Mix in the dry ingredients alternately with the milk. Fold in the roughly crushed cookies.
- Divide the batter between the pans and bake for 25 to 30 minutes. Cool completely.
- Beat the butter, powdered sugar, vanilla, and milk until smooth. Fold in the finely crushed cookies.
- Spread frosting between the cake layers and cover the outside. Press additional cookie crumbs around the sides.
- Arrange whole cookies on top and refrigerate briefly before slicing.
Marble Mocha Cake
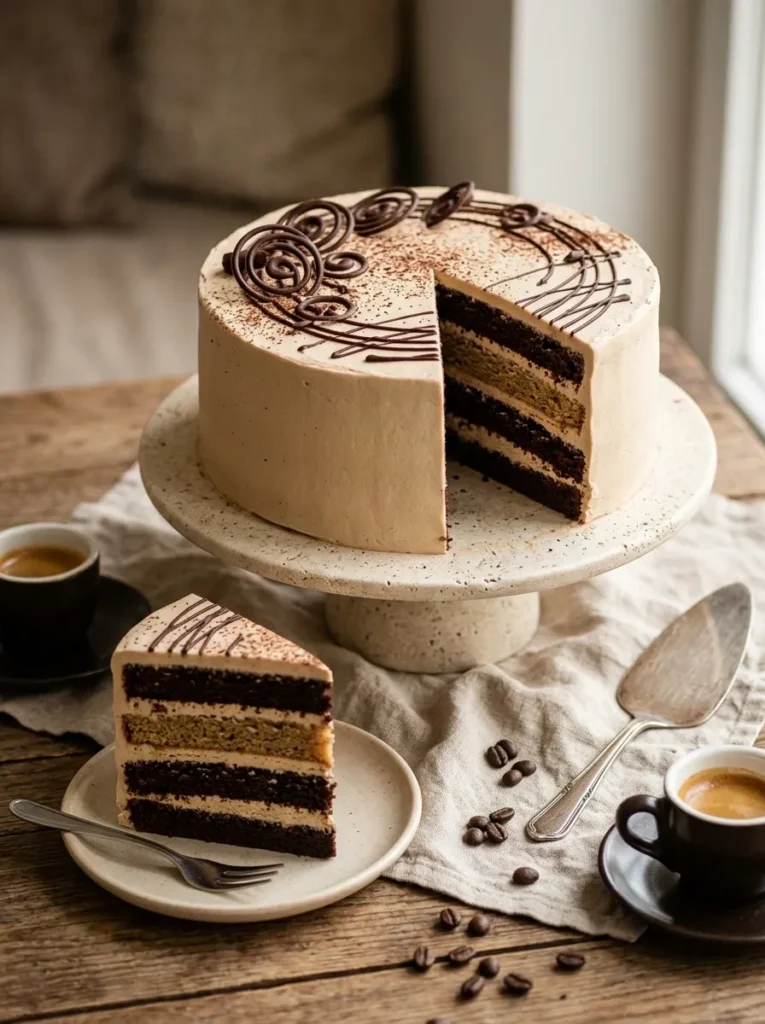
Coffee and chocolate create a rich flavor combination, while the marbled sponge gives each slice a unique pattern. This cake suits coffee lovers who want a dessert that feels elegant without relying on elaborate decorations or bright colors.
Ingredients
For the cake:
- 2 cups (250 g) all-purpose flour
- 1 cup (200 g) granulated sugar
- 1/2 cup (113 g) unsalted butter, softened
- 2 large eggs
- 3/4 cup (180 ml) milk
- 2 teaspoons baking powder
- 1 teaspoon vanilla extract
- 2 tablespoons unsweetened cocoa powder
- 1 tablespoon instant espresso powder
- 1/4 teaspoon salt
For the frosting:
- 1 cup (226 g) unsalted butter, softened
- 3 cups (360 g) powdered sugar
- 2 tablespoons cooled strong coffee
- 1 teaspoon vanilla extract
- 1 tablespoon milk, if needed
How to Make
- Preheat the oven to 350°F (175°C). Grease and line two 8-inch round cake pans.
- Mix the flour, baking powder, and salt in a bowl.
- Beat the butter and sugar until creamy. Add the eggs and vanilla.
- Mix in the dry ingredients alternately with the milk until a smooth batter forms.
- Divide the batter between two bowls. Stir the cocoa powder into one portion and the espresso powder into the other.
- Spoon alternating portions of both batters into the pans. Swirl gently with a skewer to create a marble pattern.
- Bake for 25 to 30 minutes, or until a toothpick comes out clean. Cool completely.
- Beat the frosting ingredients until fluffy. Fill and frost the cake, then finish with chocolate swirls.
A light hand is important when swirling the batter. Too much mixing blends the two colors into one shade, hiding the marble effect. For an attractive finish, keep the frosting pale mocha and add only a few chocolate curls. Serve thin slices with coffee or tea.
Mini Bento Lunchbox Cakes
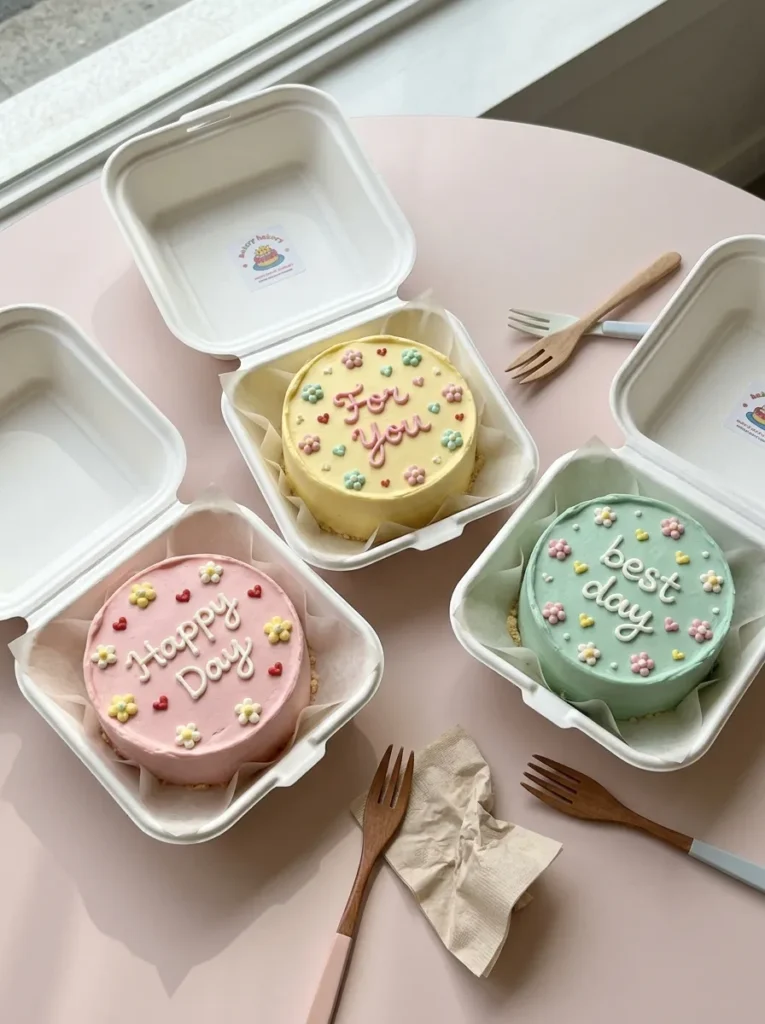
Mini bento cakes offer the charm of a decorated celebration cake in a smaller, personal-sized dessert. Their compact shape makes them easy to customize for birthdays, friendship gifts, anniversaries, or small gatherings where each person can have a different design.
- Bake a thin sponge: Prepare vanilla cake batter and spread it in a lined rectangular pan for even baking.
- Cut small rounds: Once cooled, use a round cutter to make six small sponge discs.
- Prepare the frosting: Beat butter, powdered sugar, vanilla, and a little milk until smooth.
- Stack the cakes: Layer two or three sponge discs with a thin coating of frosting between each.
- Decorate individually: Use pastel frosting, small hearts, dots, or simple lettering to personalize each cake.
Small cakes are easier to decorate when the sponge is chilled and the frosting is firm enough to hold its shape. Keep the piping simple because the limited surface area can become crowded quickly. Use clean takeaway cake boxes for gifting, and refrigerate the cakes if they contain perishable cream or cream cheese.
Ingredients
For the cake:
- 1 cup (125 g) all-purpose flour
- 1/2 cup (100 g) granulated sugar
- 1/4 cup (57 g) unsalted butter, softened
- 1 large egg
- 1/3 cup (80 ml) milk
- 1 teaspoon baking powder
- 1/2 teaspoon vanilla extract
- A pinch of salt
For the frosting:
- 1/2 cup (113 g) unsalted butter, softened
- 1 1/2 cups (180 g) powdered sugar
- 1 to 2 tablespoons milk
- 1/2 teaspoon vanilla extract
- Pastel gel food coloring
How to Make
- Preheat the oven to 350°F (175°C). Line a small rectangular baking pan with parchment paper.
- Whisk the flour, baking powder, and salt together.
- Beat the butter and sugar until light. Add the egg and vanilla.
- Mix in the dry ingredients alternately with the milk.
- Spread the batter in the pan and bake for 15 to 20 minutes. Cool completely.
- Cut six small rounds from the sponge using a round cutter.
- Beat the frosting ingredients until smooth and divide into bowls. Tint each bowl with a different pastel shade.
- Stack the sponge rounds with frosting between the layers. Cover each cake and decorate with tiny hearts, flowers, or simple lettering.
Black Forest Cherry Cake

Chocolate sponge, cherries, and whipped cream give this cake a dramatic appearance with familiar, balanced flavors. The contrast between dark chocolate curls, white cream, and glossy red fruit makes each slice look striking without requiring elaborate frosting techniques.
DO
- Cool the chocolate sponge completely before spreading the whipped cream.
- Drain cherries well if using canned fruit to prevent watery filling.
- Whip the cream until it holds medium-stiff peaks.
- Reserve chocolate shavings for the sides and top.
DON’T
- Assemble the cake while the sponge is warm.
- Spread runny cherry filling right to the outer edge.
- Overwhip the cream until it becomes grainy.
- Leave a whipped-cream cake at room temperature for extended periods.
For a neat finish, spread the cherry filling in a thin layer and pipe a ring of whipped cream around it to help keep the filling in place. Chill the assembled cake before decorating the top. Because whipped cream is perishable, refrigerate the cake promptly and serve it cold for the best texture.
Ingredients
For the cake:
- 1 3/4 cups (220 g) all-purpose flour
- 3/4 cup (75 g) unsweetened cocoa powder
- 1 1/2 cups (300 g) granulated sugar
- 2 large eggs
- 3/4 cup (180 ml) milk
- 1/2 cup (120 ml) vegetable oil
- 1 teaspoon vanilla extract
- 2 teaspoons baking powder
- 1 teaspoon baking soda
- 1/2 teaspoon salt
- 3/4 cup (180 ml) hot water
For the filling and topping:
- 1 1/2 cups (225 g) pitted cherries, drained if canned
- 2 tablespoons sugar, if using fresh or unsweetened cherries
- 2 cups (480 ml) cold heavy whipping cream
- 1/3 cup (40 g) powdered sugar
- 1 teaspoon vanilla extract
- 100 g dark chocolate, shaved or finely grated
How to Make
- Preheat the oven to 350°F (175°C). Grease and line two 8-inch round cake pans.
- Whisk the flour, cocoa powder, sugar, baking powder, baking soda, and salt together.
- Add the eggs, milk, oil, and vanilla. Mix, then gradually stir in the hot water.
- Divide the batter between the pans and bake for 28 to 35 minutes. Cool completely.
- If using fresh cherries, simmer them with the sugar until tender and juicy. Cool and drain excess liquid.
- Whip the cream with powdered sugar and vanilla until medium-stiff peaks form.
- Spread whipped cream and cherries between the cake layers. Cover the top and sides with the remaining cream.
- Press chocolate shavings around the sides and finish with cream swirls and cherries. Refrigerate until serving.
Confetti Sprinkle Cake
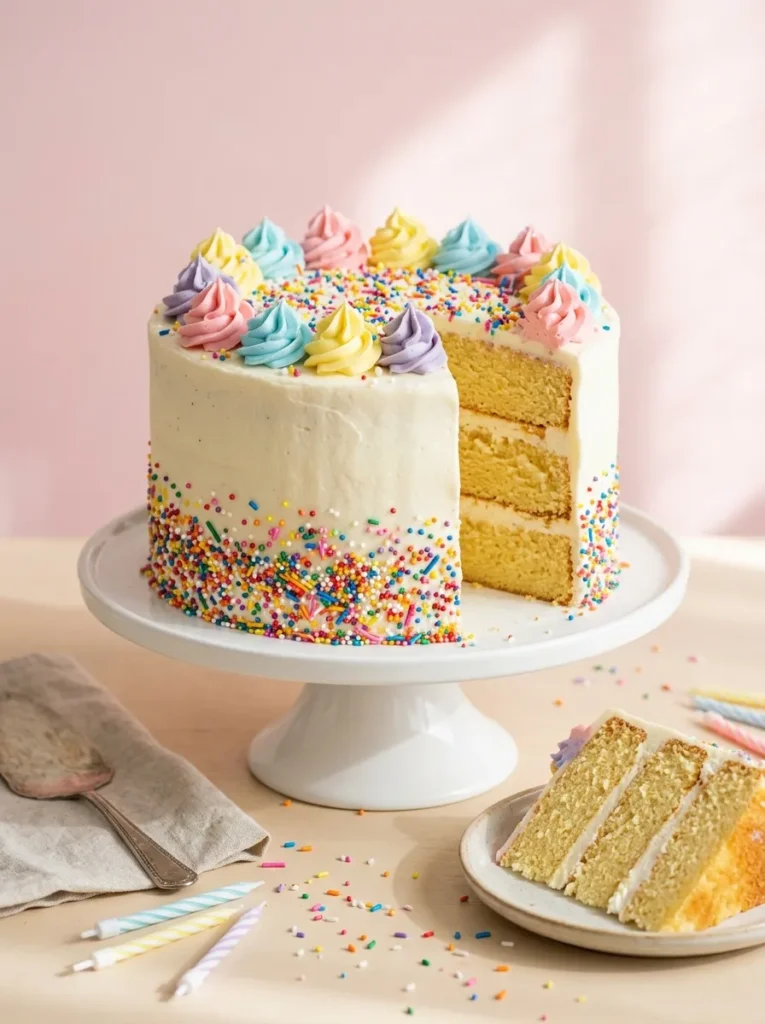
Rainbow sprinkles turn a simple vanilla cake into a colorful celebration centerpiece. The bright confetti effect looks festive without requiring advanced decorating skills, making this style a practical choice for children’s birthdays, family parties, and cheerful weekend baking.
Ingredients
For the cake:
- 2 cups (250 g) all-purpose flour
- 1 cup (200 g) granulated sugar
- 1/2 cup (113 g) unsalted butter, softened
- 2 large eggs
- 3/4 cup (180 ml) milk
- 2 teaspoons baking powder
- 2 teaspoons vanilla extract
- 1/4 teaspoon salt
- 1/3 cup (55 g) rainbow jimmies sprinkles
For the frosting:
- 1 cup (226 g) unsalted butter, softened
- 3 cups (360 g) powdered sugar
- 2 to 3 tablespoons milk
- 1 teaspoon vanilla extract
- 1/3 cup (55 g) rainbow sprinkles for decoration
How to Make
- Preheat the oven to 350°F (175°C). Grease and line two 8-inch round cake pans.
- Whisk together the flour, baking powder, and salt.
- Beat the butter and sugar until fluffy. Add the eggs and vanilla.
- Mix in the dry ingredients alternately with the milk. Fold in the rainbow sprinkles gently.
- Divide the batter between the pans and bake for 25 to 30 minutes. Cool completely.
- Beat the butter, powdered sugar, milk, and vanilla until smooth and fluffy.
- Spread frosting between the cake layers and cover the outside with an even coat.
- Press rainbow sprinkles around the sides and finish with piped frosting swirls and extra sprinkles on top.
Do
- Use rainbow jimmies that hold their color during baking.
- Fold the sprinkles into the batter just before filling the pans.
- Apply sprinkles while the frosting is still slightly soft.
- Keep the top decoration balanced with a few neat frosting swirls.
Don’t
- Use sprinkle varieties that dissolve quickly in wet batter.
- Overmix the batter after adding the sprinkles.
- Press sprinkles too firmly into the frosting.
- Cut the cake before the frosting has had time to set.
For a bakery-style finish, keep the frosting white so the rainbow details stand out. A simple border of sprinkles around the base creates a tidy finish, while a few candles make the cake ready for a birthday table. Store covered at room temperature for a short period if the room is cool, or refrigerate in warmer conditions.
Earl Grey Tea Cake
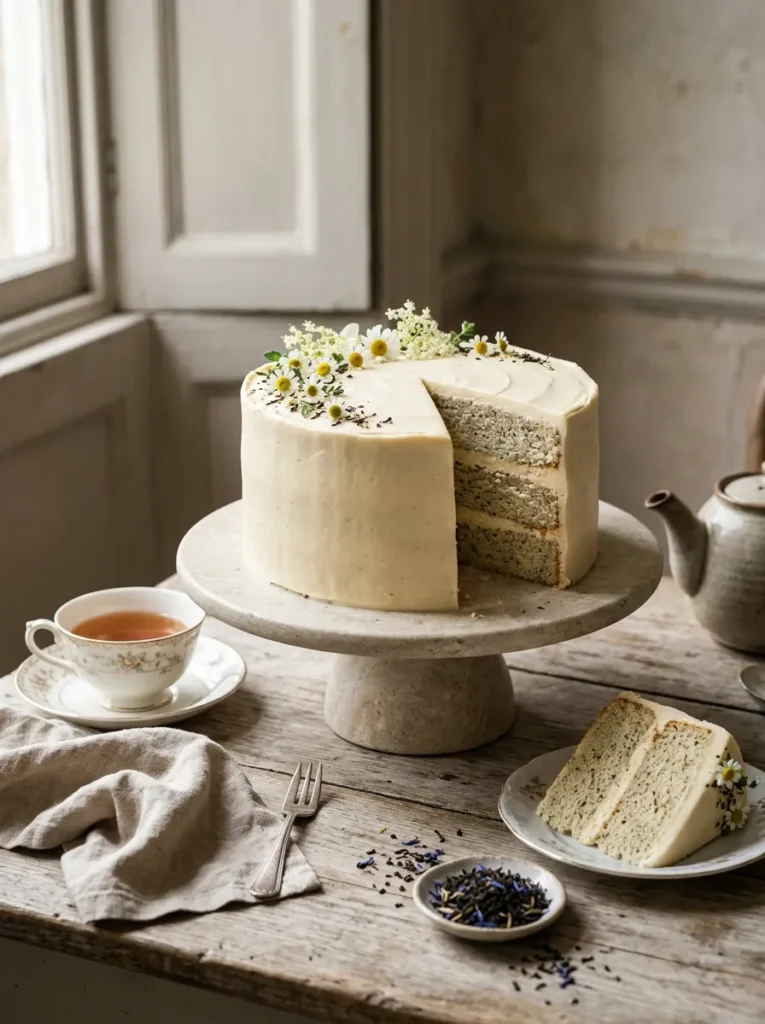
Fragrant Earl Grey tea adds gentle bergamot and citrus notes to a tender vanilla cake. The tiny tea flecks create natural detail in the sponge, while understated cream frosting gives the finished dessert a sophisticated afternoon-tea appearance.
Quick Tip:
Use finely ground tea leaves or very finely crushed loose-leaf Earl Grey so the texture stays pleasant. Steep the tea in warm milk for a few minutes, then cool and strain if using whole leaves. Avoid adding too much tea, as its bergamot flavor can become bitter.
Ingredients
For the cake:
- 2 cups (250 g) all-purpose flour
- 1 cup (200 g) granulated sugar
- 1/2 cup (113 g) unsalted butter, softened
- 2 large eggs
- 3/4 cup (180 ml) milk
- 2 Earl Grey tea bags, or 2 teaspoons loose-leaf tea
- 2 teaspoons baking powder
- 1 teaspoon vanilla extract
- 1/4 teaspoon salt
For the frosting:
- 1 cup (226 g) unsalted butter, softened
- 3 cups (360 g) powdered sugar
- 2 tablespoons milk
- 1 teaspoon vanilla extract
For decoration:
– Food-safe edible flowers or a light dusting of powdered sugar
How to Make
- Warm the milk until steaming, remove from the heat, and steep the tea for 5 to 7 minutes. Strain if using loose leaves and let the milk cool.
- Preheat the oven to 350°F (175°C). Grease and line two 8-inch round cake pans.
- Whisk the flour, baking powder, and salt in a bowl.
- Beat the butter and sugar until light. Add the eggs and vanilla.
- Mix in the dry ingredients alternately with the cooled tea-infused milk.
- Divide the batter between the pans and bake for 25 to 30 minutes. Cool completely.
- Beat the frosting ingredients until fluffy and smooth.
- Fill and frost the cake. Finish with edible flowers or a light dusting of powdered sugar.
The tea flavor should complement the vanilla rather than overpower it. Start with a moderate infusion and let the milk cool before mixing it into the batter. A plain cream finish is especially effective here because it highlights the delicate sponge and keeps the overall presentation understated.
Mango Coconut Layer Cake
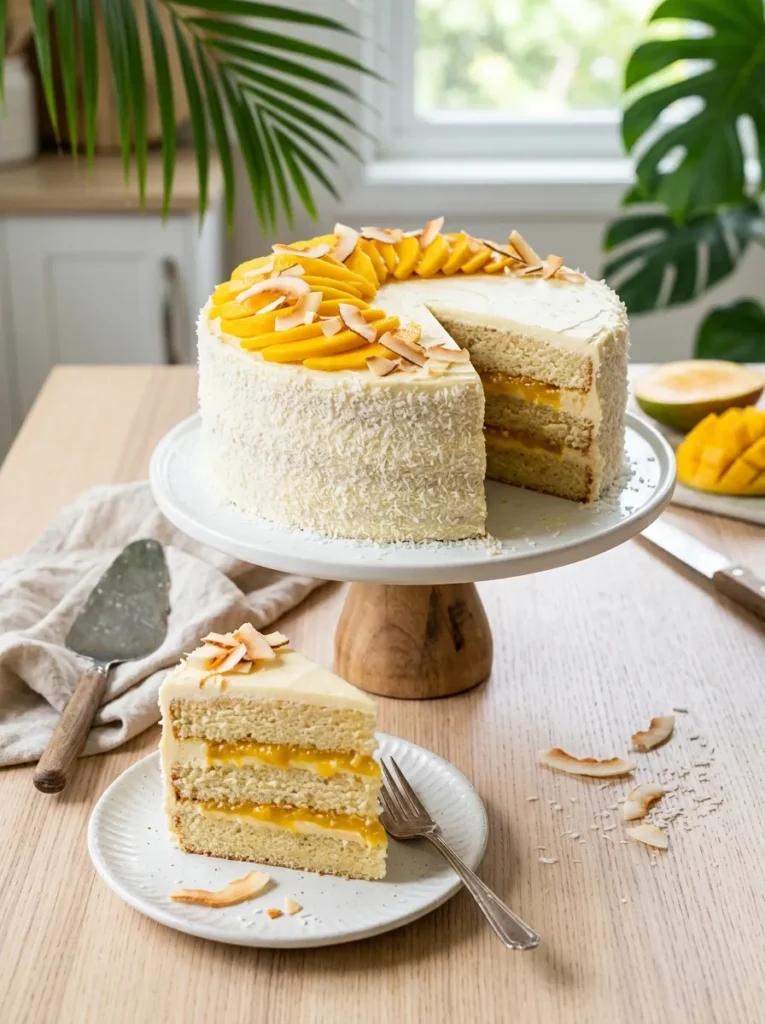
Juicy mango and creamy coconut give this cake a tropical flavor and a bright golden center. The contrast between yellow fruit and white frosting makes the layers stand out, while coconut flakes create a soft, textured finish suitable for summer celebrations.
Ingredients
For the cake:
- 2 cups (250 g) all-purpose flour
- 1 cup (200 g) granulated sugar
- 1/2 cup (113 g) unsalted butter, softened
- 2 large eggs
- 3/4 cup (180 ml) coconut milk
- 2 teaspoons baking powder
- 1 teaspoon vanilla extract
- 1/4 teaspoon salt
For the mango filling:
- 1 1/2 cups (225 g) ripe mango, finely diced
- 2 tablespoons sugar, adjusted to the fruit’s sweetness
- 1 tablespoon lime juice
- 1 teaspoon cornstarch mixed with 1 tablespoon water
For the frosting:
- 1 cup (226 g) unsalted butter, softened
- 3 cups (360 g) powdered sugar
- 2 tablespoons coconut milk
- 1/2 cup (40 g) shredded coconut
For decoration:
- 1/2 cup (40 g) shredded coconut
- Fresh mango slices
How to Make
- Preheat the oven to 350°F (175°C). Grease and line two 8-inch round cake pans.
- Whisk the flour, baking powder, and salt together.
- Beat the butter and sugar until fluffy. Add the eggs and vanilla.
- Mix in the dry ingredients alternately with the coconut milk.
- Divide the batter between the pans and bake for 25 to 30 minutes. Cool completely.
- Cook the diced mango, sugar, and lime juice in a saucepan until softened. Stir in the cornstarch mixture and cook until thick. Cool fully.
- Beat the butter and powdered sugar until smooth, then add coconut milk and shredded coconut.
- Spread the cooled mango filling between the cake layers. Frost the outside and coat the sides with extra coconut. Decorate with fresh mango slices and refrigerate until serving.
For clean layers, make sure the mango filling is thick and completely cool before assembly. If the mango is particularly juicy, cook it for a few extra minutes to remove excess moisture. Add fresh mango decorations close to serving time and keep the finished cake refrigerated because the fruit filling is perishable.
Black Sesame Honey Cake

Cost: Moderate, depending on the quality of sesame paste and honey.
Preparation Time: 25 minutes.
Baking Time: 30 to 35 minutes.
Best For: Minimalist celebrations, afternoon tea, and lovers of nutty flavors.
Black sesame gives this cake a distinctive toasted flavor and a naturally speckled appearance. Honey adds gentle sweetness without overpowering the sesame. A simple cream frosting keeps the finish balanced, while a thin honey drizzle creates an attractive shine. Serve small slices with unsweetened tea or coffee.
Ingredients
For the cake:
- 2 cups (250 g) all-purpose flour
- 3/4 cup (150 g) granulated sugar
- 1/2 cup (113 g) unsalted butter, softened
- 2 large eggs
- 3/4 cup (180 ml) milk
- 1/4 cup (60 g) black sesame paste
- 1/4 cup (85 g) honey
- 2 teaspoons baking powder
- 1 teaspoon vanilla extract
- 1/4 teaspoon salt
For the frosting:
- 1 cup (226 g) unsalted butter, softened
- 2 1/2 cups (300 g) powdered sugar
- 2 tablespoons milk
- 1 tablespoon honey
For decoration:
- 1 tablespoon toasted black sesame seeds
- 1 tablespoon honey
How to Make
- Preheat the oven to 350°F (175°C). Grease and line two 8-inch round cake pans.
- Whisk the flour, baking powder, and salt in a bowl.
- Beat the butter and sugar until light. Add the eggs one at a time, followed by the vanilla, sesame paste, and honey.
- Add the dry ingredients alternately with the milk, mixing until just combined.
- Divide the batter between the pans. Bake for 30 to 35 minutes, or until a toothpick comes out clean.
- Cool the cakes completely before removing them from the pans.
- Beat the frosting ingredients until smooth and fluffy. Spread frosting between the layers and over the cake.
- Drizzle honey over the top and sprinkle with toasted sesame seeds.
For the strongest sesame flavor, use smooth, unsweetened black sesame paste and stir it thoroughly before measuring. If the paste is particularly thick, mix it with a spoonful of milk before adding it to the batter. Keep the honey drizzle light so the frosting remains the main visual feature.
Toasted Marshmallow Cake
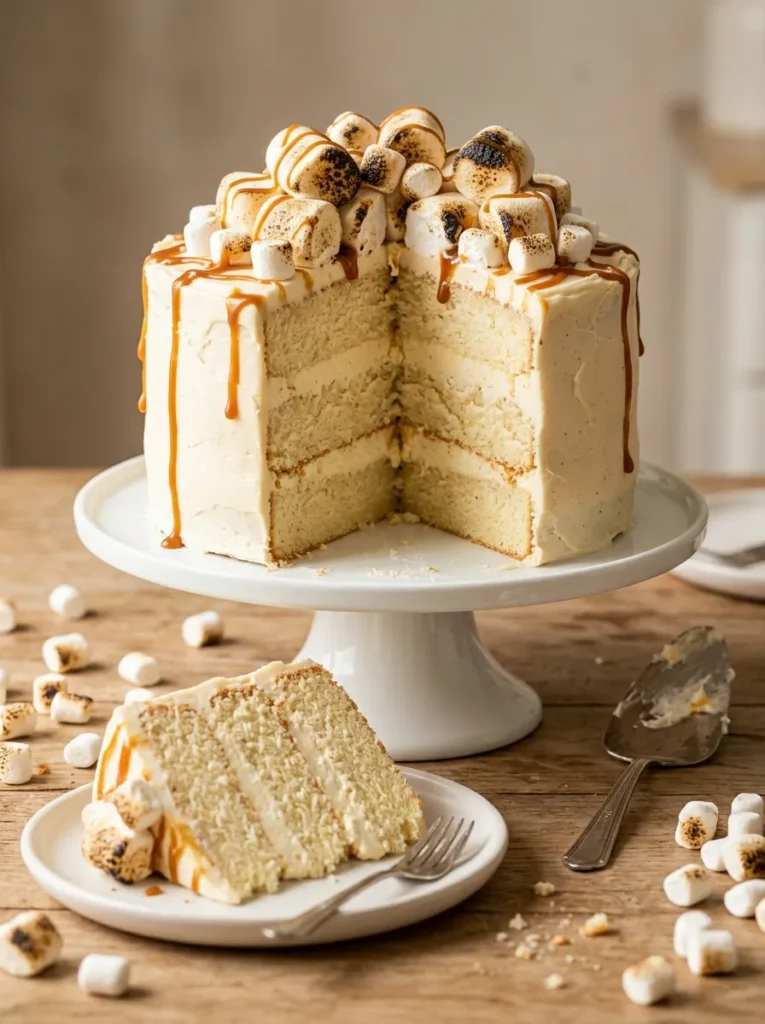
Toasted marshmallows add a campfire-inspired finish to a soft vanilla cake. The golden tops provide a little crispness, while the sponge and frosting remain tender and creamy. This design feels playful without needing elaborate decorations, making it suitable for birthday tables, cozy gatherings, and family celebrations.
Ingredients
For the cake:
- 2 cups (250 g) all-purpose flour
- 1 cup (200 g) granulated sugar
- 1/2 cup (113 g) unsalted butter, softened
- 2 large eggs
- 3/4 cup (180 ml) milk
- 2 teaspoons baking powder
- 2 teaspoons vanilla extract
- 1/4 teaspoon salt
For the frosting:
- 1 cup (226 g) unsalted butter, softened
- 3 cups (360 g) powdered sugar
- 2 tablespoons milk
- 1 teaspoon vanilla extract
For decoration:
- 2 cups mini marshmallows
- 2 tablespoons caramel sauce
How to Make
- Preheat the oven to 350°F (175°C). Grease and line two 8-inch round cake pans.
- Combine the flour, baking powder, and salt in a bowl.
- Beat the butter and sugar until fluffy. Add the eggs and vanilla.
- Mix in the flour mixture alternately with the milk until the batter is smooth.
- Divide the batter between the pans and bake for 25 to 30 minutes. Cool completely.
- Beat the frosting ingredients until light and spreadable. Layer the cakes with frosting, then cover the top and sides.
- Arrange the mini marshmallows over the top of the cake.
- Briefly toast the marshmallows using a kitchen torch, keeping the flame moving to prevent burning. Drizzle with caramel sauce and allow the topping to cool before serving.
Use a kitchen torch for controlled browning and keep it away from paper decorations, packaging, and other flammable materials. If you do not have a torch, arrange the marshmallows on a lined tray, brown them under the broiler while watching constantly, then transfer them to the frosted cake. Add the topping shortly before serving for the best texture.
Yuzu Meringue Cake

- Fresh citrus flavor: Yuzu offers a fragrant, tangy taste. Bottled yuzu juice works well when fresh fruit is unavailable.
- Soft texture: Light sponge and airy meringue balance the bright citrus filling.
- Decoration: Toasted meringue swirls create height and texture without requiring elaborate piping.
- Serving occasion: This cake suits spring celebrations, afternoon tea, and elegant dessert tables.
The key to this cake is balancing the citrus filling with a lightly sweetened meringue topping. Keep the curd thick enough to stay between the layers, and let the sponge cool completely before assembly. A little finely grated zest adds fragrance and makes the pale finish look fresh.
Ingredients
For the cake:
- 1 3/4 cups (220 g) all-purpose flour
- 3/4 cup (150 g) granulated sugar
- 1/2 cup (113 g) unsalted butter, softened
- 2 large eggs
- 1/2 cup (120 ml) milk
- 2 teaspoons baking powder
- 1 teaspoon vanilla extract
- 1 tablespoon yuzu juice
- 1/4 teaspoon salt
For the yuzu curd:
- 1/3 cup (80 ml) yuzu juice
- 1/2 cup (100 g) granulated sugar
- 2 egg yolks
- 3 tablespoons (42 g) unsalted butter
For the meringue:
- 3 large egg whites
- 3/4 cup (150 g) granulated sugar
- 1/4 teaspoon cream of tartar
For decoration:
– Finely grated citrus zest
How to Make
- Preheat the oven to 350°F (175°C). Grease and line two 8-inch round cake pans.
- Whisk the flour, baking powder, and salt together.
- Beat the butter and sugar until fluffy. Add the eggs, vanilla, and yuzu juice.
- Mix in the dry ingredients alternately with the milk. Divide the batter between the pans.
- Bake for 25 to 30 minutes, or until a toothpick inserted in the center comes out clean. Cool completely.
- For the curd, whisk the yuzu juice, sugar, and egg yolks in a heatproof bowl. Cook over gently simmering water, stirring until thickened. Remove from the heat and stir in the butter. Cool completely.
- For the meringue, beat the egg whites and cream of tartar until foamy. Gradually add the sugar and beat until glossy, stiff peaks form.
- Spread the curd between the cake layers. Pipe or spread the meringue over the top and briefly toast with a kitchen torch until golden. Finish with citrus zest.
Yuzu juice can vary in tartness, so taste the cooled curd before assembling the cake. If needed, adjust the sweetness slightly while the curd is still warm. For food safety, use pasteurized egg whites if preferred, and avoid serving uncooked meringue to people at higher risk from foodborne illness.
Lemon Poppy Seed Cake
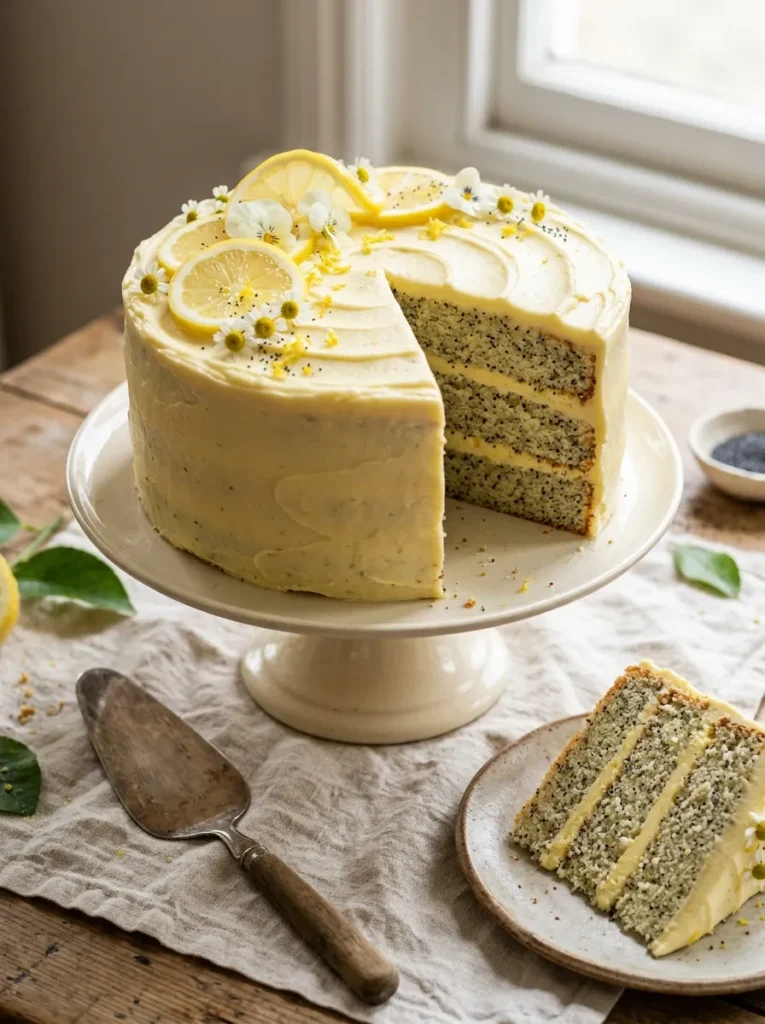
Quick Tip:
Rub the lemon zest into the sugar before mixing the batter. This releases the citrus oils and gives the cake a brighter aroma. Use freshly squeezed lemon juice for the best flavor.
Lemon poppy seed cake combines a tender crumb with little pops of texture and refreshing citrus flavor. A thin layer of lemon buttercream adds sweetness without hiding the sponge’s delicate taste. Keep the decoration simple with fresh zest and a few lemon slices for a polished finish suitable for brunches, birthdays, and afternoon tea.
Ingredients
For the cake:
- 2 cups (250 g) all-purpose flour
- 1 cup (200 g) granulated sugar
- 1/2 cup (113 g) unsalted butter, softened
- 2 large eggs
- 3/4 cup (180 ml) milk
- 2 tablespoons fresh lemon juice
- 1 tablespoon finely grated lemon zest
- 2 tablespoons poppy seeds
- 2 teaspoons baking powder
- 1 teaspoon vanilla extract
- 1/4 teaspoon salt
For the lemon frosting:
- 1 cup (226 g) unsalted butter, softened
- 3 cups (360 g) powdered sugar
- 1 tablespoon fresh lemon juice
- 1 teaspoon lemon zest
- 1 to 2 tablespoons milk, as needed
For decoration:
- Thin lemon slices
- Extra lemon zest
How to Make
- Preheat the oven to 350°F (175°C). Grease and line two 8-inch round cake pans.
- Combine the flour, baking powder, poppy seeds, and salt in a bowl.
- Rub the lemon zest into the sugar with your fingertips. Beat the lemon sugar with the butter until fluffy.
- Add the eggs one at a time, followed by the vanilla and lemon juice.
- Add the dry ingredients alternately with the milk, mixing just until combined.
- Divide the batter between the pans. Bake for 25 to 30 minutes, or until a toothpick inserted in the center comes out clean.
- Cool the cakes completely. Beat the frosting ingredients until smooth, adding milk gradually if needed.
- Spread frosting between the layers and around the cake. Decorate with lemon slices and extra zest before serving.
For a clean finish, refrigerate the frosted cake for 20 minutes before adding the lemon slices. Pat the slices dry first to prevent excess moisture from marking the buttercream. Store leftovers in an airtight container in the refrigerator, then allow individual slices to soften slightly at room temperature before serving.
Chocolate Orange Mirror Cake
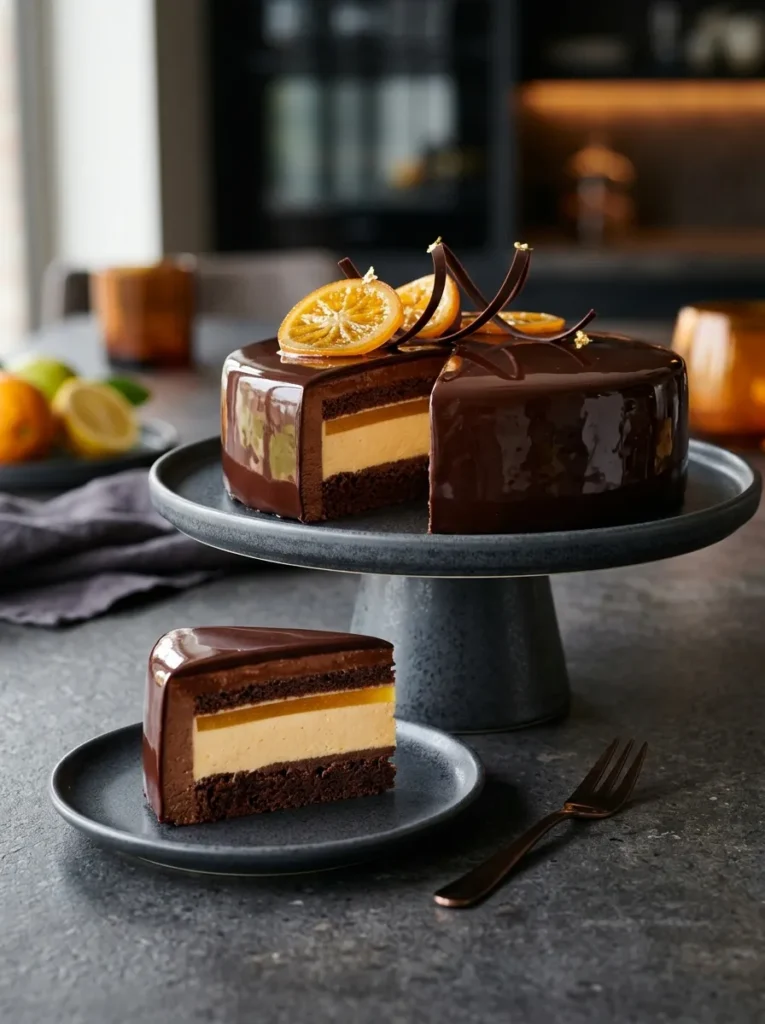
BEFORE: Prepare the chocolate sponge and orange filling separately, allowing both to cool completely before assembly. A chilled cake provides a firm surface for the glossy glaze.
AFTER: Pour the mirror glaze over the cold cake in one steady motion. Let the excess drip away before adding the final decorations. Keep the candied orange garnish toward the center for a neat presentation.
Chocolate and orange create a rich, balanced dessert with both deep cocoa notes and bright citrus fragrance. The reflective glaze gives this cake its signature appearance, while the orange filling adds freshness between the layers. Serve thin slices after special dinners or celebrations when a polished dessert can become the centerpiece.
Ingredients
For the chocolate cake:
- 1 3/4 cups (220 g) all-purpose flour
- 3/4 cup (75 g) unsweetened cocoa powder
- 1 1/2 cups (300 g) granulated sugar
- 2 large eggs
- 3/4 cup (180 ml) milk
- 1/2 cup (120 ml) vegetable oil
- 2 teaspoons baking powder
- 1 teaspoon baking soda
- 1 teaspoon vanilla extract
- 3/4 cup (180 ml) hot water
- 1/2 teaspoon salt
For the orange filling:
- 1 cup (240 ml) heavy whipping cream
- 4 ounces (113 g) cream cheese, softened
- 1/3 cup (40 g) powdered sugar
- 1 tablespoon finely grated orange zest
- 2 tablespoons fresh orange juice
For the mirror glaze:
- 1/2 cup (120 ml) heavy cream
- 1/2 cup (100 g) granulated sugar
- 1/4 cup (60 ml) water
- 1/3 cup (35 g) unsweetened cocoa powder
- 1 teaspoon powdered gelatin
- 1 tablespoon cold water for blooming the gelatin
For decoration:
- Candied orange slices
- Dark chocolate curls
How to Make
- Preheat the oven to 350°F (175°C). Grease and line two 8-inch round cake pans.
- Whisk the flour, cocoa powder, sugar, baking powder, baking soda, and salt together.
- Add the eggs, milk, oil, and vanilla. Mix until combined, then gradually stir in the hot water.
- Divide the batter between the pans and bake for 28 to 35 minutes. Cool completely.
- Beat the cream cheese and powdered sugar until smooth. Add the orange zest and juice, then gently fold in the whipped cream.
- Spread the orange filling between the cake layers. Chill the assembled cake until firm.
- Bloom the gelatin in 1 tablespoon cold water. In a saucepan, combine the cream, sugar, remaining water, and cocoa powder. Heat gently while whisking until smooth. Remove from the heat and stir in the bloomed gelatin until dissolved.
- Let the glaze cool until fluid but no longer hot. Place the chilled cake on a rack over a tray and pour the glaze over the top, allowing it to cover the sides. Refrigerate until set, then decorate with candied orange slices and chocolate curls.
For a smooth mirror finish, strain the glaze to remove cocoa lumps and allow it to cool before pouring. If it becomes too thick, warm it gently until fluid again. Place the cake on a rack so excess glaze can drain, and transfer it carefully to a serving plate once the coating has set. Keep the finished cake refrigerated because of its cream filling.
CONCLUSION
Creating a beautiful cake doesn’t have to mean mastering complicated techniques or buying expensive decorating tools. These 23 ideas offer inspiration for every occasion, from soft pastel designs to rich chocolate creations and fresh fruit finishes. Choose a recipe that matches your baking experience, gather your ingredients, and enjoy making something special. The best Aesthetic Cake Ideas Recipe is one that tastes wonderful and reflects your personal style. Save this article on Pinterest so your favorite designs are easy to find later, and share it with friends who love baking. Your next memorable cake could be just one recipe away!