22 labor day desserts That Spark Truly Endless Joy
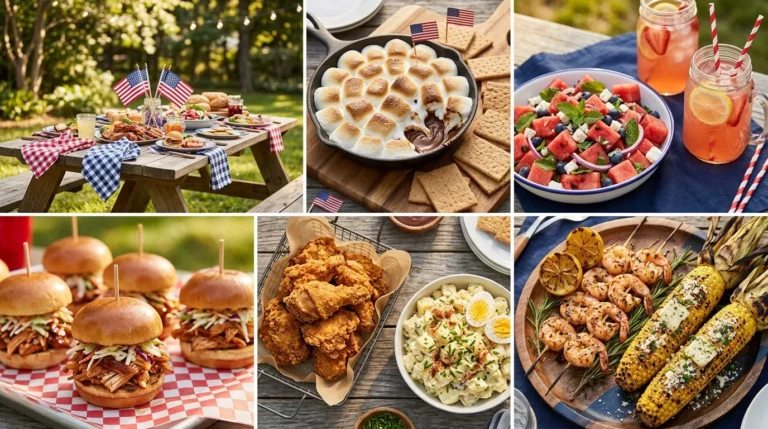
The best Labor Day gatherings deserve desserts that bring everyone back for one more bite. From juicy summer berries to rich chocolate treats, the right sweets can make your holiday table feel extra special.
These labor day desserts offer 22 delicious ways to finish your summer celebration with something memorable, whether you’re hosting a backyard barbecue, attending a potluck, or enjoying a relaxed family afternoon. You’ll find refreshing no-bake treats, fruity favorites, bite-sized sweets, and comforting baked desserts that suit different tastes and skill levels. Some are easy to prepare ahead, while others are perfect for serving fresh at the party. I’ve found that having a mix of light, fruity options and chocolatey favorites makes dessert tables more inviting because there’s something for everyone. Get inspired, choose a few recipes that fit your plans, and make your Labor Day celebration even sweeter.
Mini Peach Cobbler Cups

Sweet, juicy peaches topped with a buttery golden crumble make these mini cobblers a lovely finish to a Labor Day cookout. Individual servings are easy to carry to the table, and everyone gets a generous layer of tender fruit and crisp topping. They bring classic summer dessert flavors without requiring a large baking dish.
Fresh peaches provide the best seasonal flavor, but canned peaches work when fresh ones are unavailable. Drain canned fruit thoroughly to prevent watery filling. Serve the cups warm with vanilla ice cream, or let them cool slightly before packing them for a family gathering. A sprinkle of cinnamon adds warmth without overpowering the peaches.
Ingredients
- 3 cups peeled, sliced peaches
- 2 tablespoons granulated sugar
- 1 teaspoon lemon juice
- 1 tablespoon cornstarch
- 1/2 teaspoon ground cinnamon
- 1 cup all-purpose flour
- 1/3 cup brown sugar
- 1/4 cup cold butter, cubed
- 1/2 teaspoon baking powder
- 3 tablespoons milk
- Vanilla ice cream, for serving (optional)
How to Make It
- Preheat the oven to 375°F (190°C). Lightly grease six small oven-safe ramekins.
- Toss the peach slices with granulated sugar, lemon juice, cornstarch, and cinnamon.
- Divide the peach mixture evenly among the ramekins.
- Combine flour, brown sugar, and baking powder. Rub in the cold butter until crumbly, then stir in the milk.
- Sprinkle the crumble over the peaches and bake for 25 to 30 minutes, until the topping is golden and the filling bubbles.
- Cool for 5 to 10 minutes before serving. Add a small scoop of vanilla ice cream if desired.
ALSO READ : Low Calorie Filling Recipes
Chocolate-Dipped Banana Bites

- Choose ripe bananas: Select firm, yellow bananas without large brown patches so the rounds hold their shape.
- Cut evenly: Slice the bananas into bite-sized coins for easy dipping and consistent freezing.
- Prepare the chocolate: Melt semi-sweet chocolate chips with a little coconut oil for a smooth coating.
- Add toppings: Sprinkle chopped peanuts, shredded coconut, or colorful sprinkles over the chocolate before it sets.
- Freeze until firm: Arrange the pieces on parchment paper with space between them.
These frozen banana bites offer a refreshing sweet treat after a hot afternoon barbecue. The chocolate shell adds a satisfying crunch, while the banana stays creamy inside. For a party-ready presentation, arrange them in small paper cups on a chilled platter. Keep the bites frozen until serving, especially when outdoor temperatures are high.
Ingredients
- 2 firm ripe bananas
- 1 cup semi-sweet chocolate chips
- 1 teaspoon coconut oil
- 2 tablespoons chopped peanuts (optional)
- 2 tablespoons shredded coconut or sprinkles (optional)
How to Make It
- Peel the bananas and slice them into rounds about 1/2 inch thick.
- Arrange the slices on a parchment-lined tray and freeze for 30 minutes.
- Melt the chocolate chips with coconut oil in a microwave-safe bowl, stirring every 20 seconds until smooth.
- Dip each frozen banana round halfway or completely into the melted chocolate.
- Add peanuts, coconut, or sprinkles before the coating hardens.
- Return the bites to the freezer for 30 to 45 minutes, then serve directly from the freezer.
Pinterest Account : FreshRecipeIdeas1
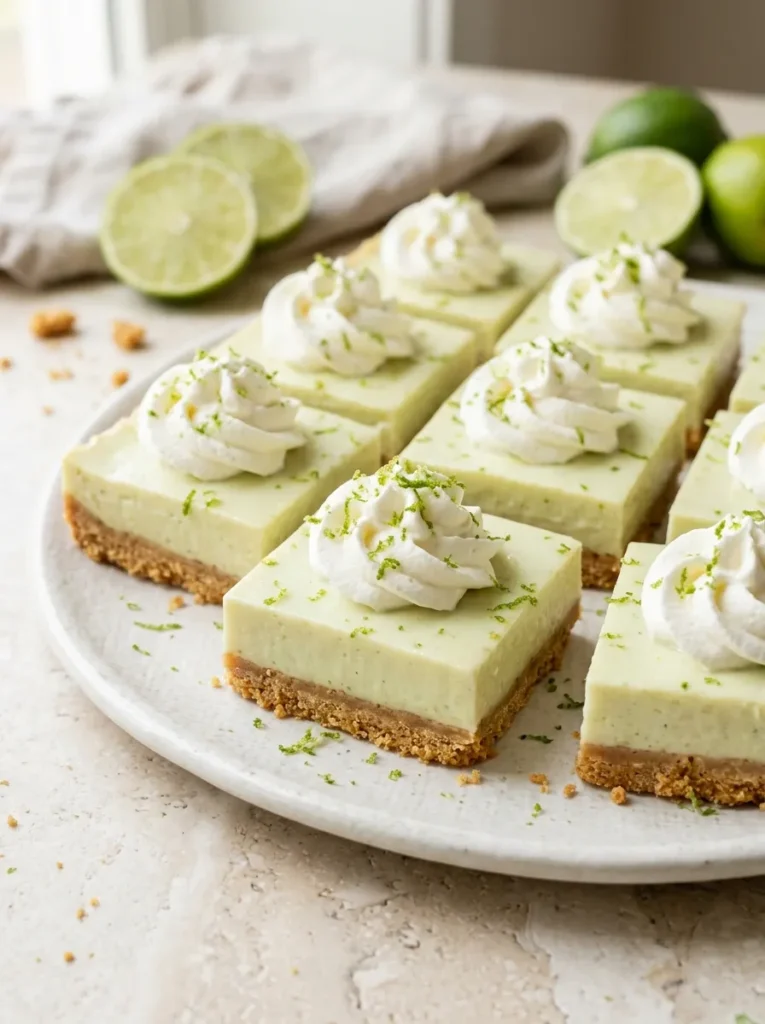
Key Lime Pie Bars
Quick Tip:
Use freshly squeezed key lime juice for a bright citrus flavor, and let the bars chill completely before cutting. Wipe your knife clean between slices to create neat edges that look beautiful on a dessert platter.
These tangy lime bars bring a cool, creamy contrast to the smoky and savory flavors of a Labor Day cookout. Their buttery graham cracker base balances the citrus filling, creating a dessert that feels refreshing without being overly sweet. Prepare them the night before your gathering so they have plenty of time to set.
Ingredients
For the crust:
- 1 1/2 cups graham cracker crumbs
- 5 tablespoons unsalted butter, melted
- 2 tablespoons granulated sugar
For the filling:
- 2 cans (14 ounces each) sweetened condensed milk
- 4 large egg yolks
- 1/2 cup key lime juice
- 1 tablespoon finely grated lime zest
For serving:
- Whipped cream (optional)
- Thin lime slices or extra lime zest (optional)
How to Make It
- Preheat the oven to 350°F (175°C). Line an 8-inch square baking pan with parchment paper.
- Mix the graham cracker crumbs, melted butter, and sugar. Press firmly into the bottom of the pan.
- Bake the crust for 8 minutes, then let it cool slightly.
- Whisk the condensed milk, egg yolks, lime juice, and lime zest until smooth.
- Pour the filling over the crust and bake for 15 to 18 minutes, until the edges are set and the center has a slight wobble.
- Cool completely, then refrigerate for at least 4 hours.
- Cut into bars and garnish with whipped cream or lime zest just before serving. Keep refrigerated until ready to eat.
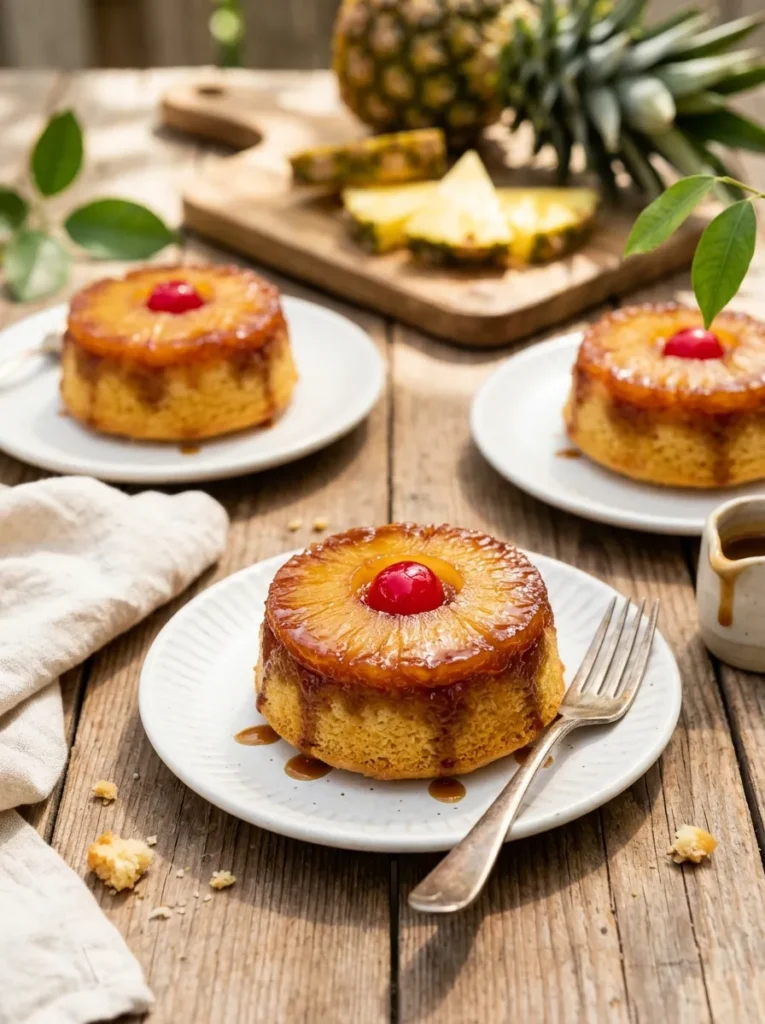
Mini Pineapple Upside-Down Cakes
BEFORE
A large pineapple upside-down cake can be tricky to slice neatly at a busy cookout. The caramel topping may stick to the knife, and the first few portions can lose their beautiful pineapple pattern.
AFTER
Individual mini cakes solve the serving problem. Each guest gets a golden cake topped with a caramelized pineapple ring and cherry, making the dessert table look polished without complicated decoration.
These little cakes bring a nostalgic bakery flavor to your Labor Day celebration. The brown sugar caramel seeps into the tender cake as it bakes, creating a moist texture and sweet pineapple topping. Use a standard muffin pan for convenient portions, and let the cakes rest briefly before turning them out.
Ingredients
- 1 can (20 ounces) pineapple rings, drained
- 6 maraschino cherries, halved
- 1/4 cup unsalted butter, melted
- 1/2 cup packed brown sugar
- 1 cup all-purpose flour
- 1/2 cup granulated sugar
- 1 teaspoon baking powder
- 1/4 teaspoon salt
- 1 large egg
- 1/3 cup milk
- 1 teaspoon vanilla extract
How to Make It
- Preheat the oven to 350°F (175°C). Grease six jumbo muffin cups or eight standard muffin cups.
- Mix the melted butter and brown sugar, then divide the mixture among the muffin cups.
- Place a pineapple ring in each cup, trimming the rings if needed. Add a cherry half to the center.
- Whisk the flour, granulated sugar, baking powder, and salt in a bowl.
- In another bowl, whisk the egg, milk, and vanilla. Stir the wet ingredients into the dry mixture until just combined.
- Divide the batter among the prepared cups, filling each about two-thirds full.
- Bake for 20 to 25 minutes, or until a toothpick inserted into the cake comes out clean.
- Cool for 5 minutes, loosen the edges, and carefully invert the cakes onto a serving plate.
No-Bake Oreo Icebox Cake Squares
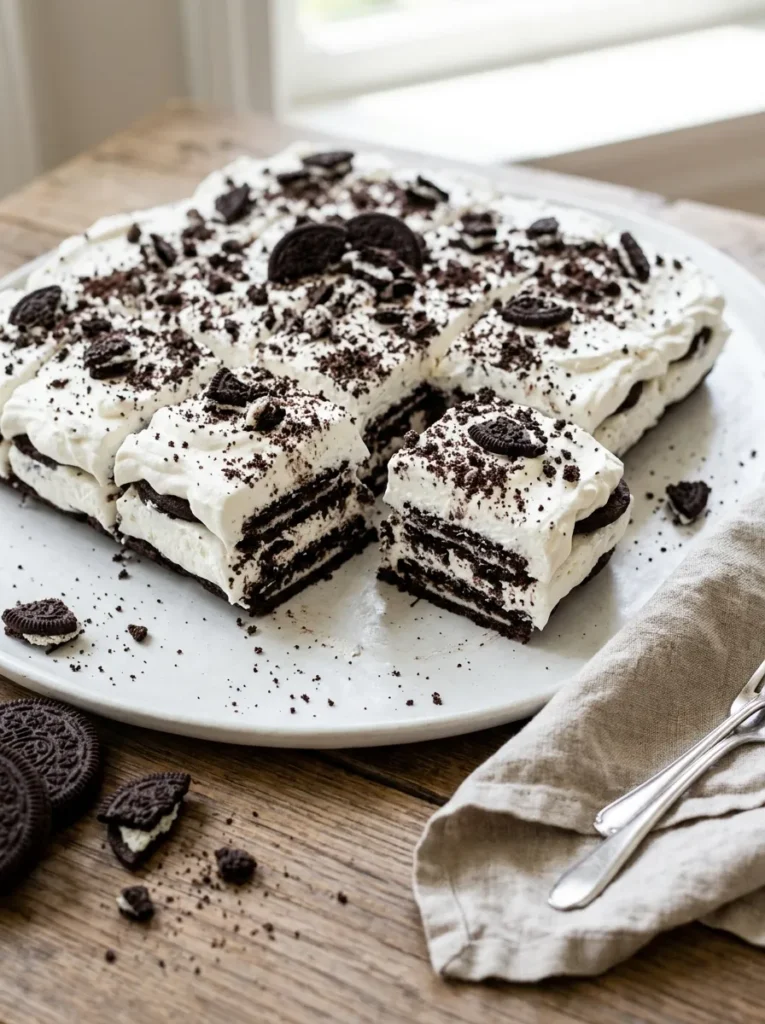
- Prepare the cream: Beat cold heavy whipping cream with powdered sugar and vanilla until stiff peaks form.
- Build the layers: Spread a thin layer of whipped cream in a lined square baking dish, then arrange chocolate sandwich cookies over it.
- Repeat the layers: Alternate cookies and whipped cream until the ingredients are used, finishing with a cream layer.
- Cover and chill: Refrigerate for at least 6 hours, preferably overnight, so the cookies soften into cake-like layers.
- Finish and slice: Sprinkle crushed cookies over the top and cut into squares with a sharp knife.
Rich chocolate cookies and airy cream create a chilled dessert that requires no oven time, leaving you free to prepare the rest of your cookout menu. The cookies soften as they rest, giving each slice a tender, cake-like texture. Make it the night before your gathering and keep it refrigerated until serving.
Ingredients
- 24 chocolate sandwich cookies, plus 3 extra for topping
- 2 cups cold heavy whipping cream
- 1/3 cup powdered sugar
- 1 teaspoon vanilla extract
- 2 tablespoons chocolate cookie crumbs, for garnish
How to Make It
- Line an 8-inch square baking dish with parchment paper, leaving a little overhang for easy removal.
- Beat the whipping cream, powdered sugar, and vanilla until stiff peaks form.
- Spread a thin layer of whipped cream across the bottom of the dish.
- Arrange a single layer of cookies over the cream, breaking a few to fill any gaps.
- Spread another layer of whipped cream over the cookies. Repeat until all the cookies and cream are used, ending with whipped cream.
- Cover the dish and refrigerate for at least 6 hours or overnight.
- Lift the chilled cake out using the parchment paper, sprinkle with cookie crumbs, and slice into squares.
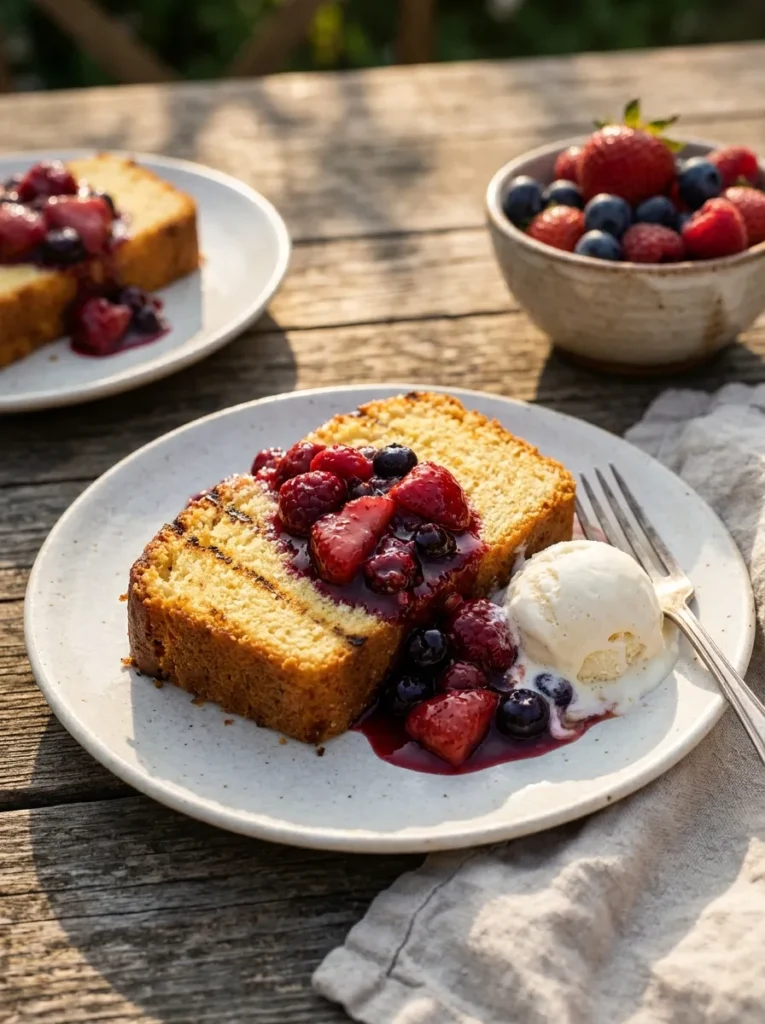
Grilled Pound Cake With Berry Compote
| Serving option | Store-bought pound cake | Homemade pound cake |
| Preparation | Ready to slice and grill | Requires baking and cooling first |
| Texture | Convenient, usually soft and dense | Customizable richness and crumb |
| Best use | Quick backyard gatherings | Planned celebrations |
| Grilling tip | Brush lightly with melted butter | Chill slices briefly if very soft |
Grilled pound cake adds a warm, lightly crisp finish to a summer dessert table, especially when paired with juicy berries. The grill marks create a smoky contrast against the sweet fruit topping. Choose thick slices so the cake holds together, and grill them just before serving for the best texture.
Ingredients
For the cake:
- 1 pound prepared pound cake, cut into 1-inch-thick slices
- 2 tablespoons unsalted butter, melted
For the berry compote:
- 1 cup strawberries, hulled and chopped
- 1/2 cup blueberries
- 1/2 cup raspberries
- 2 tablespoons granulated sugar
- 1 teaspoon lemon juice
- 1 tablespoon water
For serving:
- Vanilla ice cream or whipped cream (optional)
- Fresh mint leaves (optional)
How to Make It
- Combine the strawberries, blueberries, raspberries, sugar, lemon juice, and water in a small saucepan.
- Cook over medium-low heat for 5 to 8 minutes, stirring gently until the berries release their juices and the mixture thickens slightly. Set aside to cool.
- Preheat a clean grill or grill pan to medium heat.
- Brush both sides of the pound cake slices lightly with melted butter.
- Grill for 1 to 2 minutes per side, until golden with visible grill marks. Watch carefully because the cake can burn quickly.
- Transfer the warm slices to serving plates and spoon the berry compote over each one.
- Add vanilla ice cream or whipped cream and serve immediately.
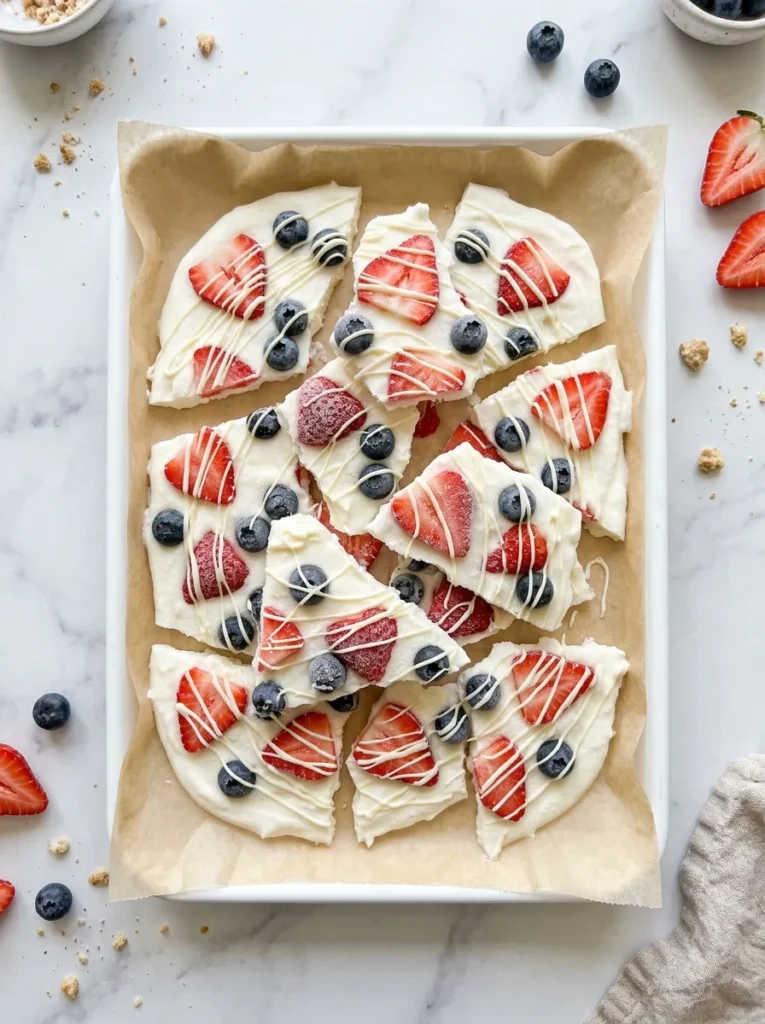
Frozen Strawberry Yogurt Bark
DO
- Use thick Greek yogurt so the bark freezes firmly and breaks into satisfying pieces.
- Spread the yogurt evenly, about 1/4 inch thick, for consistent freezing.
- Pat washed strawberries dry before adding them to reduce excess moisture.
- Freeze the tray completely before breaking the bark into pieces.
DON’T
- Don’t use watery yogurt that can create an icy texture.
- Don’t pile fruit too thickly, or the bark may break unevenly.
- Don’t leave the finished pieces sitting outside in warm weather.
- Don’t expect a soft yogurt mixture to cut neatly before freezing.
For a refreshing cookout treat, strawberry yogurt bark offers a cool alternative to rich cakes and pastries. The berries add natural sweetness and vivid color, while Greek yogurt provides a creamy, tangy base. Keep the finished pieces in a sealed container in the freezer and serve them straight from the cold.
Ingredients
- 2 cups plain or vanilla Greek yogurt
- 2 tablespoons honey or maple syrup
- 1/2 teaspoon vanilla extract
- 1/2 cup fresh strawberries, thinly sliced
- 1/3 cup fresh blueberries
- 2 tablespoons white chocolate chips, melted (optional)
How to Make It
- Line a rimmed baking sheet with parchment paper.
- Stir the Greek yogurt with honey and vanilla until smooth.
- Spread the mixture evenly across the prepared sheet, creating a layer about 1/4 inch thick.
- Scatter the sliced strawberries and blueberries over the yogurt, pressing them in gently.
- Drizzle with melted white chocolate if desired.
- Freeze for 3 to 4 hours, or until completely solid.
- Break the bark into irregular pieces and store them in an airtight freezer-safe container.
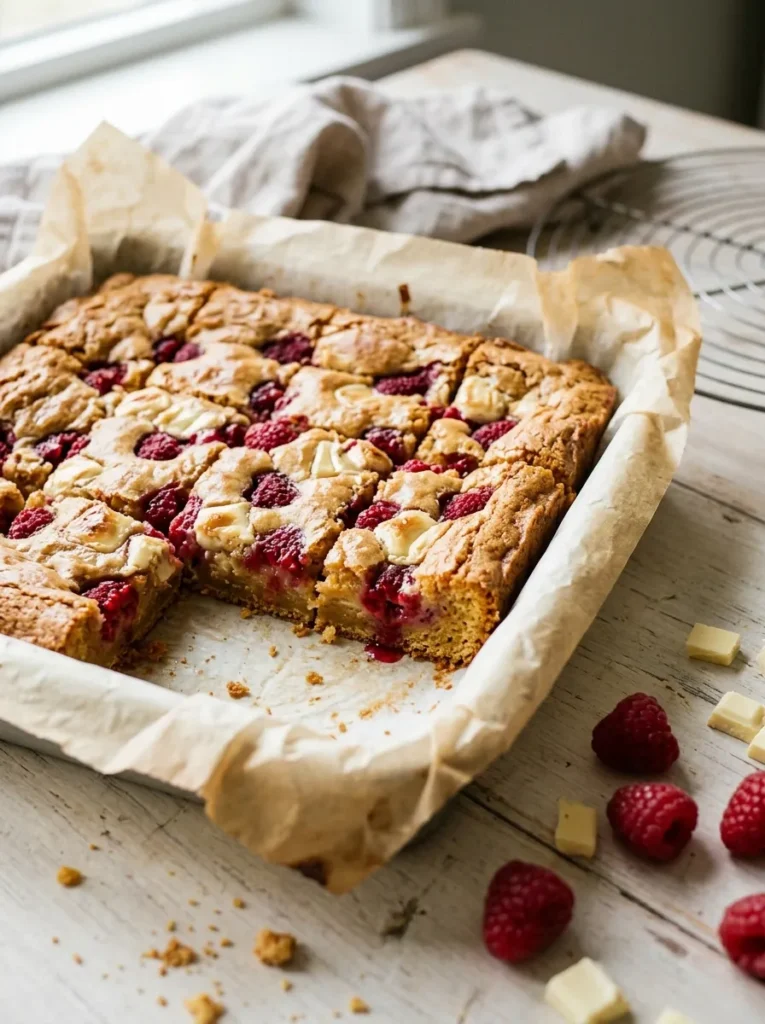
Raspberry White Chocolate Blondies
Cost: Moderate, depending on the price of fresh raspberries and white chocolate.
Time: Approximately 40 to 50 minutes, including baking and initial cooling.
Skill Level: Beginner-friendly, with simple mixing and one baking pan.
Best For: Backyard parties, dessert platters, and make-ahead picnic treats.
A tray of raspberry blondies combines buttery brown sugar sweetness with tart fruit and creamy white chocolate. The colorful berries make each square stand out on a dessert board, while the chewy texture makes them easy to serve without plates or forks. Let the slab cool fully before cutting to keep the squares neat.
Ingredients
- 1/2 cup unsalted butter, melted
- 3/4 cup packed light brown sugar
- 1 large egg
- 1 teaspoon vanilla extract
- 1 cup all-purpose flour
- 1/4 teaspoon salt
- 1/2 cup white chocolate chips
- 3/4 cup fresh raspberries
How to Make It
- Preheat the oven to 350°F (175°C). Line an 8-inch square baking pan with parchment paper.
- Whisk the melted butter and brown sugar in a bowl until combined.
- Add the egg and vanilla, then whisk until smooth.
- Fold in the flour and salt just until no dry streaks remain.
- Gently fold in the white chocolate chips and half of the raspberries.
- Spread the batter evenly in the prepared pan. Scatter the remaining raspberries over the top, pressing them in lightly.
- Bake for 22 to 28 minutes, until the edges are lightly golden and the center is just set.
- Cool completely before lifting out and cutting into squares.
Cherry Cheesecake Stuffed Strawberries
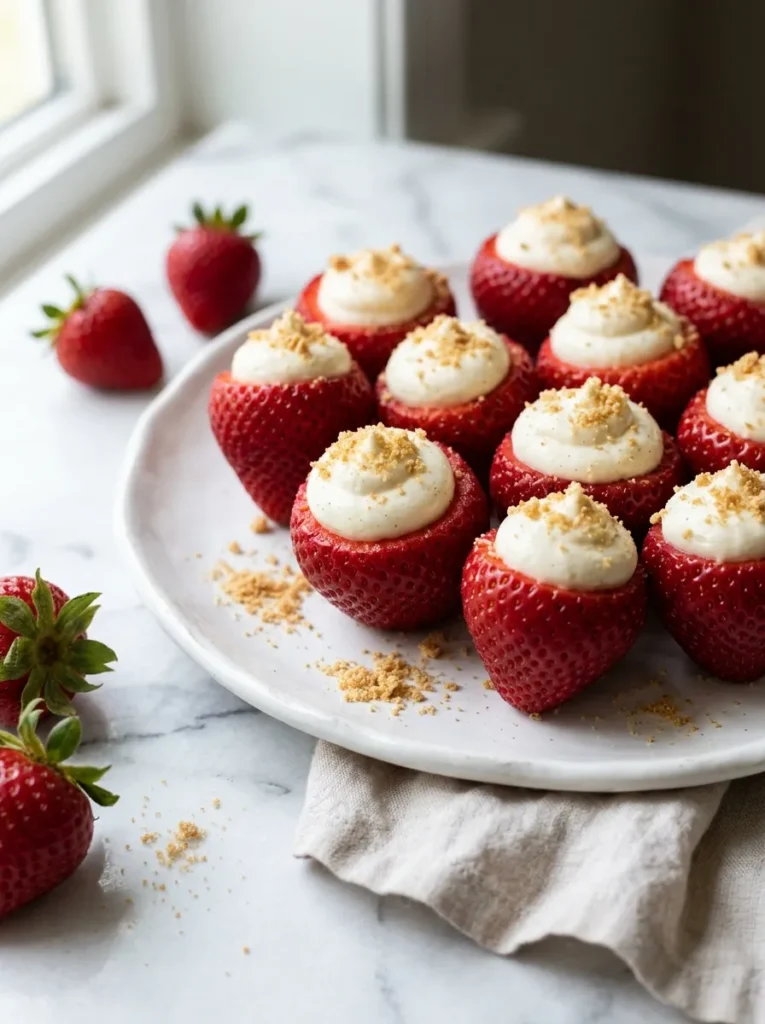
These cheesecake-stuffed strawberries deliver creamy sweetness in a fresh, bite-sized package. Each berry holds a smooth cheesecake filling, while the graham cracker crumbs add a buttery crunch. Their bright red color and neat presentation make them stand out on a summer dessert platter without requiring any baking.
For the best results, choose large, firm strawberries and chill the filling before piping it inside. Prepare the berries a few hours before your gathering, then keep them refrigerated until serving. A small piping bag creates tidy swirls, but a zip-top bag with one corner snipped works just as well for beginners.
Ingredients
- 18 large fresh strawberries
- 4 ounces cream cheese, softened
- 3 tablespoons powdered sugar
- 1/2 teaspoon vanilla extract
- 2 tablespoons heavy whipping cream
- 3 tablespoons graham cracker crumbs
How to Make It
- Wash the strawberries and dry them thoroughly. Remove the green tops and carefully hollow out a small cavity in each berry.
- Beat the softened cream cheese, powdered sugar, and vanilla until smooth.
- Add the heavy whipping cream and beat until the filling becomes light and fluffy.
- Transfer the cheesecake mixture to a piping bag or a zip-top bag with a small corner cut off.
- Pipe the filling into each strawberry, creating a small swirl above the rim.
- Sprinkle graham cracker crumbs over the filling.
- Refrigerate for 30 to 60 minutes before serving. Keep the stuffed strawberries chilled until ready to eat.
Blueberry Lemon Crumb Muffins
- Pick fresh blueberries: Choose firm berries and pat them dry before folding them into the batter.
- Mix the dry ingredients: Whisk flour, baking powder, and salt in a large bowl.
- Prepare the wet mixture: Combine melted butter, sugar, eggs, milk, lemon zest, and lemon juice.
- Make the crumb topping: Rub cold butter into flour and sugar until coarse crumbs form.
- Bake until golden: Fill the muffin cups, sprinkle with crumbs, and bake until a toothpick comes out clean.
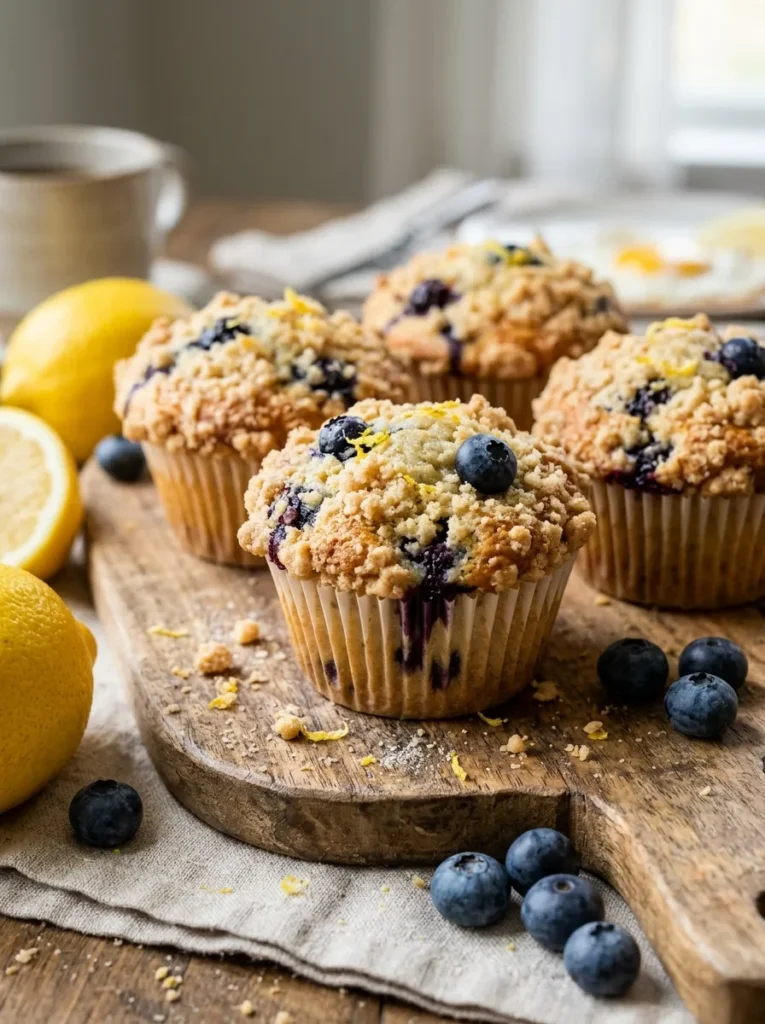
These muffins bring together sweet blueberries, bright lemon, and a buttery crumb topping in a portable dessert. They’re easy to arrange on a picnic tray and work well for guests who prefer a less sugary treat after a large meal. Bake them the morning of your gathering, then cool completely before packing.
Ingredients
For the muffins:
- 2 cups all-purpose flour
- 3/4 cup granulated sugar
- 2 teaspoons baking powder
- 1/4 teaspoon salt
- 1/2 cup unsalted butter, melted and cooled
- 2 large eggs
- 1/2 cup milk
- 1 tablespoon lemon zest
- 2 tablespoons lemon juice
- 1 teaspoon vanilla extract
- 1 cup fresh blueberries
For the crumb topping:
- 1/4 cup all-purpose flour
- 3 tablespoons granulated sugar
- 2 tablespoons cold butter, cubed
How to Make It
- Preheat the oven to 375°F (190°C). Line a 12-cup muffin pan with paper liners.
- Whisk the flour, sugar, baking powder, and salt in a large bowl.
- In another bowl, mix the melted butter, eggs, milk, lemon zest, lemon juice, and vanilla.
- Add the wet ingredients to the dry ingredients and stir gently until just combined. Fold in the blueberries.
- For the topping, mix the flour and sugar, then rub in the cold butter until coarse crumbs form.
- Divide the batter among the muffin cups, filling each about three-quarters full. Sprinkle the crumb topping evenly over each muffin.
- Bake for 18 to 22 minutes, until the tops are golden and a toothpick inserted into the center comes out clean.
- Cool in the pan for 5 minutes, then transfer to a wire rack.
Peanut Butter Pretzel Chocolate Clusters

Quick Tip:
Break the pretzels into small pieces before mixing so every cluster has a good balance of salty crunch and chocolate coating. Chill the mixture on parchment paper, and use a small cookie scoop to make evenly sized portions.
Sweet chocolate, creamy peanut butter, and salty pretzels create a no-bake treat with plenty of crunch. These clusters are especially useful for busy holiday hosts because they require only a few ingredients and minimal preparation. Make them ahead, then arrange them in mini paper cups for a tidy dessert tray that guests can grab easily.
Ingredients
- 2 cups mini pretzels, roughly broken
- 1 cup milk chocolate chips
- 1/2 cup creamy peanut butter
- 1/2 cup roasted peanuts, roughly chopped
- 1/4 teaspoon flaky sea salt (optional)
How to Make It
- Line a baking sheet with parchment paper.
- Place the chocolate chips and peanut butter in a microwave-safe bowl.
- Microwave in 20-second intervals, stirring after each interval, until the mixture is smooth.
- Fold in the broken pretzels and chopped peanuts until evenly coated.
- Drop spoonfuls of the mixture onto the prepared baking sheet, leaving space between each cluster.
- Sprinkle lightly with flaky sea salt if desired.
- Refrigerate for 30 to 45 minutes, until firm. Store in an airtight container in a cool place or in the refrigerator.
Coconut Mango Pudding Cups
BEFORE
A large pudding bowl can be awkward to transport and serve at a busy backyard gathering. Guests need individual bowls, and the toppings can become uneven once everyone starts scooping.
AFTER
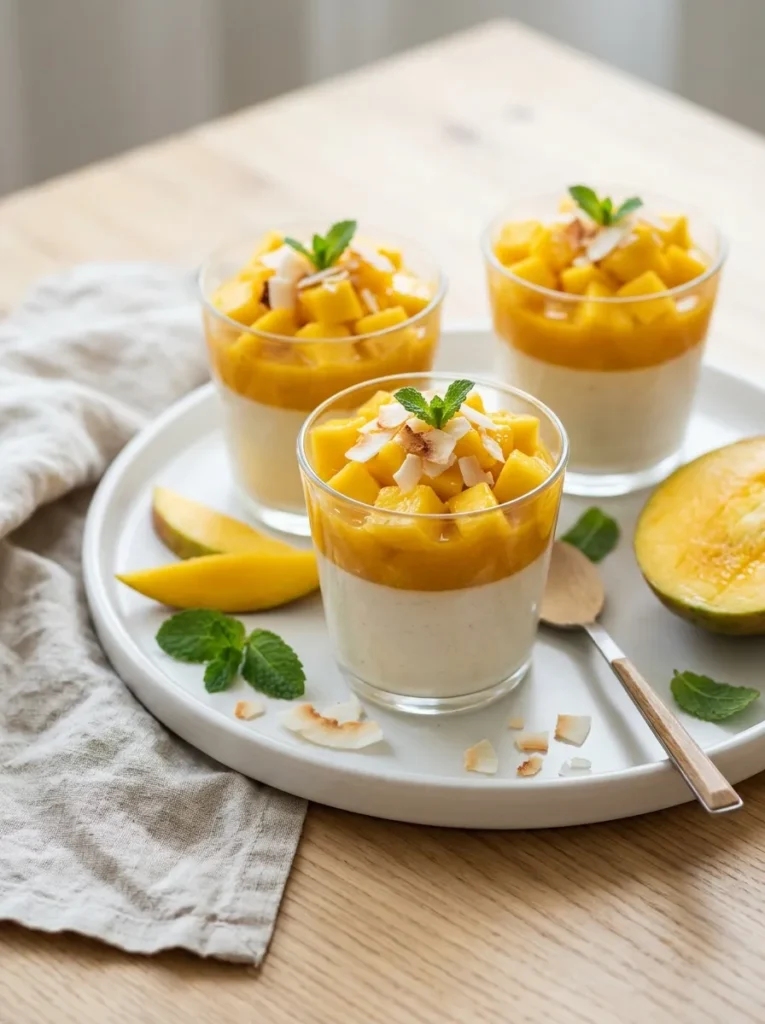
Individual coconut mango cups keep the portions neat and the layers visible. Each guest gets creamy coconut pudding topped with sweet mango, while clear glasses make the golden fruit stand out on the dessert table.
This tropical dessert brings a refreshing finish to a warm-weather celebration. Coconut milk gives the pudding a gentle richness, while ripe mango adds natural sweetness and a bright color contrast. Prepare the cups in advance and refrigerate them until serving. Choose fragrant, ripe mangoes for the smoothest puree and most flavorful topping.
Ingredients
For the coconut pudding:
- 1 can (13.5 ounces) coconut milk
- 1 cup whole milk
- 1/4 cup granulated sugar
- 3 tablespoons cornstarch
- 1 teaspoon vanilla extract
- Pinch of salt
For the mango topping:
- 2 ripe mangoes, peeled and diced
- 1 teaspoon lime juice
- 1 tablespoon shredded coconut (optional)
- Fresh mint leaves, for garnish (optional)
How to Make It
- Whisk the coconut milk, whole milk, sugar, cornstarch, vanilla, and salt together in a saucepan until smooth.
- Place the saucepan over medium heat and cook, stirring constantly, for 5 to 8 minutes, until the mixture thickens.
- Remove from the heat and let the pudding cool for 10 minutes, stirring occasionally to prevent a skin from forming.
- Divide the pudding among six small serving glasses. Cover and refrigerate for at least 2 hours.
- Blend half the diced mango with the lime juice until smooth. Keep the remaining mango pieces for topping.
- Spoon the mango puree over the chilled pudding and finish with the reserved diced mango.
- Garnish with shredded coconut or mint, if desired. Keep refrigerated until serving.
Cinnamon Sugar Churro Bites
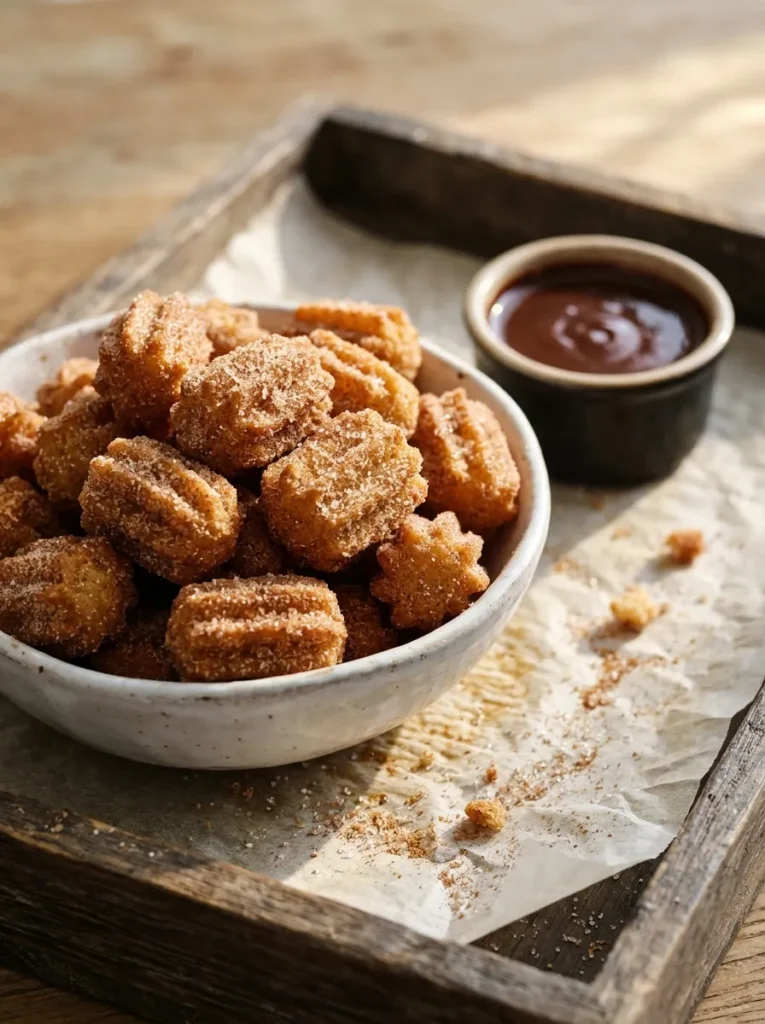
Crispy on the outside and tender in the middle, churro bites bring a fun fairground treat to your Labor Day dessert table. Their small size makes them easy to share, while cinnamon sugar gives every bite a warm, sweet finish. Serve them fresh from the fryer with chocolate sauce for a dessert guests can enjoy while chatting outdoors.
Ingredients
- 1 cup water
- 2 tablespoons unsalted butter
- 1 tablespoon granulated sugar
- 1/4 teaspoon salt
- 1 cup all-purpose flour
- 1 large egg
- 1/2 teaspoon vanilla extract
- Vegetable oil, for frying
For the coating:
- 1/2 cup granulated sugar
- 1 teaspoon ground cinnamon
For serving:
– 1/2 cup chocolate sauce
How to Make It
- Combine water, butter, sugar, and salt in a saucepan. Bring to a gentle boil.
- Remove from the heat and stir in the flour until a thick dough forms.
- Let the dough cool for 5 minutes, then mix in the egg and vanilla until smooth.
- Transfer the dough to a piping bag fitted with a large star tip.
- Heat about 2 inches of vegetable oil in a heavy saucepan to 350°F (175°C). Carefully pipe short strips of dough into the oil, cutting each with kitchen scissors.
- Fry in small batches for 2 to 3 minutes, turning as needed, until golden and crisp. Drain on paper towels.
- Mix the cinnamon and sugar in a shallow bowl. Toss the warm churro bites in the coating.
- Serve immediately with chocolate sauce. Use care around hot oil, and never leave it unattended.
Salted Caramel Pretzel Brownies

| Option | Plain chocolate brownies | Salted caramel pretzel brownies |
| Flavor | Rich and chocolatey | Sweet, salty, and chocolatey |
| Texture | Soft and fudgy | Fudgy with crunchy pretzels |
| Topping | Simple chocolate crust | Caramel drizzle and pretzel pieces |
| Serving | Works well with ice cream | Easy to serve as individual squares |
Salted caramel pretzel brownies combine three crowd-pleasing flavors in one easy-to-share dessert. The chewy chocolate base contrasts with crunchy pretzels, while caramel adds a sweet finish balanced by a little flaky salt. For clean slices, allow the brownies to cool completely before cutting and add the final caramel drizzle just before serving.
Ingredients
- 1/2 cup unsalted butter
- 1 cup granulated sugar
- 2 large eggs
- 1 teaspoon vanilla extract
- 1/3 cup unsweetened cocoa powder
- 1/2 cup all-purpose flour
- 1/4 teaspoon salt
- 1/2 cup semi-sweet chocolate chips
- 1 cup mini pretzels, roughly broken
- 1/3 cup thick caramel sauce
- 1/2 teaspoon flaky sea salt
How to Make It
- Preheat the oven to 350°F (175°C). Line an 8-inch square baking pan with parchment paper.
- Melt the butter in a saucepan or microwave-safe bowl. Whisk in the sugar.
- Add the eggs and vanilla, whisking until combined.
- Fold in the cocoa powder, flour, and salt until no dry streaks remain.
- Stir in the chocolate chips and half of the broken pretzels.
- Spread the batter into the prepared pan and scatter the remaining pretzels over the top.
- Bake for 22 to 28 minutes, until the edges are set and a toothpick inserted near the center comes out with a few moist crumbs.
- Cool completely. Drizzle with caramel sauce, sprinkle with flaky sea salt, and cut into squares.
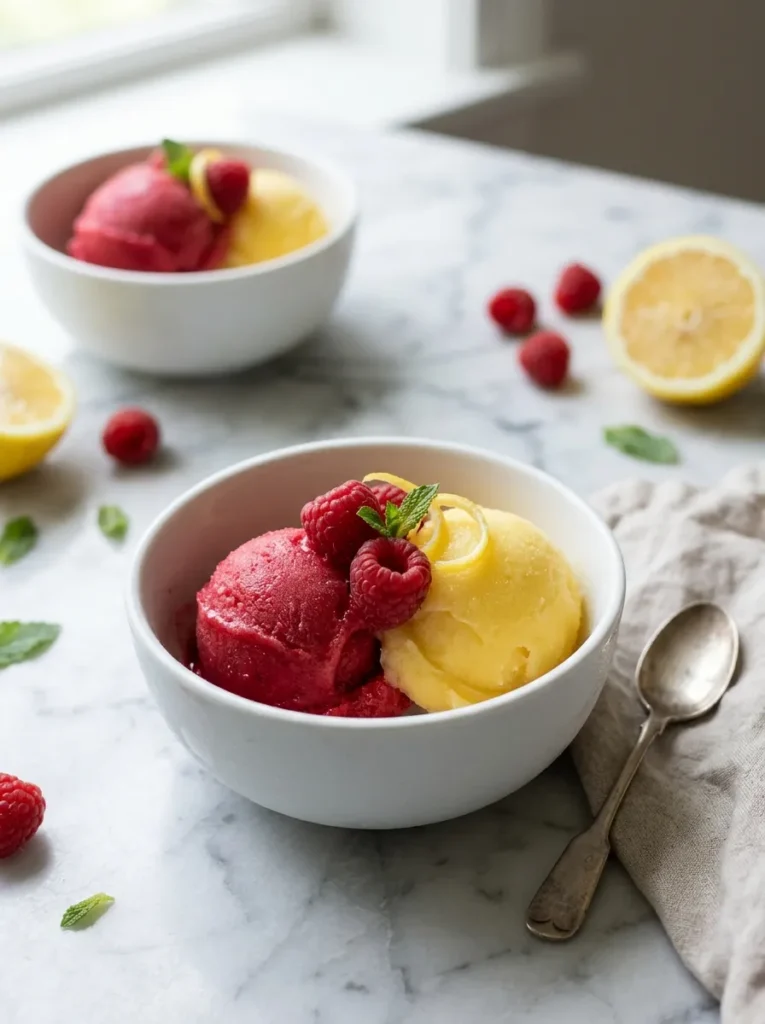
Raspberry Lemon Sorbet
Quick Tip:
For a smoother sorbet, strain the raspberry puree through a fine-mesh sieve before freezing to remove most of the seeds. Chill the mixture thoroughly before churning, and let the finished sorbet sit at room temperature for a few minutes before scooping.
Tart raspberries and fresh lemon create a refreshing frozen dessert that feels especially welcome after a hot afternoon barbecue. The vivid pink-red color looks striking in small glass bowls, and the fruit-forward flavor offers a lighter finish after a rich meal. Make it a day ahead so it has time to freeze firmly before your gathering.
Ingredients
- 4 cups frozen raspberries, thawed slightly
- 3/4 cup granulated sugar
- 1/2 cup water
- 1/3 cup freshly squeezed lemon juice
- 1 teaspoon finely grated lemon zest
- 1 tablespoon light corn syrup (optional, for smoother texture)
How to Make It
- Combine the sugar and water in a small saucepan. Heat gently, stirring until the sugar dissolves, then cool completely.
- Blend the raspberries until smooth.
- Strain the puree through a fine-mesh sieve if you prefer a seedless sorbet.
- Stir the cooled syrup into the raspberry puree with the lemon juice, lemon zest, and corn syrup if using.
- Refrigerate the mixture for at least 2 hours, until thoroughly chilled.
- Churn in an ice cream maker according to the manufacturer’s instructions.
- Transfer to a freezer-safe container and freeze for 2 to 4 hours, until scoopable but firm.
- If you do not have an ice cream maker, freeze the mixture in a shallow container, stirring vigorously every 30 minutes for about 3 hours to help reduce large ice crystals.
S’mores Chocolate Chip Cookie Bars

Cost: Moderate, depending on the chocolate and marshmallow brands.
Time: Approximately 40 minutes, plus cooling time.
Skill Level: Beginner-friendly, with a simple cookie dough base.
Best For: Backyard cookouts, family gatherings, and casual summer parties.
These cookie bars bring classic campfire flavors to your dessert table without needing a fire pit. A buttery chocolate chip cookie base holds the gooey marshmallows, melted chocolate, and crunchy graham crackers together in every square. Bake them in one pan, cool completely, and cut into portions for easy serving at your Labor Day gathering.
Ingredients
- 1/2 cup unsalted butter, softened
- 1/2 cup packed brown sugar
- 1/4 cup granulated sugar
- 1 large egg
- 1 teaspoon vanilla extract
- 1 1/4 cups all-purpose flour
- 1/2 teaspoon baking soda
- 1/4 teaspoon salt
- 3/4 cup chocolate chips
- 1 cup mini marshmallows
- 3 graham crackers, broken into small pieces
How to Make It
- Preheat the oven to 350°F (175°C). Line an 8-inch square baking pan with parchment paper.
- Beat the softened butter, brown sugar, and granulated sugar until creamy.
- Mix in the egg and vanilla extract.
- Stir in the flour, baking soda, and salt until a soft dough forms.
- Fold in the chocolate chips and half of the graham cracker pieces.
- Press the dough evenly into the prepared pan and bake for 18 to 22 minutes, until the edges are lightly golden.
- Scatter the mini marshmallows, remaining graham crackers, and a few extra chocolate chips over the top.
- Bake for another 3 to 5 minutes, until the marshmallows soften and begin to turn golden.
- Cool completely before slicing into bars.
Vanilla Bean Panna Cotta Cups

BEFORE
Heavy desserts can feel overwhelming after a meal filled with grilled meats, buttery sides, and rich sauces. A complicated plated dessert can also create extra work when you’re hosting several guests.
AFTER
Individual panna cotta cups provide a cool, creamy finish in a manageable portion. Their smooth texture, delicate vanilla flavor, and bright fruit topping create an elegant presentation with very little last-minute preparation.
Panna cotta is a useful make-ahead dessert because it needs several hours to set in the refrigerator. Use real vanilla extract or vanilla bean paste for a fragrant flavor, and add the strawberry sauce shortly before serving. For a vegetarian version, choose a suitable setting agent such as agar-agar and follow its specific preparation instructions.
Ingredients
For the panna cotta:
- 2 cups heavy cream
- 1/2 cup whole milk
- 1/4 cup granulated sugar
- 2 teaspoons unflavored powdered gelatin
- 3 tablespoons cold water
- 1 teaspoon vanilla extract
For the strawberry sauce:
- 1 cup strawberries, chopped
- 2 tablespoons granulated sugar
- 1 teaspoon lemon juice
How to Make It
- Sprinkle the gelatin over the cold water in a small bowl. Let it bloom for 5 minutes.
- Combine the heavy cream, milk, and sugar in a saucepan. Heat gently until steaming, stirring until the sugar dissolves. Do not boil.
- Remove the saucepan from the heat and stir in the bloomed gelatin until completely dissolved.
- Add the vanilla extract and divide the mixture among six small serving cups.
- Let the cups cool slightly, then cover and refrigerate for at least 4 hours, until set.
- For the sauce, combine the strawberries, sugar, and lemon juice in a small saucepan.
- Cook over medium-low heat for 5 to 8 minutes, stirring until the berries soften and release their juices. Cool completely.
- Spoon the strawberry sauce over the chilled panna cotta just before serving.
Apple Cider Donut Holes

DO
- Reduce the apple cider before mixing to concentrate its fruity flavor.
- Measure the flour carefully so the donut holes remain tender.
- Coat the warm donut holes in cinnamon sugar for an even finish.
- Fry in small batches to maintain a steady oil temperature.
DON’T
- Don’t add the full amount of liquid if the dough already feels too sticky.
- Don’t overcrowd the pan, which can lower the oil temperature.
- Don’t leave the hot oil unattended.
- Don’t coat the donut holes while they’re dripping with oil.
Apple cider donut holes offer a warm, cinnamon-scented treat that suits a Labor Day gathering as summer starts to give way to fall. Their small size makes them easy to share, and the sugar coating adds a delicate crunch around the soft center. Serve them fresh for the best texture, alongside cold apple cider or coffee.
Ingredients
- 2 cups apple cider
- 2 cups all-purpose flour
- 1/2 cup granulated sugar
- 1 teaspoon baking powder
- 1/2 teaspoon baking soda
- 1 teaspoon ground cinnamon
- 1/4 teaspoon ground nutmeg
- 1/4 teaspoon salt
- 1 large egg
- 2 tablespoons melted butter
- Vegetable oil, for frying
For the coating:
- 1/2 cup granulated sugar
- 1 teaspoon ground cinnamon
How to Make It
- Simmer the apple cider in a saucepan until reduced to about 1/2 cup. Cool completely.
- Whisk the flour, sugar, baking powder, baking soda, cinnamon, nutmeg, and salt in a large bowl.
- In a separate bowl, whisk the egg, melted butter, and cooled reduced cider.
- Stir the wet ingredients into the dry ingredients until a thick, slightly sticky dough forms. Chill for 20 to 30 minutes.
- Mix the coating sugar and cinnamon in a shallow bowl.
- Heat 2 inches of vegetable oil in a heavy saucepan to 350°F (175°C).
- Using a small cookie scoop, carefully drop small portions of dough into the oil. Fry in batches for about 2 to 3 minutes, turning until evenly golden and cooked through.
- Drain briefly on paper towels, then roll in cinnamon sugar while still warm. Let cool slightly before serving.
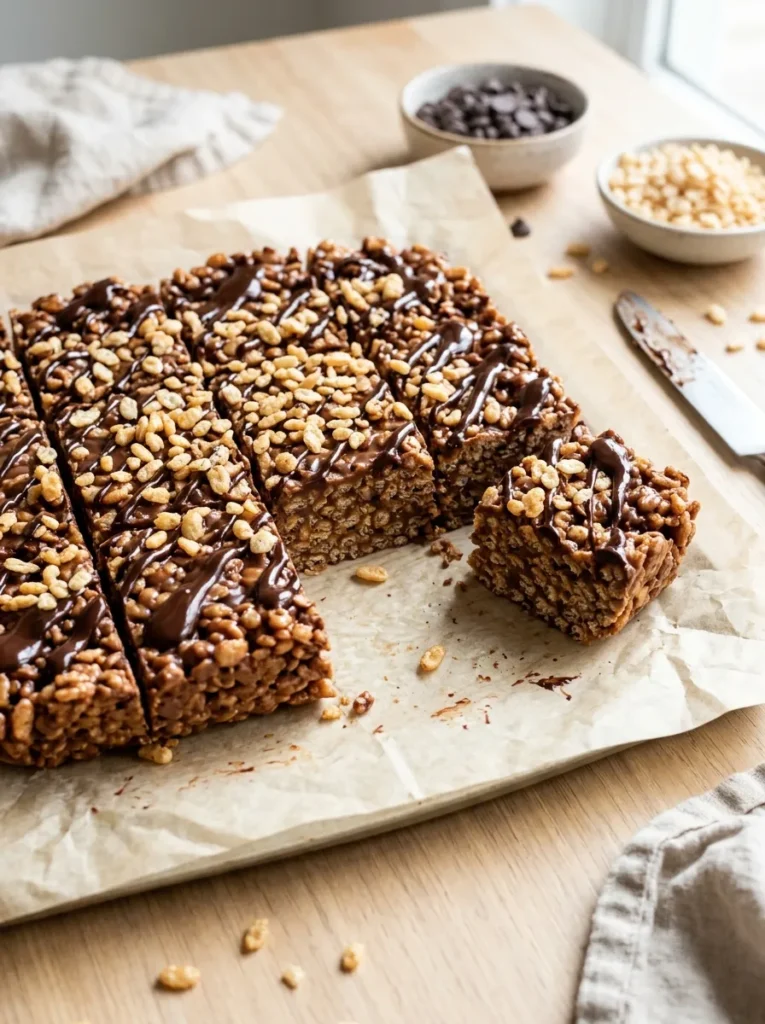
Chocolate Peanut Butter Rice Krispie Treats
Cost: Budget-friendly, using pantry staples and a few simple ingredients.
Time: About 20 minutes of preparation, plus 30 to 45 minutes of chilling.
Skill Level: Beginner-friendly, with no baking required.
Best For: Casual backyard parties, family picnics, and make-ahead dessert platters.
Chocolate and peanut butter turn classic crispy cereal treats into rich, chewy squares with plenty of crunch. The combination makes these bars satisfying without requiring a long ingredient list or an oven. Cut them into small portions for a dessert tray, and keep them covered so they stay fresh and don’t become dry.
Ingredients
- 4 cups crispy rice cereal
- 1/2 cup creamy peanut butter
- 1/3 cup honey
- 1 cup semi-sweet chocolate chips
- 1 tablespoon coconut oil
- 1/2 teaspoon vanilla extract
- Pinch of salt
How to Make It
- Line an 8-inch square pan with parchment paper.
- Combine the peanut butter and honey in a saucepan over low heat, stirring until smooth. Remove from the heat and mix in the vanilla and salt.
- Place the crispy rice cereal in a large bowl and pour the peanut butter mixture over it.
- Stir gently until the cereal is evenly coated.
- Press the mixture firmly into the prepared pan using a lightly greased spatula.
- Melt the chocolate chips with the coconut oil in a microwave-safe bowl, stirring every 20 seconds until smooth.
- Drizzle the melted chocolate over the cereal mixture.
- Refrigerate for 30 to 45 minutes, until firm, then lift out and cut into squares.
Fresh Peach Ice Cream Sandwiches

BEFORE
Serving ice cream at a summer party can become messy when guests need separate bowls, spoons, and toppings. In warm weather, scoops also melt quickly while everyone waits for their turn.
AFTER
Peach ice cream sandwiches offer individual portions that are easier to hand out. Soft oatmeal cookies surround creamy peach-filled ice cream, while the fruit adds a sweet summer flavor that feels right at the end of the season.
Choose cookies that are soft enough to bite through when frozen. If you make the sandwiches ahead, wrap each one individually and freeze until firm. Pat the diced peaches dry before folding them into softened ice cream to limit excess moisture and reduce icy patches.
Ingredients
For the cookies:
- 1 cup all-purpose flour
- 1 cup rolled oats
- 1/2 teaspoon baking soda
- 1/4 teaspoon salt
- 1/2 teaspoon ground cinnamon
- 1/2 cup unsalted butter, softened
- 1/2 cup packed brown sugar
- 1 large egg
- 1 teaspoon vanilla extract
For the filling:
- 2 cups vanilla ice cream, slightly softened
- 1/2 cup ripe peach, peeled and finely diced
How to Make It
- Preheat the oven to 350°F (175°C). Line two baking sheets with parchment paper.
- Whisk the flour, oats, baking soda, salt, and cinnamon in a bowl.
- Beat the softened butter and brown sugar until creamy. Add the egg and vanilla, then mix until combined.
- Stir the dry ingredients into the butter mixture until a soft dough forms.
- Scoop the dough onto the baking sheets, leaving space between portions. Flatten each scoop slightly.
- Bake for 9 to 12 minutes, until the edges are lightly golden and the centers remain soft. Cool completely.
- Pat the diced peaches dry, then gently fold them into the softened vanilla ice cream.
- Place a spoonful of peach ice cream on the flat side of one cookie and top with another cookie.
- Repeat with the remaining cookies and filling. Wrap each sandwich individually and freeze for at least 2 hours before serving.
Strawberry Pretzel Dessert Squares

Quick Tip:
Let the pretzel crust cool completely before spreading on the cream cheese filling. Spread the filling all the way to the edges to create a seal, which helps prevent the strawberry gelatin from soaking into the crust.
These strawberry pretzel squares balance salty crunch, creamy sweetness, and fruity gelatin in every bite. The distinct layers create a striking red-and-white dessert that looks beautiful on a holiday buffet. Prepare the dessert several hours ahead so the topping sets firmly, and use a sharp knife to cut clean squares just before serving.
Ingredients
For the crust:
- 2 cups crushed pretzels
- 3/4 cup unsalted butter, melted
- 3 tablespoons granulated sugar
For the cream layer:
- 8 ounces cream cheese, softened
- 1/2 cup granulated sugar
- 1 cup whipped topping, thawed
For the strawberry layer:
- 1 package (3 ounces) strawberry gelatin
- 1 cup boiling water
- 1/2 cup cold water
- 2 cups sliced fresh strawberries
How to Make It
- Preheat the oven to 350°F (175°C). Lightly grease a 9-by-13-inch baking dish.
- Combine the crushed pretzels, melted butter, and 3 tablespoons of sugar. Press firmly into the bottom of the dish.
- Bake for 10 minutes, then cool completely.
- Beat the cream cheese and 1/2 cup sugar until smooth. Fold in the whipped topping.
- Spread the cream mixture evenly over the cooled crust, sealing it to the edges. Refrigerate for 30 minutes.
- Dissolve the strawberry gelatin in the boiling water. Stir in the cold water and let the mixture cool until it is no longer warm but has not begun to set.
- Arrange the sliced strawberries over the cream layer, then gently pour the cooled gelatin mixture on top.
- Refrigerate for at least 4 hours, or until the gelatin is completely set.
- Cut into squares with a sharp knife and keep chilled until serving.
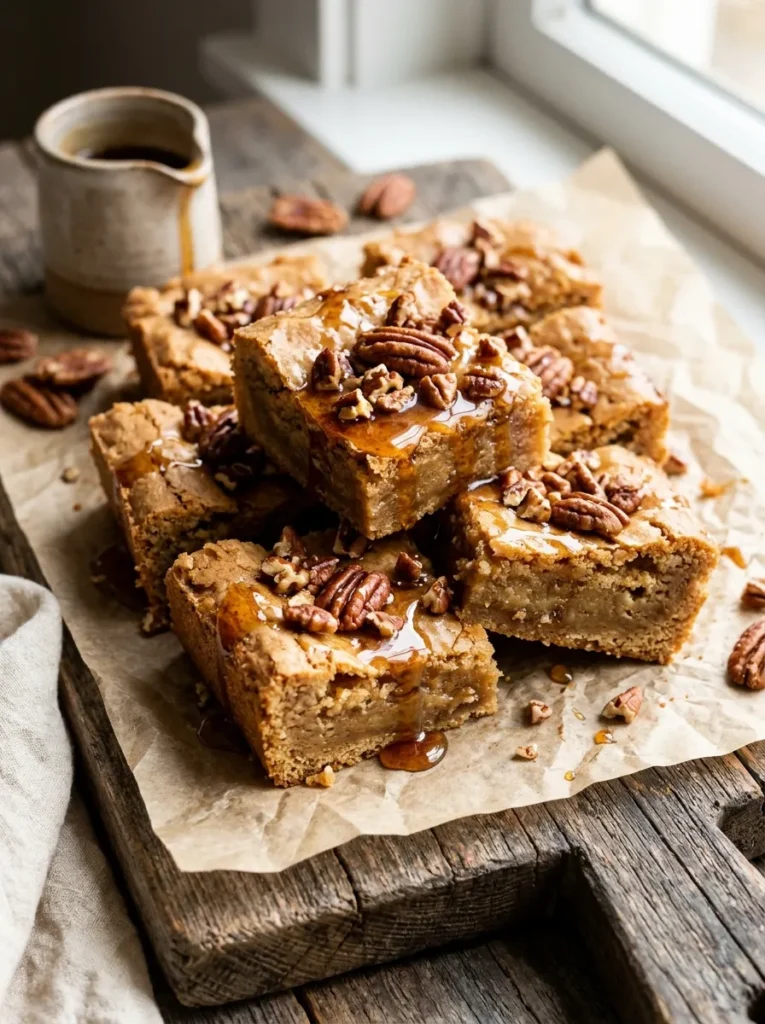
Brown Butter Maple Blondies
Cost: Moderate, depending on the quality of maple syrup and pecans.
Time: Approximately 45 minutes, plus cooling time.
Skill Level: Beginner-friendly, with a simple one-pan baking method.
Best For: Labor Day potlucks, family gatherings, and dessert trays that transition into early fall flavors.
Brown butter gives these blondies a rich, nutty aroma, while maple syrup adds a warm sweetness that pairs beautifully with toasted pecans. Their chewy texture makes them easy to cut into neat squares and serve alongside coffee or vanilla ice cream. Bake them ahead, allow them to cool completely, and drizzle with maple glaze shortly before serving.
Ingredients
For the blondies:
- 1/2 cup unsalted butter
- 3/4 cup packed light brown sugar
- 1/4 cup pure maple syrup
- 1 large egg
- 1 teaspoon vanilla extract
- 1 cup all-purpose flour
- 1/4 teaspoon baking powder
- 1/4 teaspoon salt
- 1/2 cup chopped pecans
For the maple drizzle:
- 1/2 cup powdered sugar
- 1 tablespoon pure maple syrup
- 1 to 2 teaspoons milk, as needed
How to Make It
- Preheat the oven to 350°F (175°C). Line an 8-inch square baking pan with parchment paper.
- Melt the butter in a saucepan over medium heat. Continue cooking, stirring frequently, until golden brown bits form and the butter smells nutty. Remove from the heat and let it cool slightly.
- Whisk the brown sugar and maple syrup into the browned butter.
- Add the egg and vanilla extract, mixing until smooth.
- Fold in the flour, baking powder, and salt until just combined. Stir in the chopped pecans.
- Spread the batter evenly in the prepared pan and bake for 20 to 25 minutes, until the edges are set and a toothpick inserted near the center comes out with a few moist crumbs.
- Cool completely before removing the blondies from the pan.
- Whisk the powdered sugar and maple syrup together, adding milk a little at a time until the drizzle reaches a pourable consistency.
- Drizzle over the cooled blondies, let it set briefly, and cut into squares.
CONCLUSION
A memorable holiday dessert doesn’t need to be complicated. With these 22 ideas, you can serve everything from refreshing fruit treats to rich, crowd-pleasing brownies and easy no-bake sweets. Choose recipes that match your gathering, prepare a few steps ahead when possible, and enjoy more time with the people around your table. These labor day desserts are here to help you end summer on a delicious note, whether you’re hosting friends or bringing a treat to share. Save this article on Pinterest for your next celebration, try a recipe that catches your eye, and share these ideas with someone planning a holiday get-together. Here’s to sweet bites, happy memories, and a wonderful Labor Day!