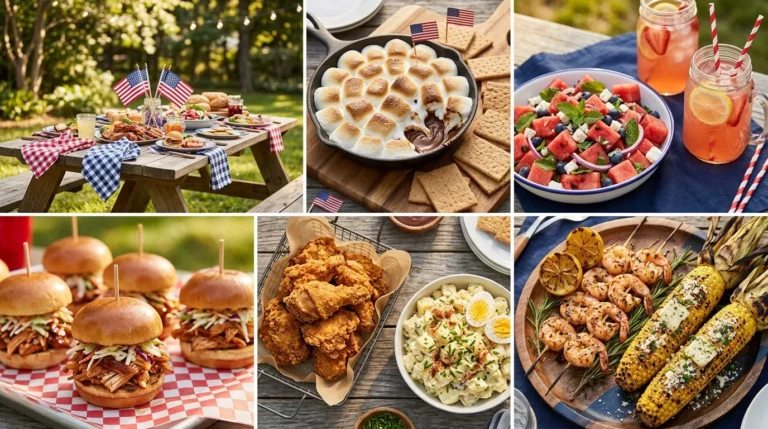
20 Epic labor day cookout ideas Everyone Will Love
Great food, happy guests, and a relaxed outdoor gathering make Labor Day feel extra special. But planning a cookout everyone will enjoy can take more time than expected.
These Epic labor day cookout ideas bring fresh inspiration to your holiday menu, from smoky grilled favorites and colorful salads to creative snacks and sweet treats. Whether you’re hosting a backyard barbecue, organizing a family get-together, or bringing a dish to a friend’s party, you’ll find delicious options for different tastes and occasions.
I’ve found that a balanced cookout menu works best when it includes a mix of hearty mains, easy-to-share sides, refreshing drinks, and simple desserts. These ideas help you plan that variety without making the day feel complicated. Pick a few favorites, prepare what you can ahead of time, and leave room to enjoy the celebration with everyone else.
Maple Mustard Pork Tenderloin

Sweet maple syrup and tangy mustard give grilled pork tenderloin a delicious balance of flavors that stands out on a cookout table. The outside develops a beautiful caramelized crust while the center stays juicy when cooked carefully. Slice the tenderloin into thick medallions after resting, then arrange them on a platter with fresh herbs.
For these epic labor day cookout ideas, this dish offers something different from the usual burgers and barbecue chicken. Prepare the glaze before guests arrive, reserve some for serving, and keep the pork on a clean platter after cooking. Pair it with grilled asparagus, dinner rolls, or a crisp cucumber salad for a satisfying holiday meal.
Ingredients
- 1½ pounds pork tenderloin
- 3 tablespoons pure maple syrup
- 2 tablespoons Dijon mustard
- 1 tablespoon olive oil
- 2 garlic cloves, minced
- 1 teaspoon smoked paprika
- ½ teaspoon black pepper
- ¾ teaspoon salt
- 1 teaspoon fresh rosemary, chopped
How to Make It
- Pat the pork tenderloin dry and trim away any silver skin. Rub it with olive oil, salt, pepper, smoked paprika, and minced garlic.
- Whisk the maple syrup, Dijon mustard, and chopped rosemary in a small bowl.
- Preheat the grill to medium-high heat and lightly oil the grates.
- Grill the tenderloin, turning occasionally, until the thickest part reaches 145°F (63°C). Brush with the maple mustard glaze during the final few minutes, taking care to prevent burning.
- Rest the pork for at least three minutes before slicing. Serve with the reserved glaze that has not touched raw meat.
ALSO READ : Keto Recipes Under 500 Calories
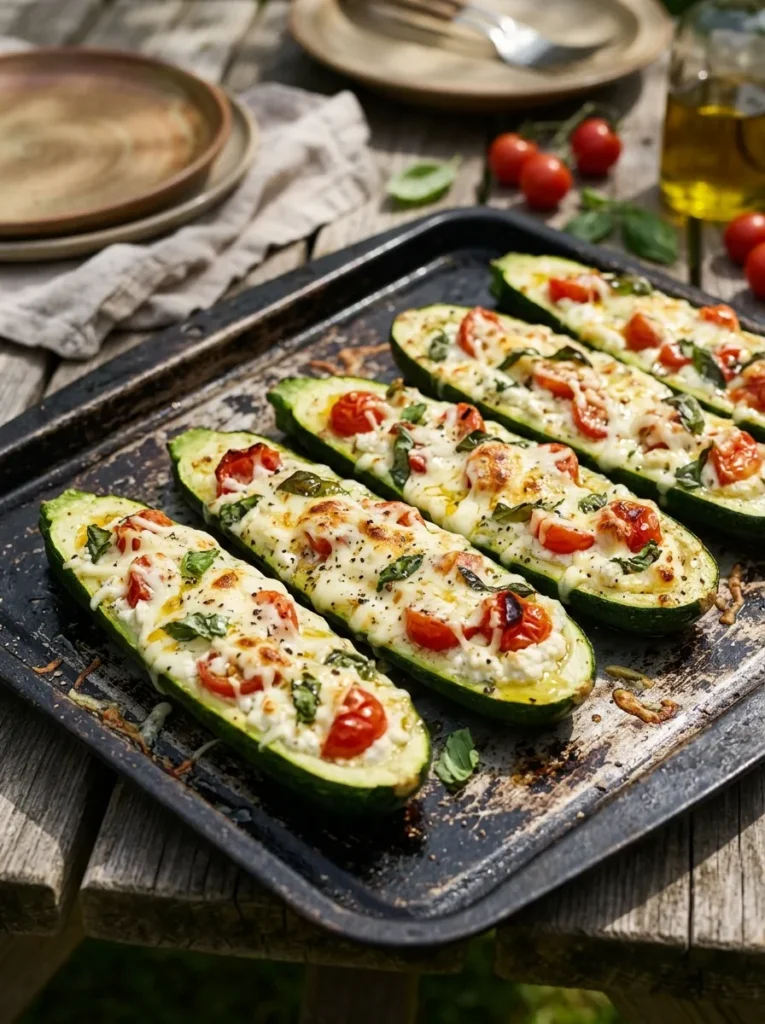
Cheesy Grilled Zucchini Boats
- Choose firm zucchini: Medium-sized zucchini hold their shape better and provide enough room for a generous filling.
- Prepare a flavorful filling: Combine ricotta, mozzarella, minced garlic, Italian seasoning, and finely chopped tomatoes.
- Pre-cook the zucchini: Grill the hollowed halves cut-side down briefly to soften them and develop light char marks.
- Fill and finish: Spoon the cheese mixture into each half and return them to the grill over indirect heat until the filling is hot and melted.
- Garnish before serving: Add fresh basil leaves and a little grated Parmesan for color and extra savory flavor.
Cheesy zucchini boats bring a colorful vegetarian dish to your Labor Day spread without requiring a separate oven. Their creamy centers contrast beautifully with lightly charred zucchini, and each half is easy to serve alongside grilled meats or other vegetables. For the best texture, remove excess moisture from the zucchini and avoid overfilling. Keep the grill covered while the cheese melts, checking frequently so the bottoms do not burn.
Ingredients
- 4 medium zucchini
- ½ cup ricotta cheese
- ¾ cup shredded mozzarella
- ½ cup cherry tomatoes, finely chopped
- 2 garlic cloves, minced
- 2 tablespoons grated Parmesan
- 1 tablespoon olive oil
- 1 teaspoon Italian seasoning
- ¼ teaspoon black pepper
- Salt to taste
- Fresh basil leaves for garnish
How to Make It
- Wash the zucchini, trim the ends, and cut each one lengthwise. Scoop out the centers with a spoon, leaving a sturdy shell.
- Brush the zucchini halves with olive oil and season lightly with salt and pepper.
- Mix the ricotta, mozzarella, tomatoes, garlic, Italian seasoning, and Parmesan in a bowl.
- Preheat the grill to medium heat. Place the zucchini cut-side down for about 3 to 4 minutes to create light grill marks.
- Turn the zucchini over and fill each half with the cheese mixture.
- Cover the grill and cook over indirect heat for approximately 8 to 12 minutes, until the zucchini is tender and the filling is hot.
- Garnish with fresh basil and serve warm.
Pinterest Account : FreshRecipeIdeas1
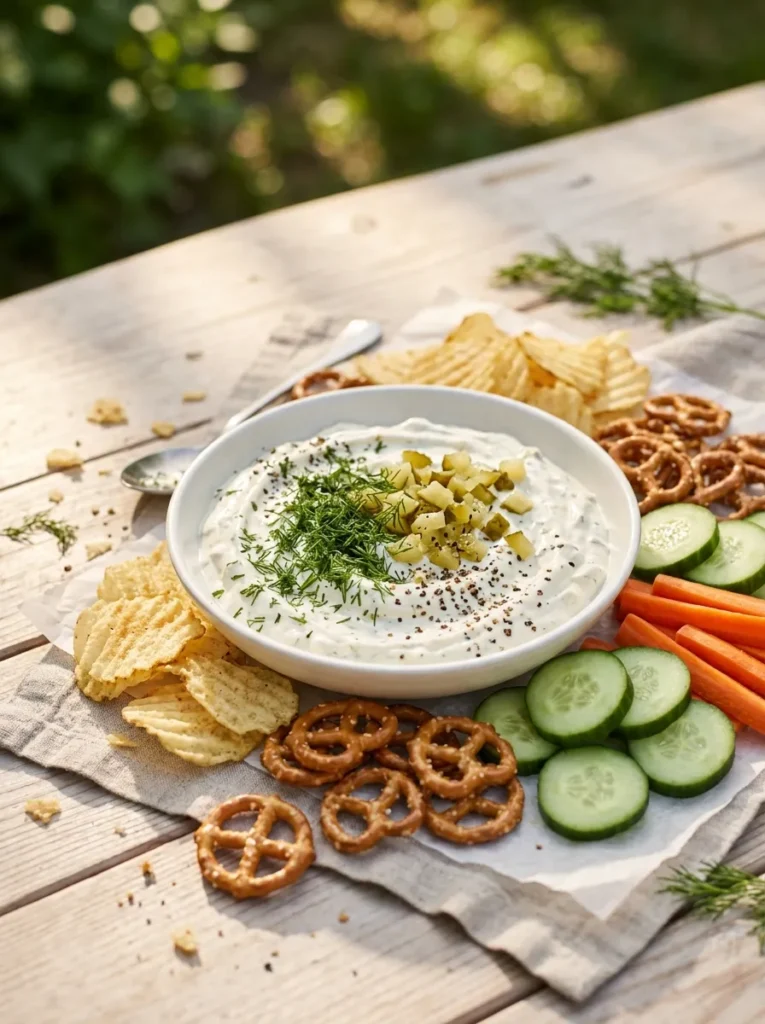
Creamy Dill Pickle Dip
Quick Tip:
Finely chop the pickles and pat them dry before mixing to prevent excess liquid from thinning the dip. Chill it for at least 30 minutes so the dill, garlic, and pickle flavors have time to blend.
A cool, tangy dip gives guests something delicious to snack on while the grill heats up. Cream cheese creates a rich base, sour cream keeps the texture scoopable, and crunchy dill pickles add plenty of flavor. Serve it in a chilled bowl surrounded by sturdy chips, pretzels, and fresh vegetables. You can prepare it several hours ahead, leaving more time to enjoy the cookout.
Ingredients
- 8 ounces cream cheese, softened
- ½ cup sour cream
- ¾ cup finely chopped dill pickles
- 1 tablespoon pickle juice
- 1 tablespoon fresh dill, chopped
- ½ teaspoon garlic powder
- ¼ teaspoon onion powder
- ¼ teaspoon black pepper
- Potato chips, pretzels, and vegetable sticks for serving
How to Make It
- Place the softened cream cheese in a mixing bowl and beat until smooth.
- Add the sour cream and pickle juice. Mix until the ingredients are fully combined.
- Fold in the chopped dill pickles, fresh dill, garlic powder, onion powder, and black pepper.
- Cover and refrigerate for at least 30 minutes to allow the flavors to develop.
- Transfer to a serving bowl and garnish with extra chopped dill and pickle pieces.
- Serve cold with chips, pretzels, cucumber rounds, or carrot sticks. Keep refrigerated until serving and return the dip to the refrigerator within two hours, or within one hour if the outdoor temperature exceeds 90°F (32°C).
Garlic Butter Steak Bites
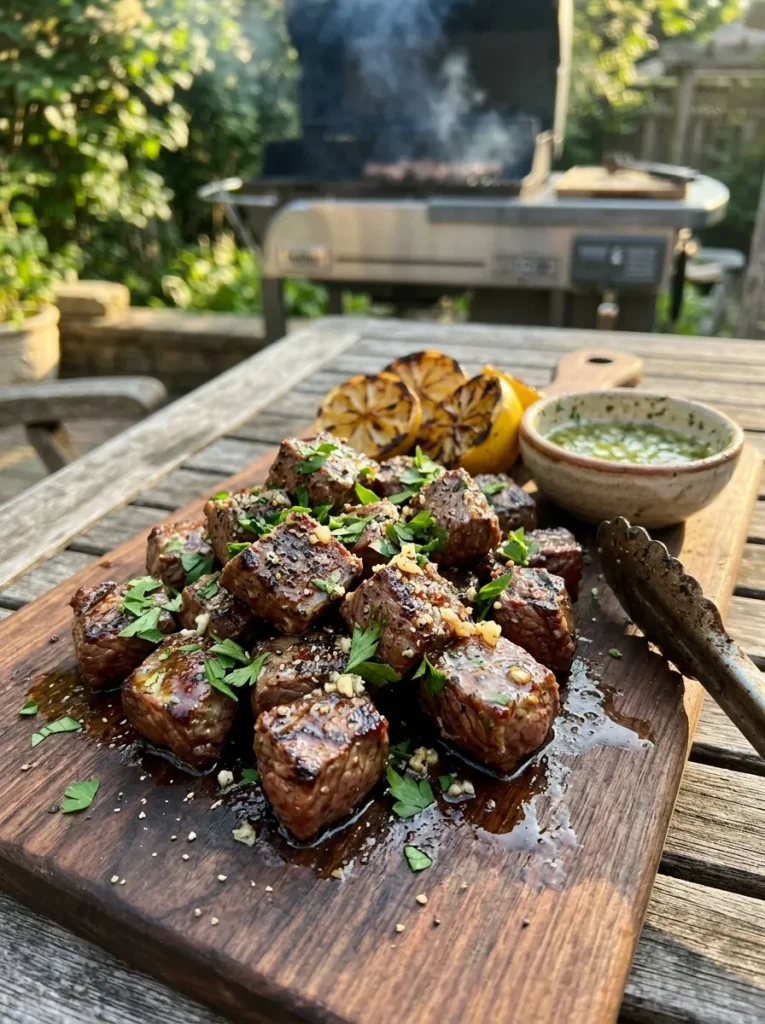
Juicy steak bites bring steakhouse flavor to a backyard gathering without requiring guests to handle large cuts of meat. Tender beef cubes develop a savory crust over high heat, while garlic butter adds richness and fresh parsley brings a burst of color. Serve them on a platter with cocktail picks for easy sharing.
For reliable results, cut the steak into evenly sized pieces and pat them dry before seasoning. Cook in small batches so the pan or grill stays hot instead of steaming the meat. These bites pair wonderfully with grilled vegetables, crusty bread, or a fresh green salad, making them a satisfying centerpiece for your cookout menu.
Ingredients
- 1½ pounds sirloin steak, cut into 1-inch cubes
- 2 tablespoons olive oil
- 3 tablespoons unsalted butter
- 3 garlic cloves, minced
- 1 teaspoon smoked paprika
- ½ teaspoon black pepper
- ¾ teaspoon salt
- 1 tablespoon fresh parsley, chopped
- Lemon wedges for serving
How to Make It
- Pat the steak cubes dry with paper towels and season with salt, black pepper, and smoked paprika.
- Preheat a grill basket or heavy grill-safe skillet over high heat. Lightly coat the cooking surface with olive oil.
- Cook the steak bites in a single layer, turning to brown the sides. Work in batches if necessary to avoid overcrowding.
- Lower the heat and add the butter and minced garlic during the final minute or two, tossing the steak until coated. Avoid burning the garlic.
- Check the internal temperature with a food thermometer. For whole cuts of beef, the USDA recommends at least 145°F (63°C), followed by a three-minute rest.
- Sprinkle with fresh parsley and serve with lemon wedges.
Cajun Shrimp Foil Packets
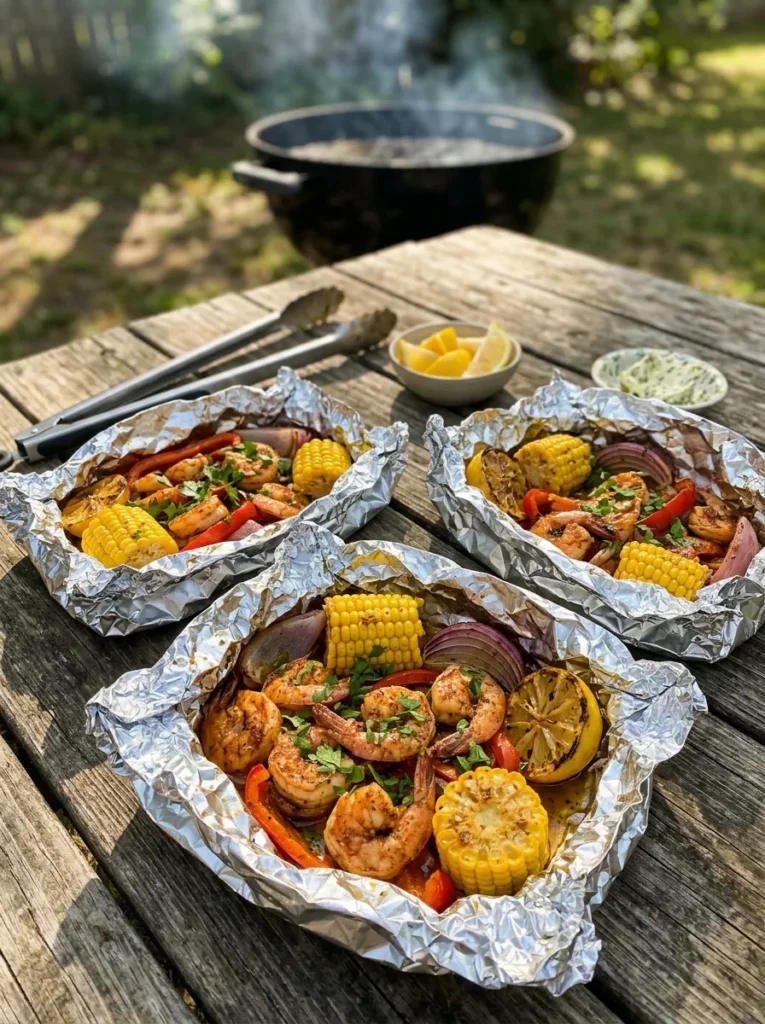
Cajun shrimp foil packets deliver bold seasoning and juicy seafood with very little cleanup afterward. Each packet holds shrimp, vegetables, and buttery spices that cook together over the grill, creating a flavorful meal with colorful presentation. Guests can open their own individual portions, making serving simple when everyone is hungry at once.
The secret is cutting the vegetables into small, evenly sized pieces so they cook at a similar rate to the shrimp. Choose large raw shrimp for a satisfying bite, and avoid overcooking them. Serve the packets with crusty bread or steamed rice to soak up the delicious juices, and keep the presentation casual with lemon wedges on the side.
Ingredients
- 1 pound large raw shrimp, peeled and deveined
- 1 cup corn kernels or small corn rounds
- 1 red bell pepper, sliced
- 1 small red onion, sliced
- 3 tablespoons melted butter
- 1 tablespoon olive oil
- 1 tablespoon Cajun seasoning
- 2 garlic cloves, minced
- 1 lemon, cut into wedges
- 2 tablespoons fresh parsley, chopped
How to Make It
- Preheat the grill to medium-high heat, around 375°F to 400°F (190°C to 205°C).
- Toss the shrimp, corn, bell pepper, and red onion with melted butter, olive oil, Cajun seasoning, and minced garlic.
- Divide the mixture among four large sheets of heavy-duty aluminum foil. Add lemon wedges and fold each sheet into a securely sealed packet, leaving a little room for steam.
- Place the packets on the grill and cook for approximately 8 to 12 minutes, turning once if needed. Cooking time depends on shrimp size and vegetable thickness.
- Carefully open one packet away from your face to release the steam. Check that the shrimp have turned opaque and reached an internal temperature of 145°F (63°C).
- Finish with fresh parsley and serve immediately with rice or bread.
Grilled Sausage and Pepper Hoagies
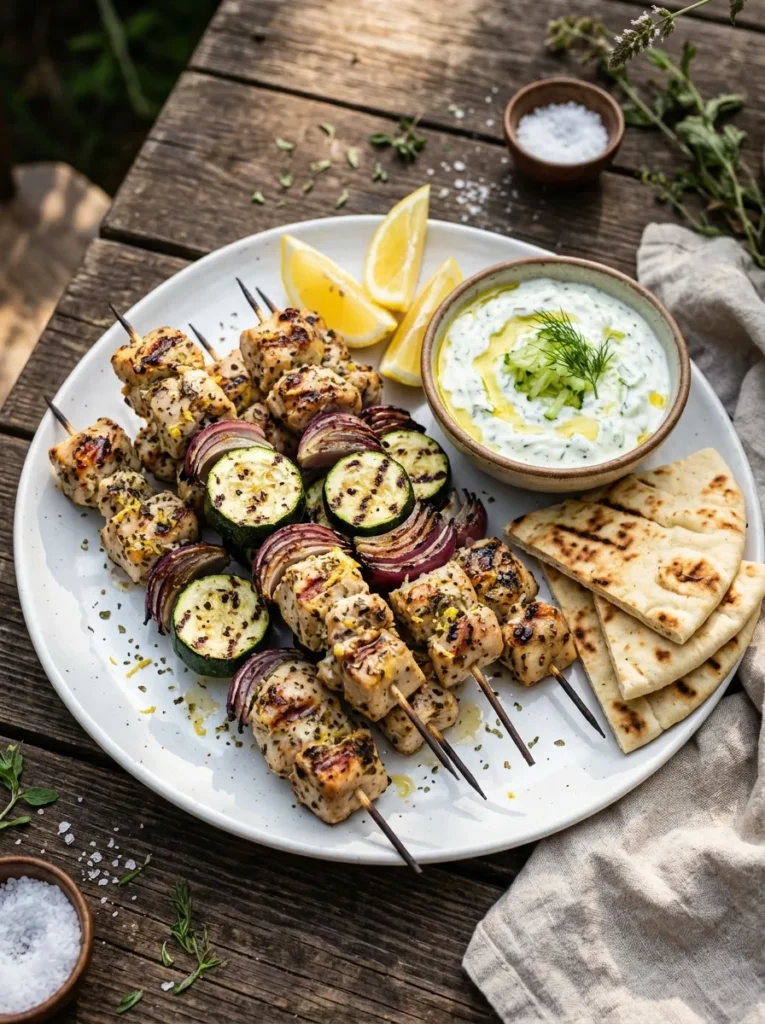
Few cookout meals are as satisfying as a warm sausage hoagie loaded with sweet peppers and tender onions. The combination of smoky sausage, lightly charred vegetables, and a toasted roll creates a hearty handheld meal that guests can enjoy without needing plates full of sides.
Choose your preparation style based on the time you have and the flavor you prefer. Grilling everything separately gives the sausages stronger char marks, while cooking the peppers and onions in a grill-safe pan makes them softer and easier to pile into the rolls. Either approach works well for a relaxed Labor Day gathering.
| Preparation | Option A: Direct Grilling | Option B: Grill-Safe Pan |
| Sausages | More pronounced char marks | Even browning with less flare-up |
| Peppers and onions | Smokier, firmer texture | Softer, more caramelized texture |
| Cleanup | Fewer dishes if using a grill tray | One pan to wash |
| Best choice | Guests who enjoy smoky flavors | Large batches and easy serving |
Ingredients
- 6 Italian sausages, raw
- 6 hoagie rolls
- 2 bell peppers, thinly sliced
- 1 large yellow onion, thinly sliced
- 1½ tablespoons olive oil
- 1 teaspoon Italian seasoning
- ½ teaspoon black pepper
- ½ teaspoon salt
- Yellow mustard or marinara sauce for serving
How to Make It
- Preheat the grill to medium heat. Toss the sliced peppers and onions with olive oil, Italian seasoning, salt, and black pepper.
- Place the vegetables in a grill-safe skillet or perforated grill pan. Cook for 12 to 15 minutes, stirring occasionally, until softened and lightly browned.
- Grill the sausages, turning frequently so they brown evenly. Cook until their centers reach 160°F (71°C) for pork or beef sausages, or 165°F (74°C) for poultry sausages.
- Transfer the cooked sausages to a clean platter and let them rest briefly.
- Toast the hoagie rolls cut-side down for about 30 to 60 seconds, watching carefully to prevent burning.
- Fill each roll with a sausage and a generous helping of peppers and onions. Serve with mustard or marinara sauce on the side.
Grilled Peach and Halloumi Skewers
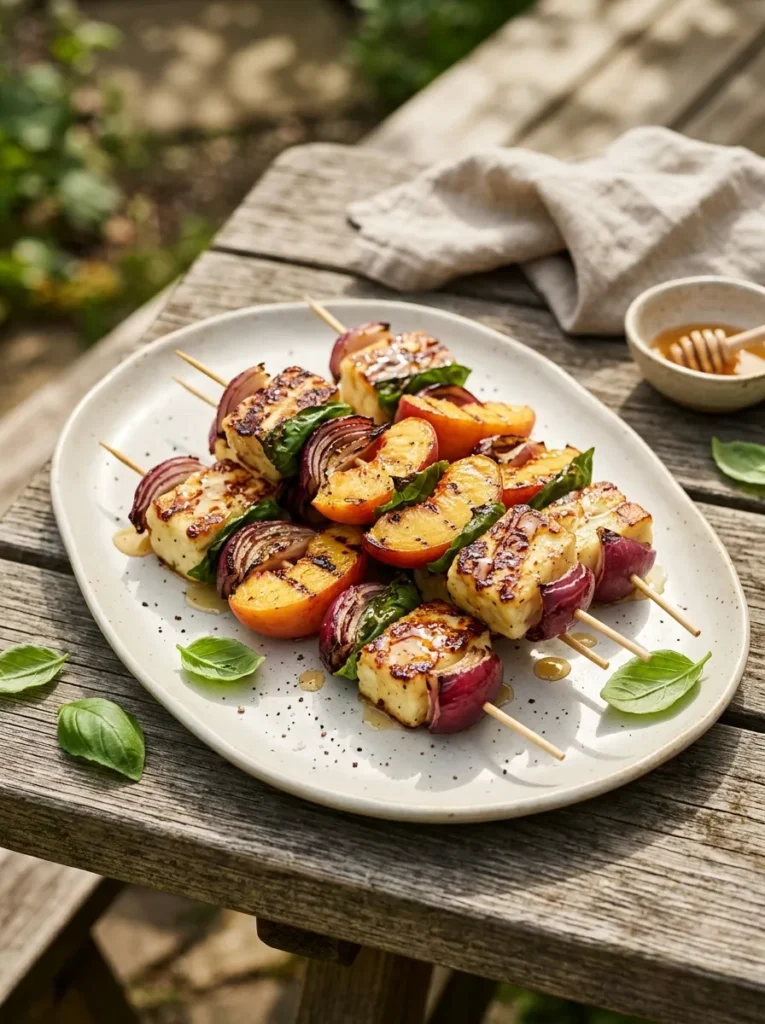
Sweet peaches and salty halloumi create a delicious contrast that makes these skewers stand out from traditional cookout dishes. The cheese develops a golden crust on the grill while the peaches soften and release their natural sweetness. Fresh basil adds an aromatic finish, and a light honey drizzle ties the flavors together.
Choose peaches that are ripe but still firm enough to hold their shape over the heat. Cut the halloumi into thick cubes so it does not break apart when turned. Serve these skewers as a vegetarian appetizer or alongside grilled vegetables for a colorful addition to your Labor Day spread.
Ingredients
- 8 ounces halloumi cheese, cut into thick cubes
- 2 firm ripe peaches, cut into wedges
- 1 small red onion, cut into chunks
- 1 tablespoon olive oil
- 1 tablespoon honey
- 6 to 8 fresh basil leaves
- ¼ teaspoon freshly ground black pepper
- Wooden or metal skewers
How to Make It
- If using wooden skewers, soak them in water for at least 30 minutes to reduce scorching.
- Cut the halloumi, peaches, and red onion into pieces of similar size.
- Thread the cheese, peach wedges, and onion chunks onto the skewers, alternating the ingredients.
- Brush lightly with olive oil and sprinkle with black pepper.
- Preheat the grill to medium heat. Grill the skewers for about 2 to 3 minutes per side, turning gently until the cheese is golden and the peaches have visible grill marks.
- Transfer to a serving platter, drizzle lightly with honey, and garnish with fresh basil leaves.
- Serve warm while the halloumi is still tender and lightly crisp on the outside.
Watermelon Mint Lemonade
Cost: Budget-friendly | Preparation: 10 to 15 minutes | Skill level: Beginner | Best for: Outdoor gatherings
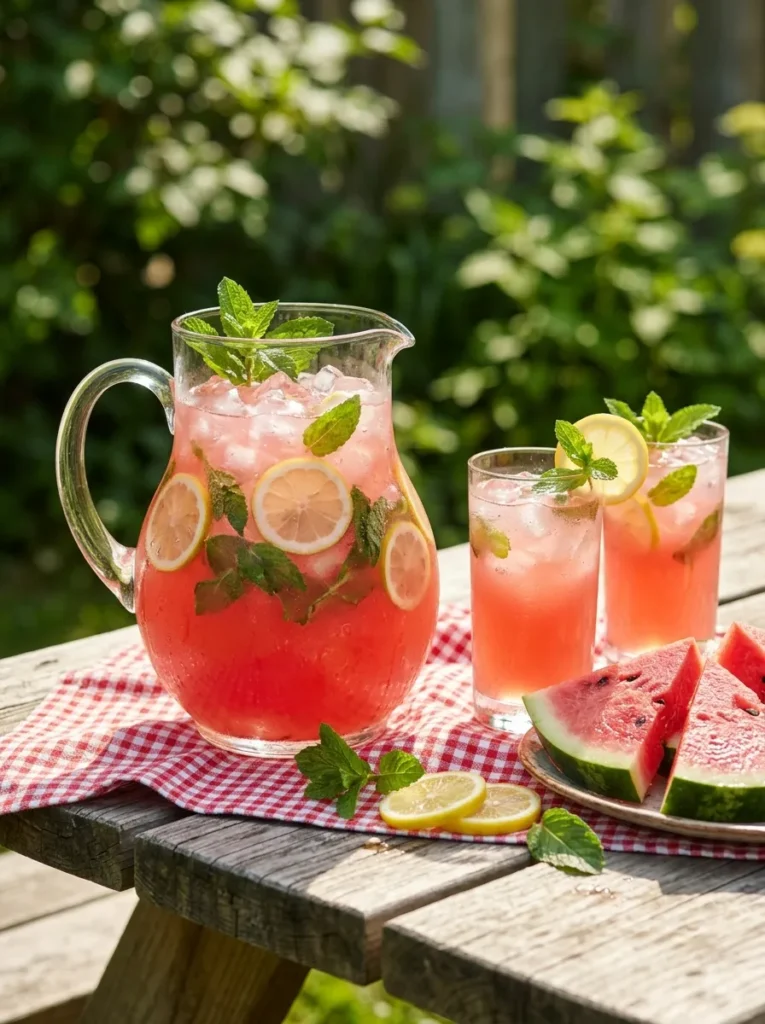
A chilled pitcher of watermelon mint lemonade gives guests a refreshing alternative to sugary sodas on a warm holiday afternoon. Fresh watermelon brings natural sweetness and a beautiful pink color, while lemon juice adds a sharp citrus kick. Mint leaves make every glass smell fresh, and plenty of ice keeps the drink cool during serving.
For the smoothest texture, blend seedless watermelon and strain the juice before mixing it with lemon juice and cold water. Taste before adding sweetener because ripe watermelon can be surprisingly sweet. Prepare the pitcher shortly before guests arrive, or refrigerate it in advance and add the mint and ice just before serving for the freshest flavor.
Ingredients
- 4 cups seedless watermelon cubes
- ½ cup freshly squeezed lemon juice
- 3 cups cold water
- 2 to 4 tablespoons honey or simple syrup, optional
- 10 to 12 fresh mint leaves
- 2 cups ice cubes
- Lemon slices and watermelon wedges for garnish
How to Make It
- Add the watermelon cubes to a blender and blend until completely smooth.
- Strain the watermelon juice through a fine-mesh sieve if you prefer a smoother drink.
- Pour the juice into a large pitcher and add the lemon juice and cold water.
- Stir in honey or simple syrup a little at a time, tasting until the sweetness suits your preference.
- Gently clap the mint leaves between your hands to release their aroma, then add them to the pitcher.
- Refrigerate until chilled. Add ice cubes just before serving to avoid diluting the lemonade too quickly.
- Pour into glasses and garnish with lemon slices, mint, or small watermelon wedges.
Crispy Parmesan Potato Wedges
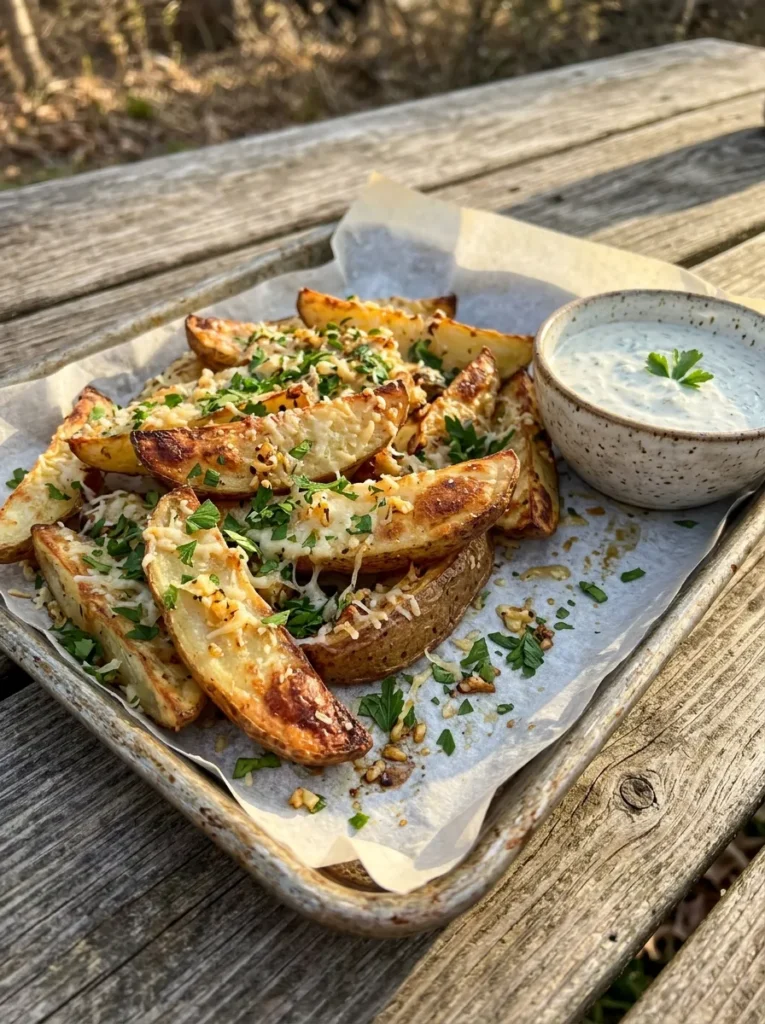
Golden, crunchy potato wedges are a cookout favorite because they deliver a satisfying side dish without requiring complicated ingredients. Parmesan creates a savory crust, garlic adds depth, and fresh parsley brightens the finished tray. Serve them hot with a creamy dipping sauce, or place several bowls of ketchup and ranch nearby for guests to share.
The trick to crisp wedges is removing excess surface starch and moisture before cooking. Cut the potatoes evenly so the thinner pieces do not burn before the thicker ones soften. A light coating of oil helps the seasonings cling, while grated Parmesan added toward the end prevents excessive browning. These wedges work well beside grilled sausages, steak, or vegetarian mains.
Ingredients
- 2 pounds russet potatoes
- 2 tablespoons olive oil
- ⅓ cup finely grated Parmesan cheese
- 1 teaspoon garlic powder
- 1 teaspoon smoked paprika
- ½ teaspoon dried oregano
- ½ teaspoon black pepper
- ¾ teaspoon salt
- 2 tablespoons chopped fresh parsley
- Ranch dressing or ketchup for serving
How to Make It
- Wash and scrub the potatoes, then cut them lengthwise into evenly sized wedges.
- Soak the wedges in cold water for 20 to 30 minutes if time allows. Drain and dry thoroughly with a clean kitchen towel.
- Preheat the oven to 425°F (220°C). Line a large baking sheet with parchment paper.
- Toss the potatoes with olive oil, garlic powder, smoked paprika, oregano, salt, and black pepper.
- Spread the wedges in a single layer with space between them. Roast for about 25 minutes, turning halfway through.
- Sprinkle with Parmesan and roast for another 8 to 12 minutes, until the potatoes are tender inside and crisp outside.
- Finish with fresh parsley and serve immediately with your favorite dipping sauce.
Brown Sugar Grilled Salmon

- Choose the right cut: Center-cut salmon fillets cook more evenly and are easier to handle on the grill.
- Mix a balanced glaze: Combine brown sugar, Dijon mustard, garlic, lemon juice, and a pinch of smoked paprika.
- Prepare the grill: Clean and oil the grates before placing the fish skin-side down.
- Glaze near the end: Brush on the brown sugar mixture during the final minutes to reduce burning.
- Check doneness: Use a food thermometer to confirm the thickest part reaches 145°F (63°C).
Brown sugar grilled salmon brings a sweet, savory flavor to your holiday menu and offers a lighter alternative to heavier barbecue dishes. The glaze caramelizes over the heat, while lemon juice keeps the flavor bright. Serve each fillet with grilled asparagus, rice, or a crunchy cabbage slaw for a balanced plate that feels special without complicated preparation.
Ingredients
- 4 salmon fillets, about 6 ounces each
- 2 tablespoons brown sugar
- 1 tablespoon Dijon mustard
- 1 tablespoon olive oil
- 1 tablespoon fresh lemon juice
- 2 garlic cloves, minced
- ½ teaspoon smoked paprika
- ½ teaspoon black pepper
- ½ teaspoon salt
- Lemon wedges and parsley for serving
How to Make It
- Pat the salmon fillets dry with paper towels. Season with salt, black pepper, and smoked paprika.
- Whisk the brown sugar, Dijon mustard, olive oil, lemon juice, and minced garlic in a small bowl.
- Preheat the grill to medium heat and clean and oil the grates.
- Place the salmon skin-side down on the grill. Close the lid and cook for approximately 6 to 10 minutes, depending on thickness.
- Brush the glaze over the salmon during the final 2 to 3 minutes of cooking. Watch closely because the sugar can burn.
- Check that the thickest part reaches 145°F (63°C). Transfer to a clean platter and let it rest briefly.
- Garnish with lemon wedges and parsley, then serve warm.
Ranch Cucumber Pinwheels
Quick Tip:
Use large flour tortillas and spread the filling in a thin, even layer all the way to the edges. Chill the rolled tortillas for at least 30 minutes before slicing so the spirals stay neat instead of falling apart.
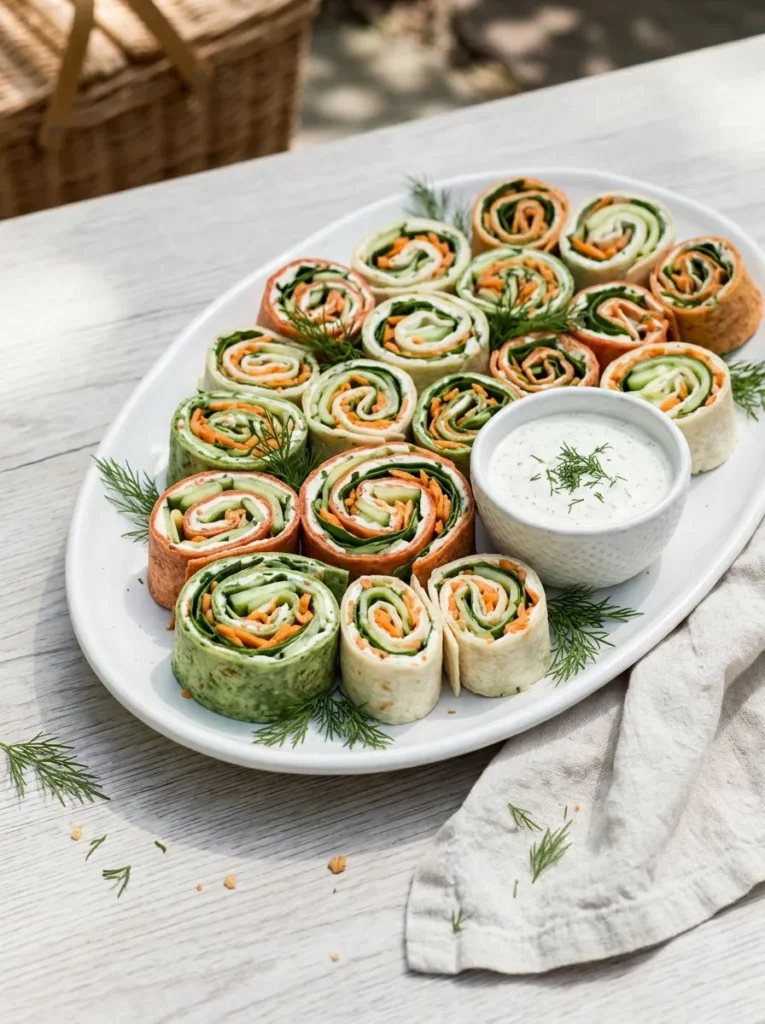
Cool, crunchy pinwheels offer a refreshing finger food for guests who want something light between grilled dishes. Creamy ranch-seasoned cheese balances the crisp cucumber and carrots, while spinach adds color to every spiral. They are easy to prepare ahead, transport to a picnic table, and serve without plates or cutlery.
For the cleanest slices, use a sharp serrated knife and wipe the blade between cuts. Pat the cucumber dry before assembling to prevent soggy tortillas. Arrange the finished pieces in a single layer on a chilled platter, and keep them refrigerated until serving. These pinwheels pair well with vegetable trays, grilled corn, and other casual party snacks.
Ingredients
- 4 large flour tortillas
- 8 ounces cream cheese, softened
- ¼ cup sour cream
- 1 tablespoon ranch seasoning
- 1 medium cucumber, thinly sliced or shaved into ribbons
- ½ cup shredded carrots
- 1 cup baby spinach leaves
- 1 tablespoon chopped fresh dill, optional
How to Make It
- Mix the softened cream cheese, sour cream, ranch seasoning, and fresh dill until smooth.
- Lay a tortilla flat and spread a thin layer of the cream cheese mixture over the surface.
- Arrange cucumber ribbons, shredded carrots, and spinach in an even layer, leaving a small border around the edges.
- Roll the tortilla tightly from one side, keeping the filling tucked inside.
- Repeat with the remaining tortillas and filling.
- Wrap each roll securely and refrigerate for at least 30 minutes.
- Trim the ends, then slice each roll into approximately 1-inch pinwheels. Arrange on a platter and keep chilled until serving.
Grilled Pineapple Dessert Boats

BEFORE
A cookout dessert table can feel heavy after burgers, grilled meats, and rich sides. Store-bought sweets may also melt quickly in the summer heat, leaving you with extra serving stress.
AFTER
Grilled pineapple boats provide a warm, fruity dessert with caramelized edges and a tropical presentation. The hollowed pineapple shells double as serving dishes, creating less fuss with bowls and making the dessert look special.
Fresh pineapple develops a deeper sweetness when grilled, and toasted coconut adds a pleasant crunch. Serve the fruit warm with a scoop of vanilla ice cream added just before eating. For guests who prefer a lighter finish, offer the pineapple without ice cream and provide lime wedges for a bright, tangy contrast. Prepare the shells in advance, but grill the fruit close to serving time for the best texture.
Ingredients
- 1 large ripe pineapple
- 2 tablespoons melted butter
- 1 tablespoon brown sugar
- ½ teaspoon ground cinnamon
- ¼ cup toasted coconut flakes
- 1 pint vanilla ice cream
- 1 teaspoon lime zest
- Fresh mint leaves for garnish
How to Make It
- Cut the pineapple lengthwise into two halves, keeping the leafy tops attached if desired.
- Carefully remove the flesh from each half, leaving a sturdy shell. Cut the flesh into bite-sized chunks and set the shells aside.
- Toss the pineapple chunks with melted butter, brown sugar, and cinnamon.
- Preheat the grill to medium heat. Grill the pineapple pieces for about 2 to 3 minutes per side until lightly caramelized.
- Return the warm pineapple chunks to the hollowed shells and sprinkle with toasted coconut flakes and lime zest.
- Add vanilla ice cream just before serving so it does not melt too quickly.
- Garnish with fresh mint and serve immediately.
Mediterranean Chicken Pita Pockets

- Season the chicken: Combine olive oil, lemon juice, minced garlic, oregano, paprika, salt, and black pepper for a bright Mediterranean marinade.
- Grill until juicy: Cook the chicken over medium-high heat, turning as needed, until it reaches an internal temperature of 165°F (74°C).
- Prepare the vegetables: Dice cucumber and tomatoes, thinly slice red onion, and crumble the feta cheese.
- Warm the pita: Heat the pita breads briefly on the grill until soft and flexible.
- Assemble the pockets: Fill each pita with sliced chicken, vegetables, feta, and tzatziki just before serving.
These Mediterranean-inspired pockets offer a fresh alternative to traditional cookout sandwiches. The juicy chicken pairs with crunchy vegetables and tangy sauce, while pita bread makes everything easy to hold. Set out the fillings separately if guests enjoy building their own meals. This also helps prevent the bread from becoming soggy during a long afternoon outdoors.
Ingredients
- 1½ pounds boneless, skinless chicken breasts
- 6 pita breads
- 2 tablespoons olive oil
- 2 tablespoons lemon juice
- 2 garlic cloves, minced
- 1 teaspoon dried oregano
- ½ teaspoon paprika
- ½ teaspoon salt
- ¼ teaspoon black pepper
- 1 cucumber, diced
- 1 cup cherry tomatoes, quartered
- ½ small red onion, thinly sliced
- ½ cup crumbled feta cheese
- ¾ cup tzatziki sauce
- Fresh parsley for garnish
How to Make It
- Whisk the olive oil, lemon juice, garlic, oregano, paprika, salt, and pepper in a bowl.
- Coat the chicken with the marinade and refrigerate for 20 to 30 minutes.
- Preheat the grill to medium-high heat. Grill the chicken until the center reaches 165°F (74°C), adjusting the cooking time according to thickness.
- Transfer the chicken to a clean plate and let it rest for a few minutes before slicing.
- Prepare the cucumber, tomatoes, red onion, and feta while the chicken rests.
- Warm the pita breads on the grill for about 30 seconds per side.
- Fill each pita with chicken, vegetables, feta, and tzatziki. Garnish with parsley and serve immediately.
Loaded Street Corn Nachos
Cost: Budget-friendly | Prep time: 15 minutes | Cooking time: 8 to 10 minutes | Skill level: Beginner
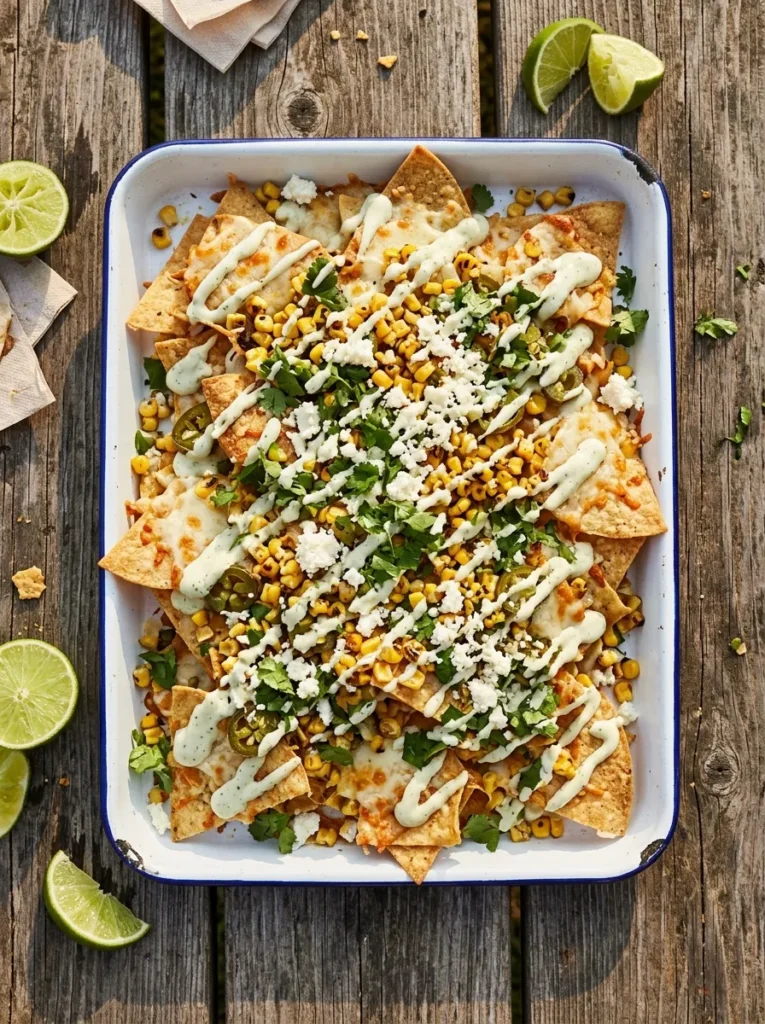
Crunchy tortilla chips topped with sweet corn, melted cheese, and creamy lime sauce bring a fun sharing dish to your cookout. Each bite combines crisp chips with juicy corn, salty cheese, and fresh herbs. The toppings take inspiration from Mexican street corn, turning a familiar snack into a colorful platter that guests can gather around.
For the best texture, use thick tortilla chips that can support the toppings without breaking. Melt the cheese over the chips first, then add the wetter ingredients just before serving. Keep the jalapeños and chili sauce on the side so everyone can adjust the heat. Serve the nachos straight from the tray while the cheese is warm.
Ingredients
- 1 large bag thick tortilla chips, about 12 ounces
- 2 cups cooked corn kernels
- 1½ cups shredded Monterey Jack cheese
- ½ cup crumbled cotija cheese
- 1 jalapeño, thinly sliced
- ¼ cup sour cream
- 2 tablespoons mayonnaise
- 1 tablespoon fresh lime juice
- ¼ teaspoon chili powder
- ¼ cup chopped fresh cilantro
- 1 lime, cut into wedges
How to Make It
- Preheat the oven to 400°F (200°C). Spread the tortilla chips across a large oven-safe tray or baking sheet.
- Scatter the cooked corn kernels and shredded Monterey Jack evenly over the chips.
- Bake for 5 to 8 minutes, until the cheese melts and the chips are warmed through.
- Whisk the sour cream, mayonnaise, lime juice, and chili powder in a small bowl.
- Remove the nachos from the oven and sprinkle with cotija cheese, jalapeño slices, and chopped cilantro.
- Drizzle the lime sauce over the top just before serving.
- Add fresh lime wedges and serve immediately while the chips remain crisp.
Herb-Roasted Garlic Mushrooms

DO
- Choose mushrooms of similar size so they cook evenly.
- Wipe them clean with a damp paper towel and trim the dry stem ends.
- Use fresh garlic, thyme, and rosemary for a fragrant, savory finish.
- Spread the mushrooms in a single layer to encourage browning.
DON’T
- Don’t soak mushrooms in water because they absorb moisture.
- Don’t overcrowd the pan, or the mushrooms may steam instead of brown.
- Don’t add all the garlic too early over intense heat, where it can burn.
- Don’t leave cooked mushrooms sitting outdoors in hot weather for extended periods.
Garlic and herbs turn simple mushrooms into a deeply savory side that complements grilled chicken, steak, and vegetarian mains. As they cook, the mushrooms release moisture and develop a tender texture with browned edges. A squeeze of lemon at the end brightens their earthy flavor. Serve them in the same skillet for a rustic presentation, with crusty bread nearby to catch the flavorful juices.
Ingredients
- 1 pound cremini mushrooms
- 2 tablespoons olive oil
- 2 tablespoons unsalted butter, melted
- 3 garlic cloves, minced
- 1 teaspoon fresh thyme leaves
- 1 teaspoon chopped fresh rosemary
- ½ teaspoon salt
- ¼ teaspoon black pepper
- 1 tablespoon chopped fresh parsley
- 1 teaspoon lemon juice
How to Make It
- Preheat the oven to 400°F (200°C). Clean the mushrooms with a damp paper towel and trim the stem ends.
- Whisk the olive oil, melted butter, minced garlic, thyme, rosemary, salt, and black pepper in a bowl.
- Toss the mushrooms with the garlic herb mixture until evenly coated.
- Spread them in a single layer in a cast-iron skillet or roasting pan.
- Roast for 20 to 25 minutes, stirring once halfway through, until the mushrooms are tender and browned.
- Drizzle with lemon juice and sprinkle with fresh parsley.
- Serve warm as a side dish or offer toothpicks for easy cookout snacking.
Honey Lime Grilled Chicken Thighs
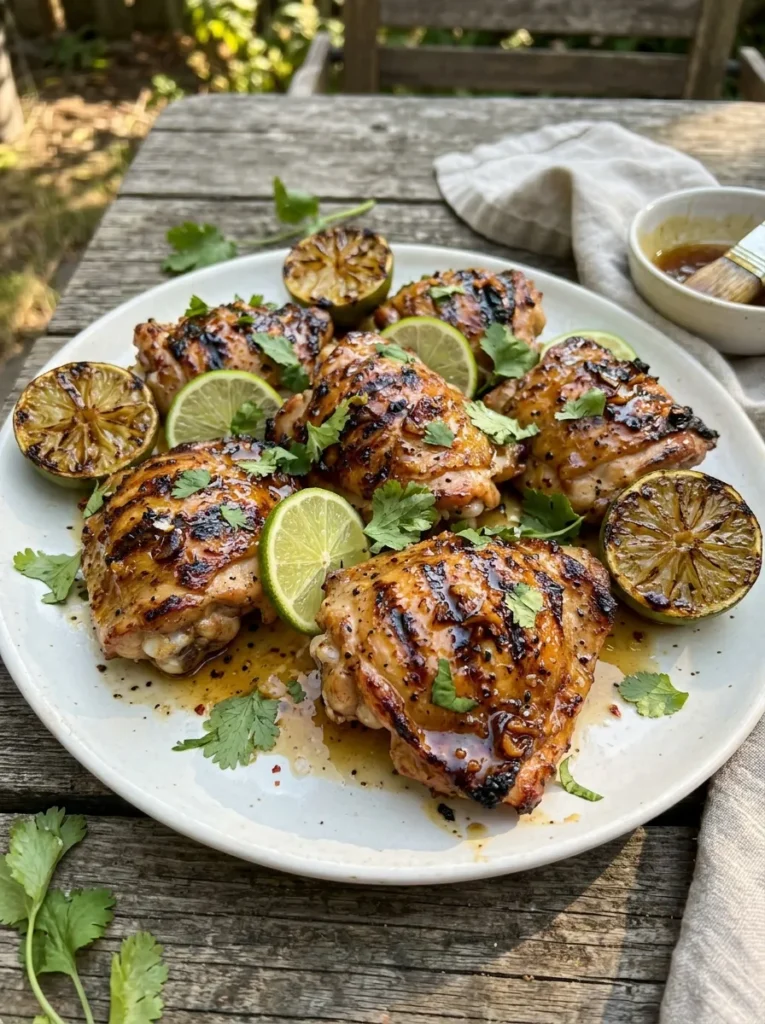
Sticky, citrusy chicken thighs bring a delicious balance of sweet honey and zesty lime to your Labor Day cookout. Dark meat stays juicy on the grill, while the glaze creates a glossy finish with lightly caramelized edges. Fresh cilantro and charred lime add color and brightness, making the platter look inviting beside traditional barbecue sides.
For the best flavor, let the chicken sit in its marinade for at least 30 minutes in the refrigerator. Reserve a separate portion of glaze for brushing during cooking, rather than reusing marinade that touched raw chicken. Serve the finished thighs with cilantro rice, grilled zucchini, or a crunchy cabbage salad for an easy outdoor meal.
Ingredients
- 2 pounds boneless, skinless chicken thighs
- 3 tablespoons honey
- 2 tablespoons fresh lime juice
- 1 tablespoon olive oil
- 2 garlic cloves, minced
- 1 teaspoon smoked paprika
- ½ teaspoon ground cumin
- ¾ teaspoon salt
- ¼ teaspoon black pepper
- 2 tablespoons chopped fresh cilantro
- Lime wedges for serving
How to Make It
- Whisk the honey, lime juice, olive oil, garlic, paprika, cumin, salt, and black pepper in a bowl.
- Place the chicken thighs in a shallow dish and coat them with the marinade. Cover and refrigerate for 30 minutes to 2 hours.
- Reserve a small portion of fresh glaze before adding the chicken, if you want extra sauce for brushing or serving.
- Preheat the grill to medium heat and lightly oil the grates.
- Remove the chicken from the marinade and grill for approximately 5 to 7 minutes per side, depending on thickness.
- Brush with the reserved glaze during the final few minutes. Check that the thickest pieces reach an internal temperature of 165°F (74°C).
- Rest the chicken briefly, sprinkle with cilantro, and serve with fresh lime wedges.
Creamy Pesto Tortellini Salad

Cost: Moderate | Prep time: 15 minutes | Cooking time: 10 minutes | Skill level: Beginner
Cheese-filled tortellini tossed with basil pesto creates a satisfying pasta salad that feels more special than a basic side dish. Juicy cherry tomatoes add sweetness, mozzarella provides creamy bites, and baby spinach brings freshness to every forkful. The colorful ingredients make this salad especially appealing beside grilled meats and other classic holiday dishes.
Cook the tortellini just until tender, then drain and cool it before adding the dressing. A little reserved pasta water can help loosen thick pesto, but add it sparingly so the salad does not become watery. Prepare the vegetables in advance and combine everything shortly before serving for the freshest texture. Keep the salad chilled until guests are ready to eat.
Ingredients
- 20 ounces refrigerated cheese tortellini
- ¾ cup basil pesto
- 1 cup cherry tomatoes, halved
- 8 ounces fresh mozzarella pearls
- 2 cups baby spinach
- 2 tablespoons olive oil, if needed
- 1 tablespoon fresh lemon juice
- ¼ teaspoon black pepper
- Salt to taste
- Fresh basil leaves for garnish
How to Make It
- Bring a large pot of salted water to a boil. Cook the tortellini according to the package instructions.
- Drain the tortellini and rinse briefly with cool water to stop the cooking. Let it drain thoroughly.
- Transfer the cooled tortellini to a large mixing bowl.
- Add the pesto and lemon juice, tossing gently until the pasta is evenly coated.
- Fold in the cherry tomatoes, mozzarella pearls, and baby spinach.
- Add a little olive oil if the pesto is too thick. Season with black pepper and salt as needed.
- Garnish with fresh basil and refrigerate until serving. Keep the salad cold during the cookout.
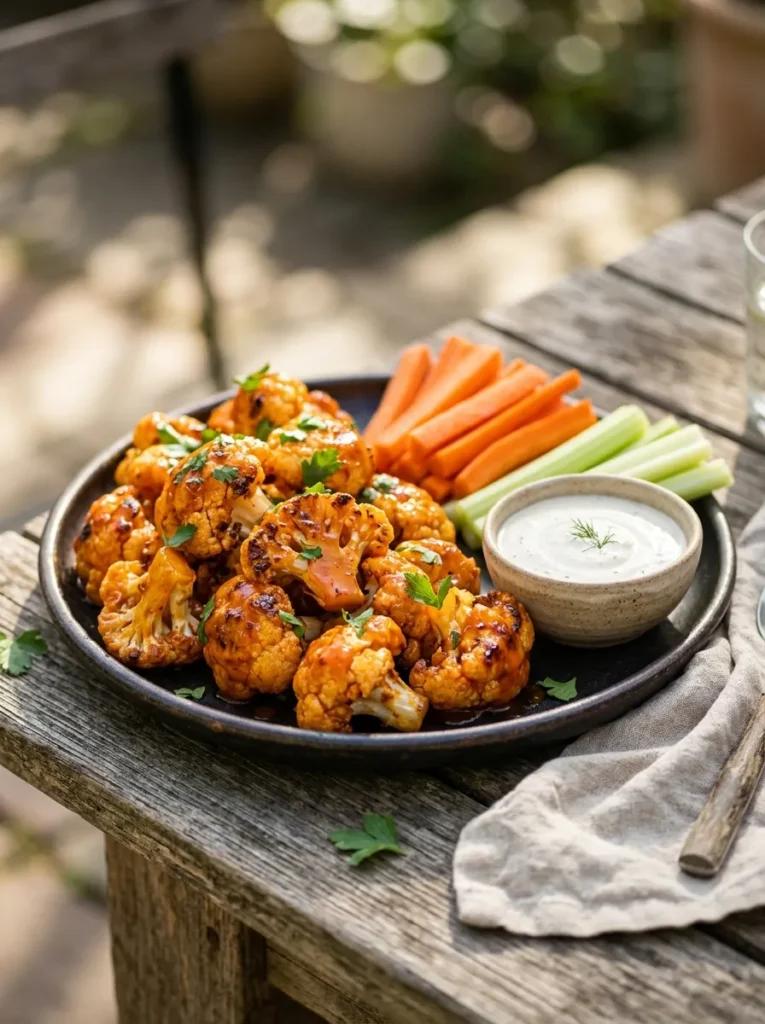
Crispy Buffalo Cauliflower Bites
BEFORE
A cookout menu dominated by meat can leave vegetarian guests with limited choices beyond simple salads or plain vegetable platters. Raw vegetables offer freshness, but they may not satisfy anyone looking for a warm, flavorful snack.
AFTER
Buffalo cauliflower bites bring spicy, tangy flavor and crisp edges to the table without using meat. Roasting creates browned surfaces, while a coating of buffalo sauce delivers the familiar heat associated with classic party wings. Serve them with crunchy celery, carrots, and cool ranch dressing to balance the spice.
For the best texture, keep the cauliflower florets similar in size and spread them across the baking sheet without overcrowding. Roast them until the edges begin to brown before tossing with buffalo sauce. A brief return to the oven helps the coating cling while preserving some crispness. Offer extra sauce separately so guests can control how spicy each bite tastes.
Ingredients
- 1 large head cauliflower, cut into florets
- 2 tablespoons olive oil
- ½ teaspoon garlic powder
- ½ teaspoon smoked paprika
- ¼ teaspoon black pepper
- ¼ teaspoon salt
- ⅓ cup buffalo hot sauce
- 1 tablespoon melted butter
- 1 teaspoon honey, optional
- Celery and carrot sticks for serving
- Ranch or blue cheese dressing for serving
How to Make It
- Preheat the oven to 425°F (220°C). Line a large baking sheet with parchment paper.
- Wash the cauliflower, dry it thoroughly, and cut it into bite-sized florets.
- Toss the florets with olive oil, garlic powder, smoked paprika, black pepper, and salt.
- Arrange the cauliflower in a single layer and roast for 20 to 25 minutes, turning halfway through, until golden and tender.
- Whisk the buffalo sauce with melted butter and optional honey.
- Toss the roasted cauliflower with the sauce, then return it to the oven for another 5 to 8 minutes.
- Serve hot with celery, carrots, and a bowl of ranch or blue cheese dressing.
Balsamic Caprese Salad Skewers

Red, white, and green ingredients make these Caprese skewers a colorful addition to a Labor Day spread. Juicy cherry tomatoes pair with soft mozzarella and fragrant basil, while balsamic glaze adds a sweet, tangy finish. Each skewer delivers a fresh bite without requiring plates or forks, making the appetizer easy to serve as guests mingle around the backyard.
Choose firm cherry tomatoes and mozzarella balls of similar size for a tidy presentation. Pat the mozzarella dry before assembling so excess moisture does not collect on the platter. Arrange the skewers in neat rows, then add the balsamic glaze shortly before serving. For a little extra flavor, brush the tomatoes lightly with good-quality olive oil and season with freshly cracked black pepper.
Ingredients
- 24 cherry tomatoes
- 24 small fresh mozzarella balls
- 24 fresh basil leaves
- 2 tablespoons extra-virgin olive oil
- 2 tablespoons balsamic glaze
- ¼ teaspoon freshly ground black pepper
- Small wooden skewers or cocktail picks
How to Make It
- Wash the cherry tomatoes and basil leaves, then dry them thoroughly.
- Drain the mozzarella balls and pat them dry with paper towels.
- Thread one cherry tomato, one folded basil leaf, and one mozzarella ball onto each small skewer. Repeat the pattern until all ingredients are used.
- Arrange the finished skewers on a serving platter in a single layer.
- Drizzle lightly with olive oil and season with freshly ground black pepper.
- Add the balsamic glaze just before serving to preserve the fresh appearance.
- Refrigerate until needed and avoid leaving the mozzarella at room temperature for more than two hours, or one hour when temperatures exceed 90°F (32°C).
S’mores Stuffed Strawberries

These bite-sized treats bring the familiar flavors of campfire s’mores to a fresh summer dessert. Juicy strawberries replace the traditional graham cracker base, while marshmallow filling and chocolate create a sweet, creamy combination. They look colorful on a dessert tray and offer guests a lighter-feeling alternative to large brownies or heavy slices of cake after a filling cookout meal.
Choose large, firm strawberries that can hold the filling without collapsing. Dry them completely after washing, then hollow out a small section near the stem to make room for the marshmallow mixture. Finish with crushed graham crackers for a little crunch and a drizzle of chocolate. Since the berries are delicate, assemble them close to serving time and keep them chilled until guests are ready for dessert.
Ingredients
- 16 large strawberries
- ½ cup marshmallow creme
- 2 tablespoons softened cream cheese
- ¼ cup graham cracker crumbs
- ¼ cup semisweet chocolate chips
- 1 teaspoon coconut oil or neutral oil
- 2 tablespoons mini chocolate chips, optional
- Extra graham cracker crumbs for garnish
How to Make It
- Wash the strawberries and dry them thoroughly with paper towels.
- Remove the leafy tops and carefully hollow out a small cavity in each strawberry using a small paring knife or a strawberry huller.
- Mix the marshmallow creme and softened cream cheese in a small bowl until smooth.
- Spoon or pipe the marshmallow mixture into each strawberry cavity.
- Place the semisweet chocolate chips and oil in a microwave-safe bowl. Heat in short intervals, stirring between each, until smooth.
- Drizzle the melted chocolate over the filled strawberries.
- Sprinkle with graham cracker crumbs and optional mini chocolate chips.
- Refrigerate briefly to help the filling set, then serve chilled. Keep the strawberries refrigerated until serving and return leftovers promptly to the refrigerator.
CONCLUSION
A memorable Labor Day cookout doesn’t need an elaborate menu or hours of preparation. With these Epic labor day cookout ideas, you can mix grilled favorites, fresh sides, tasty snacks, and sweet treats to create a spread your guests will love. Choose recipes that suit your gathering, prepare a few items ahead, and let everyone enjoy the relaxed holiday atmosphere. I’ve found that simple, shareable dishes often bring people together just as much as the main course. Save this article on Pinterest for easy planning, try a new recipe this Labor Day, and share these ideas with friends and family who love a good cookout. Here’s to delicious food and wonderful memories!