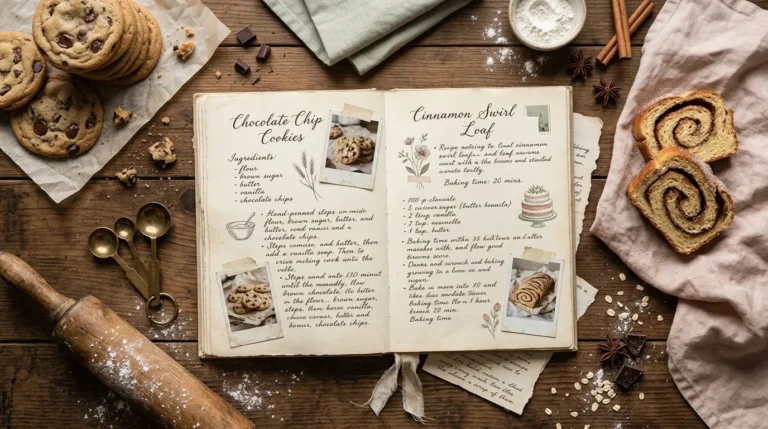
20 Junk Journal Recipe Ideas for Creative Keepsakes
Your favorite recipes deserve more than a plain notebook page! Turn simple paper scraps into beautiful keepsakes filled with vintage charm, creative details, and personal meaning.
These Junk Journal Recipe Ideas combine the joy of paper crafting with the warmth of collecting food memories. Whether you love baking, enjoy decorating journals, or want a creative way to preserve family recipes, these projects offer plenty of inspiration without requiring expensive supplies or advanced crafting skills.
From tea-stained recipe cards and miniature flip tags to decorative pockets and watercolor food illustrations, each idea adds something special to your journal. You can use leftover scrapbook paper, handwritten notes, fabric scraps, and printed illustrations to create pages that reflect your personal style.
I’ve noticed that small details, such as a handwritten recipe title or a tiny botanical illustration, can make even a simple page feel more personal. Start with the materials you already have, choose an idea that catches your eye, and build a recipe collection you’ll love revisiting.
Vintage Recipe Cards

Vintage recipe cards bring an old-fashioned cookbook aesthetic to your junk journal. Use handwritten recipe names, decorative borders, and tiny food illustrations to make each card feel like a treasured keepsake. You can create fictional recipes for decoration or record real family favorites. Leave enough blank space for notes, ingredients, or memories connected to a special meal.
For an authentic aged finish, gently brush the edges with brown distress ink and layer a small piece of torn paper behind the title. In my experience, keeping the decorations concentrated around the corners makes the handwriting easier to read. These cards also work beautifully as removable inserts tucked into small journal pockets.
Ingredients
- Cream or ivory cardstock
- Vintage cookbook pages or printed paper scraps
- Brown distress ink
- Fine-tip black or sepia pen
- Small food illustrations or stamps
- Glue stick
- Optional lace, ribbon, or pressed-flower illustrations
How to Make
- Cut the cardstock into small rectangles that fit comfortably inside your journal.
- Tear a narrow strip from an old book page and glue it along one edge.
- Write a recipe title in cursive lettering, leaving room for ingredients or notes.
- Add a tiny illustration, decorative border, or handwritten date.
- Lightly distress the edges and let the ink dry before placing the card in your journal.
ALSO READ : Clean Eating Meal Prep Recipes
Fold-Out Recipe Booklets
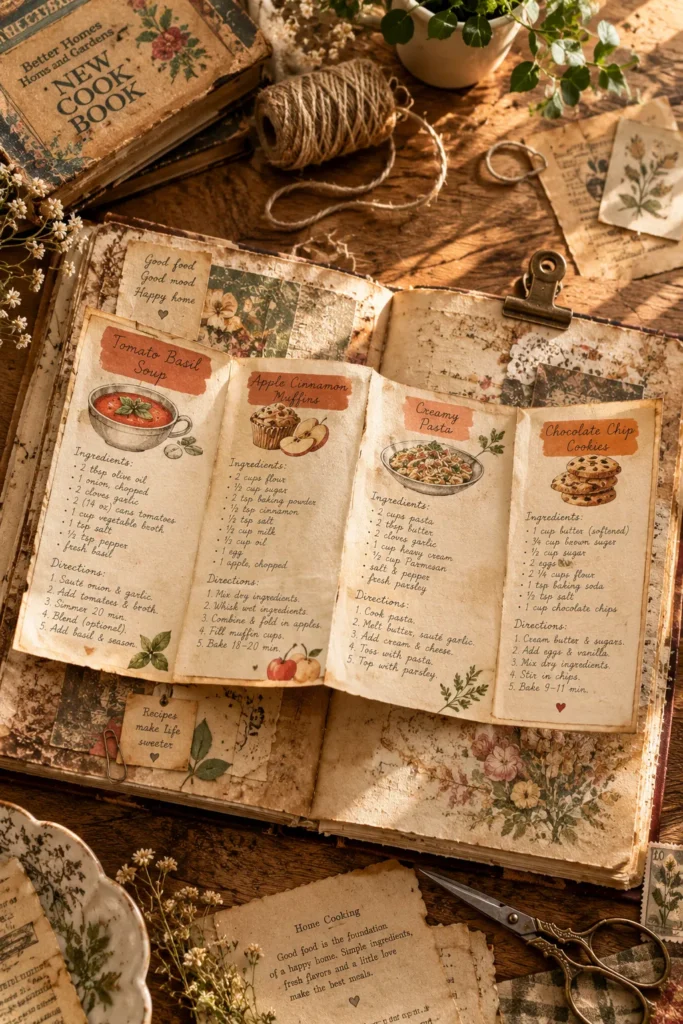
- Choose lightweight paper: Use thin cream paper so the folded booklet does not make your journal too bulky.
- Create separate panels: Divide the paper into sections for recipe names, ingredients, preparation notes, and serving suggestions.
- Decorate the cover: Add a tiny pie illustration, vintage label, or stamped kitchen motif.
- Keep folds neat: Score each fold with a ruler and bone folder for clean accordion panels.
- Secure the booklet: Attach one end to a journal page or tuck it inside a decorative pocket.
Fold-out booklets are useful when a single recipe needs more writing space than a standard journal card allows. Keep the cover decorative but the inside practical. You can record a favorite family dish across several panels, with room for substitutions and personal notes without overcrowding the surrounding pages.
Ingredients
- Lightweight cream or ivory paper
- Cardstock for the cover
- Ruler and pencil
- Bone folder or blunt scoring tool
- Glue stick or double-sided tape
- Vintage food labels or small printed illustrations
- Fine-tip pen
How to Make
- Cut a long strip of lightweight paper and divide it into equal panels.
- Fold the strip back and forth in an accordion pattern, pressing each crease firmly.
- Cut a slightly larger piece of cardstock for the front cover.
- Decorate the cover with a recipe title and one small food illustration.
- Attach the back panel to your journal page or secure the booklet inside a pocket.
- Fill the panels with a recipe, ingredient notes, and preparation steps.
Pinterest Account : FreshRecipeIdeas1
Recipe Memory Pockets
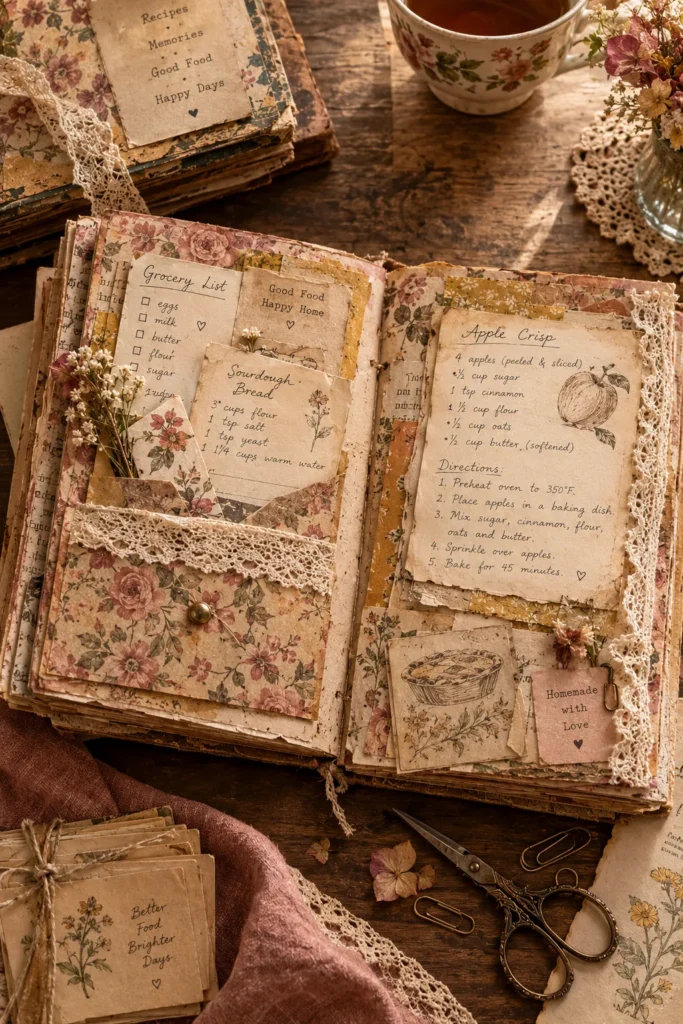
Quick Tip:
Make your pocket slightly wider than the recipe slips you plan to store inside it. Test the fit before gluing the edges, and leave the top open so the inserts can slide in and out without tearing.
Recipe pockets give loose notes a permanent home while keeping your journal interactive. Store handwritten ingredient substitutions, grocery reminders, or short memories about meals shared with family. Label the pocket with a small title such as “Kitchen Notes” and decorate only the outer edges, leaving enough room for easy access.
Ingredients
- Vintage patterned paper or lightweight scrapbook paper
- Kraft cardstock
- Scissors and ruler
- Glue stick or double-sided tape
- Small blank recipe slips
- Decorative label or alphabet stamps
- Optional lace trim or washi tape
How to Make
- Cut a rectangle of patterned paper large enough to hold your recipe slips.
- Fold the bottom upward to create a pocket, then fold both side edges inward.
- Glue the side flaps and bottom edge to a journal page, keeping the top open.
- Reinforce the pocket edges with narrow washi tape if the paper is delicate.
- Add a small label to the front and slide in handwritten recipe notes or grocery lists.
- Check that the inserts move freely before adding any extra decorations.
Tea-Stained Recipe Pages
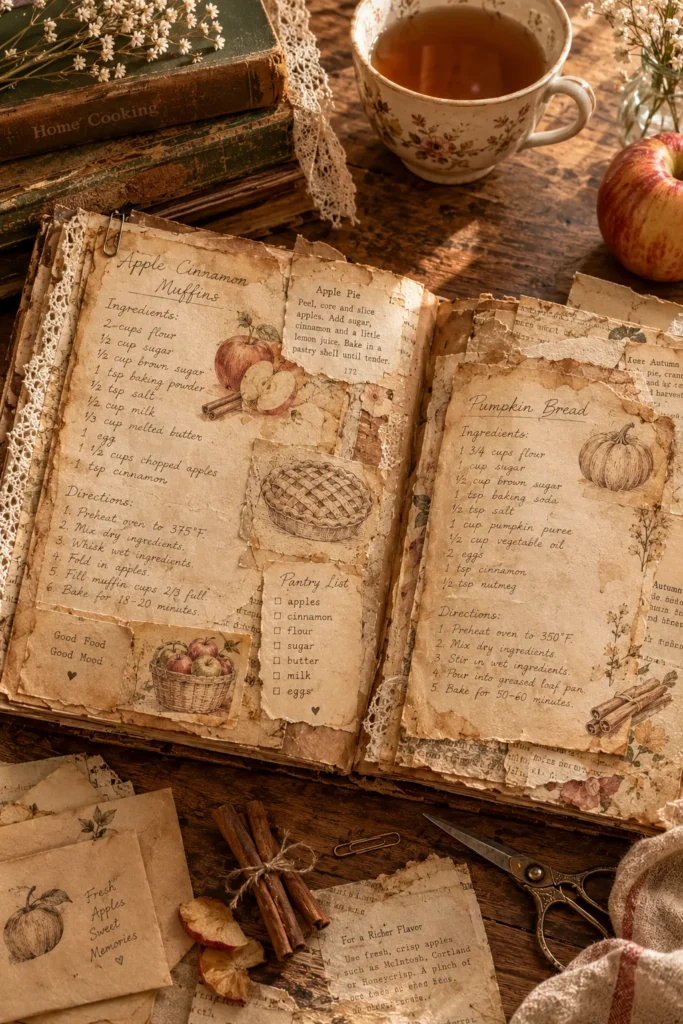
Tea-stained pages give your journal the appearance of an old cookbook filled with treasured recipes. The soft brown tones work beautifully with handwritten notes, vintage food illustrations, and torn book pages. Each sheet develops slightly different marks, making the finished spread feel collected rather than mass-produced.
Keep the staining subtle enough that the writing remains readable. Brush extra tea around the corners for darker edges, then let the paper dry completely before decorating it. These aged pages work especially well for handwritten dessert recipes, family cooking notes, and nostalgic kitchen-themed journal spreads.
Ingredients
- Cream or white paper
- 1 black tea bag
- Warm water
- Small bowl
- Soft brush or sponge
- Paper towels
- Protective tray
How to Make
- Brew strong black tea in a small bowl and let it cool until warm.
- Place a sheet of paper on a protected tray.
- Brush a thin layer of tea across the paper, leaving a few lighter patches.
- Dab the corners with extra tea to create a naturally aged appearance.
- Allow the sheet to air-dry completely on a flat surface.
- Add recipe titles, food illustrations, and handwritten notes after the paper is dry.
Mini Recipe Flip Tags
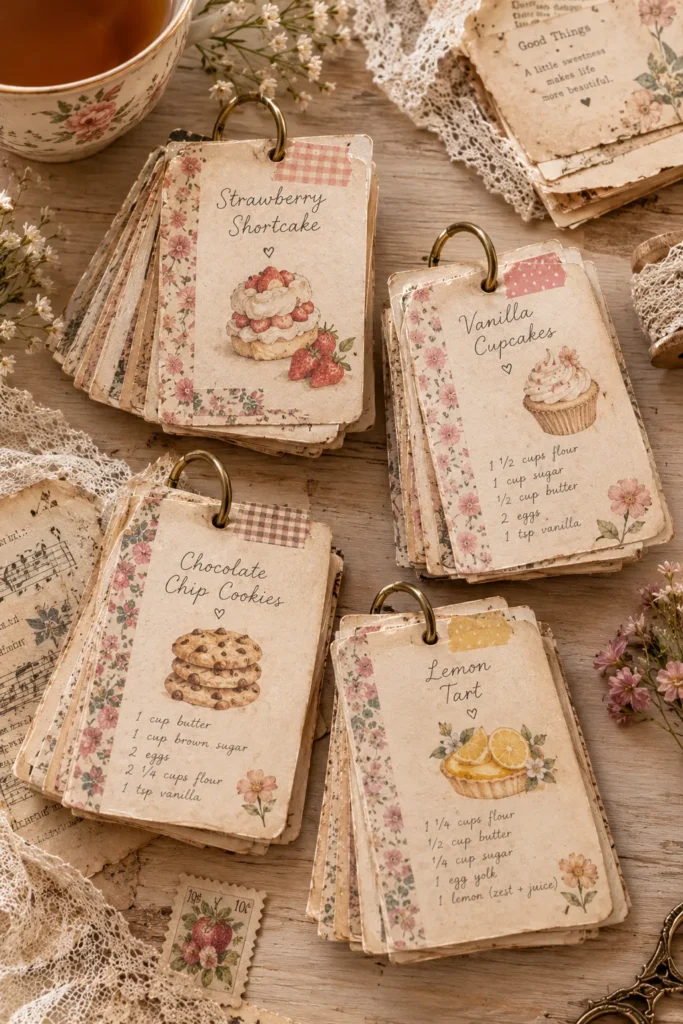
A tiny collection of flip tags can hold several favorite recipes without filling an entire journal page. Each tag becomes a small canvas for a recipe title, ingredient notes, or a personal cooking memory. Their movable design also makes browsing your collection more enjoyable.
Use a consistent color palette to keep the tags visually connected. For example, combine cream cardstock, dusty pink accents, and sepia lettering for a vintage dessert theme. Leave enough space around the punched holes so the tags turn freely without tearing.
Ingredients
- Cream cardstock
- Small metal binder ring
- Hole punch
- Scissors
- Fine-tip pen
- Food-themed stamps or printed illustrations
- Decorative washi tape
- Patterned paper scraps
How to Make
- Cut four to six cardstock rectangles to your preferred tag size.
- Write a different recipe title on each tag.
- Add ingredients or short cooking notes to the reverse sides.
- Decorate the corners with small illustrations and narrow washi tape strips.
- Punch a hole in the same corner of every tag.
- Connect the tags with a binder ring and attach the set to your journal using a sturdy paper tab.
Fabric-Covered Recipe Inserts
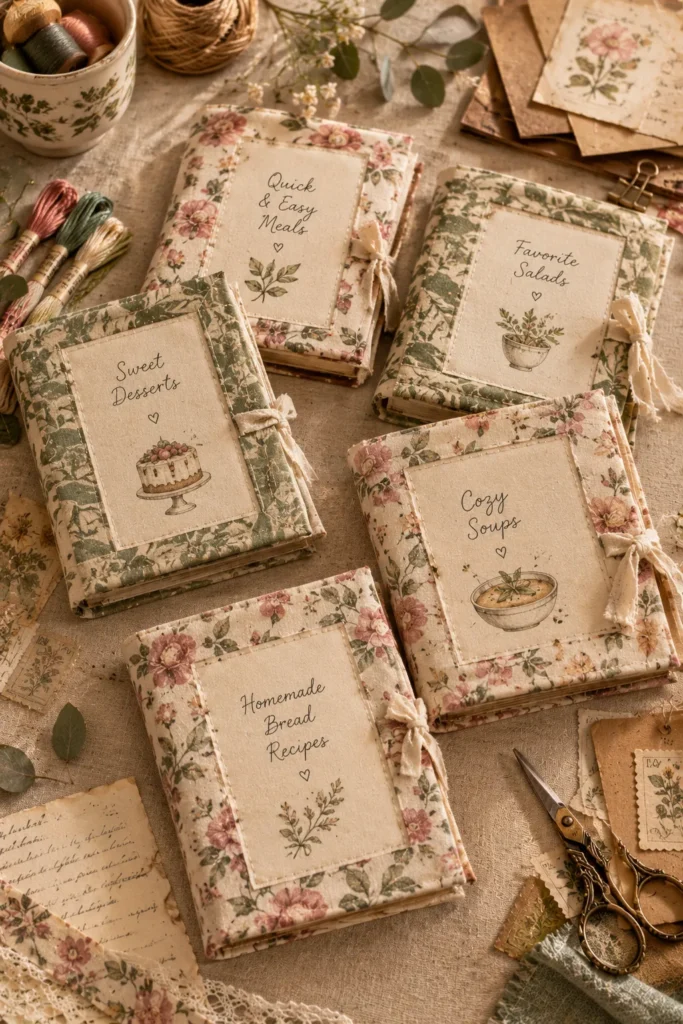
Fabric-covered inserts combine soft textile patterns with the practical layout of a recipe card. The fabric adds texture, while a smooth paper panel gives you room to record ingredients and cooking instructions. Lightweight cotton works particularly well because it folds neatly and adds less bulk than heavy upholstery material.
Choose a small floral print or faded gingham pattern to create a nostalgic cookbook style. Keep the fabric on the cover or outer border rather than covering the entire writing surface. This approach makes the insert decorative without sacrificing readability or making handwritten recipes difficult to maintain.
Ingredients
- Lightweight cotton fabric scraps
- Sturdy cardstock
- Cream paper
- Fabric-safe adhesive
- Fabric scissors
- Ruler
- Pencil
- Optional embroidery thread or fabric tabs
How to Make
- Cut cardstock to fit your journal and trim the fabric slightly larger on every side.
- Apply a thin layer of fabric-safe adhesive to the cardstock.
- Wrap the fabric edges around the back and press them flat.
- Cut a cream paper panel and attach it over the folded fabric edges.
- Write a recipe title on the panel and leave space for ingredients.
- Add a small fabric tab or simple stitched detail, ensuring the insert remains flexible enough for your journal.
Recipe Envelope Pockets
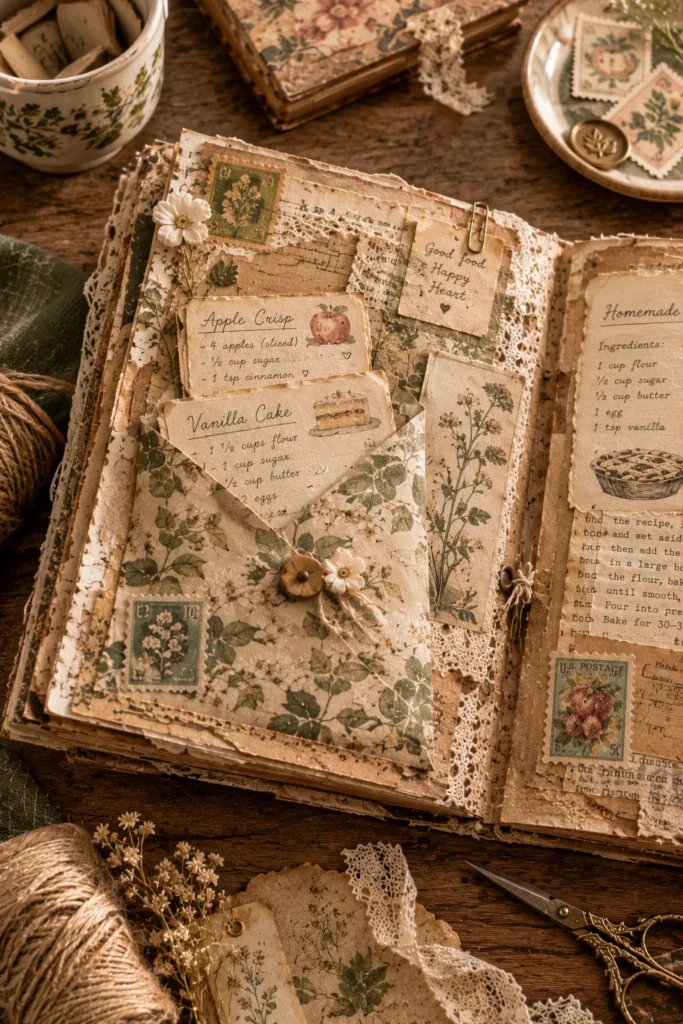
Loose recipe notes can quickly clutter a journal, but a decorative envelope keeps them organized and easy to find. Use an old-fashioned envelope shape to store handwritten ingredient lists, favorite cooking tips, or small recipe clippings. The pocket adds depth to your page while keeping useful pieces removable.
DO
- Choose lightweight patterned paper that folds without cracking.
- Reinforce the opening if you plan to use the pocket often.
- Label the front with a category such as “Baking Notes.”
- Keep the inserts slightly smaller than the pocket.
DON’T
- Glue the top flap shut if you want reusable storage.
- Use thick embellishments where the envelope folds.
- Overfill the pocket with bulky cards.
- Attach damp or freshly inked papers inside.
A few carefully chosen details make the pocket feel like part of an old recipe collection. Add a tiny stamped whisk or a small handwritten label, then tuck in notes for future baking projects. Keep the decoration simple so you can remove and replace the slips without damaging the page.
Ingredients
- Vintage patterned paper
- Kraft cardstock
- Scissors
- Ruler
- Pencil
- Glue stick or double-sided tape
- Small recipe slips
- Optional washi tape and food-themed stamps
How to Make
- Draw an envelope template with a rectangular center and four folding flaps.
- Cut out the shape and fold the side flaps inward.
- Fold the bottom flap upward and glue the overlapping edges.
- Leave the top flap open to create a usable pocket.
- Decorate the front with a small label or food illustration.
- Insert handwritten recipes, ingredient notes, or miniature grocery lists.
Watercolor Food Illustrations
- Cost: Low if you already own basic watercolor supplies.
- Time: About 20 to 40 minutes for a small collection of illustrations.
- Skill Level: Beginner-friendly with simple fruit and pastry shapes.
- Best For: Recipe cards, journal borders, dividers, and decorative labels.
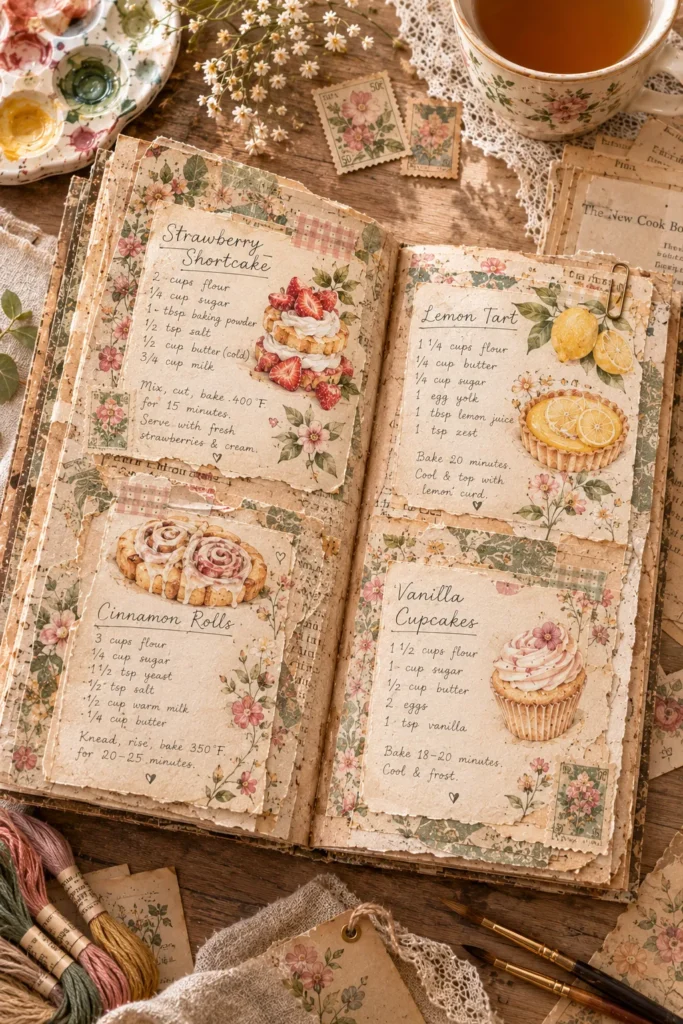
Watercolor illustrations bring a handmade artistic touch to your journal without requiring elaborate drawing skills. Start with recognizable shapes such as strawberries, apples, bread slices, or teacups. A few loose brushstrokes often look more charming than overly detailed drawings, especially when paired with handwritten recipe titles and lightly distressed paper.
Ingredients
- Watercolor paper or thick mixed-media paper
- Watercolor paints
- Small round paintbrush
- Water container
- Paper towel
- Pencil and eraser
- Fine-tip waterproof pen
- Scissors
How to Make
- Sketch a few simple food shapes lightly in pencil.
- Paint the largest areas using pale washes of color.
- Allow each layer to dry before adding darker details.
- Add outlines or small accents with a waterproof pen after the paint dries.
- Cut out the illustrations with a narrow white border.
- Glue them beside recipe titles or use them to decorate journal cards and pockets.
Vintage Grocery List Inserts
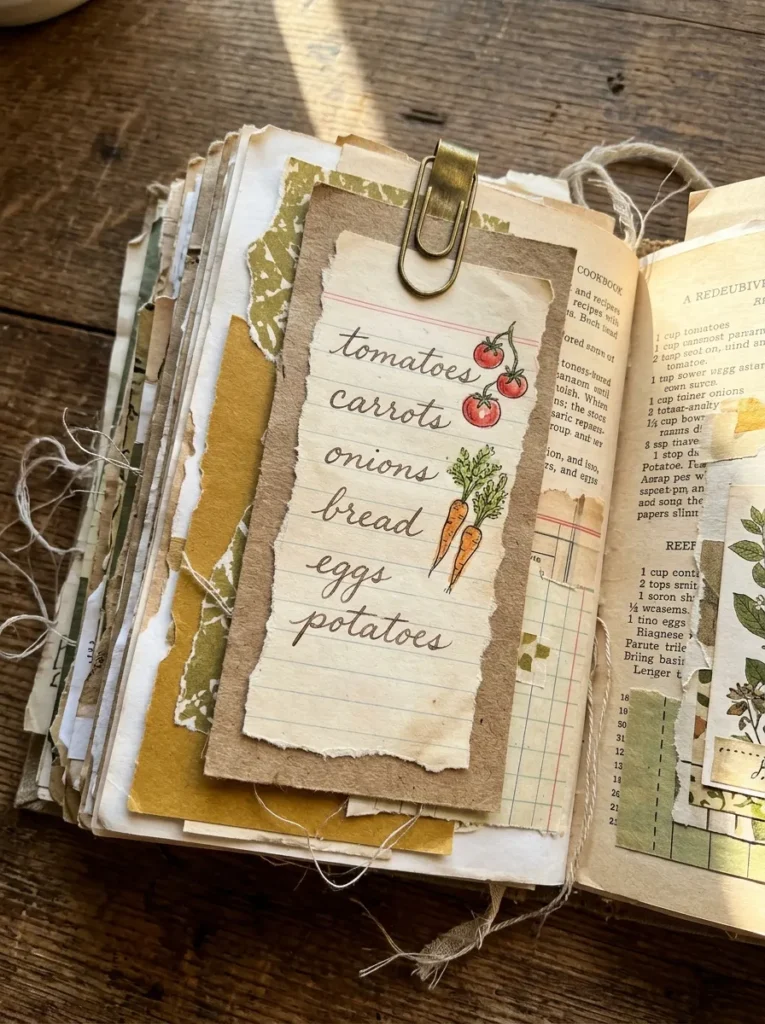
A grocery list insert connects your creative journal with everyday kitchen routines. Instead of recording only finished recipes, use the page to collect ingredients you need, pantry staples to replace, and seasonal produce worth trying. The result is both decorative and useful, especially when planning several meals for the week.
Keep the layout simple with short lines and small category labels. Separate fresh produce, pantry goods, and baking supplies so the list remains easy to scan. A narrow paper tab or paper clip lets you remove the insert when shopping and return it to the journal afterward.
Ingredients
- Cream lined paper
- Kraft cardstock
- Ruler and pencil
- Fine-tip pen
- Small food illustrations or stamps
- Paper clip or small binder clip
- Glue stick
- Optional twine or washi tape
How to Make
- Cut a sheet of lined paper to fit inside your journal.
- Mount it onto kraft cardstock for extra stability.
- Divide the page into sections for produce, pantry items, and baking supplies.
- Add small handwritten labels and a few simple food illustrations.
- Attach a paper clip or decorative tab for easy removal.
- Place the finished insert in a pocket or tuck it behind a recipe page.
Pressed Flower Recipe Pages
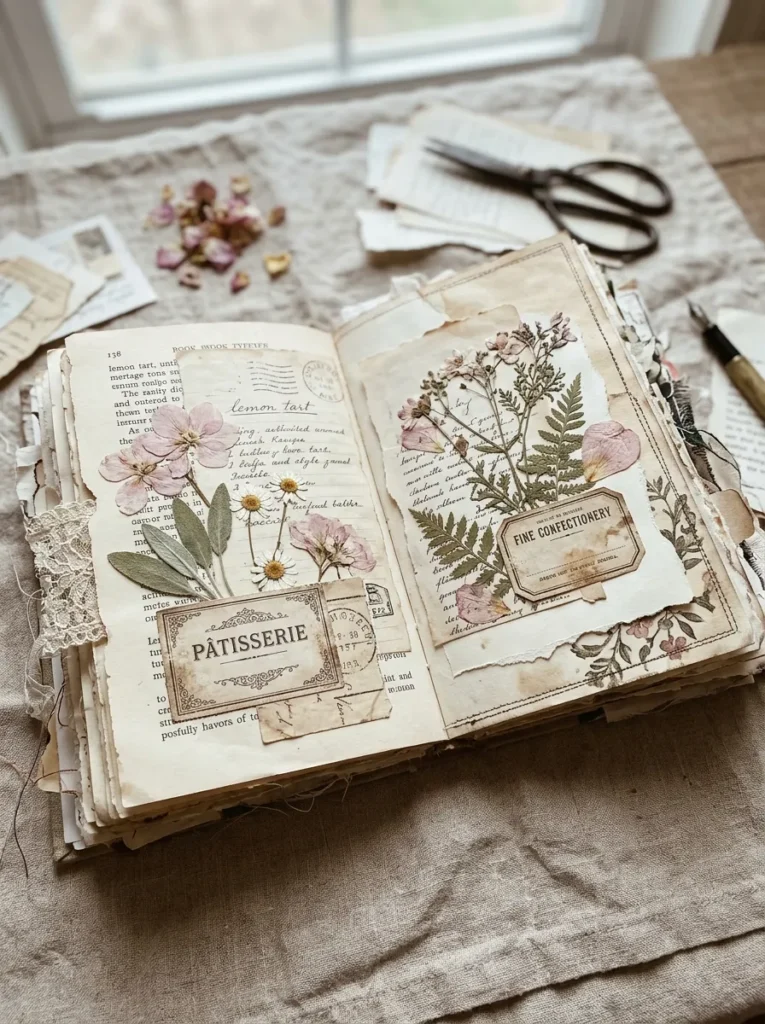
Pressed flowers bring a natural, delicate finish to recipe journal pages, especially those featuring herbal teas, floral cakes, or spring desserts. Their thin petals pair beautifully with handwritten notes and faded paper. Keep the flowers near the page edges so the recipe remains readable and the botanical details stand out.
For a practical keepsake, use fully dried flowers or printed botanical illustrations. Real flowers can become brittle, so handle them with tweezers and avoid placing thick stems near the journal binding. A simple arrangement of two small blossoms and a leaf often looks more balanced than filling every corner.
Ingredients
- Fully dried pressed flowers
- Cream cardstock or journal paper
- Fine-tip pen
- Tweezers
- Acid-free glue or archival adhesive
- Small botanical labels
- Optional tracing paper or a lightweight protective sheet
How to Make
- Choose a dry journal page and decide where the flowers will sit.
- Write the recipe title and any notes before adding delicate decorations.
- Lift each pressed flower carefully with tweezers.
- Apply a tiny amount of archival adhesive to the back of each flower.
- Arrange the flowers around the page edges, pressing them gently into place.
- Allow the adhesive to dry fully before closing the journal.
Recipe Washi Tape Borders
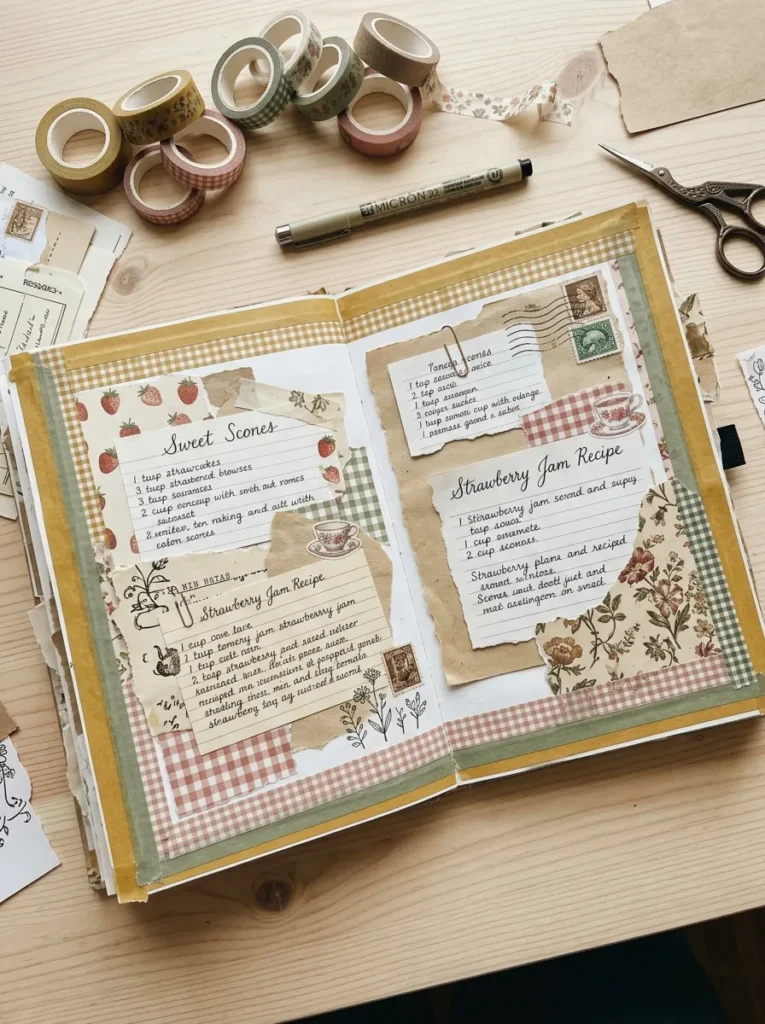
- Choose a color palette: Pick two or three coordinating tape colors to keep the page visually balanced.
- Frame the title: Place a narrow strip above or below the recipe heading.
- Highlight important details: Use small tape pieces beside ingredient lists or cooking notes.
- Layer carefully: Overlap different patterns slightly to create depth without hiding the writing.
- Finish the edges: Tear the tape by hand for a softer, handmade appearance.
Washi tape is especially useful for decorating a page when you have limited time or drawing experience. It adds pattern and color without requiring complicated artwork. I’ve noticed that using one bold print with two quieter patterns creates a more cohesive result than combining several busy designs.
Ingredients
- Washi tape in coordinating colors
- Cream or kraft journal paper
- Scissors
- Fine-tip pen
- Recipe cards or handwritten recipe sheets
- Optional vintage labels and food stickers
How to Make
- Select two or three washi tape designs that match your journal theme.
- Write the recipe title and main content on the page first.
- Add a narrow strip of tape above the heading or along one outer edge.
- Use shorter tape pieces to highlight small labels or separate sections.
- Layer a second pattern over a small portion of the first strip.
- Press the tape gently to secure it, keeping all writing areas clear.
Antique Cookbook Collages
BEFORE
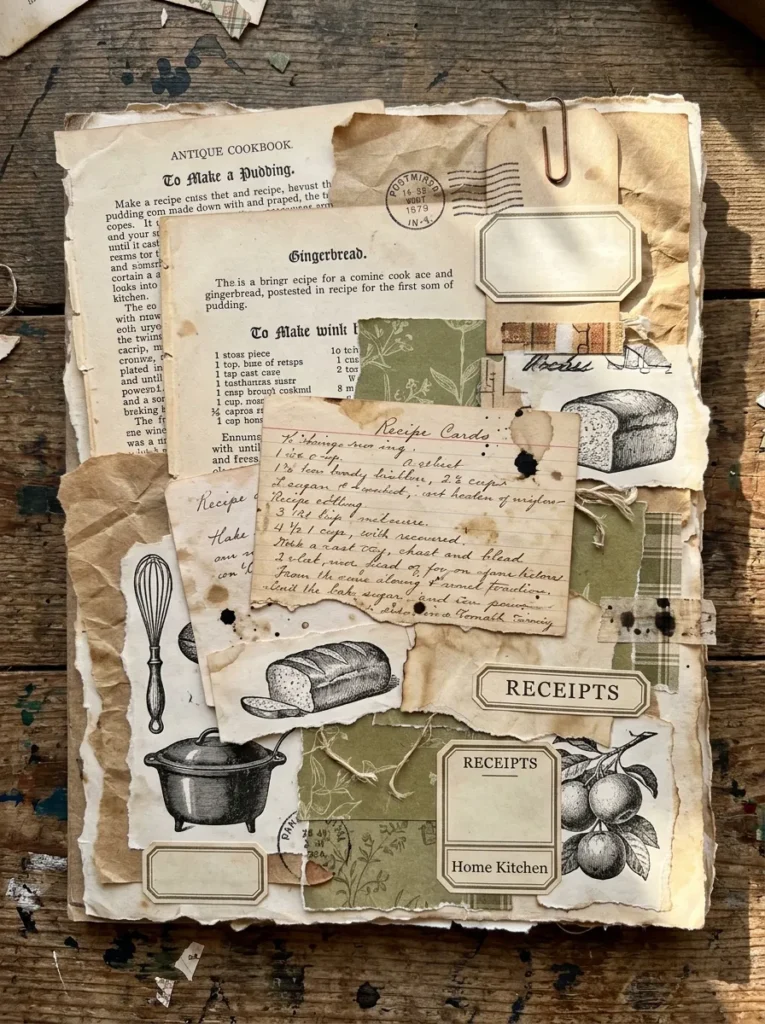
A blank journal page can look unfinished when surrounded by richly decorated recipe cards. New paper and modern lettering may also feel disconnected from an antique cookbook theme.
AFTER
Layered cookbook fragments create a cohesive vintage background with varied textures and visual interest. A few recognizable food illustrations and handwritten details help the page feel intentional without requiring elaborate decoration.
Choose paper fragments with different sizes and tones. Place larger pieces first, then add small labels and illustrations to fill gaps. Keep any original recipe text you plan to read unobstructed, and use copies of copyrighted cookbook pages when practical for decorative crafting.
Ingredients
- Copies of vintage cookbook pages
- Kraft paper and cream cardstock
- Scissors
- Glue stick
- Brown distress ink
- Food illustrations or vintage labels
- Fine-tip pen
- Optional paper doilies or washi tape
How to Make
- Select three or four paper fragments with different text sizes and background tones.
- Tear the edges by hand to create an aged, irregular finish.
- Arrange the largest fragments across the page before applying glue.
- Layer smaller text pieces and food illustrations over selected areas.
- Add a handwritten recipe title on a separate cream label.
- Distress a few edges lightly and let the page dry flat before closing the journal.
Watercolor Recipe Bookmarks
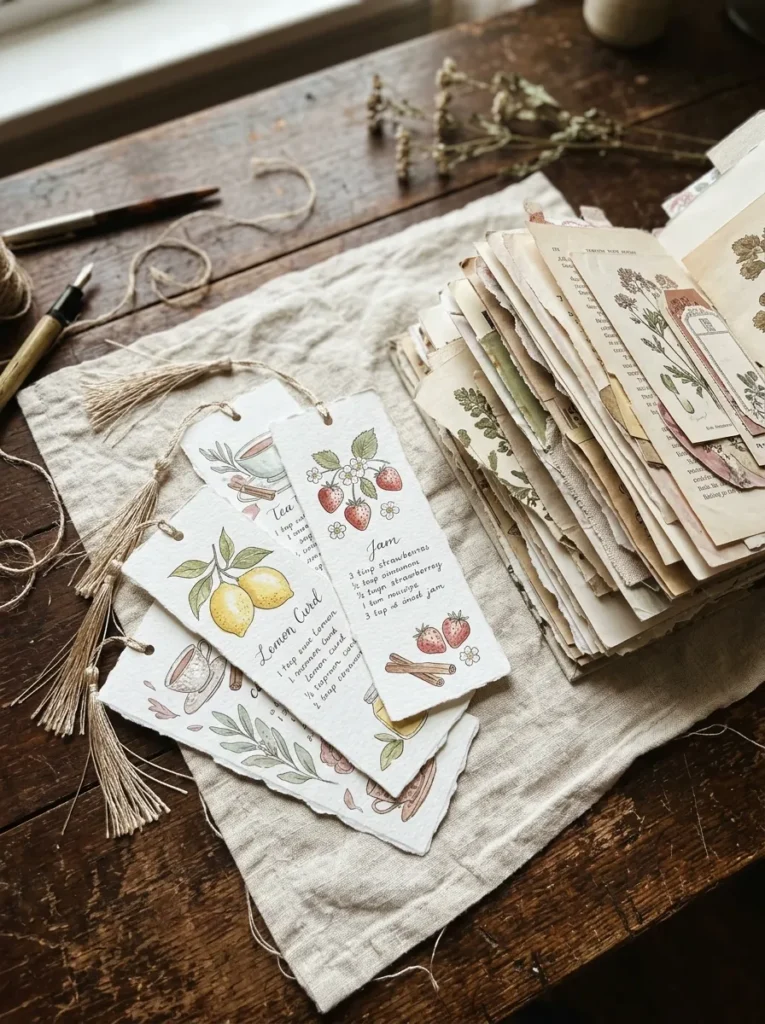
A handmade bookmark adds a useful decorative detail to your recipe journal. Use different food illustrations to identify sections such as breakfast, desserts, drinks, or family dinners. The slim shape fits easily between pages, while a small ribbon or twine tassel makes the bookmark easy to find.
Ingredients
- Watercolor paper or heavyweight cardstock
- Watercolor paints
- Small paintbrush
- Pencil and eraser
- Hole punch
- Cotton twine or thin ribbon
- Scissors
- Fine-tip pen
How to Make
- Cut the paper into long, narrow bookmark shapes with straight or rounded corners.
- Lightly sketch a fruit, pastry, teacup, or herb illustration near the top.
- Paint the illustration with soft watercolor washes and allow it to dry completely.
- Write a small category label, such as “Sweet Treats” or “Family Meals,” near the bottom.
- Punch a hole at the top and thread through a short piece of ribbon or twine.
- Slide the bookmark into your journal at the beginning of the matching recipe section.
- Best for: Marking recipe categories or favorite pages.
- Skill level: Beginner-friendly.
- Time: Around 20 to 30 minutes per bookmark.
- Design tip: Repeat one accent color across the collection for a coordinated look.
These bookmarks are a practical way to use leftover watercolor paper and small paint samples. Keep the illustrations simple so the bookmarks remain readable at a glance. For extra durability, choose sturdy paper and avoid oversized tassels that could catch on the journal binding.
Interactive Recipe Wheel
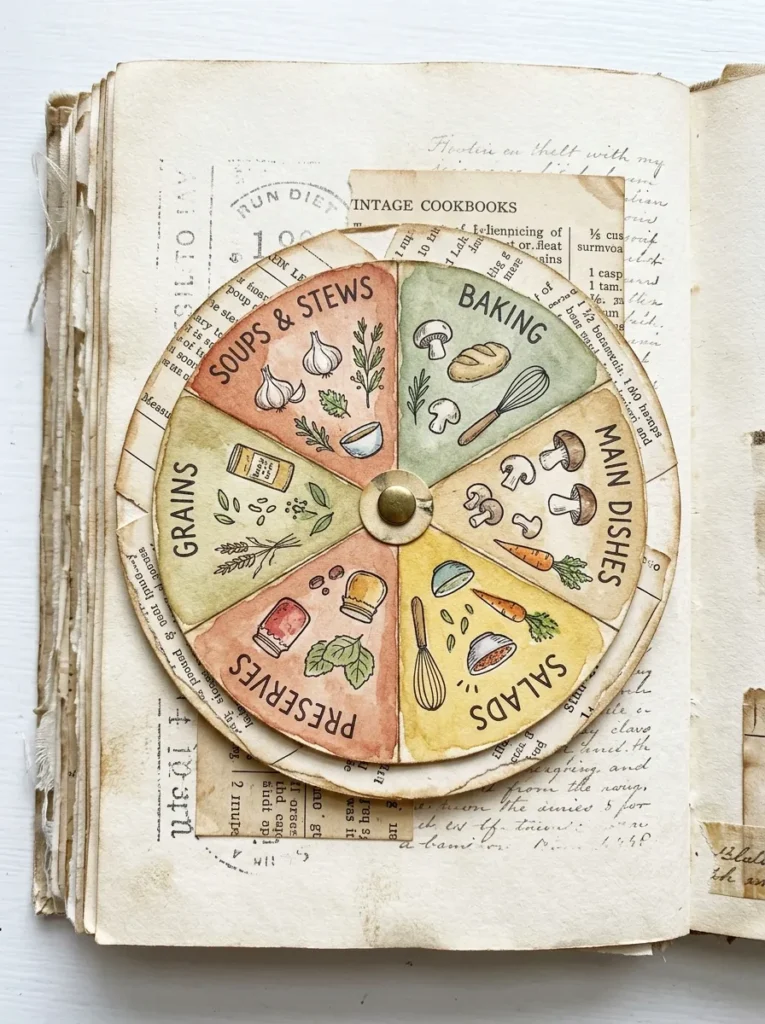
A rotating recipe wheel adds an interactive element to a handmade journal. Each section can represent a meal category, favorite ingredient, or baking inspiration. Turning the wheel reveals a different prompt, making the page useful for choosing what to cook or collecting ideas for future recipes.
Quick Tip:
Use lightweight cardstock for the rotating wheel and make sure the paper fastener is not too tight. Test the rotation before attaching the page to your journal, and keep decorations away from the center hole so the wheel turns smoothly.
Ingredients
- Two pieces of cardstock
- Pencil and ruler
- Scissors
- Compass or round template
- Small brass paper fastener
- Fine-tip pens
- Colored pencils or food illustrations
- Optional patterned paper
How to Make
- Cut two circles from cardstock, making the top circle slightly smaller than the bottom one.
- Divide the larger circle into four to six sections and label each with a recipe category or cooking prompt.
- Cut a small viewing window into the smaller circle, leaving its outer edge intact.
- Place the smaller circle over the larger one and align their centers.
- Pierce the center of both circles and connect them with a brass paper fastener.
- Attach the finished wheel to a sturdy journal page, checking that it rotates freely before decorating around it.
A recipe wheel works best when its labels are short and easy to read through the viewing window. You could include prompts such as “Use Seasonal Fruit,” “Bake Something Sweet,” or “Try a Family Favorite.” Keep the mechanism simple so the paper stays flexible and the wheel remains enjoyable to use.
Recipe Memory Journaling
DO
- Record who shared the recipe or where you first tried it.
- Add a date, holiday, or special occasion when relevant.
- Leave space for cooking adjustments and personal notes.
- Pair short memories with small illustrations or photographs.
DON’T
- Invent personal experiences and present them as genuine memories.
- Cover handwritten notes with bulky embellishments.
- Force long stories into small cards.
- Use original photographs without considering whether they need protection.
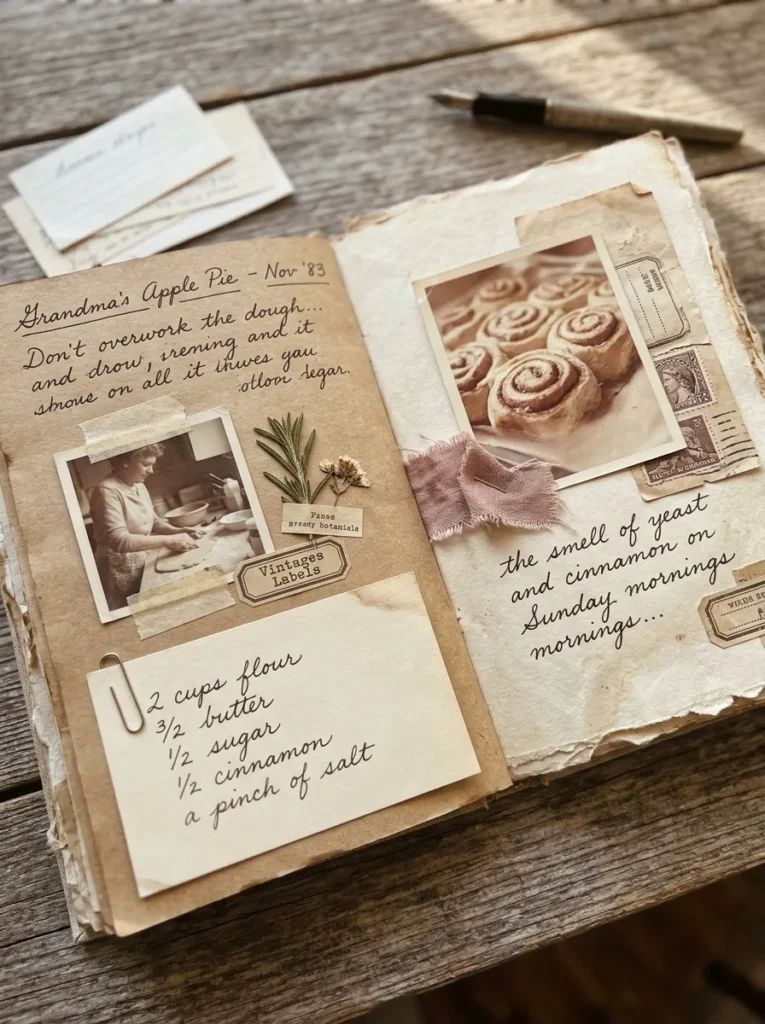
A recipe journal becomes more meaningful when it preserves the details behind the food. A short note about a birthday cake, a favorite rainy-day soup, or a dish shared during a holiday can add context that an ingredient list alone cannot capture. Keep each memory specific and concise so the page remains easy to revisit.
Ingredients
- Cream or kraft journal paper
- Fine-tip pen
- Small photographs or printed food images
- Decorative labels
- Glue stick or photo-safe adhesive
- Vintage paper scraps
- Optional washi tape and botanical illustrations
How to Make
- Choose a recipe connected to a real memory, person, or occasion.
- Write a short note explaining why the recipe matters to you.
- Add the recipe name, date, or name of the person who shared it.
- Attach a small photograph or food illustration beside the note.
- Decorate the border with restrained paper layers or washi tape.
- Leave a small blank area for future cooking notes or changes to the recipe.
Miniature Recipe File Folders
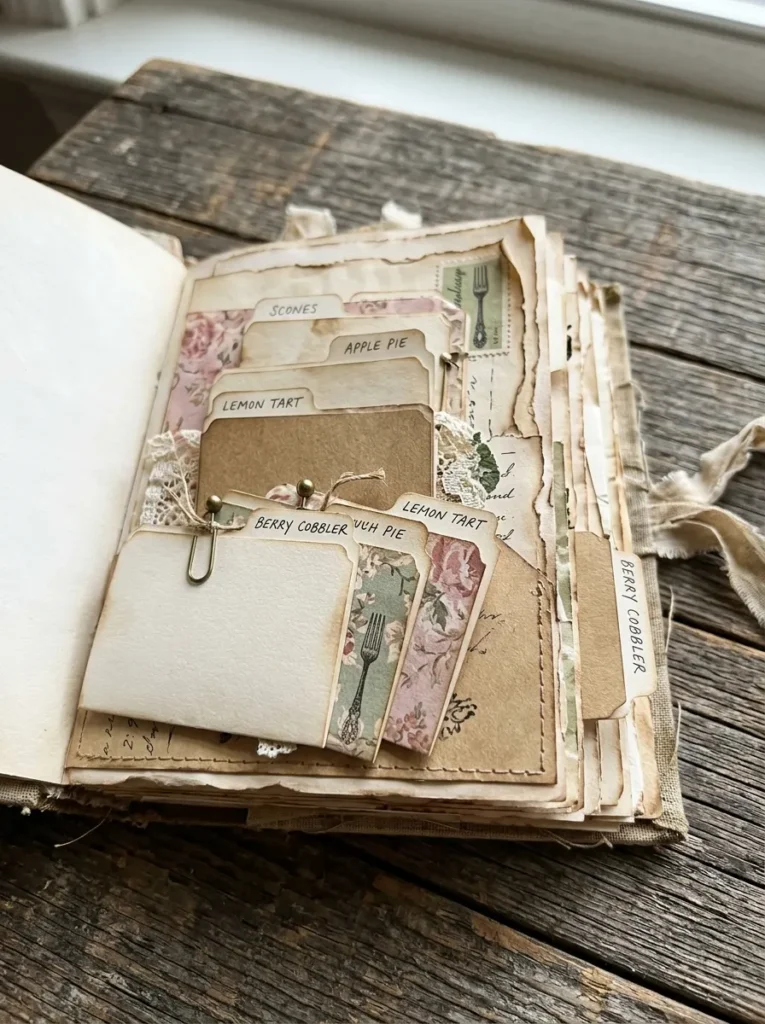
Miniature file folders turn a recipe journal into a small, organized archive. Each folder can hold separate cards for desserts, breakfast favorites, family meals, or seasonal treats. The tabbed edges make categories easy to identify, while the layered paper creates a charming office-inspired detail within your handmade journal.
Keep the folders slim enough to fit comfortably between pages. Use lightweight cardstock for the structure and reserve heavier decorative paper for small accents. A simple label on each tab will make the collection easier to browse without adding unnecessary bulk.
Ingredients
- Lightweight cardstock
- Vintage patterned paper
- Ruler and pencil
- Scissors
- Glue stick
- Fine-tip pen
- Small label stickers or paper tabs
- Optional miniature brass paper clips
How to Make
- Cut a rectangle of cardstock and fold it in half to create the folder base.
- Trim the front edge slightly lower than the back to create a visible tab area.
- Add a narrow strip of patterned paper to the outside cover.
- Write a category name on a small label and attach it to the tab.
- Make miniature recipe cards that fit inside the folder.
- Attach the folder to a journal page or store it in a larger pocket.
- Best for: Organizing recipe cards by category.
- Skill level: Beginner-friendly.
- Time: About 20 minutes per folder.
- Design tip: Repeat the same folder shape and vary the tab colors to distinguish categories.
Layered Ingredient Envelopes
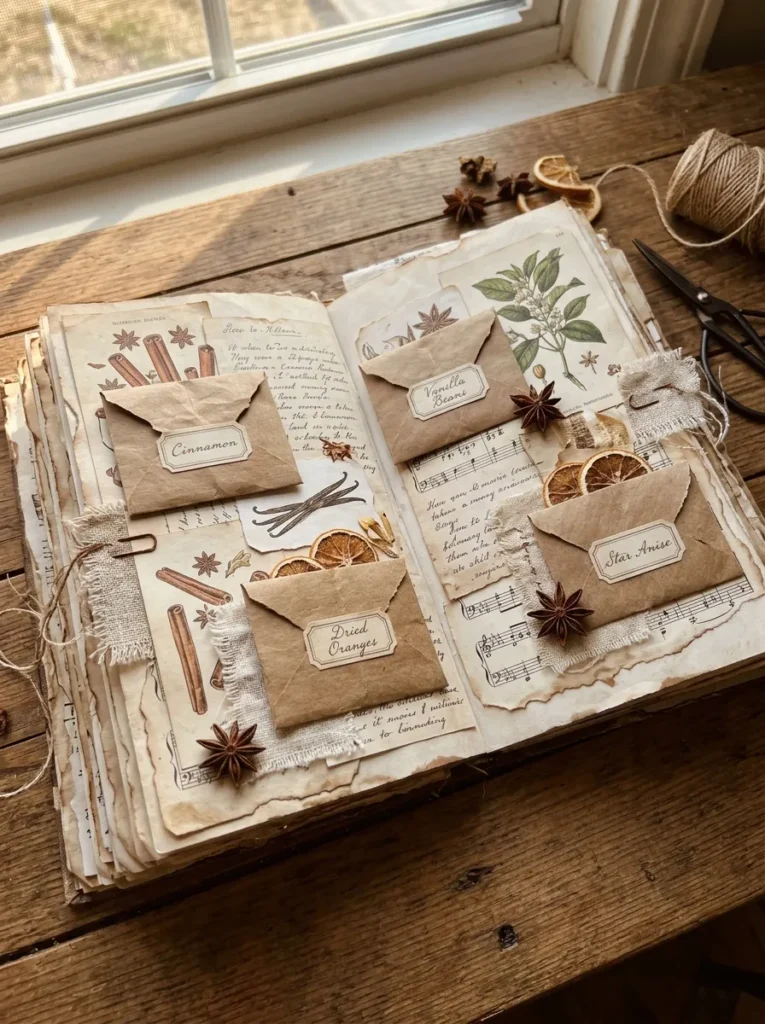
Quick Tip:
Make each envelope just large enough to hold a folded ingredient note or a small decorative card. Use lightweight paper for the folds and avoid storing loose food ingredients inside the journal, where oils, crumbs, and moisture could damage the pages.
Small ingredient envelopes create an appealing way to store recipe notes and cooking inspiration. Label each one with a spice, baking ingredient, or flavor combination, then tuck in a card describing how you might use it. This works particularly well for seasonal baking collections and handmade dessert journals.
Ingredients
- Kraft paper or lightweight scrapbook paper
- Cream cardstock
- Scissors
- Ruler
- Glue stick
- Fine-tip pen
- Small botanical illustrations
- Optional washi tape and label stickers
How to Make
- Cut small rectangles from kraft or patterned paper.
- Fold the bottom section upward to form a pocket and fold the side edges inward.
- Glue the side flaps and bottom edge, leaving the top open.
- Cut small cream cards to fit inside each envelope.
- Label the cards with ingredients such as cinnamon, vanilla, or dried citrus, adding notes about suitable recipes.
- Decorate the envelope fronts with botanical images and attach them to your journal page.
Recipe-Themed Paper Collage
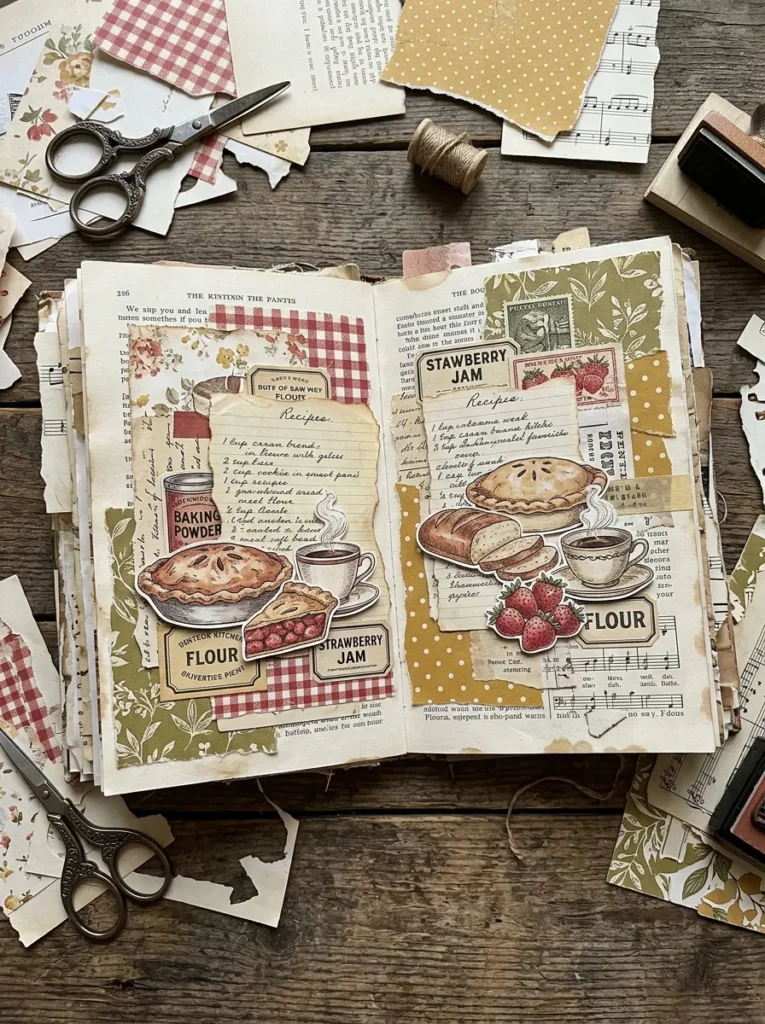
BEFORE
A collection of unrelated paper scraps can make a journal page look crowded and disconnected. Different patterns may compete for attention when they lack a shared color palette or focal point.
AFTER
A recipe-themed collage brings those scraps together through repeated food motifs, coordinated colors, and intentional layering. A central illustration or recipe title gives the eye a place to rest while smaller pieces add texture around it.
Choose one main image, such as a pie illustration or vintage teacup, and build the collage around it. Use a few larger scraps as the background, then add smaller details gradually. Leaving some cream paper visible helps balance the composition and gives handwritten notes room to breathe.
Ingredients
- Vintage cookbook page copies
- Food illustrations or magazine cutouts
- Kraft paper and cream cardstock
- Scissors
- Glue stick
- Fine-tip pen
- Patterned paper scraps
- Optional washi tape and distress ink
How to Make
- Select one main food illustration to act as the focal point.
- Arrange two or three larger paper scraps around it without gluing them yet.
- Add smaller recipe fragments and labels to create overlapping layers.
- Check that the colors complement one another and that some blank space remains.
- Glue the pieces from the background forward, pressing each layer flat.
- Add a handwritten recipe title or short cooking note to finish the page.
Seasonal Recipe Journal Tabs
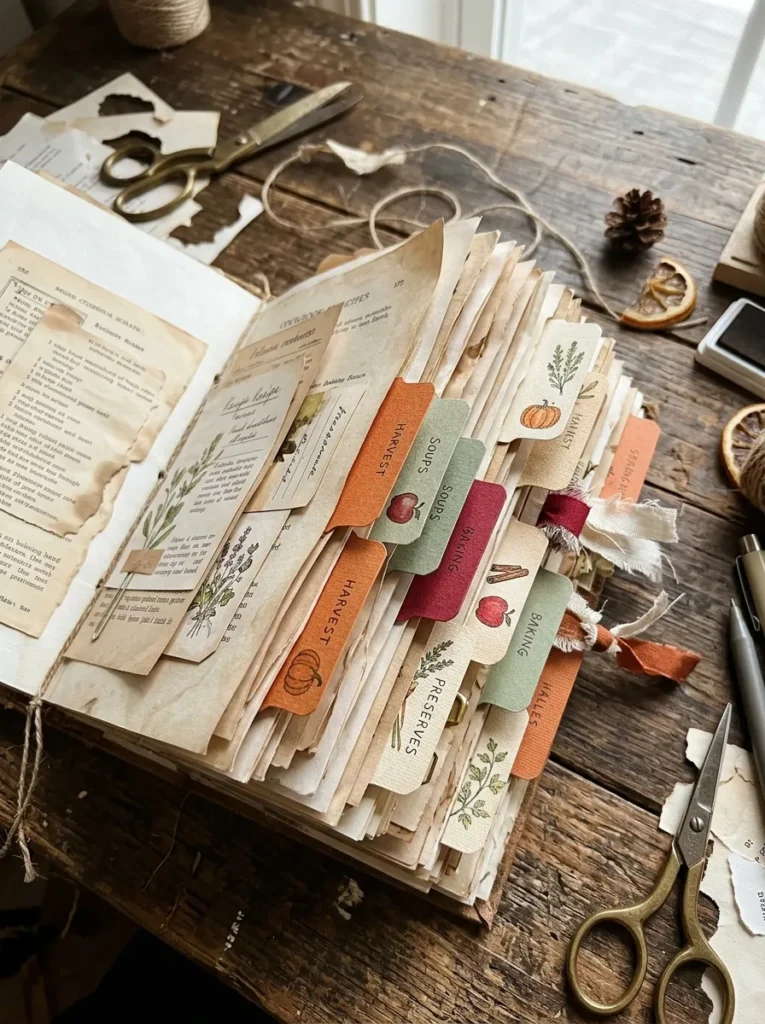
Seasonal tabs make it easier to find recipes while giving your journal a coordinated, colorful appearance. Create separate markers for autumn baking, winter comfort food, spring brunches, or summer drinks. Matching each tab to a seasonal color palette makes the collection easy to navigate without needing elaborate decorations.
Ingredients
- Colored cardstock
- Cream paper scraps
- Scissors
- Ruler
- Pencil
- Fine-tip pen
- Glue stick or double-sided tape
- Small seasonal illustrations or stamps
How to Make
- Cut cardstock into small rectangles or flag-shaped tabs.
- Choose a color for each season or recipe category.
- Write short labels such as “Autumn,” “Baking,” or “Summer Drinks.”
- Add one tiny seasonal illustration to each tab.
- Fold the tabs over page edges or attach them to sturdy paper dividers.
- Check that the tabs remain visible when the journal is closed.
- Best for: Journals containing recipes from multiple seasons.
- Skill level: Beginner-friendly.
- Time: Around 15 to 30 minutes for a set.
- Design tip: Keep labels short and use the same lettering style across all tabs.
These markers are particularly helpful when your journal grows beyond a few pages. Place them beside matching recipe collections, and avoid making them too wide or bulky. A consistent set of colors and labels will help the journal look organized while keeping its handmade charm.
Recipe Pocket Accordion Pages
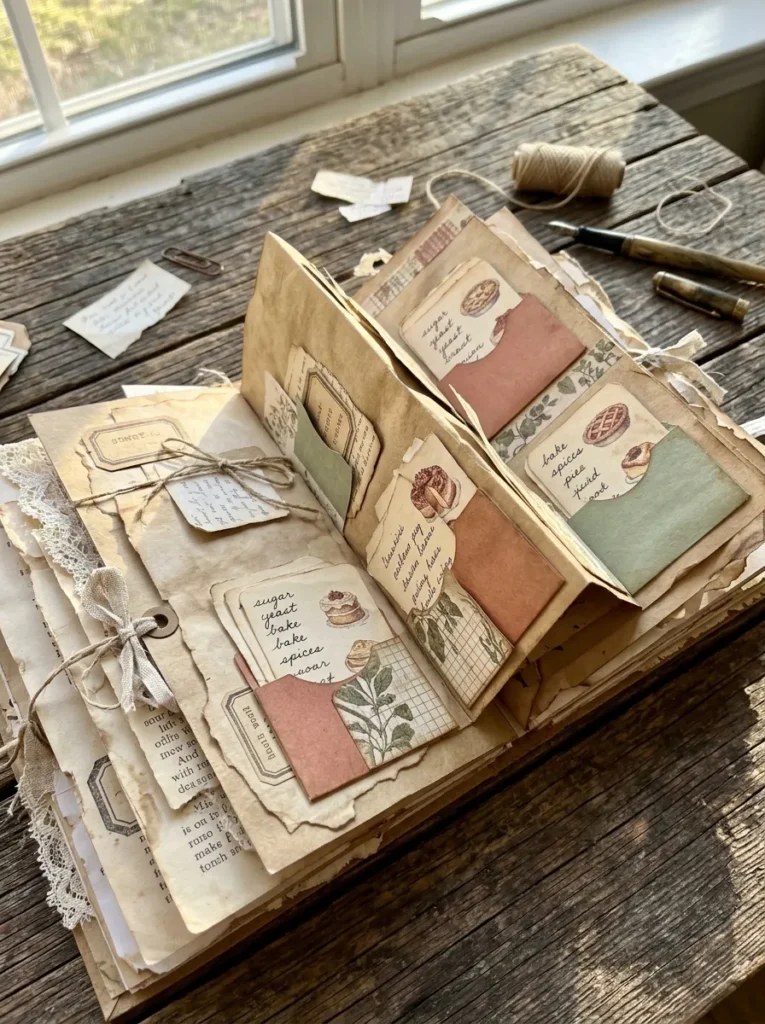
Accordion pages provide extra storage without requiring a separate journal. Their folded sections can hold recipe cards, handwritten cooking notes, and small decorative inserts, making them useful for themed collections such as holiday desserts or family baking favorites.
Ingredients
- Lightweight cardstock
- Cream recipe paper
- Ruler and pencil
- Scissors or paper trimmer
- Bone folder or blunt scoring tool
- Glue stick or double-sided tape
- Decorative labels
- Optional ribbon or washi tape
How to Make
- Cut a long strip of lightweight cardstock and divide it into equal panels.
- Score the dividing lines and fold the strip back and forth like an accordion.
- Attach small folded paper pockets to selected panels, gluing only the sides and bottom edges.
- Make recipe cards that fit inside each pocket without sticking out too far.
- Decorate the panel fronts with small food illustrations and handwritten category labels.
- Attach one end of the accordion to a sturdy journal page and check that the folds open and close comfortably.
- Best for: Keeping several recipe cards together in one spread.
- Skill level: Beginner to intermediate.
- Time: About 30 to 45 minutes.
- Design tip: Use thin paper and small embellishments so the folded page does not become too bulky.
For the best result, test the accordion folds before attaching the page permanently. Keep the pockets shallow and distribute the cards evenly so the journal closes without straining its binding. This design combines the charm of interactive paper crafting with a practical place to collect recipes and cooking inspiration.
CONCLUSION
Creating a recipe journal is a lovely way to bring together creativity, food inspiration, and meaningful memories. From vintage recipe cards to interactive accordion pages, these projects offer plenty of ways to turn ordinary paper supplies into treasured keepsakes.
The best Junk Journal Recipe Ideas are the ones that reflect your personality and give each page a purpose. Start with one simple project, experiment with colors and textures, and let your collection grow naturally.
Save this article on Pinterest for your next crafting session, try your favorite ideas, and share it with a friend who loves journaling or handmade keepsakes. Your next cherished creation can begin with a few paper scraps and a little imagination!