21 Thanksgiving Dessert Recipe Ideas for Sweet Bliss
Thanksgiving dinner deserves a sweet ending, and the right dessert can make the entire celebration feel extra special. From the first slice of pie to the last chocolatey bite, these little treats create memories everyone can enjoy.
These Thanksgiving Dessert Recipe Ideas bring together comforting fall flavors, beautiful presentation, and easy-to-share sweets for your holiday table. Whether you’re hosting a big family gathering, bringing dessert to a potluck, or planning a cozy dinner at home, you’ll find plenty of inspiration to suit the occasion. Choose from fruity pastries, creamy cheesecakes, rich chocolate desserts, and cinnamon-spiced favorites that capture the warmth of the season. I’ve found that preparing at least one dessert ahead of time can make holiday hosting feel much more manageable. With these delicious ideas, you can plan a dessert spread that looks inviting, tastes wonderful, and gives everyone something to look forward to.
Maple Sweet Potato Pie

Maple syrup gives this traditional Thanksgiving pie a deep caramel-like sweetness, while mashed sweet potatoes create a naturally creamy filling. The buttery crust balances the soft center, making every slice satisfying without requiring elaborate decoration. This dessert works especially well for families who enjoy classic holiday flavors with a slightly different twist.
Ingredients
- 1 unbaked 9-inch pie crust
- 2 cups cooked, mashed sweet potatoes
- 2 large eggs
- 1/2 cup pure maple syrup
- 1/2 cup evaporated milk
- 3 tablespoons melted butter
- 1 teaspoon vanilla extract
- 1 teaspoon ground cinnamon
- 1/4 teaspoon ground nutmeg
- 1/4 teaspoon salt
How to Make
- Preheat the oven to 350°F (175°C). Place the pie crust in a 9-inch pie plate and crimp the edges.
- In a large bowl, whisk the mashed sweet potatoes, eggs, maple syrup, evaporated milk, melted butter, and vanilla until smooth.
- Stir in the cinnamon, nutmeg, and salt.
- Pour the filling into the prepared crust and smooth the surface.
- Bake for 50 to 60 minutes, until the edges are set and the center has only a slight wobble.
- Cool completely before slicing. Refrigerate leftovers within two hours.
ALSO READ : Clean Keto Recipes
Cranberry Orange Shortbread Bars
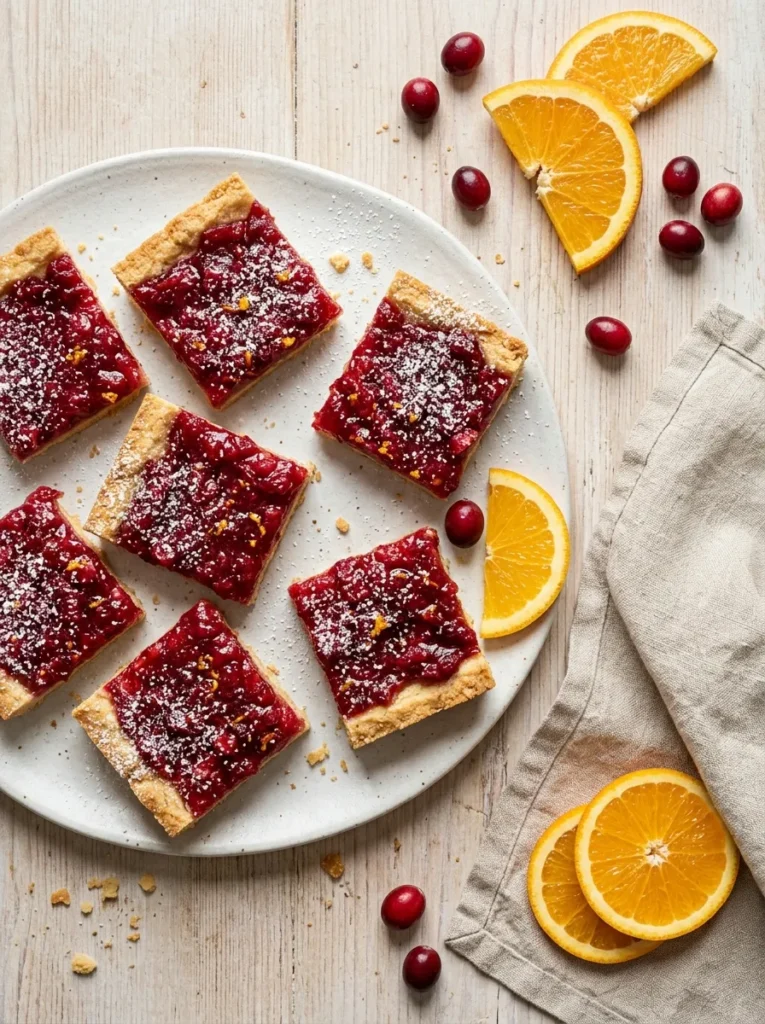
Tart cranberries and fresh orange zest bring a refreshing contrast to rich, buttery shortbread. These colorful bars offer something different from the usual pumpkin and pecan desserts, while their neat square shape makes serving a crowd simple. Their bright red topping also adds an attractive seasonal accent to a Thanksgiving dessert platter.
Ingredients
For the shortbread base:
- 1 cup unsalted butter, softened
- 1/2 cup granulated sugar
- 2 cups all-purpose flour
- 1/4 teaspoon salt
- 1 teaspoon vanilla extract
For the cranberry orange topping:
- 2 cups fresh or frozen cranberries
- 1/2 cup granulated sugar
- 1/4 cup orange juice
- 1 teaspoon finely grated orange zest
- 1 tablespoon cornstarch
- 1 tablespoon cold water
How to Make
- Preheat the oven to 350°F (175°C). Line an 8-inch square baking pan with parchment paper.
- Cream the softened butter and sugar until smooth. Mix in the vanilla, flour, and salt until a soft dough forms.
- Press the dough evenly into the prepared pan. Bake for 18 to 22 minutes, until lightly golden around the edges.
- Meanwhile, combine the cranberries, sugar, orange juice, and zest in a saucepan. Cook over medium heat for 8 to 10 minutes, stirring until the berries burst.
- Mix the cornstarch with cold water, then stir it into the cranberry mixture. Cook for another minute until thickened.
- Spread the topping over the baked shortbread base.
- Bake for another 10 to 12 minutes. Cool completely, then refrigerate until firm before cutting into bars.
Pinterest Account : FreshRecipeIdeas1
Chocolate Hazelnut Tart
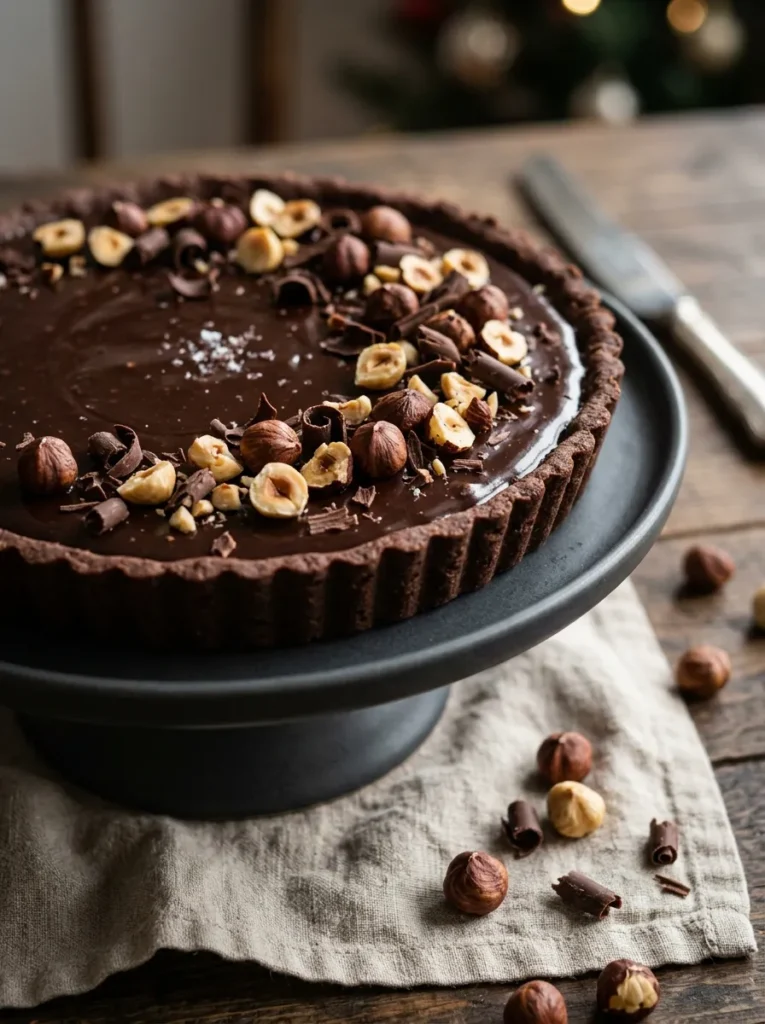
For guests who prefer chocolate over traditional fruit pies, this rich tart makes a striking Thanksgiving dessert. A crisp cocoa crust holds a silky chocolate filling, while toasted hazelnuts add crunch and a warm, nutty flavor. Small slices are usually enough after a large holiday meal, making this tart ideal for sharing.
Ingredients
For the crust:
- 1 1/4 cups chocolate cookie crumbs
- 4 tablespoons unsalted butter, melted
- 1 tablespoon granulated sugar
For the filling:
- 8 ounces semisweet chocolate, finely chopped
- 3/4 cup heavy cream
- 2 tablespoons unsalted butter
- 1/2 teaspoon vanilla extract
- 1/2 cup toasted hazelnuts, roughly chopped
- 1 tablespoon chocolate shavings, optional
How to Make
- Preheat the oven to 350°F (175°C). Combine the cookie crumbs, melted butter, and sugar.
- Press the mixture firmly into the base and sides of a 9-inch tart pan.
- Bake the crust for 8 to 10 minutes, then let it cool.
- Place the chopped chocolate in a heatproof bowl. Warm the cream in a saucepan until steaming, but do not let it boil.
- Pour the hot cream over the chocolate and leave it for two minutes. Stir until smooth, then mix in the butter and vanilla.
- Pour the ganache into the cooled crust and sprinkle the toasted hazelnuts over the top.
- Refrigerate for at least three hours, until the filling is firm. Add chocolate shavings before serving.
Brown Butter Apple Blondies
BEFORE
A Thanksgiving dessert table filled with pies can feel a little predictable, especially for guests who prefer handheld treats. Traditional cakes may also require extra frosting, decorating, and serving time.
AFTER
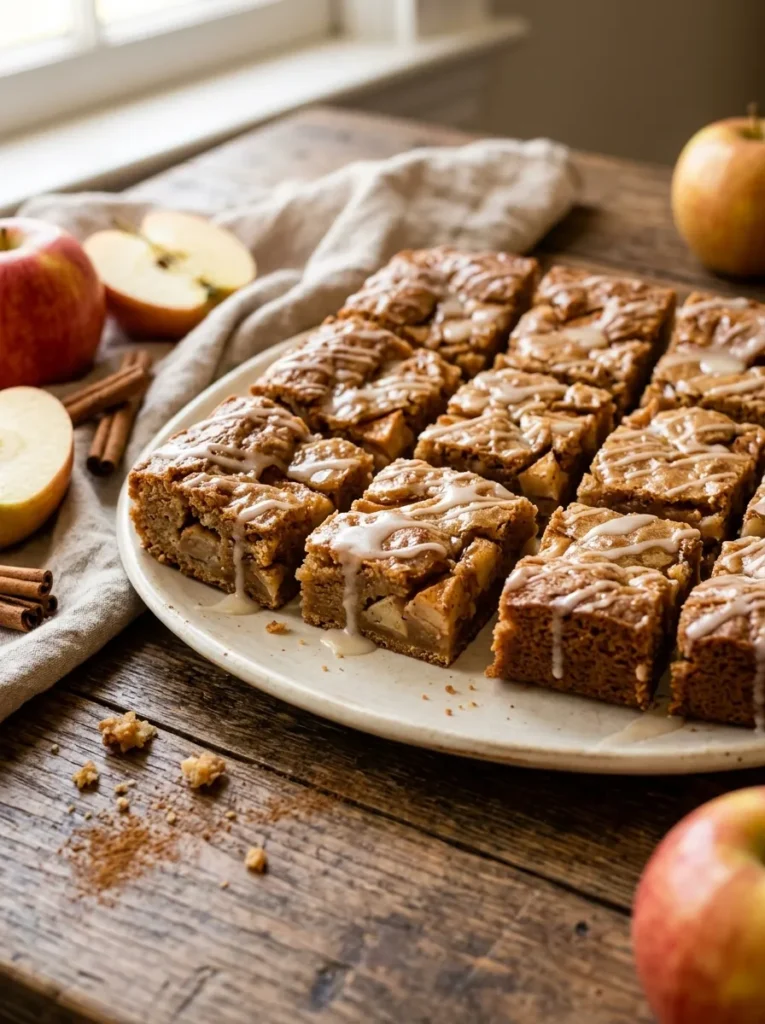
Brown butter apple blondies offer a chewy, buttery alternative with soft fruit pieces and warm fall spices. Their square shape makes portioning easy, and they can be baked in advance without taking up refrigerator space.
These bars get their nutty flavor from butter cooked until golden and fragrant. Let the butter cool slightly before mixing it with the sugar and eggs. Choose firm apples, such as Granny Smith, and cut them into small pieces so they soften evenly. A simple vanilla glaze adds sweetness without overpowering the fruit.
Ingredients
- 1/2 cup unsalted butter
- 3/4 cup brown sugar
- 1 large egg
- 1 teaspoon vanilla extract
- 1 cup all-purpose flour
- 1/2 teaspoon ground cinnamon
- 1/4 teaspoon baking powder
- 1/4 teaspoon salt
- 1 medium apple, peeled and finely diced
- 1/3 cup chopped pecans, optional
For the glaze:
- 1/2 cup powdered sugar
- 1 to 2 tablespoons milk
- 1/4 teaspoon vanilla extract
How to Make
- Preheat the oven to 350°F (175°C). Line an 8-inch square baking pan with parchment paper.
- Melt the butter in a saucepan over medium heat, stirring until it develops golden brown flecks and a nutty aroma. Remove from the heat and cool for five minutes.
- Whisk the brown butter with brown sugar, egg, and vanilla until combined.
- Fold in the flour, cinnamon, baking powder, salt, diced apple, and pecans, if using.
- Spread the batter evenly in the pan and bake for 22 to 28 minutes, until the edges are golden and a toothpick comes out with a few moist crumbs.
- Cool completely. Mix the glaze ingredients until smooth and drizzle over the blondies before cutting into squares.
Cinnamon Pear Galette
- Prepare the pastry. Roll chilled pie dough into a roughly 12-inch circle on parchment paper, leaving the edges slightly irregular.
- Season the pears. Slice two ripe but firm pears thinly. Toss them with one tablespoon brown sugar, half a teaspoon cinnamon, one teaspoon lemon juice, and one teaspoon cornstarch.
- Arrange the filling. Place the pear slices in the center of the pastry, leaving a two-inch border around the edges.
- Fold and finish. Fold the pastry border over the fruit in overlapping sections. Brush the crust with beaten egg and sprinkle with coarse sugar.
- Bake until golden. Bake at 400°F (200°C) for 35 to 45 minutes, until the pastry is crisp and the pears are tender.
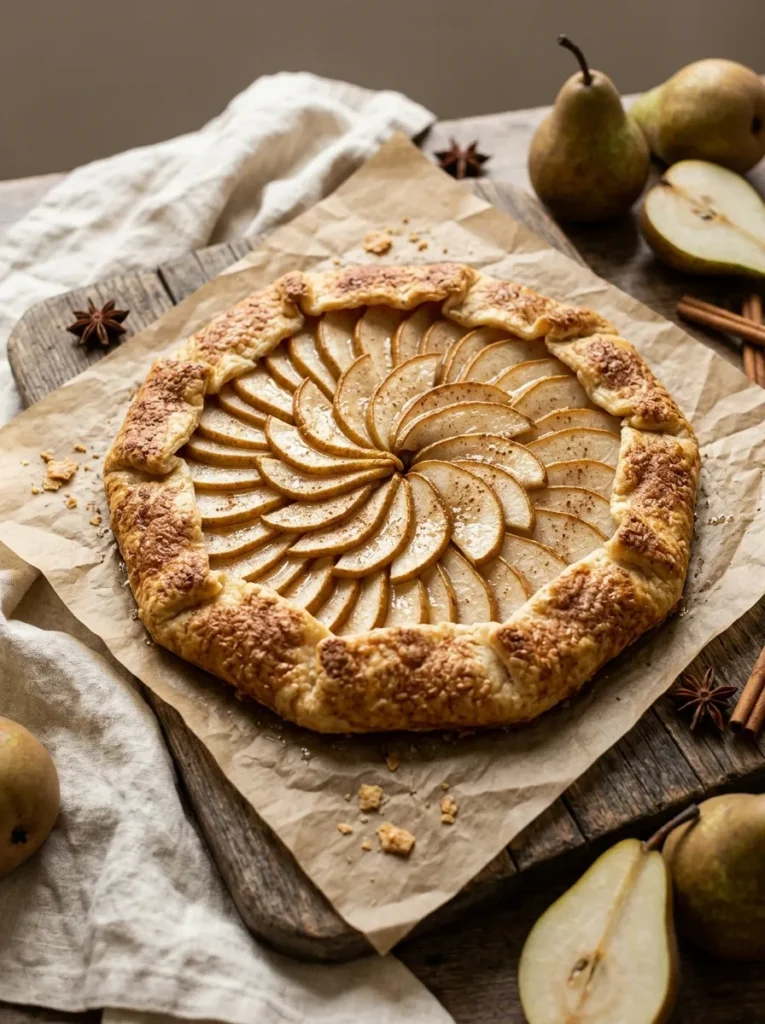
A galette gives you the charm of a homemade pie without the need for a special pie dish or perfectly shaped crust. The open center showcases the fruit, making it especially attractive in Pinterest photographs. Serve each warm slice with vanilla ice cream or a spoonful of lightly sweetened whipped cream.
Ingredients
- 1 refrigerated pie crust, approximately 9 to 10 ounces
- 2 medium firm pears
- 1 tablespoon brown sugar
- 1/2 teaspoon ground cinnamon
- 1 teaspoon lemon juice
- 1 teaspoon cornstarch
- 1 egg, beaten
- 1 tablespoon coarse sugar
- 1 teaspoon honey, optional
Chocolate Bourbon Pudding Cake
| Option A: Individual Ramekins | Option B: One Baking Dish |
| Presentation: Elegant individual portions | Presentation: Casual family-style serving |
| Baking time: About 20 to 25 minutes | Baking time: About 30 to 35 minutes |
| Best for: Dinner parties | Best for: Larger family gatherings |
| Serving: Ready to portion | Serving: Scoop directly from the dish |
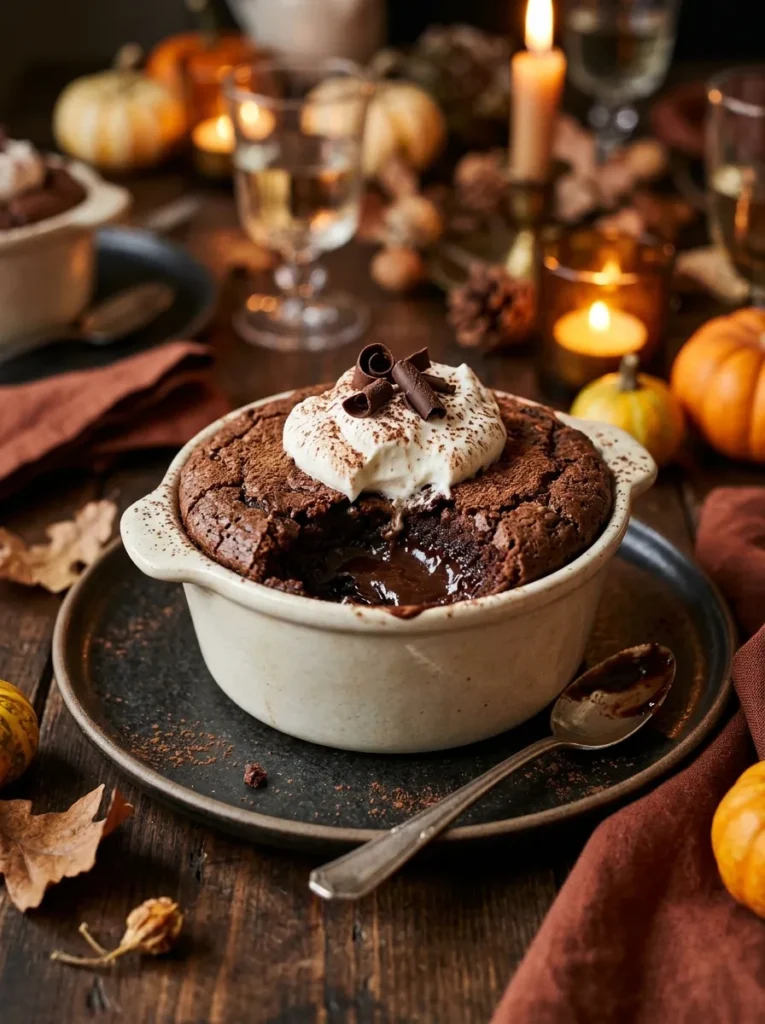
Chocolate pudding cake creates its own sauce as it bakes, giving you a tender cake layer above a warm, fudgy chocolate base. A small amount of bourbon adds depth without making the dessert taste strongly alcoholic. For a family-friendly version, replace the bourbon with milk or strong brewed coffee.
Ingredients
- 1 cup all-purpose flour
- 3/4 cup granulated sugar
- 1/4 cup unsweetened cocoa powder
- 2 teaspoons baking powder
- 1/4 teaspoon salt
- 1/2 cup milk
- 1/4 cup melted butter
- 1 teaspoon vanilla extract
- 1 tablespoon bourbon, optional
- 1/2 cup packed brown sugar
- 1/4 cup unsweetened cocoa powder for the topping
- 1 1/4 cups hot water
How to Make
- Preheat the oven to 350°F (175°C). Lightly grease an 8-inch square baking dish.
- Whisk together the flour, granulated sugar, cocoa powder, baking powder, and salt.
- Stir in the milk, melted butter, vanilla, and bourbon, if using. Spread the thick batter in the prepared dish.
- Mix the brown sugar with the remaining cocoa powder and sprinkle evenly over the batter.
- Carefully pour the hot water over the top. Do not stir, as the liquid creates the sauce during baking.
- Bake for 30 to 35 minutes, until the cake top is set but the sauce underneath remains soft.
- Rest for 10 minutes before serving. Spoon into bowls and top with whipped cream or vanilla ice cream.
Cranberry White Chocolate Cookies
DO
- Use room-temperature butter so it creams evenly with the sugar.
- Pat the cranberries dry if they are unusually moist.
- Chill the dough for 20 to 30 minutes to help the cookies hold their shape.
- Remove the cookies when the edges are lightly golden and the centers still look slightly soft.
DON’T
- Don’t overmix the dough after adding the flour.
- Don’t crowd the baking sheet, as the cookies need room to spread.
- Don’t wait for the centers to become completely firm in the oven.
- Don’t transfer the cookies while they are piping hot, as they may break.
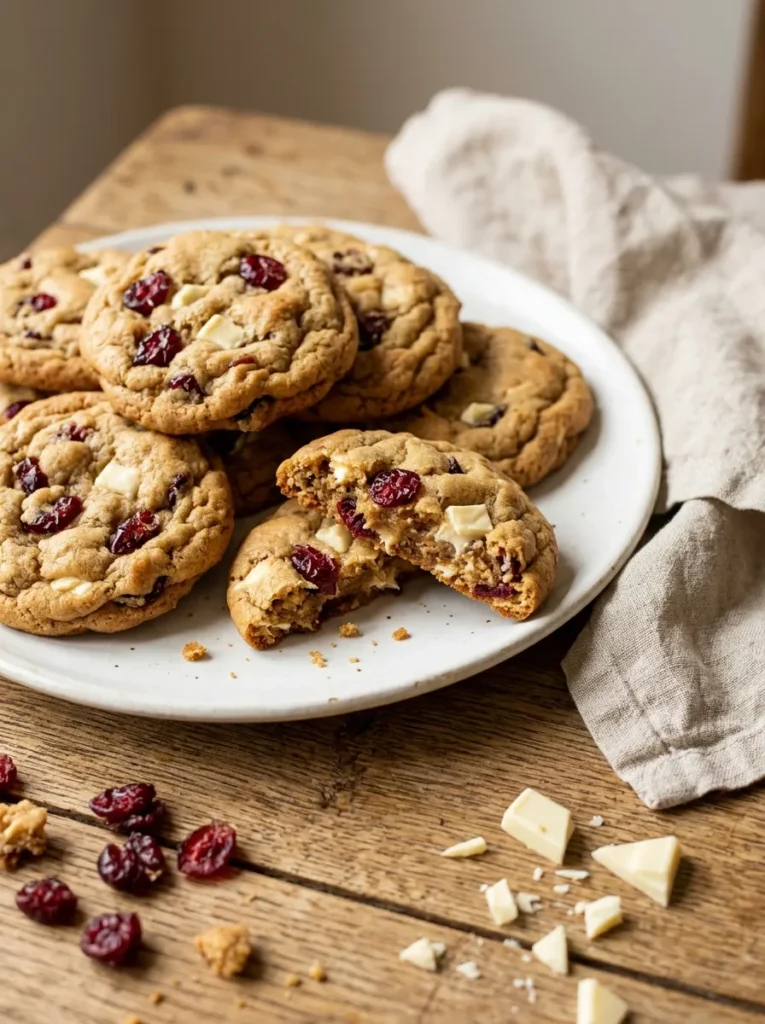
These cookies combine sweet white chocolate with tart cranberries for a festive contrast in every bite. I’ve found that reserving a few chocolate chunks and cranberries to press onto the dough before baking creates a more attractive finish. Arrange them on a dessert platter or package cooled cookies in small bags for guests to take home.
Ingredients
- 1/2 cup unsalted butter, softened
- 1/2 cup brown sugar
- 1/4 cup granulated sugar
- 1 large egg
- 1 teaspoon vanilla extract
- 1 1/2 cups all-purpose flour
- 1/2 teaspoon baking soda
- 1/4 teaspoon salt
- 3/4 cup dried cranberries
- 3/4 cup white chocolate chips or chunks
How to Make
- Preheat the oven to 350°F (175°C). Line two baking sheets with parchment paper.
- Beat the butter, brown sugar, and granulated sugar until creamy.
- Mix in the egg and vanilla until combined.
- In a separate bowl, whisk the flour, baking soda, and salt. Gradually add the dry mixture to the butter mixture.
- Fold in the cranberries and white chocolate.
- Scoop tablespoon-sized portions onto the baking sheets, leaving about two inches between each cookie.
- Bake for 10 to 13 minutes, until the edges are lightly golden. Cool on the baking sheet for five minutes before transferring to a wire rack.
Maple Pumpkin Bread Pudding
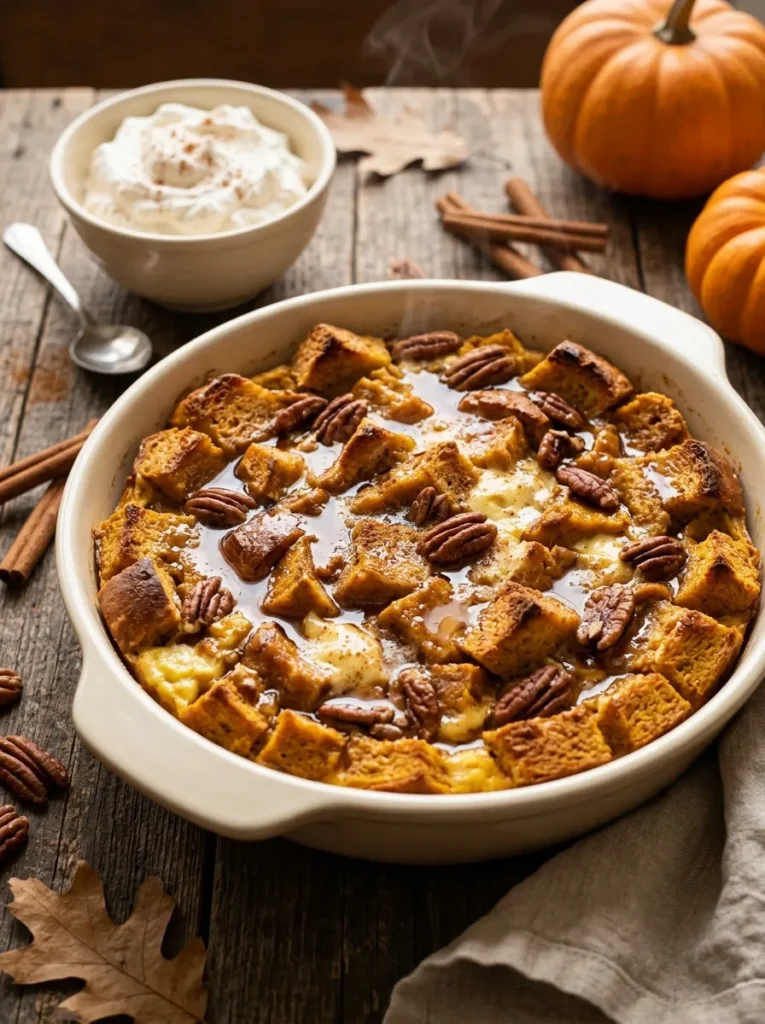
Cost: Budget-friendly when made with leftover bread.
Prep Time: 15 minutes.
Bake Time: 40 to 50 minutes.
Skill Level: Beginner-friendly.
Best For: Family gatherings and make-ahead holiday desserts.
Maple pumpkin bread pudding turns ordinary bread into a comforting seasonal dessert with very little fuss. Day-old brioche, challah, or French bread works particularly well because it absorbs the custard without immediately falling apart. The maple syrup adds gentle sweetness, while pumpkin puree and warming spices bring classic fall flavor to the table.
Ingredients
- 6 cups day-old bread, cut into 1-inch cubes
- 1 cup pumpkin puree
- 2 cups whole milk
- 3 large eggs
- 1/3 cup pure maple syrup
- 1/4 cup brown sugar
- 2 tablespoons melted butter
- 1 teaspoon vanilla extract
- 1 teaspoon ground cinnamon
- 1/4 teaspoon ground nutmeg
- 1/4 teaspoon salt
- 1/3 cup chopped pecans, optional
How to Make
- Preheat the oven to 350°F (175°C). Grease a 2-quart baking dish with butter.
- Spread the bread cubes evenly in the dish, adding the pecans if desired.
- Whisk the pumpkin puree, milk, eggs, maple syrup, brown sugar, melted butter, vanilla, cinnamon, nutmeg, and salt until smooth.
- Pour the custard evenly over the bread. Press the cubes gently so they absorb the liquid.
- Let the mixture stand for 10 to 15 minutes while the oven finishes heating.
- Bake for 40 to 50 minutes, until the center is set and the top is golden. If the surface browns too quickly, loosely cover it with foil.
- Rest for 10 minutes before serving. Add a little warm maple syrup or whipped cream if desired.
Salted Caramel Cheesecake Cups
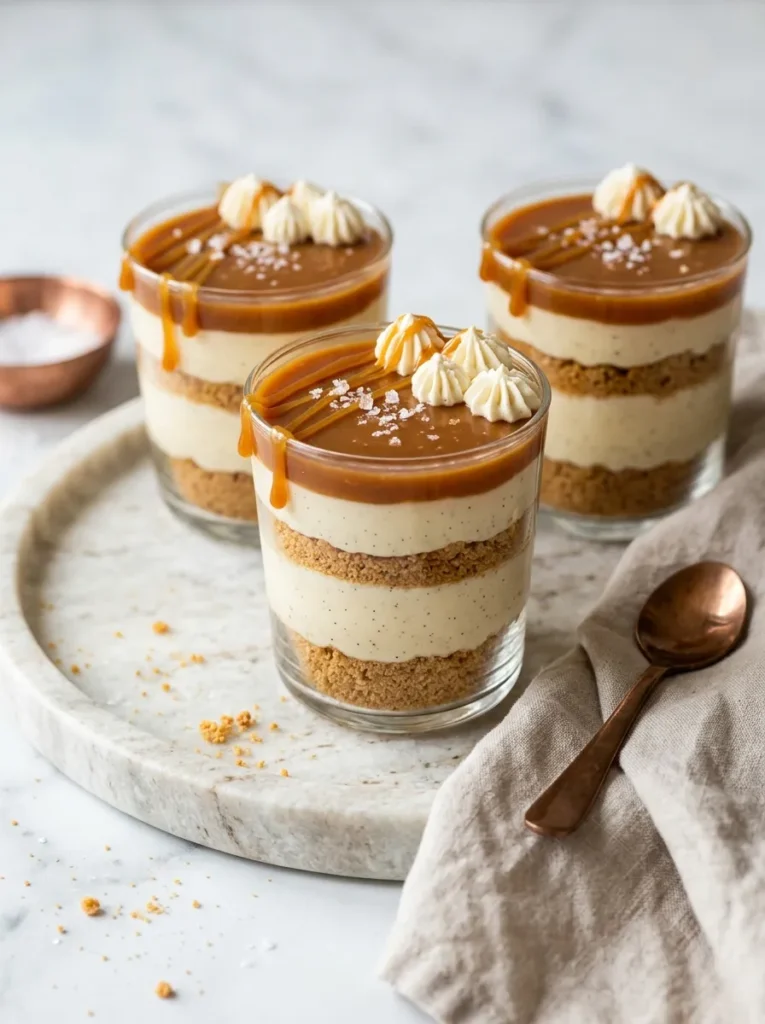
Cheesecake cups deliver the creamy richness of cheesecake without the need to bake a full cake or worry about cracks. The clear glasses show off each distinct layer, making them especially appealing for Thanksgiving dessert tables. A touch of flaky sea salt balances the caramel’s sweetness, while the biscuit base adds a satisfying crunch.
Ingredients
For the base:
- 1 cup graham cracker or digestive biscuit crumbs
- 3 tablespoons melted butter
For the filling:
- 8 ounces cream cheese, softened
- 1/3 cup powdered sugar
- 1 teaspoon vanilla extract
- 3/4 cup cold heavy whipping cream
For the topping:
- 1/2 cup thick caramel sauce, cooled
- 1/4 teaspoon flaky sea salt, or to taste
How to Make
- Combine the biscuit crumbs and melted butter until the texture resembles damp sand.
- Divide the mixture among six small dessert cups and press gently to create an even base.
- Beat the softened cream cheese, powdered sugar, and vanilla until smooth.
- In another bowl, whip the cold cream to medium-stiff peaks. Fold it gently into the cream cheese mixture.
- Spoon or pipe the filling over the biscuit bases, leaving room for the caramel topping.
- Refrigerate for at least three hours to allow the filling to firm up.
- Spoon caramel over each cup just before serving and finish with a small pinch of flaky sea salt.
Spiced Chai Snickerdoodles
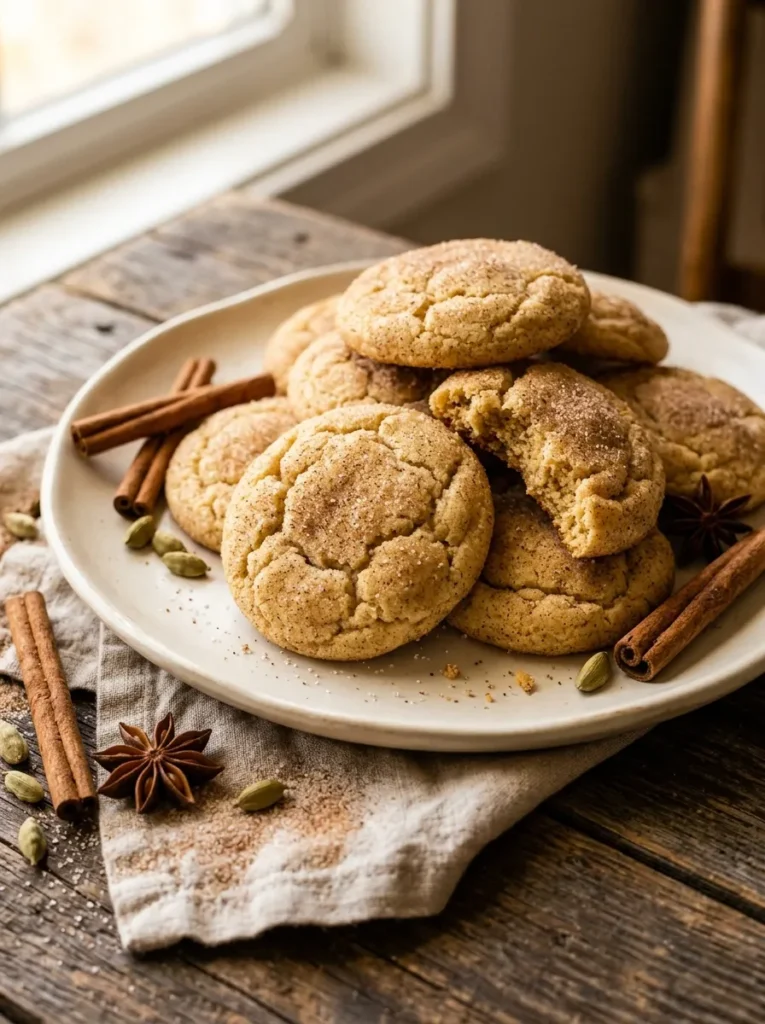
These fragrant cookies bring a warm blend of cinnamon, ginger, cardamom, and cloves to your Thanksgiving dessert spread. Their crisp edges and soft centers make them easy to enjoy after a hearty holiday meal. The chai-inspired flavor also offers a refreshing alternative to traditional pumpkin and pecan desserts.
For the best texture, avoid overbaking the cookies. Remove them when the edges are set but the centers still look slightly soft. They will continue firming up as they cool, leaving you with tender cookies that pair beautifully with coffee, tea, or hot chocolate.
Ingredients
- 1/2 cup unsalted butter, softened
- 3/4 cup granulated sugar
- 1 large egg
- 1 teaspoon vanilla extract
- 1 1/2 cups all-purpose flour
- 1/2 teaspoon cream of tartar
- 1/2 teaspoon baking soda
- 1/4 teaspoon salt
- 1/2 teaspoon ground cinnamon
- 1/4 teaspoon ground ginger
- 1/4 teaspoon ground cardamom
- 1/8 teaspoon ground cloves
For the coating:
- 2 tablespoons granulated sugar
- 1 teaspoon ground cinnamon
How to Make
- Preheat the oven to 350°F (175°C) and line a baking sheet with parchment paper.
- Beat the softened butter and sugar until creamy. Add the egg and vanilla, mixing until combined.
- Whisk the flour, cream of tartar, baking soda, salt, cinnamon, ginger, cardamom, and cloves in a separate bowl.
- Gradually mix the dry ingredients into the butter mixture until a soft dough forms.
- Combine the coating sugar and cinnamon in a small bowl.
- Roll the dough into small balls and coat each one in cinnamon sugar. Place them two inches apart on the baking sheet.
- Bake for 9 to 12 minutes, until the edges are set. Cool on the tray for five minutes before transferring to a wire rack.
Brown Sugar Fig Tart
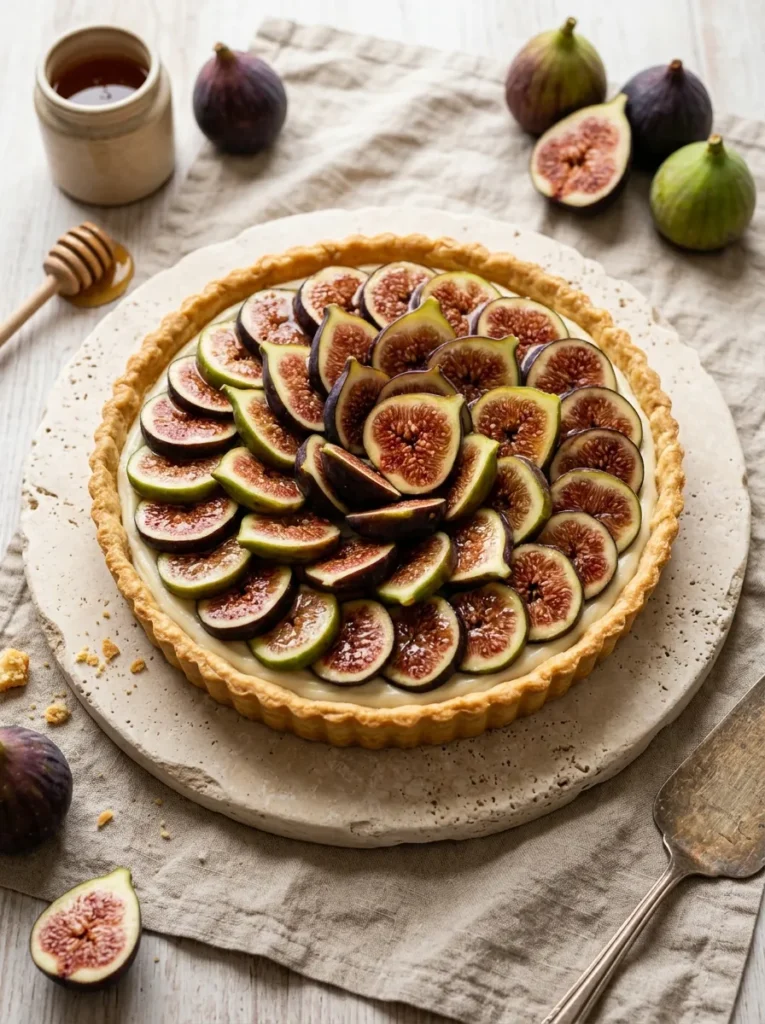
A fresh fig tart adds a sophisticated fruit dessert to your Thanksgiving table. The buttery pastry contrasts with the soft figs, while brown sugar enhances their natural sweetness. Its jewel-like fruit topping creates an eye-catching presentation without complicated decorating techniques.
Choose ripe figs that feel slightly soft but are not mushy. Pat them dry before slicing to prevent excess moisture from affecting the filling. If fresh figs are unavailable, thinly sliced pears offer a delicious seasonal alternative. Chill the tart before serving so the filling holds its shape when sliced.
Ingredients
For the crust:
- 1 1/4 cups all-purpose flour
- 1/4 cup powdered sugar
- 1/4 teaspoon salt
- 1/2 cup cold unsalted butter, cubed
- 1 large egg yolk
- 1 to 2 tablespoons cold water
For the filling:
- 8 ounces cream cheese, softened
- 1/4 cup brown sugar
- 1 large egg
- 1 teaspoon vanilla extract
- 6 to 8 fresh figs, thinly sliced
- 1 tablespoon honey, optional
How to Make
- Mix the flour, powdered sugar, and salt. Cut in the cold butter until the mixture resembles coarse crumbs.
- Add the egg yolk and enough cold water to bring the dough together. Shape into a disk and refrigerate for 30 minutes.
- Preheat the oven to 375°F (190°C). Roll the dough into a 9-inch tart pan and press it evenly into the base and sides.
- Line the crust with parchment paper and baking weights. Bake for 15 minutes, remove the weights, and bake for another five minutes.
- Beat the cream cheese and brown sugar until smooth. Mix in the egg and vanilla.
- Spread the filling into the crust and arrange the sliced figs over the top.
- Bake for 20 to 25 minutes, until the filling is set. Cool completely and brush the figs with honey if desired.
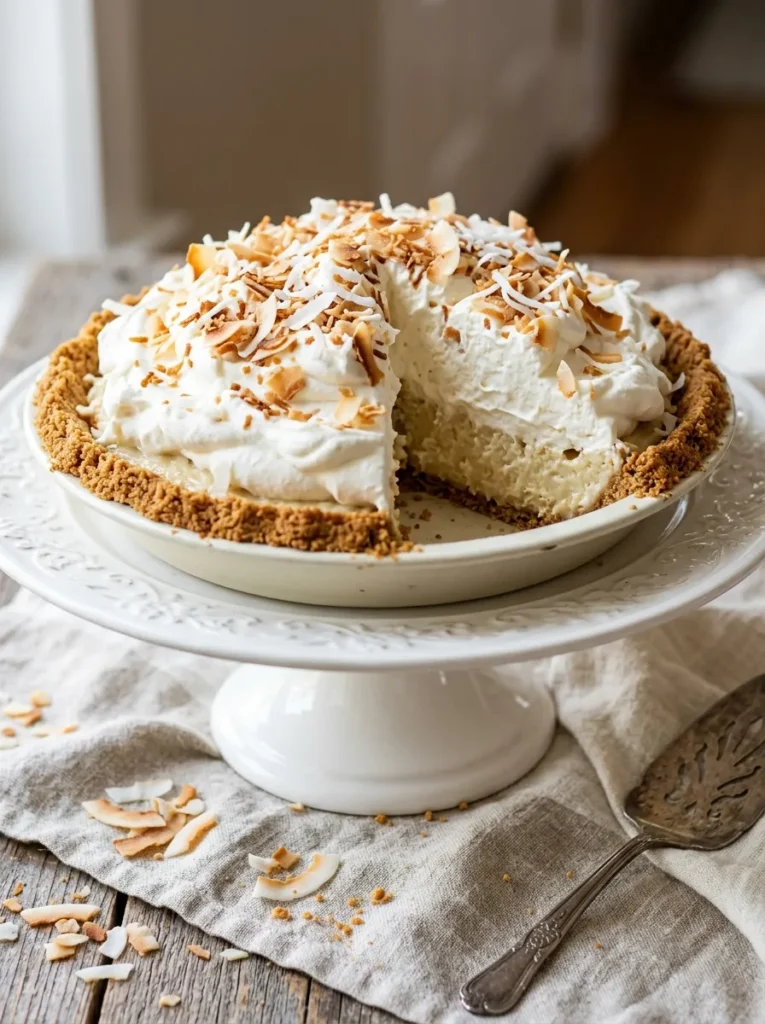
Toasted Coconut Cream Pie
Quick Tip:
Toast the shredded coconut in a dry skillet over medium-low heat, stirring frequently until lightly golden. Let it cool completely before sprinkling it over the whipped cream. Coconut can brown quickly, so remove it from the pan as soon as it reaches the desired color.
This creamy pie balances a smooth coconut custard with a crisp crust and a crunchy topping. Preparing the filling ahead saves valuable time on Thanksgiving Day, especially when the oven is occupied by other dishes. Refrigerate the assembled pie for at least four hours, then add freshly whipped cream and toasted coconut before serving.
Ingredients
For the crust:
– 1 prepared 9-inch graham cracker crust
For the filling:
- 2 cups whole milk
- 1/2 cup granulated sugar
- 3 tablespoons cornstarch
- 1/4 teaspoon salt
- 3 large egg yolks
- 1 tablespoon unsalted butter
- 1 teaspoon vanilla extract
- 1 cup sweetened shredded coconut
For the topping:
- 1 cup cold heavy whipping cream
- 2 tablespoons powdered sugar
- 1/2 teaspoon vanilla extract
- 1/3 cup shredded coconut, toasted
How to Make
- Warm the milk in a saucepan over medium heat until steaming, but do not let it boil.
- In a bowl, whisk the sugar, cornstarch, salt, and egg yolks until smooth.
- Slowly whisk some warm milk into the egg mixture. Pour it back into the saucepan.
- Cook over medium heat, whisking continuously, until the custard thickens and bubbles. Continue cooking for one minute.
- Remove from the heat and stir in the butter, vanilla, and shredded coconut.
- Pour the filling into the prepared crust. Cover the surface with plastic wrap and refrigerate for at least four hours.
- Whip the cream with powdered sugar and vanilla until soft peaks form. Spread or pipe it over the chilled pie and sprinkle with toasted coconut.
Apple Cider Donut Cake
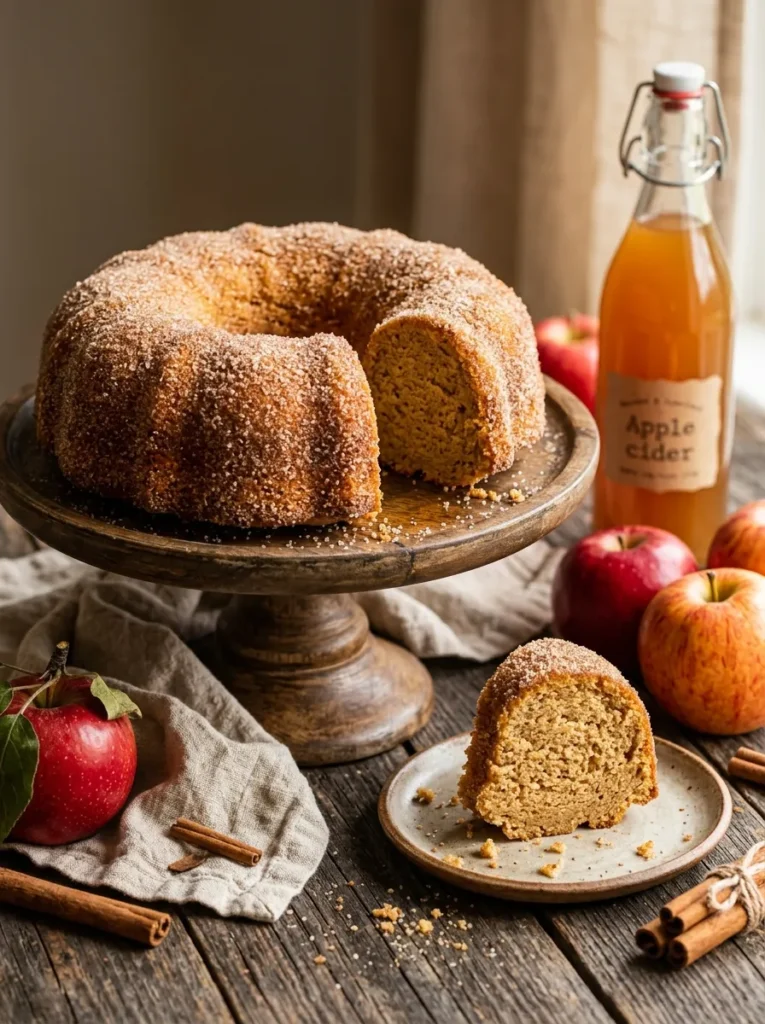
- Reduce the cider: Simmer apple cider in a saucepan until concentrated to deepen its fruity flavor.
- Prepare the batter: Combine the dry ingredients separately, then mix the butter, sugar, eggs, vanilla, and reduced cider before combining everything.
- Bake until golden: Pour the batter into a greased Bundt pan and bake at 350°F (175°C) until a toothpick comes out clean.
- Add the coating: Brush the warm cake with melted butter and sprinkle generously with cinnamon sugar.
This cake brings the nostalgic flavor of apple cider donuts to a shareable holiday dessert. Its soft interior and cinnamon-sugar coating make it especially inviting on a Thanksgiving dessert table. Bake it a day ahead, wrap it once completely cool, and add the buttery coating shortly before serving for the freshest texture.
Ingredients
- 2 cups all-purpose flour
- 1 teaspoon baking powder
- 1/2 teaspoon baking soda
- 1/2 teaspoon salt
- 1 1/2 teaspoons ground cinnamon
- 1/4 teaspoon ground nutmeg
- 1/2 cup unsalted butter, softened
- 3/4 cup granulated sugar
- 2 large eggs
- 1 teaspoon vanilla extract
- 1/2 cup apple cider, reduced to about 1/4 cup
- 1/2 cup buttermilk
For the coating:
- 3 tablespoons melted butter
- 1/4 cup granulated sugar
- 1 teaspoon ground cinnamon
How to Make
- Simmer the apple cider over medium heat until reduced to approximately 1/4 cup. Set aside to cool.
- Preheat the oven to 350°F (175°C). Grease and flour a 10 to 12-cup Bundt pan.
- Whisk the flour, baking powder, baking soda, salt, cinnamon, and nutmeg in a bowl.
- Beat the softened butter and sugar until fluffy. Add the eggs one at a time, then mix in the vanilla and reduced cider.
- Add the dry ingredients in alternating portions with the buttermilk, mixing just until combined.
- Pour the batter into the pan and bake for 35 to 45 minutes, until a toothpick inserted into the center comes out clean.
- Cool in the pan for 10 to 15 minutes before turning onto a rack. Brush with melted butter and coat with cinnamon sugar while still slightly warm.
Raspberry Almond Crumble Bars
| Feature | Fresh Raspberry Filling | Raspberry Preserves |
| Flavor | Bright, tangy fruit taste | Sweeter, concentrated berry flavor |
| Texture | Soft fruit with small seeds | Smooth and consistent filling |
| Preparation | Requires brief stovetop cooking | Ready to spread |
| Best for | Homemade seasonal flavor | Faster holiday preparation |
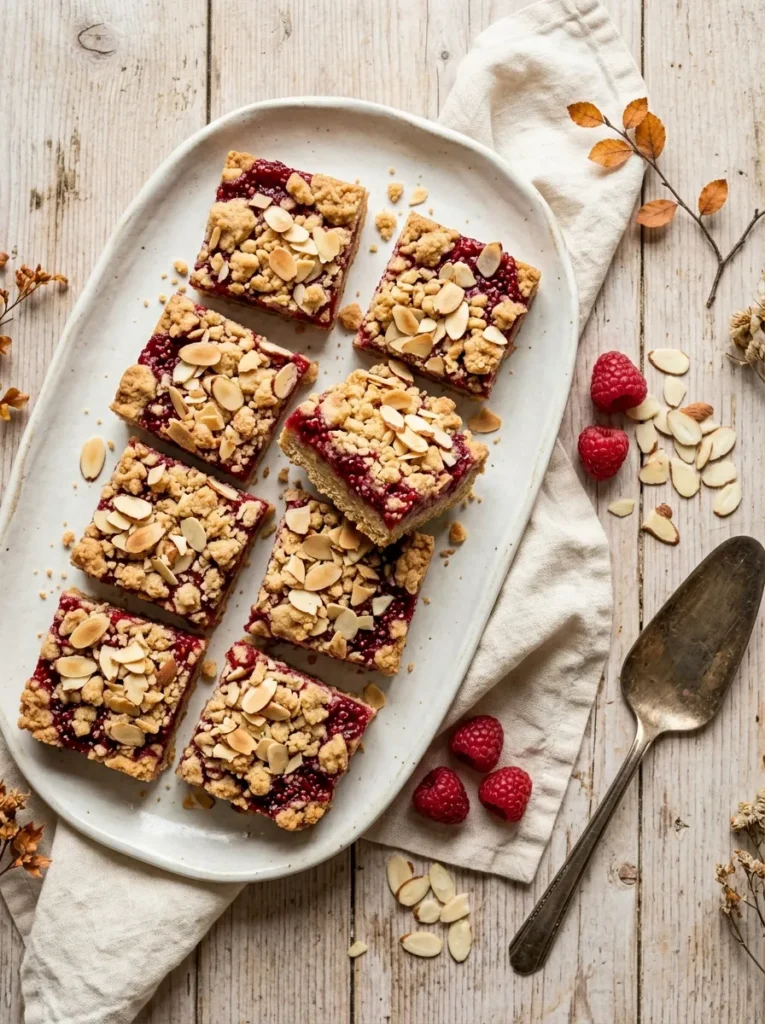
These bars add a bright berry flavor to a dessert table filled with richer fall treats. The almond crumble gives each square a delicate crunch, while the buttery base keeps the texture satisfying. For clean edges, let the pan cool completely before slicing. Refrigerating the bars briefly can make cutting even easier.
Ingredients
For the base and crumble:
- 1 1/2 cups all-purpose flour
- 1/2 cup rolled oats
- 1/2 cup granulated sugar
- 1/4 teaspoon salt
- 1/2 cup cold unsalted butter, cubed
- 1/3 cup sliced almonds
For the filling:
- 2 cups fresh or frozen raspberries
- 1/3 cup granulated sugar
- 1 tablespoon cornstarch
- 1 tablespoon lemon juice
- 1/2 teaspoon almond extract
How to Make
- Preheat the oven to 350°F (175°C). Line an 8-inch square baking pan with parchment paper.
- Combine the flour, oats, sugar, and salt. Cut in the cold butter until coarse crumbs form, then stir in the sliced almonds.
- Press about two-thirds of the mixture firmly into the pan to create the base. Bake for 12 minutes.
- Combine the raspberries, sugar, cornstarch, lemon juice, and almond extract in a saucepan.
- Cook over medium heat for 5 to 8 minutes, stirring gently until the berries soften and the filling thickens.
- Spread the raspberry mixture over the warm base. Sprinkle the remaining crumble evenly over the top.
- Bake for 25 to 30 minutes, until the topping is golden. Cool completely before cutting into squares.
Gingerbread Pear Upside-Down Cake
DO
- Choose firm, ripe pears that hold their shape during baking.
- Arrange the pear slices in a single overlapping layer for an attractive finish.
- Measure the molasses accurately to keep the gingerbread flavor balanced.
- Let the cake rest briefly before turning it onto a serving plate.
DON’T
- Don’t use overripe pears that release too much liquid.
- Don’t skip greasing the pan, especially around the sides.
- Don’t leave the cake in the pan until it becomes completely cold.
- Don’t flip the cake immediately after removing it from the oven, as the hot caramel topping can spill.
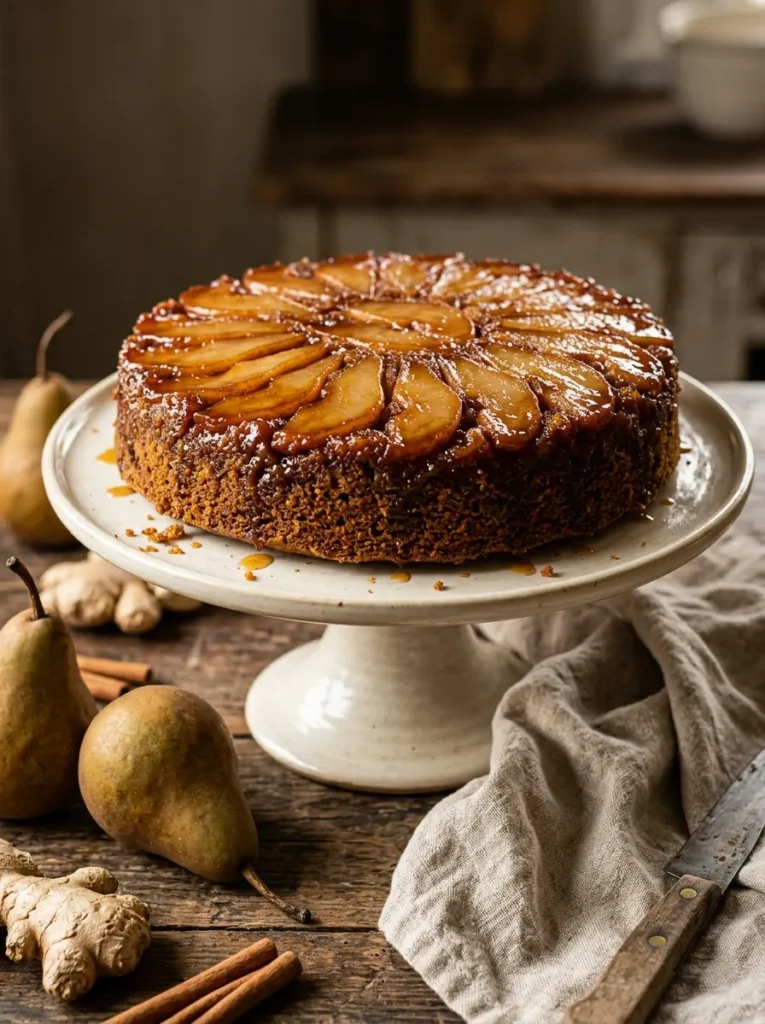
The combination of warming gingerbread spices and tender caramelized pears makes this cake a distinctive addition to a fall celebration. Its fruit-covered top creates a naturally decorative finish, so elaborate frosting is unnecessary. Serve slightly warm with whipped cream, or prepare it earlier in the day and bring it to room temperature before dessert.
Ingredients
For the topping:
- 2 medium firm pears, peeled and thinly sliced
- 1/4 cup unsalted butter
- 1/3 cup brown sugar
For the cake:
- 1 1/2 cups all-purpose flour
- 1 teaspoon baking soda
- 1/4 teaspoon salt
- 1 1/2 teaspoons ground ginger
- 1 teaspoon ground cinnamon
- 1/4 teaspoon ground cloves
- 1/2 cup unsalted butter, softened
- 1/2 cup brown sugar
- 1 large egg
- 1/2 cup unsulphured molasses
- 1/2 cup hot water
How to Make
- Preheat the oven to 350°F (175°C). Grease a 9-inch round cake pan and line the bottom with parchment paper.
- Melt the topping butter in a saucepan or directly in an oven-safe pan. Stir in the brown sugar and spread evenly across the bottom of the cake pan.
- Arrange the pear slices over the sugar mixture in a neat overlapping pattern.
- Whisk the flour, baking soda, salt, ginger, cinnamon, and cloves in a medium bowl.
- Beat the softened butter and brown sugar until creamy. Add the egg and molasses, mixing until combined.
- Add the dry ingredients in portions, alternating with the hot water. Mix gently until the batter is smooth.
- Pour the batter over the pears and level the surface. Bake for 35 to 45 minutes, until a toothpick inserted into the center comes out clean.
- Let the cake rest for 10 to 15 minutes. Run a knife around the edge, place a serving plate over the pan, and carefully invert. Remove the pan and parchment, then allow the caramel topping to settle before slicing.
Cranberry Pistachio Biscotti
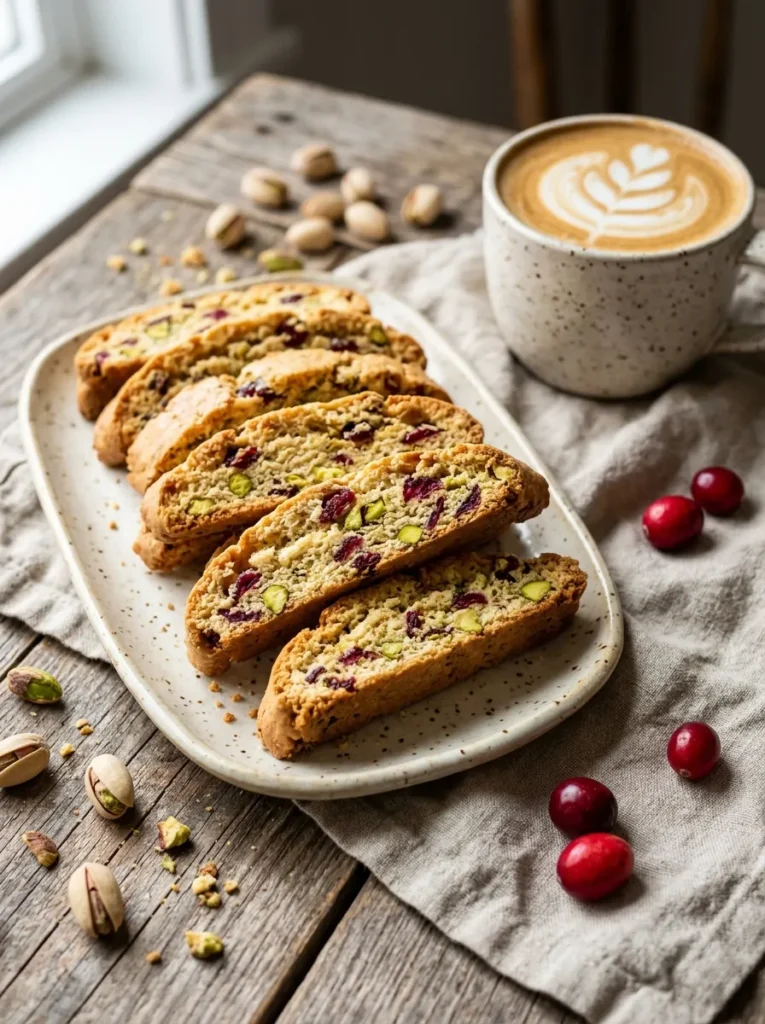
Biscotti add a satisfying crunch to your Thanksgiving dessert table and pair beautifully with coffee or tea after a hearty meal. Dried cranberries bring a tart contrast to buttery pistachios, while orange zest adds a fresh, fragrant note. Their festive colors make these cookies especially attractive on holiday platters.
The twice-baked method creates a firm texture that holds up well when stored properly. For even slices, let the baked dough logs cool briefly before cutting them with a serrated knife. These cookies are also easy to package in small gift bags for guests to take home.
Ingredients
- 2 cups all-purpose flour
- 3/4 cup granulated sugar
- 1 teaspoon baking powder
- 1/4 teaspoon salt
- 2 large eggs
- 1 teaspoon vanilla extract
- 1 tablespoon orange zest
- 1/2 cup shelled pistachios, roughly chopped
- 1/2 cup dried cranberries
- 2 tablespoons melted butter
How to Make
- Preheat the oven to 350°F (175°C). Line a baking sheet with parchment paper.
- Whisk the flour, sugar, baking powder, and salt in a large bowl.
- In another bowl, beat the eggs with vanilla, orange zest, and melted butter.
- Stir the wet ingredients into the dry mixture until a firm dough forms. Fold in the pistachios and cranberries.
- Divide the dough in half and shape each portion into a flattened log about 10 inches long.
- Bake for 25 to 30 minutes, until the logs are lightly golden and firm. Cool for 10 to 15 minutes.
- Reduce the oven temperature to 300°F (150°C). Slice each log diagonally into pieces about 1/2 inch thick.
- Place the slices cut-side down on the baking sheet and bake for 10 to 15 minutes. Turn them over and bake for another 10 to 15 minutes until crisp. Cool completely before storing in an airtight container.
Vanilla Bean Rice Pudding
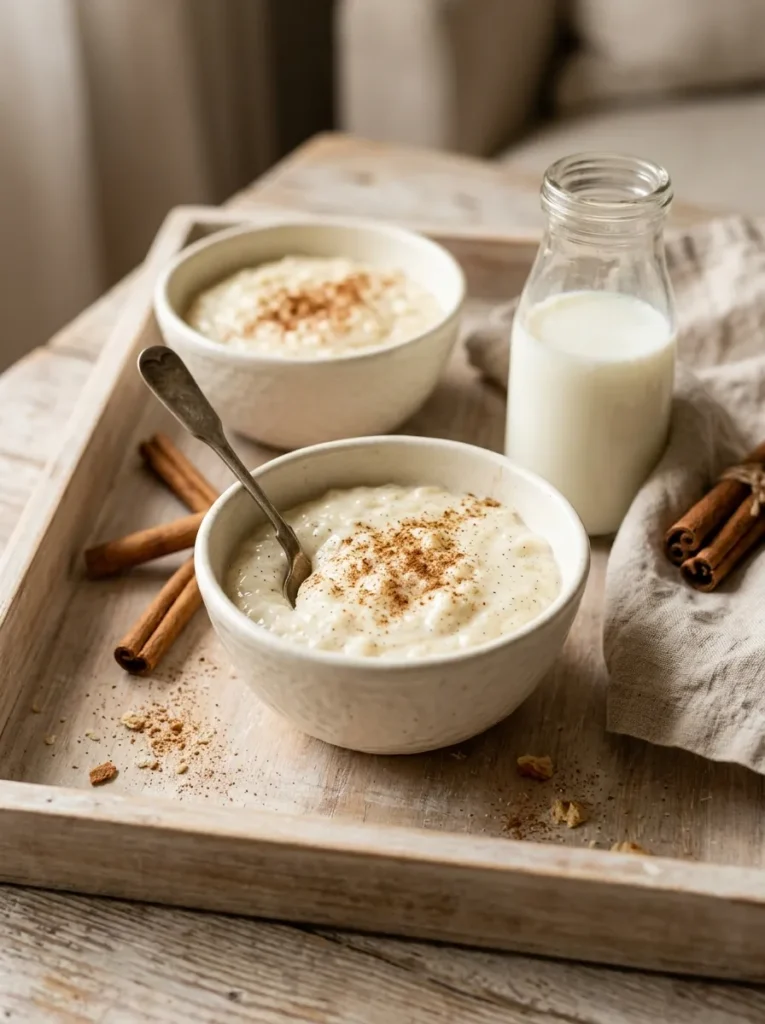
A bowl of creamy rice pudding offers a comforting alternative to rich Thanksgiving cakes and pies. Vanilla provides a delicate aroma, while slowly cooked rice creates a soft, thick texture that feels satisfying in a small serving. Individual glass cups make this simple dessert look elegant on a holiday table.
For the creamiest result, use short-grain rice and stir frequently as it cooks. Keep the heat low once the milk begins to simmer, because vigorous boiling can cause scorching. The pudding will thicken as it cools, so remove it from the heat while it remains slightly looser than your preferred final consistency.
Ingredients
- 1/2 cup short-grain white rice
- 4 cups whole milk
- 1/4 cup granulated sugar
- 1 tablespoon unsalted butter
- 1 teaspoon vanilla bean paste or vanilla extract
- 1/4 teaspoon ground cinnamon
- 1 small pinch of salt
- Extra cinnamon for serving, optional
How to Make
- Rinse the rice briefly under cool water and drain.
- Combine the rice, milk, sugar, butter, and salt in a heavy-bottomed saucepan.
- Bring to a gentle simmer over medium heat, stirring frequently.
- Reduce the heat to low and cook uncovered for 30 to 40 minutes, stirring regularly until the rice is tender and the mixture is creamy.
- Stir in the vanilla and cinnamon during the final five minutes of cooking.
- Remove from the heat and let the pudding rest for about 10 minutes.
- Spoon into individual bowls and serve warm, or refrigerate for a chilled dessert. Add a light cinnamon dusting before serving.
Pumpkin Streusel Muffins
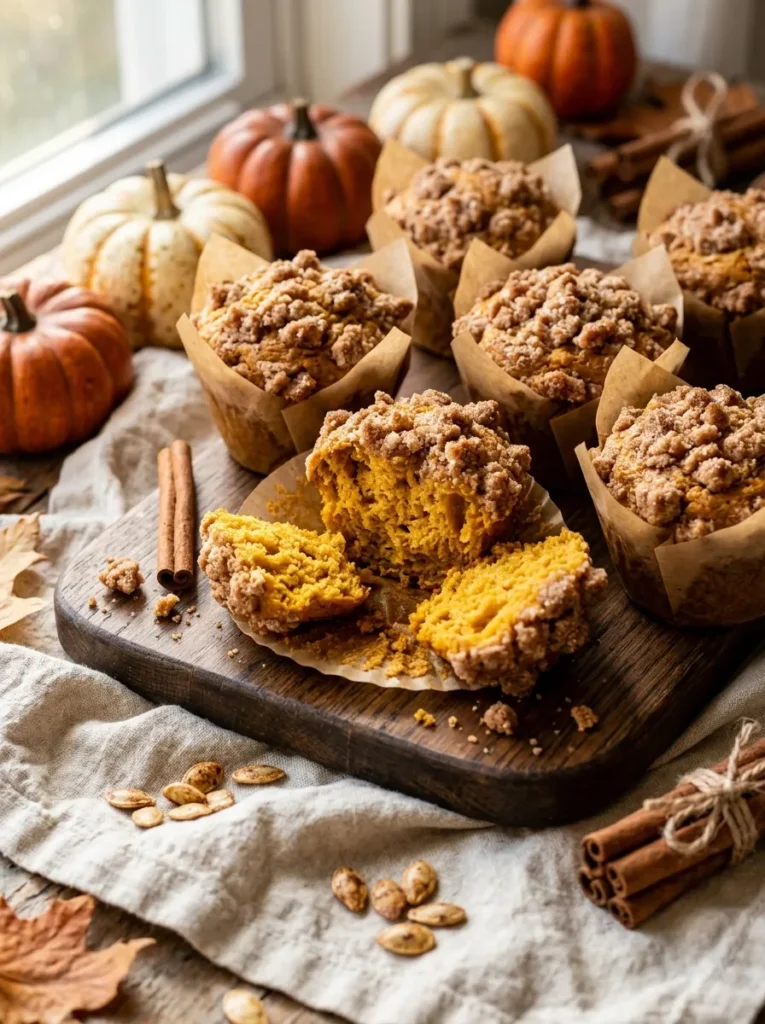
Pumpkin streusel muffins bring familiar fall spices and a crunchy topping to your Thanksgiving dessert spread. Their individual portions make them simple to serve alongside coffee or add to a dessert buffet filled with cakes, cookies, and pies. The tender pumpkin crumb contrasts beautifully with the buttery cinnamon topping.
For bakery-style muffins, keep the batter slightly lumpy rather than mixing until completely smooth. Overmixing can make the crumb dense. Use plain pumpkin puree instead of sweetened pie filling, which already contains added sugar and spices. Let the muffins cool briefly before serving so the streusel stays crisp and the centers finish setting.
Ingredients
For the muffins:
- 1 3/4 cups all-purpose flour
- 1 teaspoon baking soda
- 1 teaspoon ground cinnamon
- 1/2 teaspoon ground ginger
- 1/4 teaspoon ground nutmeg
- 1/2 teaspoon salt
- 1 cup pumpkin puree
- 2 large eggs
- 3/4 cup brown sugar
- 1/3 cup vegetable oil
- 1 teaspoon vanilla extract
For the streusel:
- 1/3 cup all-purpose flour
- 1/4 cup brown sugar
- 1/2 teaspoon ground cinnamon
- 3 tablespoons cold unsalted butter, cubed
How to Make
- Preheat the oven to 375°F (190°C). Line a 12-cup muffin pan with paper liners.
- Whisk the flour, baking soda, cinnamon, ginger, nutmeg, and salt in a bowl.
- In a separate bowl, whisk the pumpkin puree, eggs, brown sugar, oil, and vanilla until smooth.
- Fold the dry ingredients into the pumpkin mixture just until combined.
- For the streusel, combine the flour, brown sugar, and cinnamon. Rub in the cold butter with your fingertips until coarse crumbs form.
- Divide the batter among the muffin cups, filling each about three-quarters full. Sprinkle the streusel evenly over the tops.
- Bake for 18 to 23 minutes, until a toothpick inserted into the center comes out clean.
- Cool in the pan for five minutes, then transfer the muffins to a wire rack.
Chocolate Orange Fudge
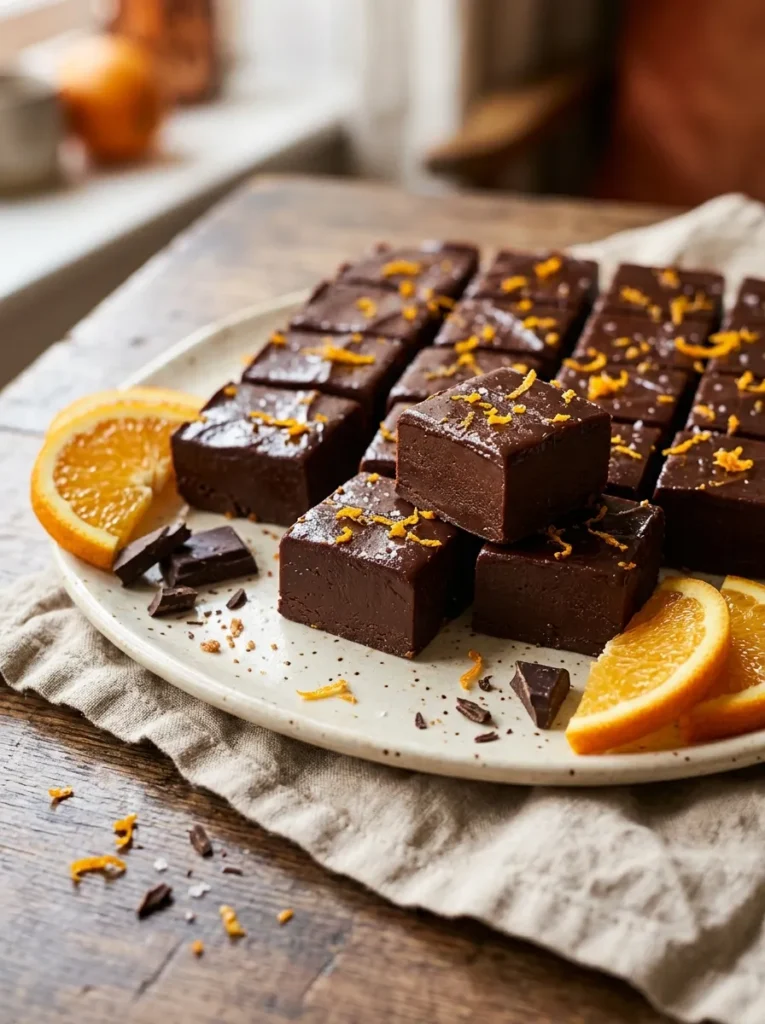
Chocolate and orange create a rich yet refreshing flavor combination that stands out among traditional Thanksgiving sweets. The deep cocoa flavor balances the citrus aroma, while the firm, creamy texture makes each square easy to serve. These little treats also look attractive arranged in paper candy cups on a holiday dessert platter.
Ingredients
- 3 cups semisweet chocolate chips
- 1 can (14 ounces) sweetened condensed milk
- 2 tablespoons unsalted butter
- 1 tablespoon finely grated orange zest
- 1/2 teaspoon orange extract, optional
- 1/4 teaspoon salt
- Extra orange zest for garnish
How to Make
- Line an 8-inch square pan with parchment paper, leaving some overhang to lift the fudge out later.
- Combine the chocolate chips, sweetened condensed milk, and butter in a heatproof bowl.
- Melt the mixture gently over a saucepan of barely simmering water, stirring until smooth. Alternatively, microwave in short intervals, stirring between each one.
- Remove from the heat and stir in the orange zest, orange extract if using, and salt.
- Spread the mixture evenly in the prepared pan and sprinkle a little extra orange zest over the top.
- Refrigerate for at least three hours, or until firm.
- Lift the fudge from the pan and cut it into small squares with a sharp knife. Wipe the knife between cuts for neater edges.
Chocolate orange fudge is especially convenient for holiday preparation because it requires no oven time and can be made ahead. Store it in an airtight container in the refrigerator, separating layers with parchment paper. Let the pieces sit at room temperature briefly before serving so the chocolate texture softens slightly.
Honey Walnut Baklava Rolls
Quick Tip:
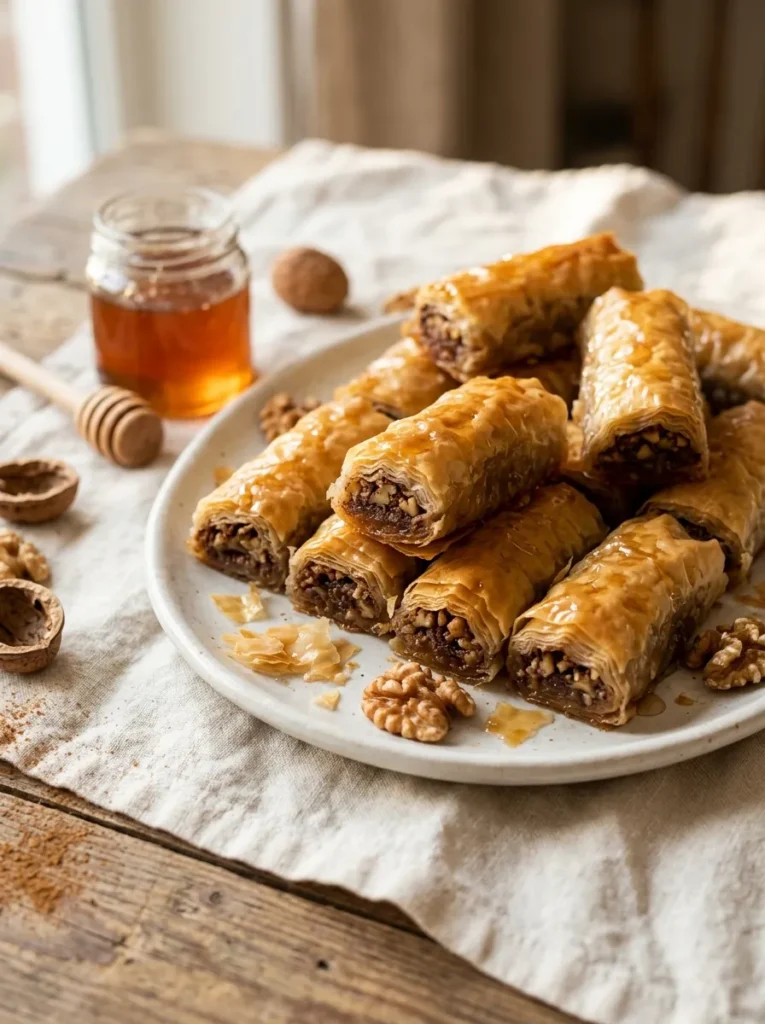
Keep unused phyllo pastry covered with a slightly damp kitchen towel while assembling the rolls. The thin sheets dry out quickly when exposed to air and can tear during rolling. Brush each sheet lightly with melted butter rather than soaking it, which helps the layers bake into crisp, flaky pastry.
These honey walnut rolls bring a delicate crunch and fragrant sweetness to a Thanksgiving dessert platter. Their small size makes them easy to share, while the walnut filling provides a satisfying contrast to the crisp pastry. Allowing the syrup to soak in after baking gives the rolls their characteristic glossy finish without hiding the flaky layers.
Ingredients
- 12 sheets phyllo pastry, thawed according to package directions
- 1 cup finely chopped walnuts
- 2 tablespoons granulated sugar
- 1 teaspoon ground cinnamon
- 1/2 cup unsalted butter, melted
For the honey syrup:
- 1/2 cup honey
- 1/3 cup water
- 1/3 cup granulated sugar
- 1 teaspoon lemon juice
- 1 small cinnamon stick, optional
How to Make
- Preheat the oven to 350°F (175°C). Lightly grease a baking dish.
- Combine the chopped walnuts, sugar, and cinnamon in a small bowl.
- Lay one phyllo sheet on a clean surface and brush lightly with melted butter. Add another sheet and brush again, repeating until you have three layers.
- Sprinkle a thin line of the walnut mixture along one long edge. Roll the pastry into a tight cylinder, then cut it into smaller rolls.
- Arrange the rolls seam-side down in the baking dish. Repeat with the remaining phyllo and filling.
- Brush the tops with the remaining butter and bake for 25 to 35 minutes, until crisp and golden.
- While the rolls bake, simmer the honey, water, sugar, lemon juice, and cinnamon stick for about five minutes. Remove the cinnamon stick.
- Pour the warm syrup evenly over the hot rolls. Let them rest for at least one hour before serving so the syrup can soak into the pastry.
Vanilla Cranberry Cheesecake Swirl Brownies
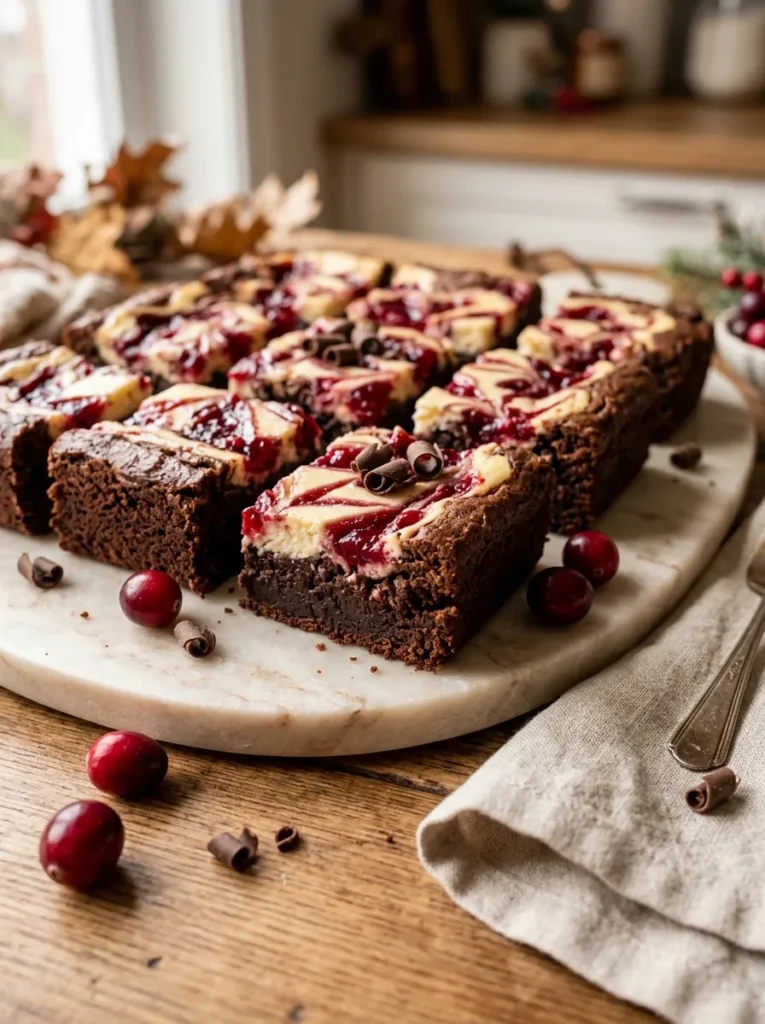
These brownies combine three dessert favorites in one treat: fudgy chocolate, creamy cheesecake, and tangy cranberry swirls. The contrasting colors create a festive finish that looks impressive without complicated decoration. Small squares are ideal after a large Thanksgiving dinner, especially when guests want to sample several different desserts.
For the clearest swirls, spoon small amounts of cheesecake mixture and cranberry sauce over the brownie batter, then gently drag a skewer through the surface. Avoid excessive swirling, which can blend the layers together. Cool the brownies completely and refrigerate them before slicing to help the cheesecake topping set and create tidy edges.
Ingredients
For the brownie layer:
- 1/2 cup unsalted butter
- 1 cup granulated sugar
- 2 large eggs
- 1 teaspoon vanilla extract
- 1/3 cup unsweetened cocoa powder
- 1/2 cup all-purpose flour
- 1/4 teaspoon salt
For the cheesecake swirl:
- 8 ounces cream cheese, softened
- 1/4 cup granulated sugar
- 1 large egg yolk
- 1/2 teaspoon vanilla extract
For the cranberry swirl:
- 1/2 cup cranberry sauce, smooth or lightly chunky
- 1 teaspoon orange zest, optional
How to Make
- Preheat the oven to 350°F (175°C). Line an 8-inch square baking pan with parchment paper.
- Melt the butter and let it cool slightly. Whisk in the sugar, eggs, and vanilla until combined.
- Stir in the cocoa powder, flour, and salt until no dry streaks remain. Spread the brownie batter evenly in the prepared pan.
- In another bowl, beat the cream cheese and sugar until smooth. Mix in the egg yolk and vanilla.
- Spoon the cheesecake mixture over the brownie batter in small dollops.
- Stir the orange zest into the cranberry sauce if using. Add small spoonfuls of cranberry sauce between the cheesecake dollops.
- Drag a skewer gently through the toppings to create swirls without mixing them completely into the brownie batter.
- Bake for 30 to 38 minutes, until the edges are set and the cheesecake layer looks mostly firm.
- Cool completely, then refrigerate for at least two hours before cutting into squares with a clean knife.
CONCLUSION
A memorable Thanksgiving dessert table doesn’t need to be complicated. With these 21 sweet ideas, you can mix traditional autumn flavors with creative treats that bring variety, color, and a little extra joy to your celebration. Choose a comforting pie, prepare a batch of bite-sized sweets, or try something new that catches your eye. Planning ahead can also help you spend less time in the kitchen and more time enjoying your guests. Save this collection of Thanksgiving Dessert Recipe Ideas on Pinterest so your favorites are easy to find when the holiday arrives. Try a recipe, share this article with fellow dessert lovers, and make this Thanksgiving a little sweeter!