20 football appetizers to Energize Your Game Night
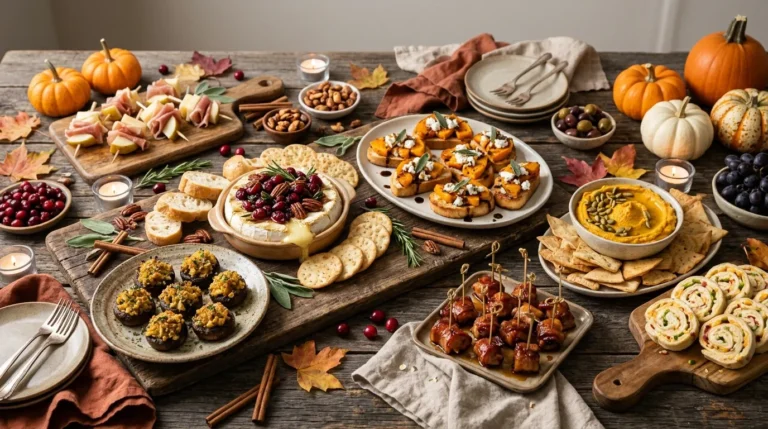
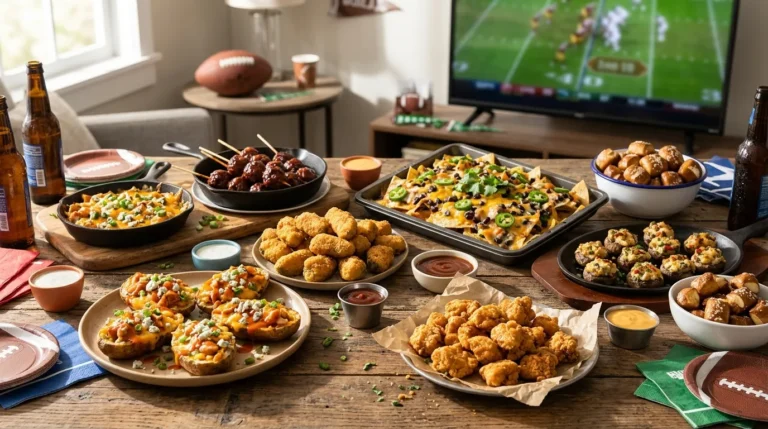
Great game nights deserve food that gets everyone excited before kickoff! From cheesy, crispy bites to saucy favorites, the right snacks can make watching football with friends and family even more memorable.
These football appetizers bring together delicious, shareable ideas that work for everything from casual living room watch parties to bigger game-day gatherings. If you’re tired of serving the same chips and dip every time, you’ll find fresh inspiration for creating a spread with different flavors, textures, and easy-to-grab portions.
I’ve noticed that the best party menus offer a little variety, including something cheesy, something spicy, and a few lighter options to balance the table. Many of these ideas can also be prepared ahead, helping you spend less time in the kitchen and more time enjoying the game. Explore the recipes, choose your favorites, and build a game-day spread your guests will be happy to gather around.
BBQ Chicken Nacho Cups

These crispy nacho cups bring bold barbecue flavor to game night without the mess of a traditional nacho platter. Each bite combines crunchy tortilla edges, tender chicken, smoky sauce, and gooey cheese. Their individual portions make them easy to grab during halftime or while watching an exciting final quarter.
For the best texture, assemble the cups shortly before serving. I’ve found that adding fresh toppings after baking keeps everything colorful and prevents the tortillas from becoming soggy. Set out salsa, sour cream, and jalapeños in separate bowls so guests can customize their portions. These football appetizers also work well for casual birthday parties and weekend gatherings.
Ingredients
- 12 small flour tortillas
- 2 cups cooked shredded chicken
- 1/2 cup barbecue sauce
- 1 cup shredded cheddar cheese
- 1/2 cup canned black beans, drained and rinsed
- 1/3 cup diced red bell pepper
- 2 tablespoons sliced green onions
- 2 tablespoons chopped fresh cilantro
- Cooking spray
- Sour cream and salsa, for serving
How to Make It
- Preheat the oven to 375°F (190°C). Lightly coat a 12-cup muffin pan with cooking spray.
- Press one small tortilla into each muffin cup, folding the edges to create a bowl shape.
- Mix the shredded chicken with barbecue sauce in a medium bowl.
- Divide the chicken mixture among the tortilla cups. Add black beans, diced bell pepper, and shredded cheddar.
- Bake for 12 to 15 minutes, until the cheese melts and the tortilla edges turn golden and crisp.
- Let the cups cool for 3 minutes before removing them from the pan.
- Garnish with green onions and cilantro. Serve warm with sour cream and salsa.
ALSO READ : Healthy Fall Dump and Go Crockpot Recipes
Cheeseburger Egg Rolls

- Choose lean ground beef. It creates a flavorful filling without leaving too much grease inside the wrappers.
- Season generously. Combine the beef with garlic powder, onion powder, salt, and black pepper for classic burger flavor.
- Keep the filling cool. Allow cooked beef to cool slightly before wrapping to make the egg rolls easier to handle.
- Seal the edges. Brush the wrapper corners with beaten egg to help prevent the filling from escaping.
- Serve with burger sauce. A creamy mixture of mayonnaise, ketchup, mustard, and relish adds familiar cheeseburger flavor.
Cheeseburger egg rolls deliver the satisfying taste of a backyard burger in a crunchy, handheld package. For a party, prepare the filling ahead and roll the wrappers shortly before cooking. Keep the dipping sauce chilled until serving, and cut a few egg rolls in half to show off their cheesy centers on the platter.
Ingredients
- 1 pound ground beef
- 12 egg roll wrappers
- 1 cup shredded cheddar cheese
- 1/3 cup finely diced dill pickles
- 1/4 cup finely diced onion
- 1 teaspoon garlic powder
- 1/2 teaspoon onion powder
- 1/2 teaspoon salt
- 1/4 teaspoon black pepper
- 1 beaten egg, for sealing
- 1 tablespoon cooking oil, plus more if pan-frying
For the burger dipping sauce:
- 1/3 cup mayonnaise
- 2 tablespoons ketchup
- 1 teaspoon yellow mustard
- 1 tablespoon finely chopped pickle relish
How to Make It
- Heat a skillet over medium heat. Cook the ground beef and diced onion until the beef is browned and fully cooked, reaching 160°F (71°C).
- Drain excess grease. Stir in garlic powder, onion powder, salt, and black pepper.
- Let the beef cool slightly, then mix in the cheddar cheese and diced pickles.
- Place an egg roll wrapper on a clean surface with one corner facing you. Add about 2 tablespoons of filling near the center.
- Fold the bottom corner over the filling, tuck in both sides, and roll tightly. Brush the final corner with beaten egg to seal.
- For pan-frying, heat a thin layer of oil in a skillet over medium heat. Cook the egg rolls in batches, turning until golden and crisp on all sides. Alternatively, brush with oil and air-fry at 375°F (190°C) for approximately 8 to 12 minutes, turning halfway.
- Mix the mayonnaise, ketchup, mustard, and pickle relish to make the dipping sauce. Serve the egg rolls hot with the sauce on the side.
Pinterest Account : FreshRecipeIdeas1
Garlic Parmesan Chicken Wings
Quick Tip:
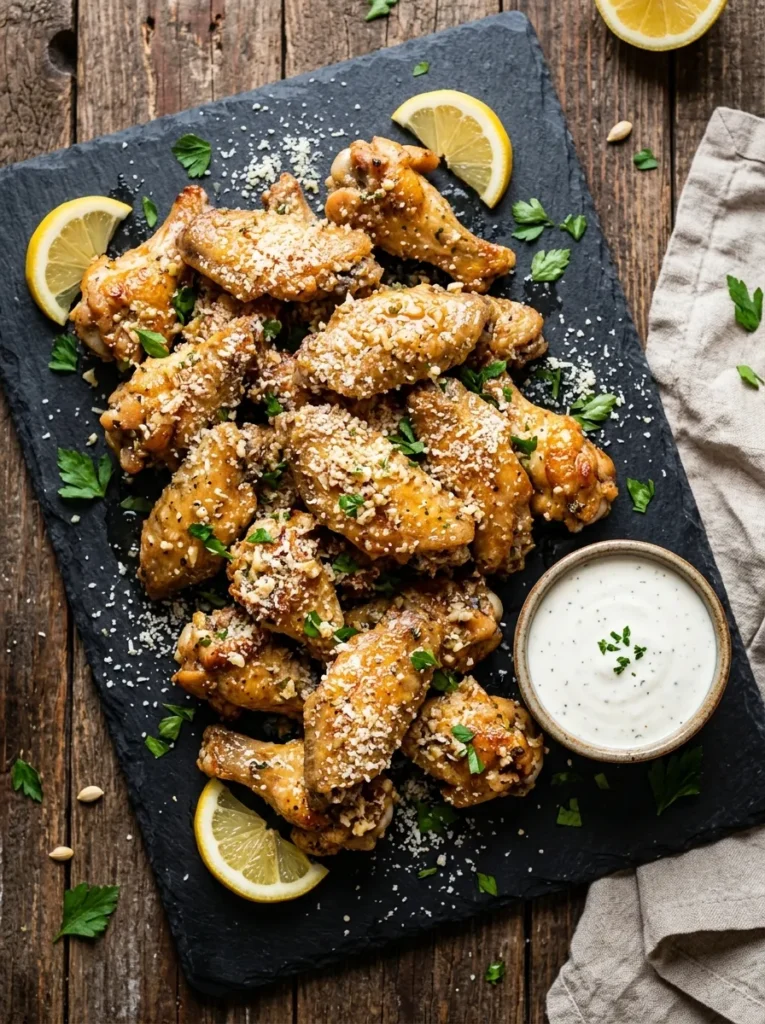
Pat the chicken wings completely dry before seasoning them. Moisture on the skin can prevent proper browning, especially when baking. For crispier results, arrange the wings on a wire rack over a baking sheet so hot air circulates around them.
Garlic Parmesan wings offer a savory alternative to traditional spicy buffalo wings. Their buttery garlic coating, salty cheese, and fresh parsley create plenty of flavor without relying on hot sauce. Bake them until the skin is crisp and the internal temperature reaches 165°F (74°C), then toss with the Parmesan mixture while the wings are still hot.
Ingredients
- 2 pounds chicken wings, split at the joints with tips removed
- 1 tablespoon olive oil
- 1 teaspoon baking powder, aluminum-free
- 1/2 teaspoon salt
- 1/2 teaspoon black pepper
- 1 teaspoon garlic powder
- 3 tablespoons unsalted butter, melted
- 3 garlic cloves, finely minced
- 1/2 cup finely grated Parmesan cheese
- 2 tablespoons chopped fresh parsley
- 1 tablespoon lemon juice
- Ranch dressing, for serving
How to Make It
- Preheat the oven to 425°F (220°C). Line a baking sheet with foil and place a wire rack on top.
- Pat the wings dry with paper towels. Toss them with olive oil, baking powder, salt, pepper, and garlic powder.
- Arrange the wings in a single layer on the rack, leaving space between each piece.
- Bake for 40 to 50 minutes, turning halfway through, until golden and crisp. Check that the thickest parts reach an internal temperature of 165°F (74°C).
- Melt the butter in a small saucepan over low heat. Add the minced garlic and cook for about 30 to 60 seconds, just until fragrant.
- Remove the saucepan from the heat. Stir in the Parmesan, parsley, and lemon juice.
- Toss the hot wings with the garlic Parmesan mixture until evenly coated. Serve immediately with ranch dressing and extra Parmesan.
Pepperoni Pizza Pinwheels
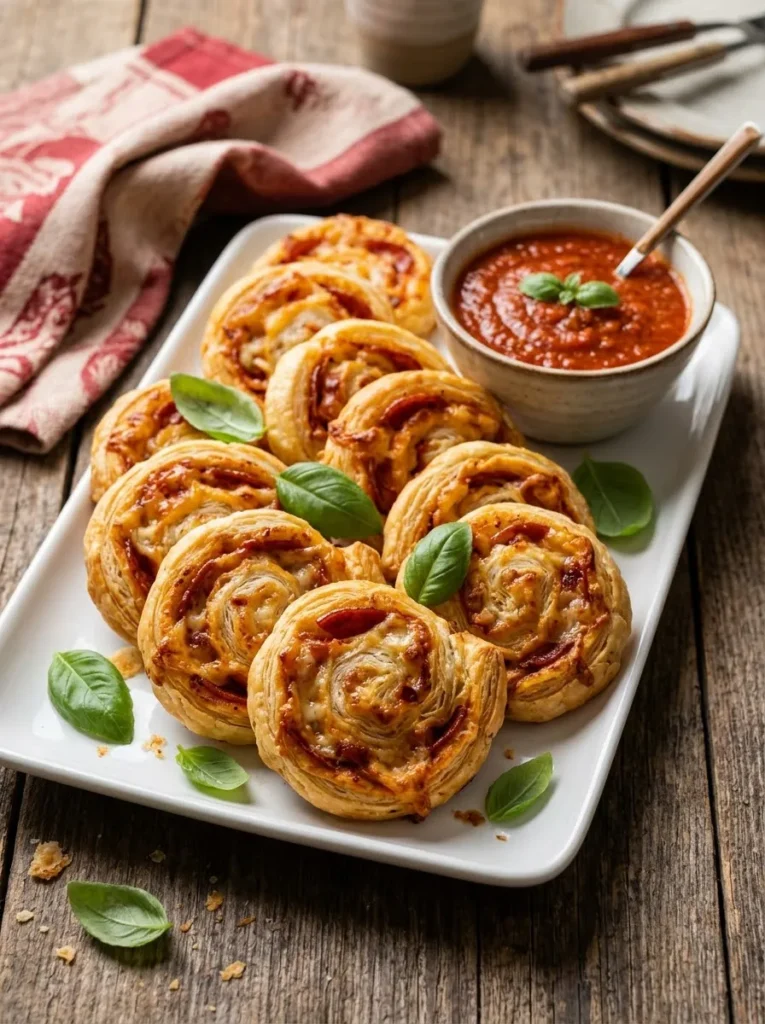
Nothing gets a snack table moving quite like warm, cheesy pizza bites. These flaky pinwheels combine familiar pizza flavors with a crisp pastry exterior, making them easy to serve without plates or forks. Pepperoni adds a savory kick, while mozzarella melts into the spiral layers for a satisfying pull-apart texture.
For the neatest slices, chill the filled pastry roll for 10 to 15 minutes before cutting. Keep the pizza sauce layer thin because excess moisture can make the pastry soggy. Serve the pinwheels with warm marinara for dipping, and arrange them in a circular pattern for an inviting game night platter.
Ingredients
- 1 sheet frozen puff pastry, thawed
- 1/3 cup pizza sauce
- 1 cup shredded mozzarella cheese
- 20 to 24 small pepperoni slices
- 1/2 teaspoon Italian seasoning
- 1 tablespoon grated Parmesan cheese
- 1 tablespoon chopped fresh basil, optional
- 1 egg, beaten
- Extra marinara sauce for serving
How to Make It
- Preheat the oven to 400°F (200°C). Line a baking sheet with parchment paper.
- Unfold the thawed puff pastry onto a lightly floured surface.
- Spread a thin layer of pizza sauce over the pastry, leaving a small border along one edge.
- Sprinkle the mozzarella and Italian seasoning evenly over the sauce. Arrange the pepperoni slices on top.
- Roll the pastry tightly into a log, starting from the long edge. Brush the exposed border with beaten egg and press gently to seal.
- Chill the roll for 10 to 15 minutes, then cut it into approximately 1/2-inch slices.
- Arrange the pinwheels on the baking sheet, leaving space between them. Brush the tops lightly with beaten egg and sprinkle with Parmesan.
- Bake for 15 to 20 minutes, until puffed and golden. Cool briefly, garnish with basil if desired, and serve with marinara sauce.
Crispy Pickle Chips
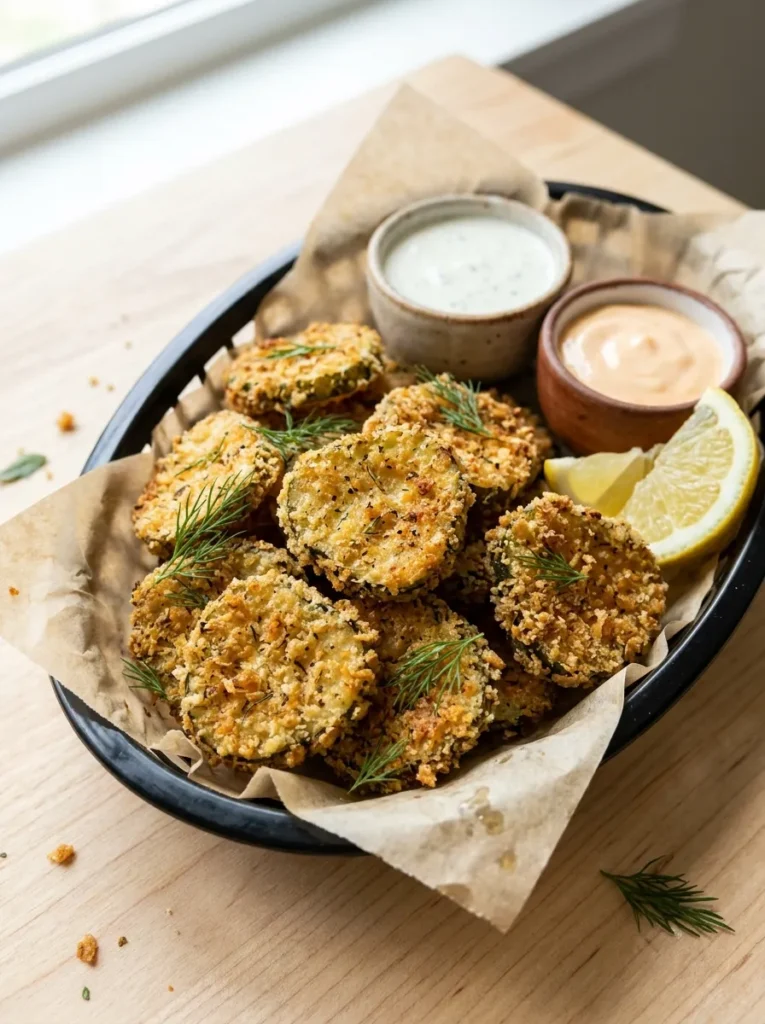
Tangy pickles wrapped in a crunchy coating offer a welcome contrast to rich, cheesy party snacks. Each chip has a crisp exterior and a juicy, briny center, while ranch dressing adds a cool, creamy finish. Their small size makes them easy to serve alongside sandwiches, sliders, and other savory finger foods.
The secret to a crisp coating is removing as much moisture as possible before breading. Pat the pickle slices dry with paper towels, then coat them in flour, egg, and seasoned breadcrumbs. Air-frying or baking provides a convenient alternative to deep-frying, although the texture may differ slightly. Serve immediately for the best crunch.
Ingredients
- 2 cups dill pickle chips, drained
- 1/2 cup all-purpose flour
- 2 large eggs
- 1 tablespoon water
- 1 cup panko breadcrumbs
- 1/2 teaspoon garlic powder
- 1/2 teaspoon paprika
- 1/4 teaspoon black pepper
- Cooking spray
- Ranch dressing, for serving
How to Make It
- Drain the pickle chips and pat them thoroughly dry with paper towels.
- Place the flour in one shallow bowl. Whisk the eggs with water in a second bowl.
- Combine the panko breadcrumbs, garlic powder, paprika, and black pepper in a third bowl.
- Coat each pickle chip in flour, dip it into the egg mixture, and press it into the seasoned breadcrumbs.
- For air-frying, preheat the air fryer to 400°F (200°C). Arrange the chips in a single layer and lightly spray them with cooking spray.
- Air-fry for 8 to 10 minutes, flipping halfway through, until golden and crisp. Work in batches to avoid overcrowding.
- Serve immediately with ranch dressing. For oven baking, place the coated chips on a wire rack over a baking sheet and bake at 425°F (220°C) for approximately 15 to 20 minutes, turning once.
Mini Pretzel Dogs
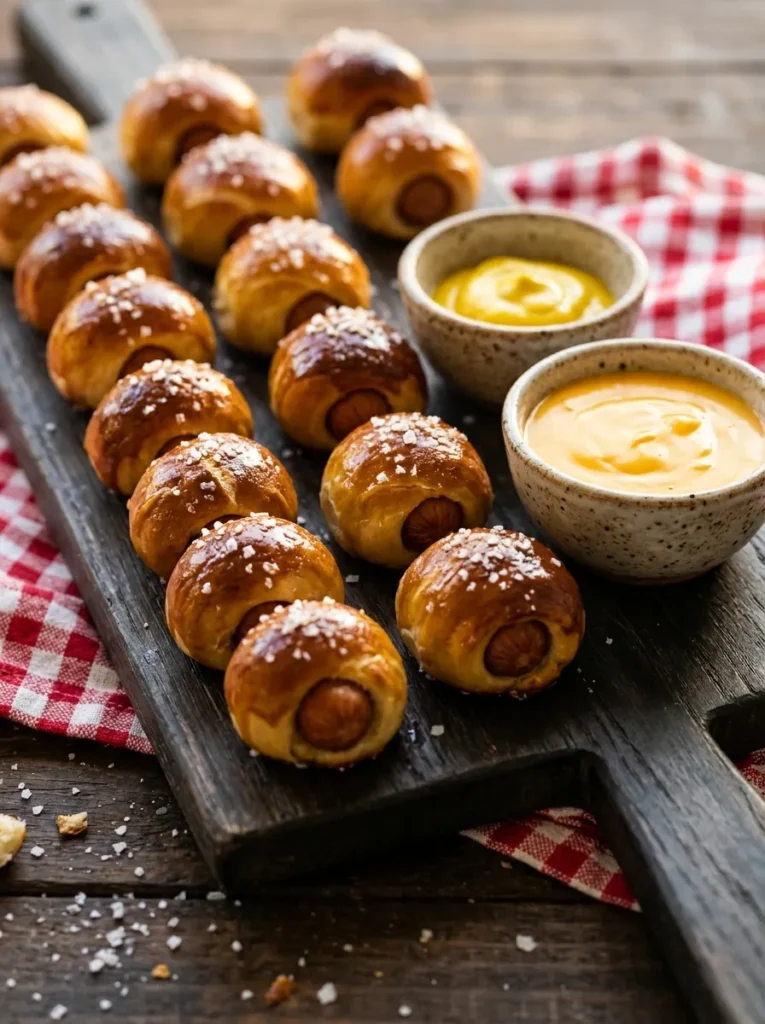
Soft pretzel dough and savory mini sausages create a hearty snack that feels right at home on a football watch party table. The lightly salted exterior contrasts with the juicy sausage inside, while mustard and cheese sauce provide easy dipping options. Their compact shape makes them especially practical when guests are eating between plays.
For consistent results, use cocktail sausages of similar sizes and leave a little space between the wrapped pieces on the baking sheet. A quick baking soda bath helps create the characteristic pretzel color and flavor. If serving children or a large crowd, offer several dipping sauces in separate bowls so everyone can choose a favorite.
Ingredients
- 1 package refrigerated pizza dough, about 13 to 16 ounces
- 24 cocktail sausages
- 5 cups water
- 1/4 cup baking soda
- 1 large egg, beaten
- 1 tablespoon coarse pretzel salt
- Yellow mustard, for serving
- Cheese sauce, for serving
How to Make It
- Preheat the oven to 400°F (200°C). Line a baking sheet with parchment paper.
- Unroll the pizza dough and cut it into 24 narrow strips.
- Wrap one strip of dough around each cocktail sausage, pinching the ends to secure the dough.
- Bring the water to a gentle boil in a large saucepan. Carefully add the baking soda, stirring until dissolved.
- Working in small batches, lower the wrapped sausages into the baking soda water for about 20 to 30 seconds. Remove them with a slotted spoon and place them on the prepared baking sheet.
- Brush each piece with beaten egg and sprinkle lightly with coarse salt.
- Bake for 12 to 16 minutes, until the dough is puffed and deep golden brown. Check the package instructions if using a different dough.
- Let the pretzel dogs cool for a few minutes before serving with mustard and cheese sauce.
Jalapeño Popper Dip
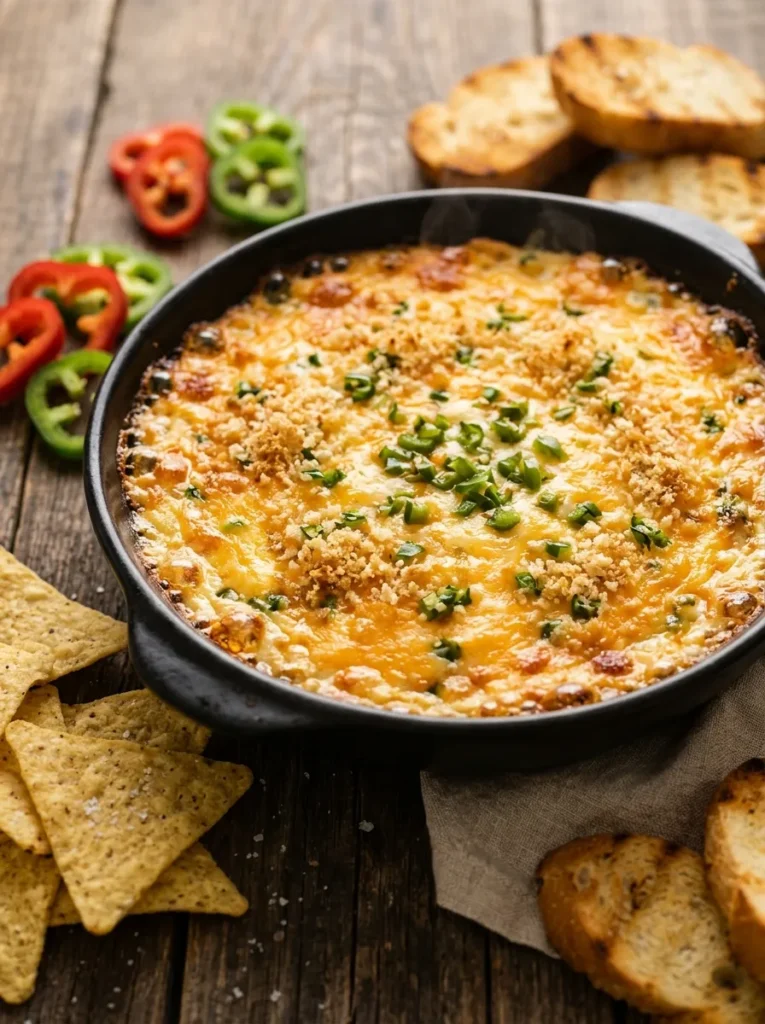
Creamy, cheesy, and pleasantly spicy, jalapeño popper dip brings the flavor of a favorite party appetizer to a shareable dish. Cream cheese softens the pepper heat, while cheddar adds a rich, savory finish. A crisp breadcrumb topping provides a satisfying contrast to the smooth center.
For a crowd-friendly version, remove the jalapeño seeds before chopping if you prefer milder heat. Mix the dip ahead of time, refrigerate it, and bake shortly before kickoff. Serve it with sturdy tortilla chips or toasted bread that can hold a generous scoop without breaking. Keep the dip warm during serving, and offer sliced fresh jalapeños separately for guests who enjoy extra spice.
Ingredients
- 8 ounces cream cheese, softened
- 1/2 cup sour cream
- 1 cup shredded cheddar cheese
- 1/2 cup shredded mozzarella cheese
- 3 to 4 jalapeños, seeded and finely chopped
- 2 garlic cloves, minced
- 1/2 teaspoon onion powder
- 1/4 teaspoon black pepper
- 1/3 cup panko breadcrumbs
- 1 tablespoon melted butter
- Tortilla chips or toasted baguette slices, for serving
How to Make It
- Preheat the oven to 375°F (190°C). Lightly grease a small oven-safe baking dish.
- In a mixing bowl, combine the softened cream cheese and sour cream until smooth.
- Stir in the cheddar, mozzarella, chopped jalapeños, minced garlic, onion powder, and black pepper.
- Spread the mixture evenly into the prepared baking dish.
- Combine the panko breadcrumbs with melted butter and sprinkle them over the dip.
- Bake for 20 to 25 minutes, until the edges bubble and the top turns lightly golden.
- Let the dip rest for 5 minutes before serving with tortilla chips or toasted baguette slices.
Honey Garlic Meatballs
Prep: 10 minutes | Cook: 20 minutes | Servings: 6
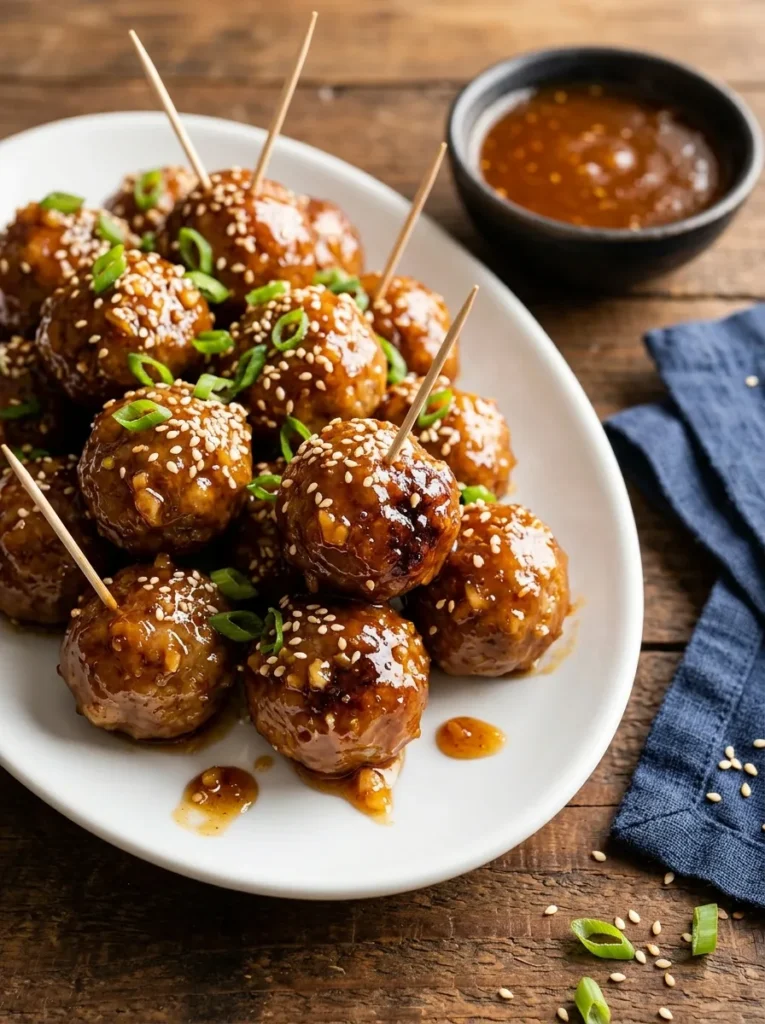
Sweet, savory, and easy to serve, honey garlic meatballs bring big flavor to a game day spread. Their sticky glaze clings to every bite, making them a satisfying choice for guests who prefer something milder than spicy wings. Toothpicks keep serving simple, and the glossy sauce makes the platter look inviting.
- Use fully cooked meatballs: Frozen beef or turkey meatballs save preparation time.
- Balance the glaze: Honey adds sweetness, while soy sauce and garlic provide savory depth.
- Keep the sauce thick: Simmer it until it lightly coats the back of a spoon.
- Garnish just before serving: Green onions and sesame seeds add color and texture.
For an easy party setup, prepare the sauce while the meatballs heat through. Transfer everything to a slow cooker on its warm setting if you need to keep the appetizer available throughout the game. Stir occasionally and avoid leaving the meatballs at room temperature for extended periods.
Ingredients
- 1 pound fully cooked frozen beef or turkey meatballs
- 1/3 cup honey
- 1/4 cup low-sodium soy sauce
- 3 garlic cloves, minced
- 1 tablespoon ketchup
- 1 tablespoon rice vinegar
- 1 teaspoon cornstarch
- 1 tablespoon water
- 1 teaspoon sesame seeds
- 2 tablespoons sliced green onions
How to Make It
- Cook the meatballs according to the package instructions until heated through.
- In a small saucepan, whisk together the honey, soy sauce, minced garlic, ketchup, and rice vinegar.
- Bring the sauce to a gentle simmer over medium-low heat, stirring regularly for 3 to 4 minutes.
- Mix the cornstarch with water in a small bowl. Stir this slurry into the sauce and cook for another 1 to 2 minutes until slightly thickened.
- Add the cooked meatballs and toss until every piece is coated.
- Simmer gently for 2 to 3 minutes, stirring carefully.
- Transfer to a serving dish and garnish with sesame seeds and green onions. Serve with toothpicks.
Caprese Tortellini Skewers
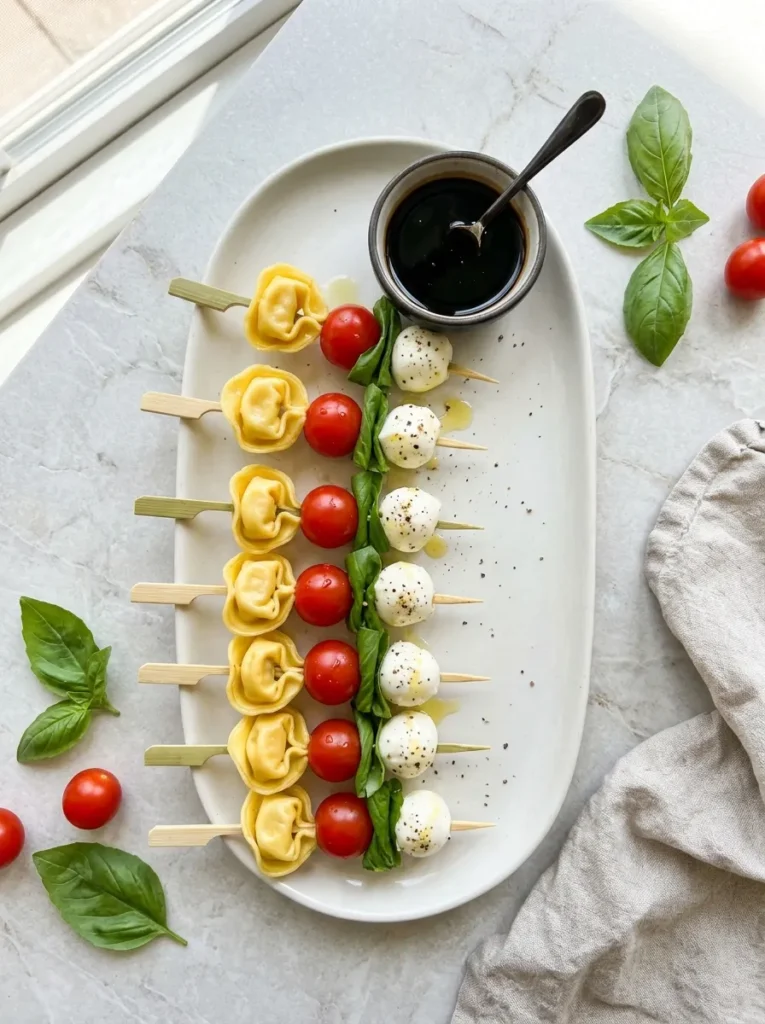
These colorful skewers add a fresh, summery touch to a table filled with rich party snacks. Cheese tortellini provides a satisfying base, cherry tomatoes bring juicy sweetness, and mozzarella adds a creamy bite. Fresh basil ties everything together, while balsamic glaze delivers a tangy finish without requiring a complicated dipping sauce.
Cook the tortellini until just tender, then cool it completely before assembling the skewers. This helps the pasta hold its shape and prevents the cheese from becoming too soft. Alternate the ingredients to create attractive red, white, and green patterns. Arrange the finished skewers in tidy rows, making them easy to grab during halftime.
Ingredients
- 12 ounces refrigerated cheese tortellini
- 24 cherry tomatoes
- 24 small mozzarella balls, drained
- 24 fresh basil leaves
- 2 tablespoons olive oil
- 1/2 teaspoon Italian seasoning
- 1/4 teaspoon salt
- 1/4 teaspoon black pepper
- 2 tablespoons balsamic glaze
- 24 small appetizer skewers
How to Make It
- Bring a pot of salted water to a boil and cook the tortellini according to the package instructions.
- Drain the pasta carefully and rinse briefly under cool water to stop the cooking. Allow it to drain thoroughly.
- Toss the cooled tortellini with olive oil, Italian seasoning, salt, and black pepper.
- Thread one tortellini, one cherry tomato, one folded basil leaf, and one mozzarella ball onto each skewer. Repeat the pattern if the skewers are long enough.
- Arrange the skewers on a serving platter in a single layer.
- Drizzle lightly with balsamic glaze just before serving.
- If preparing ahead, cover and refrigerate the assembled skewers, then add the glaze shortly before guests arrive.
Bacon Wrapped Dates
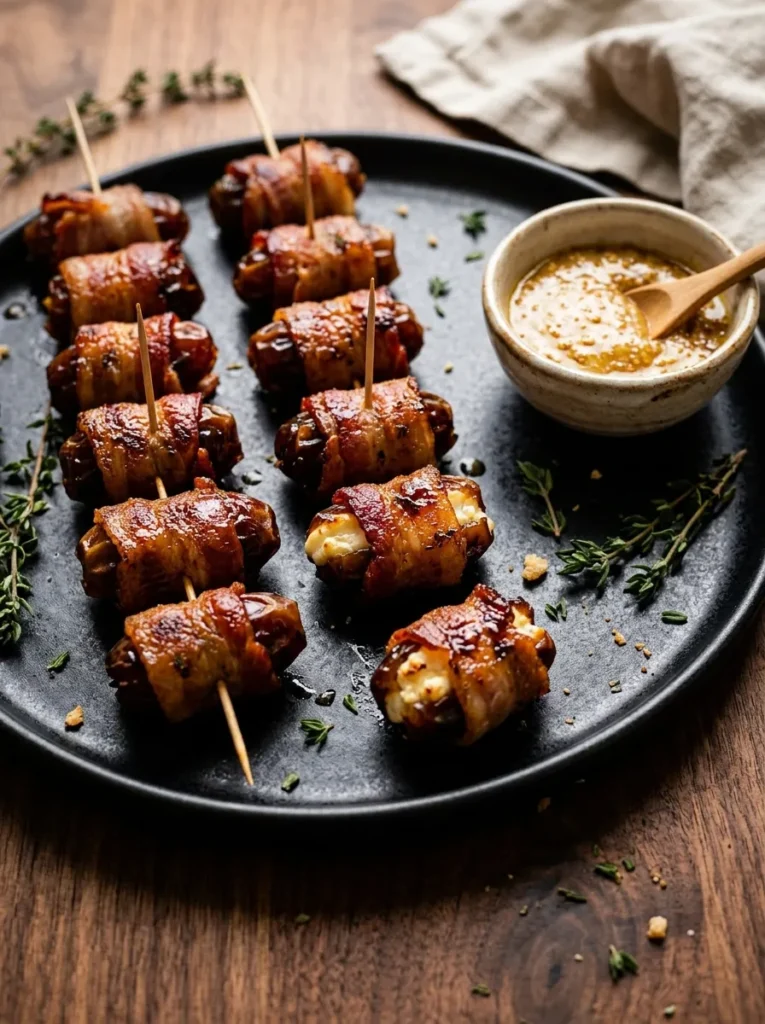
A sweet and savory combination makes these bite-sized treats stand out among traditional party snacks. Soft dates become rich and caramel-like in the oven, while bacon adds a salty, crisp exterior. A small amount of goat cheese or cream cheese tucked inside creates a creamy center that balances the sweetness.
- Choose large, pitted dates: Medjool dates are soft, plump, and easy to fill.
- Cut the bacon strips appropriately: Halve each strip crosswise so it wraps around the date without excessive overlap.
- Secure each piece: Place the bacon seam-side down or use a toothpick to keep it in place.
- Allow room for crisping: Arrange the dates with space between them on a foil-lined baking sheet fitted with a rack if available.
- Watch the final minutes: Bacon thickness affects cooking time, so check frequently near the end.
These little bites can be assembled before guests arrive and baked shortly before serving. For variety, fill half with goat cheese and leave the rest plain. The contrasting flavors look appealing on a mixed appetizer platter, and the small portions make it easy for guests to sample something sweet and savory between other snacks.
Ingredients
- 20 large Medjool dates, pitted
- 10 bacon strips, cut in half crosswise
- 4 ounces goat cheese or cream cheese, optional
- 1 tablespoon honey, optional
- 1/4 teaspoon freshly ground black pepper
- Toothpicks, if needed
- Fresh thyme, for garnish
How to Make It
- Preheat the oven to 400°F (200°C). Line a baking sheet with foil and place a wire rack on top if available.
- Carefully open each pitted date along one side.
- For filled dates, spoon approximately 1 teaspoon of goat cheese or cream cheese into each opening. Press the date closed gently.
- Wrap each date with half a bacon strip. Secure with a toothpick if necessary.
- Place the wrapped dates seam-side down on the prepared baking sheet, leaving a little space between each piece.
- Bake for 18 to 25 minutes, turning halfway through if needed, until the bacon is crisp and cooked through. Thicker bacon may require additional time.
- If desired, drizzle lightly with honey during the final few minutes of baking.
- Rest for 5 minutes before serving, then garnish with fresh thyme.
Cheesy Taco Cups
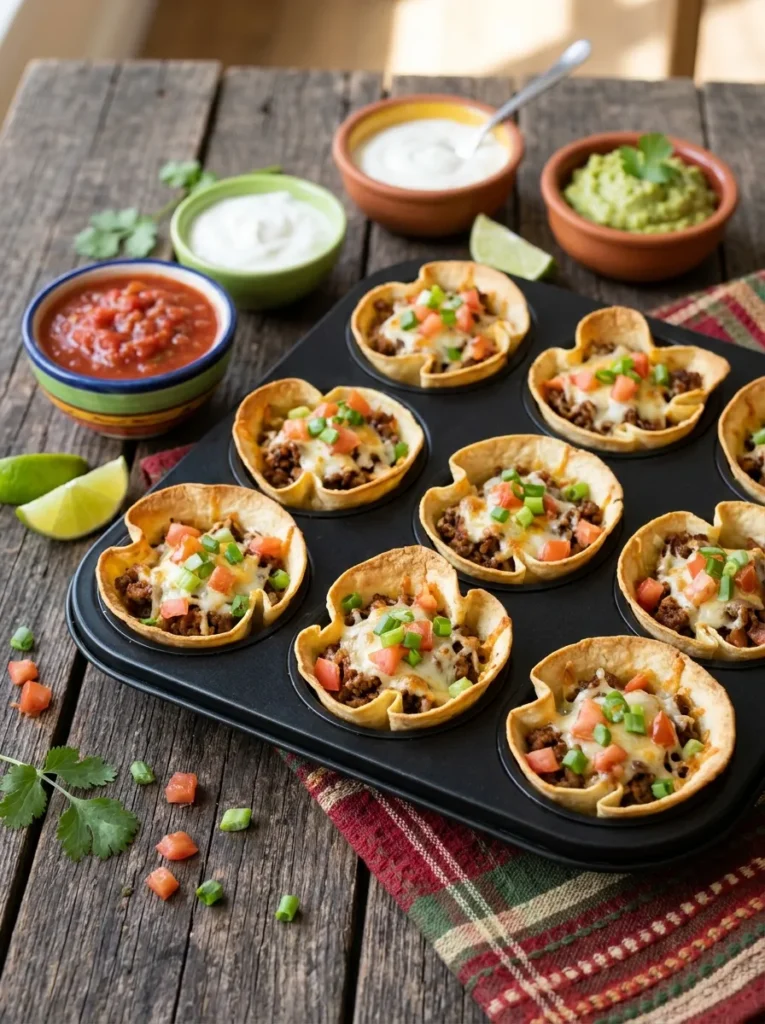
Cheesy taco cups pack the familiar flavors of taco night into crisp, individual portions. Seasoned beef provides a savory filling, melted cheese holds everything together, and fresh toppings add color and crunch. Unlike traditional tacos, these little cups are easier to carry around, making them convenient for guests who want to keep their eyes on the game.
For the crispiest shells, press small tortillas firmly into a muffin pan and bake them briefly before adding the filling. Avoid overloading each cup with salsa or other watery toppings before baking. Instead, set out fresh garnishes separately so everyone can customize their snack. A combination of beef, beans, and cheese also makes the filling hearty enough to satisfy hungry guests.
Ingredients
- 12 small flour tortillas
- 1 pound ground beef
- 1 tablespoon olive oil, if needed
- 2 tablespoons taco seasoning
- 1/3 cup water
- 1 cup shredded Monterey Jack or cheddar cheese
- 1/2 cup canned black beans, drained and rinsed
- 1/2 cup diced tomatoes
- 2 tablespoons sliced green onions
- Cooking spray
- Sour cream, salsa, and guacamole for serving
How to Make It
- Preheat the oven to 375°F (190°C). Lightly grease a 12-cup muffin pan.
- Press one small tortilla into each muffin cup, folding the edges to form a bowl.
- Bake the empty tortilla cups for 5 to 7 minutes until they begin to firm up.
- Meanwhile, cook the ground beef in a skillet over medium heat until browned and fully cooked, reaching 160°F (71°C). Drain excess grease.
- Stir in the taco seasoning and water. Simmer for 2 to 3 minutes until the mixture thickens.
- Divide the beef and black beans among the tortilla cups. Sprinkle the shredded cheese over the filling.
- Bake for another 8 to 10 minutes, until the cheese melts and the tortilla edges turn golden.
- Let the cups cool for a few minutes. Add diced tomatoes and green onions, then serve with sour cream, salsa, and guacamole.
Crispy Zucchini Fries
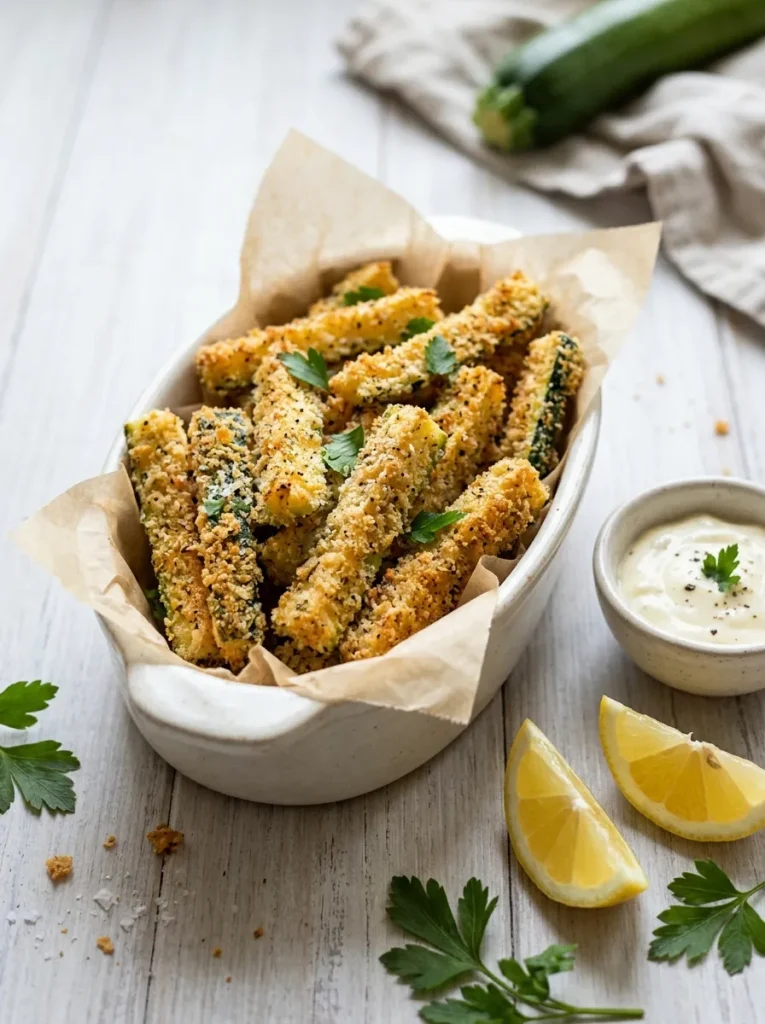
Crispy zucchini fries bring a lighter vegetable option to a table full of rich, cheesy snacks. Their tender centers and crunchy breadcrumb coating offer plenty of texture, while garlic aioli adds a creamy, savory dip. They are especially useful when you want a colorful platter that balances heavier foods without sacrificing the satisfying crunch everyone enjoys.
The trick is to cut the zucchini into similar-sized sticks and remove excess surface moisture before breading. Panko breadcrumbs help create a crispier exterior, and a single layer on the baking sheet encourages even browning. Serve the fries straight from the oven because zucchini releases moisture as it cools, which can soften the coating.
Ingredients
- 2 medium zucchini
- 1/2 cup all-purpose flour
- 2 large eggs
- 1 tablespoon water
- 1 cup panko breadcrumbs
- 1/3 cup grated Parmesan cheese
- 1 teaspoon garlic powder
- 1/2 teaspoon paprika
- 1/2 teaspoon salt
- 1/4 teaspoon black pepper
- Olive oil cooking spray
For the garlic aioli:
- 1/3 cup mayonnaise
- 1 small garlic clove, finely minced
- 1 teaspoon lemon juice
How to Make It
- Preheat the oven to 425°F (220°C). Line a baking sheet with parchment paper or place a wire rack over the sheet.
- Wash and dry the zucchini. Cut each one into sticks approximately 3 inches long and 1/2 inch thick.
- Pat the sticks dry with paper towels to remove excess moisture.
- Place the flour in one shallow bowl. Whisk the eggs and water in a second bowl.
- In a third bowl, mix the panko breadcrumbs, Parmesan, garlic powder, paprika, salt, and black pepper.
- Coat each zucchini stick in flour, dip it into the egg mixture, and press it into the breadcrumb mixture.
- Arrange the coated sticks in a single layer. Lightly spray with olive oil and bake for 18 to 22 minutes, turning halfway through, until golden and tender.
- Mix the mayonnaise, garlic, and lemon juice to prepare the aioli. Serve the zucchini fries hot with the dip.
Baked Ham and Swiss Sliders
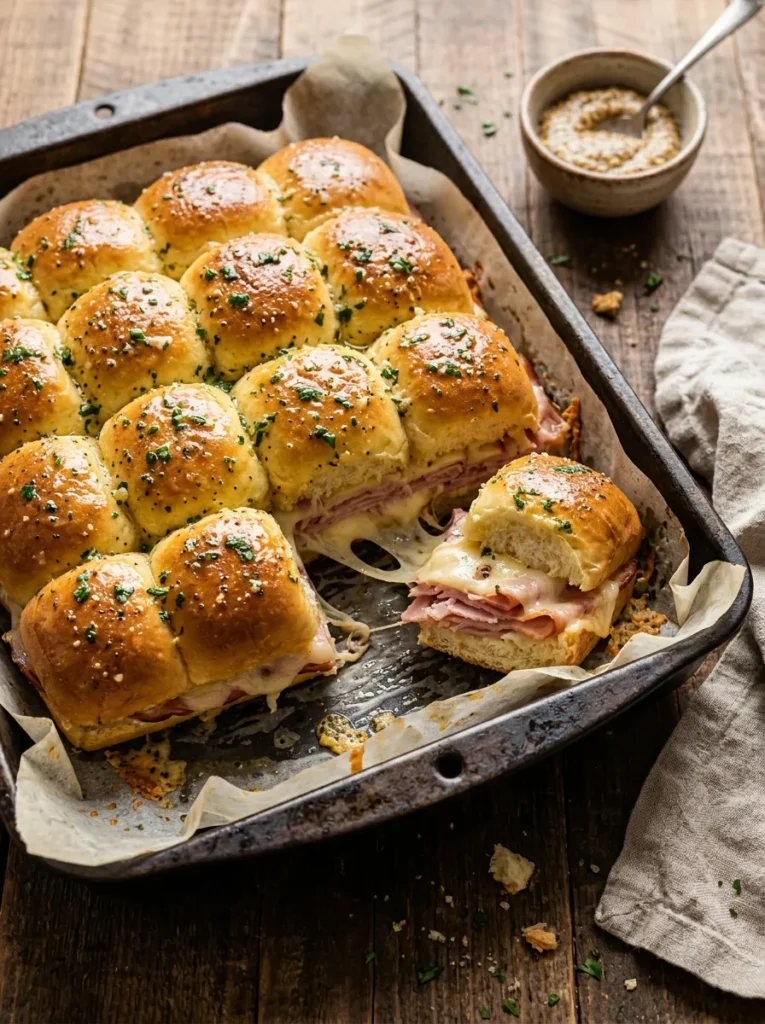
Warm ham and Swiss sliders are a dependable choice when your guests need something more filling than chips and dips. Soft rolls soak up a savory butter topping, while sliced ham and melted Swiss cheese create a classic combination. The sliders bake together in one tray, so preparing enough for a group requires very little individual assembly.
For an even finish, keep the rolls connected while slicing them horizontally, then add the filling as one layer. Brush the tops with melted butter mixed with Dijon mustard and dried herbs before baking. Cover the tray loosely with foil at first if the tops brown too quickly, then uncover it to develop a golden finish. Cut along the roll seams before serving.
Ingredients
- 12 soft dinner rolls, kept connected if possible
- 12 ounces thinly sliced deli ham
- 8 slices Swiss cheese
- 4 tablespoons unsalted butter, melted
- 1 tablespoon Dijon mustard
- 1 teaspoon Worcestershire sauce
- 1 teaspoon poppy seeds
- 1/2 teaspoon garlic powder
- 1/2 teaspoon dried parsley
- Black pepper, to taste
How to Make It
- Preheat the oven to 350°F (175°C). Lightly grease a 9-by-13-inch baking dish.
- Slice the entire block of rolls horizontally without separating the individual rolls.
- Place the bottom half in the baking dish. Layer the ham evenly over the rolls, followed by the Swiss cheese.
- Replace the top half of the rolls.
- In a small bowl, whisk together the melted butter, Dijon mustard, Worcestershire sauce, poppy seeds, garlic powder, dried parsley, and black pepper.
- Brush the butter mixture evenly over the tops of the rolls, allowing some to run down the sides.
- Cover loosely with foil and bake for 10 minutes. Remove the foil and bake for another 5 to 10 minutes, until the cheese has melted and the tops are golden.
- Rest for 3 minutes, cut along the roll seams, and serve warm.
Crispy Coconut Shrimp
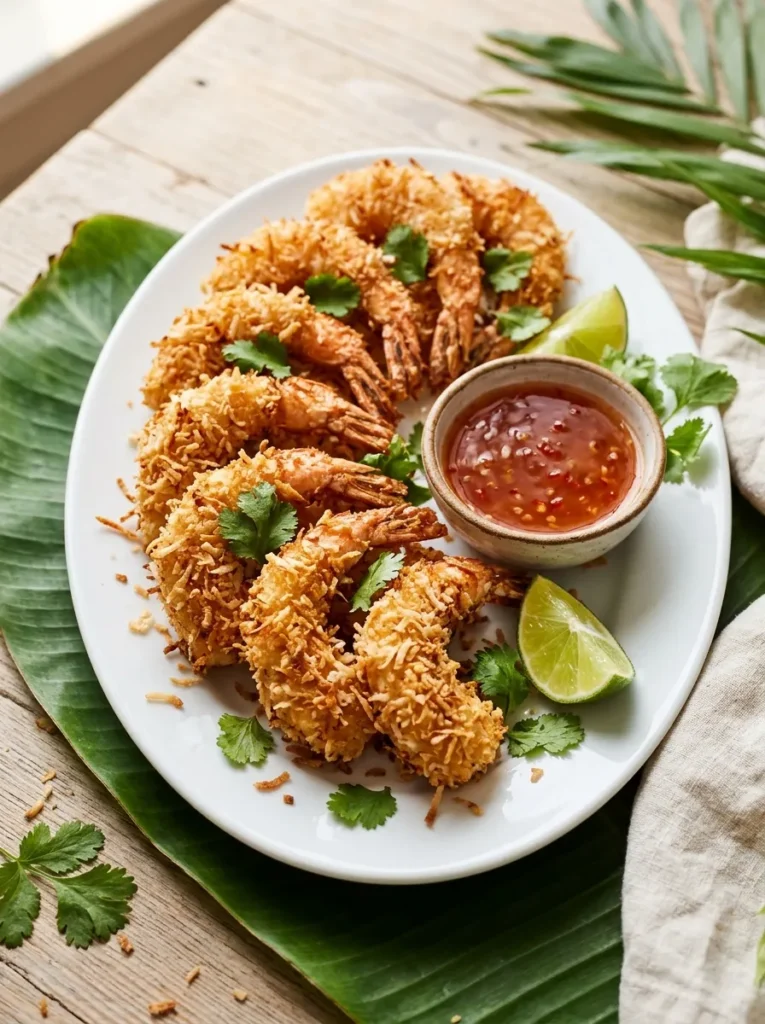
Crispy coconut shrimp brings a sweet, crunchy twist to a football watch party. Each shrimp has a tender center surrounded by a golden coating of panko and shredded coconut. Sweet chili sauce adds a little heat, while fresh lime cuts through the richness. This seafood appetizer offers something different from the usual wings and sliders.
For an even coating, pat the shrimp dry before dipping them into the flour, egg, and coconut mixture. Use unsweetened shredded coconut to keep the flavor balanced, and arrange the shrimp in a single layer while cooking. Serve the dipping sauce separately so the coating stays crisp. If preparing for a large crowd, cook in batches rather than overcrowding the pan.
Ingredients
- 1 pound large raw shrimp, peeled and deveined, tails on or off
- 1/2 cup all-purpose flour
- 2 large eggs
- 1 tablespoon water
- 1 cup panko breadcrumbs
- 3/4 cup unsweetened shredded coconut
- 1/2 teaspoon garlic powder
- 1/2 teaspoon paprika
- 1/4 teaspoon salt
- 1/4 teaspoon black pepper
- Cooking spray or oil for cooking
- Sweet chili sauce and lime wedges, for serving
How to Make It
- Pat the shrimp dry with paper towels. Preheat the oven to 425°F (220°C) if baking.
- Place the flour in one shallow bowl. Whisk the eggs and water in a second bowl.
- Mix the panko, shredded coconut, garlic powder, paprika, salt, and pepper in a third bowl.
- Coat each shrimp in flour, dip it into the egg mixture, then press it into the coconut breadcrumb mixture.
- For baking, arrange the shrimp on a lightly greased baking sheet. Spray the tops lightly with cooking spray.
- Bake for approximately 10 to 14 minutes, turning once, until the coating is golden and the shrimp are opaque and reach 145°F (63°C).
- Alternatively, air-fry at 400°F (200°C) for about 8 to 10 minutes, working in batches.
- Serve hot with sweet chili sauce and fresh lime wedges.
Pimento Cheese Stuffed Mini Peppers

Colorful mini peppers filled with creamy pimento cheese add a fresh, crunchy option to your game day spread. The sweet peppers contrast with the rich cheese filling, creating a balanced bite that does not require cooking. Their bright colors also make the appetizer platter stand out among darker, fried, and baked snacks.
Choose peppers that can sit flat on a serving tray, then cut them lengthwise and remove the seeds. A thick cheese filling works best because it stays in place without running over the edges. Prepare the peppers a few hours before guests arrive and refrigerate them until serving. For a little extra flavor, sprinkle smoked paprika or chopped chives over the filling just before arranging them on the platter.
Ingredients
- 12 mini sweet bell peppers
- 8 ounces sharp cheddar cheese, finely grated
- 4 ounces cream cheese, softened
- 1/4 cup mayonnaise
- 1/4 cup finely chopped pimentos, drained
- 1/4 teaspoon garlic powder
- 1/4 teaspoon smoked paprika
- 1 tablespoon chopped fresh chives
- Black pepper, to taste
How to Make It
- Wash the mini peppers and pat them dry. Slice each pepper lengthwise and remove the seeds and membranes.
- In a medium bowl, combine the softened cream cheese and mayonnaise until smooth.
- Stir in the grated cheddar, chopped pimentos, garlic powder, smoked paprika, and black pepper.
- Mix until the cheese filling is evenly combined. Refrigerate for 15 to 20 minutes if it feels too soft to handle.
- Spoon or pipe the filling into each pepper half, creating a generous but tidy layer.
- Arrange the stuffed peppers on a serving platter and sprinkle with chopped chives.
- Cover and refrigerate until ready to serve. For food safety, do not leave the dairy-based filling at room temperature for more than two hours.
Baked Cajun Cauliflower Bites

Cajun cauliflower bites deliver bold seasoning and satisfying roasted edges in a vegetable-based snack. Paprika, garlic, and a little cayenne create a smoky, spicy coating, while the tender centers keep each bite pleasant to eat. A cool ranch dip balances the heat, making these bites a useful addition to a table filled with rich party foods.
Cut the cauliflower into similar-sized florets so they cook at roughly the same rate. Toss them thoroughly with oil and spices, then spread them across the baking sheet without crowding. Roasting at a high temperature encourages browning instead of steaming. For extra crunch, serve immediately and keep the dipping sauce in a separate bowl.
Ingredients
- 1 large head cauliflower, cut into bite-sized florets
- 2 tablespoons olive oil
- 1 teaspoon smoked paprika
- 1/2 teaspoon garlic powder
- 1/2 teaspoon onion powder
- 1/2 teaspoon dried oregano
- 1/4 teaspoon cayenne pepper, or to taste
- 1/2 teaspoon salt
- 1/4 teaspoon black pepper
- 2 tablespoons chopped fresh parsley
- Ranch dressing, for serving
How to Make It
- Preheat the oven to 425°F (220°C). Line a large baking sheet with parchment paper.
- Wash the cauliflower florets and dry them thoroughly.
- Place the florets in a large bowl. Add the olive oil, smoked paprika, garlic powder, onion powder, oregano, cayenne, salt, and black pepper.
- Toss until the cauliflower is evenly coated with the seasoning.
- Spread the florets in a single layer on the baking sheet, leaving space between them.
- Roast for 25 to 30 minutes, turning halfway through, until the edges are browned and the centers are tender.
- Transfer to a serving platter and sprinkle with fresh parsley.
- Serve immediately with ranch dressing and lemon wedges if desired.
Philly Cheesesteak Stuffed Mushrooms
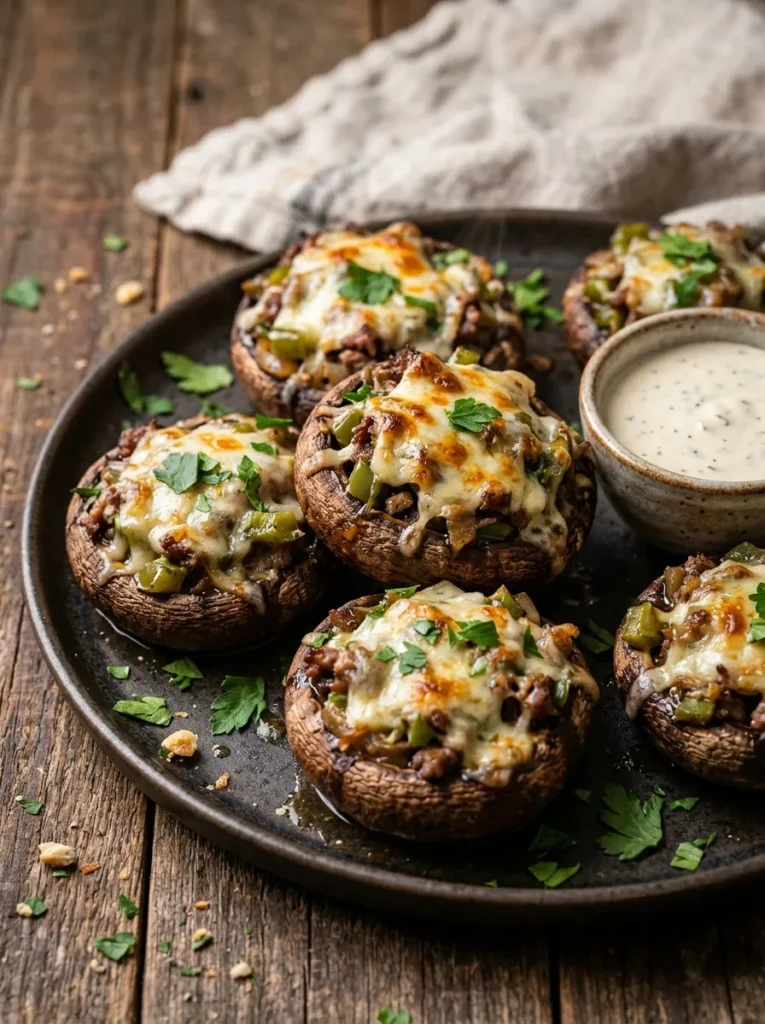
These stuffed mushrooms combine the savory flavors of a Philly cheesesteak with the convenience of a bite-sized appetizer. Tender mushrooms hold a filling of seasoned beef, sweet onions, and peppers, while provolone melts into a rich, cheesy topping. The result is hearty enough to satisfy guests without requiring a full sandwich.
Choose large mushroom caps so they hold plenty of filling without tipping over. Cook the beef and vegetables before stuffing the mushrooms, and let excess moisture evaporate to avoid a watery filling. Arrange them in a single layer and bake until the mushrooms soften and the cheese bubbles. Serve them warm on a platter with small forks or cocktail picks.
Ingredients
- 16 large cremini mushrooms
- 8 ounces thinly sliced beef steak, finely chopped
- 1/2 cup finely diced green bell pepper
- 1/2 cup finely diced onion
- 1 tablespoon olive oil
- 1 teaspoon Worcestershire sauce
- 1/2 teaspoon garlic powder
- 1/4 teaspoon black pepper
- 4 slices provolone cheese, cut into small pieces
- 2 tablespoons chopped fresh parsley
How to Make It
- Preheat the oven to 375°F (190°C). Line a baking sheet with parchment paper.
- Clean the mushrooms with a damp paper towel. Remove the stems and finely chop them if desired.
- Heat the olive oil in a skillet over medium heat. Add the beef, bell pepper, and onion.
- Cook until the beef is browned and reaches 145°F (63°C) for whole-muscle steak, with a three-minute rest, or 160°F (71°C) if using ground beef. The vegetables should be tender and excess moisture should evaporate.
- Stir in the Worcestershire sauce, garlic powder, black pepper, and chopped mushroom stems if using.
- Arrange the mushroom caps on the baking sheet, cavity-side up. Spoon the beef mixture into each cap.
- Top each mushroom with a piece of provolone cheese.
- Bake for 15 to 20 minutes, until the mushrooms are tender and the cheese has melted. Garnish with parsley and serve warm.
Sweet Chili Chicken Lettuce Wraps
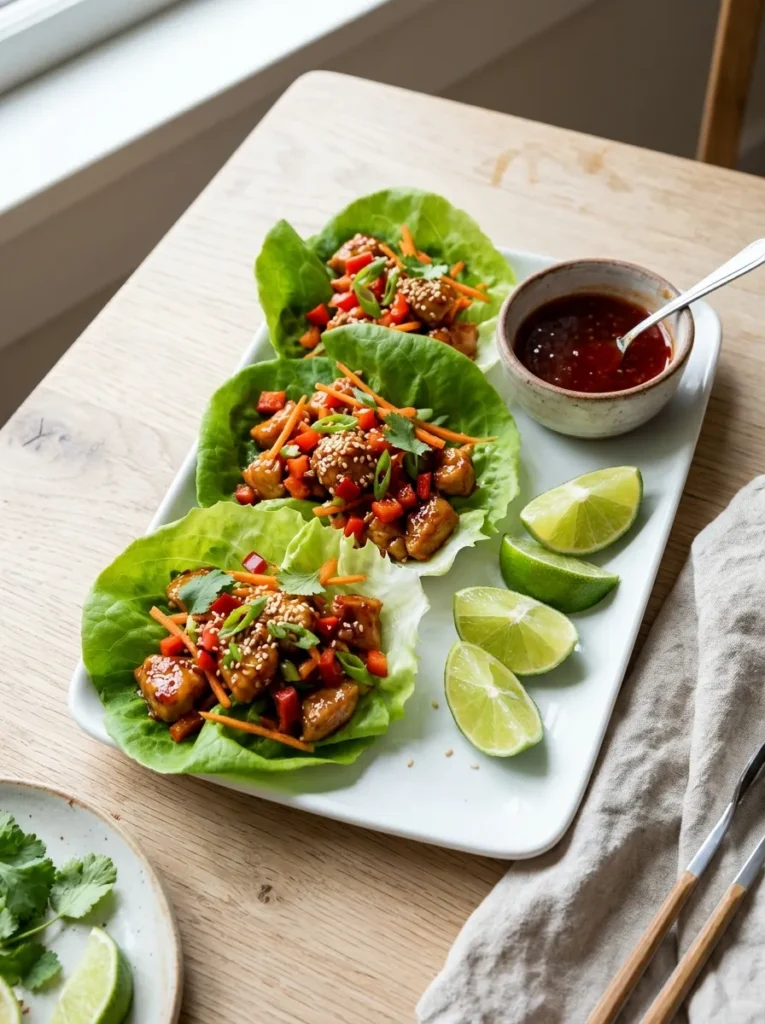
Sweet chili chicken lettuce wraps offer a fresh, crunchy alternative to heavier game day snacks. Tender chicken coated in a sweet and mildly spicy glaze pairs beautifully with cool lettuce leaves and crisp vegetables. Each wrap is easy to pick up and eat, giving guests a lighter option that still delivers plenty of flavor.
Use sturdy butter lettuce or romaine leaves that can hold the filling without tearing. Cook the chicken until it reaches 165°F (74°C), then add the sauce near the end so it coats the meat without burning. Keep the filling warm and the lettuce chilled until serving. Let guests assemble their own wraps if you want to preserve the crisp texture for longer.
Ingredients
- 1 pound boneless, skinless chicken breast, finely diced
- 1 tablespoon olive oil
- 1/3 cup sweet chili sauce
- 1 tablespoon low-sodium soy sauce
- 1 teaspoon fresh ginger, grated
- 2 garlic cloves, minced
- 1/2 cup finely diced red bell pepper
- 1/2 cup shredded carrots
- 2 green onions, thinly sliced
- 12 large butter lettuce leaves
- 1 teaspoon sesame seeds
- Lime wedges, for serving
How to Make It
- Separate the lettuce leaves, rinse them gently, and dry them thoroughly. Refrigerate until needed.
- Heat the olive oil in a large skillet over medium-high heat.
- Add the diced chicken and cook for 6 to 8 minutes, stirring regularly, until browned and cooked through to 165°F (74°C).
- Stir in the garlic and grated ginger. Cook for about 30 seconds until fragrant.
- Add the sweet chili sauce and soy sauce. Stir to coat the chicken and simmer for 1 to 2 minutes until glossy.
- Fold in the diced red bell pepper and shredded carrots. Cook for another minute while keeping the vegetables slightly crisp.
- Spoon the chicken mixture into the chilled lettuce leaves.
- Garnish with sliced green onions and sesame seeds. Serve immediately with lime wedges.
Spinach Feta Puff Pastry Bites

Flaky pastry and tangy feta make these little bites a welcome change from traditional meat-heavy snacks. Spinach adds color and a mild earthy flavor, while the cheese creates a creamy, savory center. Their crisp edges and compact size make them easy to arrange on a platter for guests who want a quick bite between plays.
The most important step is removing excess water from the spinach before mixing the filling. Too much moisture can make puff pastry soggy and prevent the layers from crisping properly. Cut the pastry into evenly sized squares, avoid overfilling them, and brush the tops with egg wash for a golden finish. Serve warm, with tzatziki or plain Greek yogurt on the side.
Ingredients
- 1 sheet frozen puff pastry, thawed
- 1 cup frozen chopped spinach, thawed and thoroughly squeezed dry
- 4 ounces feta cheese, crumbled
- 2 ounces cream cheese, softened
- 1 small garlic clove, minced
- 1 tablespoon chopped fresh dill
- 1/4 teaspoon black pepper
- 1 egg, beaten
- 1 tablespoon water
- Tzatziki sauce, for serving
How to Make It
- Preheat the oven to 400°F (200°C). Line a baking sheet with parchment paper.
- In a bowl, combine the squeezed-dry spinach, crumbled feta, cream cheese, garlic, dill, and black pepper.
- Unfold the puff pastry on a lightly floured surface. Cut it into 12 equal squares.
- Place a small spoonful of spinach filling in the center of each square, leaving the edges clear.
- Fold two opposite corners toward the center, or leave the squares open-faced for a simpler shape. Press the edges gently to help them hold.
- Whisk the beaten egg with the water. Brush a thin layer over the pastry.
- Arrange the bites on the baking sheet with space between them. Bake for 15 to 20 minutes, until puffed and golden.
- Allow the pastry bites to cool for 5 minutes before serving with tzatziki sauce.
BBQ Pulled Pork Sliders

Smoky pulled pork tucked into soft mini buns makes a satisfying finale for your game night spread. The tender meat brings rich barbecue flavor, while crunchy coleslaw adds freshness and a creamy contrast. These handheld sandwiches are filling enough to serve as a main party snack, especially alongside chips, vegetable sticks, and a few lighter bites.
For easier preparation, use fully cooked pulled pork and warm it with barbecue sauce shortly before serving. Keep the coleslaw chilled until assembly, then add it just before the sliders reach the table to prevent the buns from becoming soggy. Set out extra pickles and sauce so guests can customize their sandwiches. For a larger gathering, arrange the sliders in a baking dish and cover them loosely to keep the buns soft.
Ingredients
- 12 mini brioche slider buns
- 3 cups cooked pulled pork
- 3/4 cup barbecue sauce, plus extra for serving
- 2 tablespoons chicken broth or water, if needed
- 1 1/2 cups prepared coleslaw
- 12 dill pickle slices
- 2 tablespoons melted butter
- 1/2 teaspoon garlic powder
- 1 teaspoon sesame seeds, optional
How to Make It
- Preheat the oven to 350°F (175°C) if you want to warm the assembled buns.
- Place the cooked pulled pork in a skillet over medium-low heat. Add the barbecue sauce and a little broth or water if the meat seems dry.
- Stir occasionally for 5 to 8 minutes, until the pork is steaming hot. If using refrigerated leftovers, reheat them to 165°F (74°C).
- Slice the slider buns horizontally, keeping them connected if possible.
- Spoon the warm barbecue pork onto the bottom halves of the buns. Add a pickle slice to each slider.
- Mix the melted butter with garlic powder and brush it over the tops of the buns. Sprinkle with sesame seeds if desired.
- Place the sliders in a baking dish and warm for 5 to 8 minutes, until the buns are soft and lightly toasted.
- Remove from the oven and top each slider with coleslaw. Replace the bun tops and serve immediately with extra barbecue sauce.
CONCLUSION
A memorable game night doesn’t need a complicated menu. With these football appetizers, you can serve a fun mix of savory bites, cheesy favorites, crispy snacks, and crowd-pleasing flavors that keep everyone coming back for more. Choose a few recipes that suit your guests, prepare what you can ahead of time, and enjoy the game without feeling stuck in the kitchen. I’ve found that a little variety makes sharing food feel even more special. Save this article to your Pinterest boards for your next watch party, try a new recipe, and share these ideas with friends who love hosting. Make your next game night delicious!